Know more about purchasing a domain here or link your existing domain by clicking here.
Setting up an official email for your store allows your customers to get in touch with you easily. An official email address also makes your store seem more professional.
With the forwarding emails feature, you can choose to get an official email address for your store. These emails are then forwarded to your primary email address.
This is how the feature works:

To use this feature, head over to the Store Settings section. Then, click on the Domains section.

In the domains section click Set up under Forwarding emails.
On clicking set up, the following screen will appear:
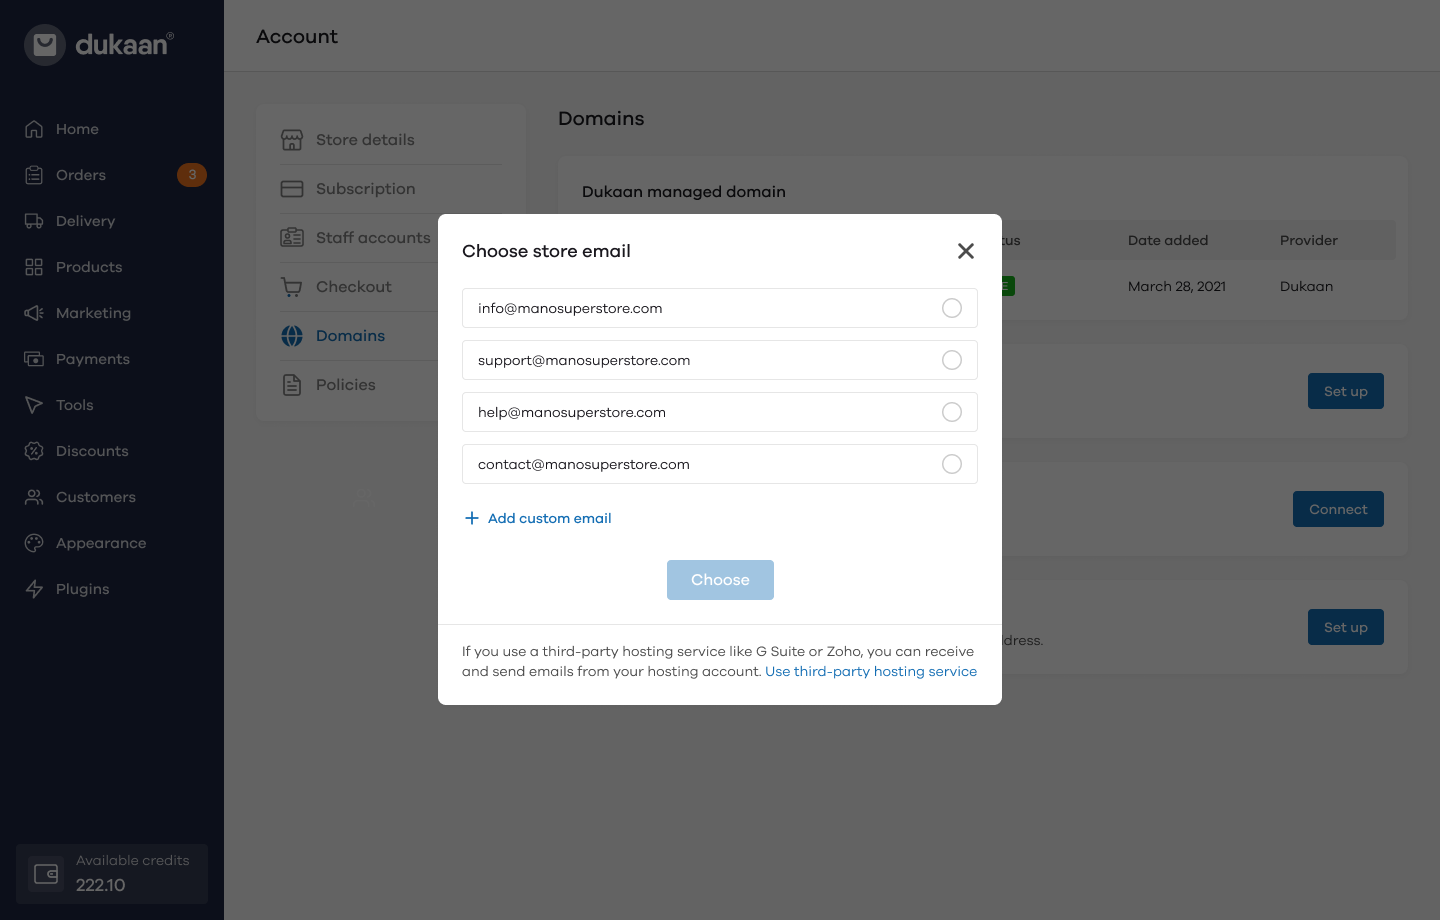
Here, you can choose from an existing set of emails or add a custom email. You can also choose to use a third party hosting service like GSuite or Zoho.
Choosing store email
If you choose an email from the pre-defined options given and click on Choose, you will be prompted to add the forwarding email address.
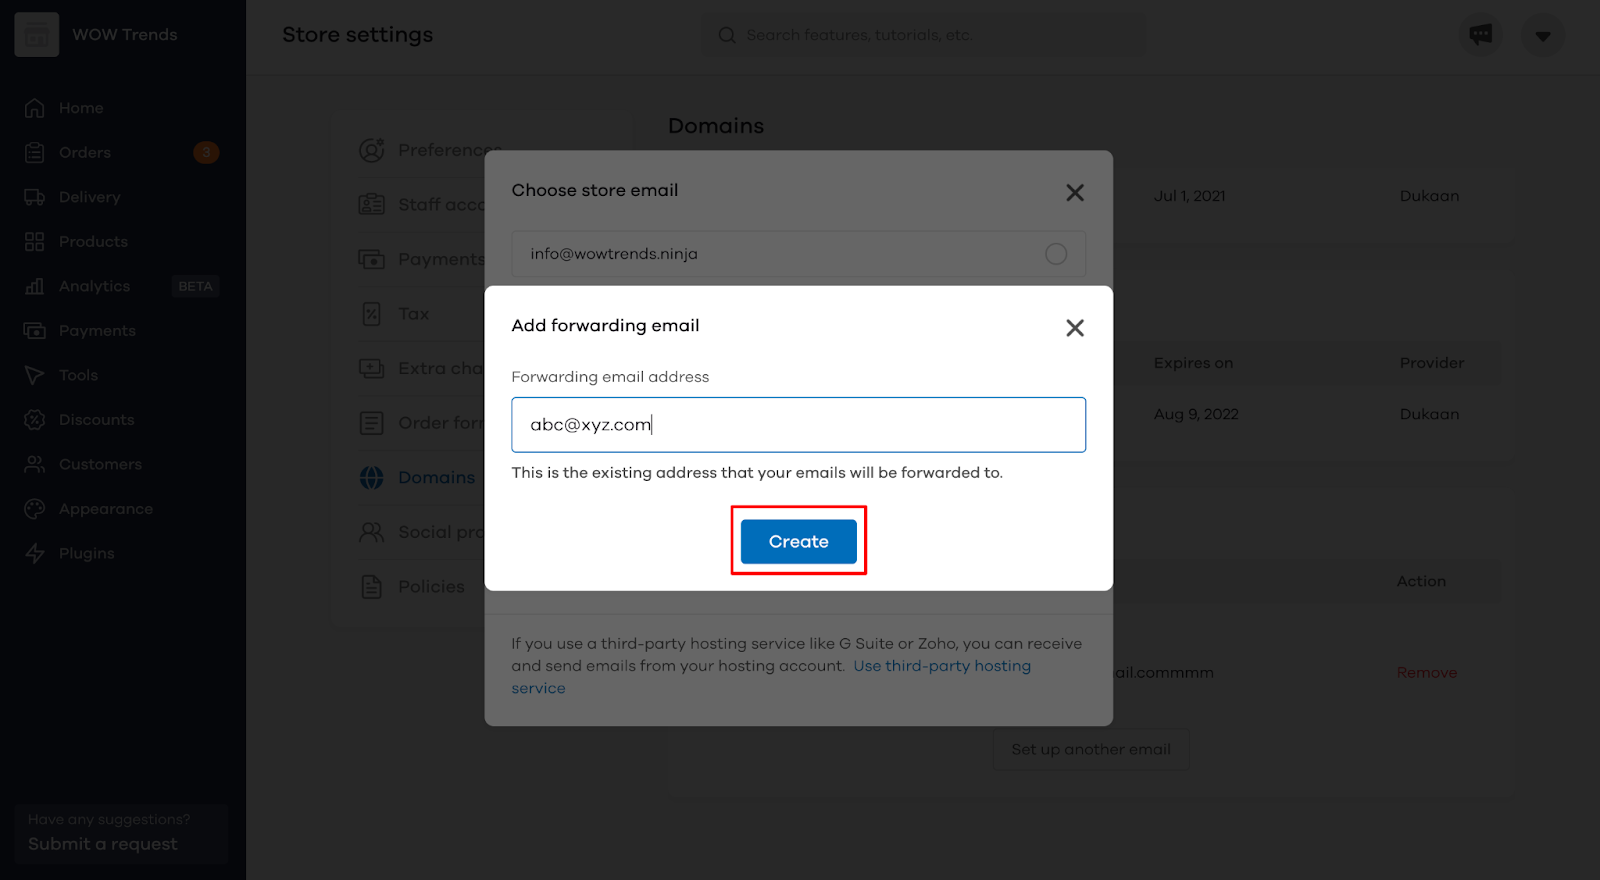
In this section, you will need to add the email to which you want the emails to be forwarded. After entering the email, click on Create.
(Note: The forwarding email address needs to be an existing address to which your emails will be forwarded)
Adding Custom E-mail Address
If you want to add a custom email address, click on Add custom email. You will be asked to enter your store email address and your forwarding email address.
The store email address is the one your customers will send emails to.
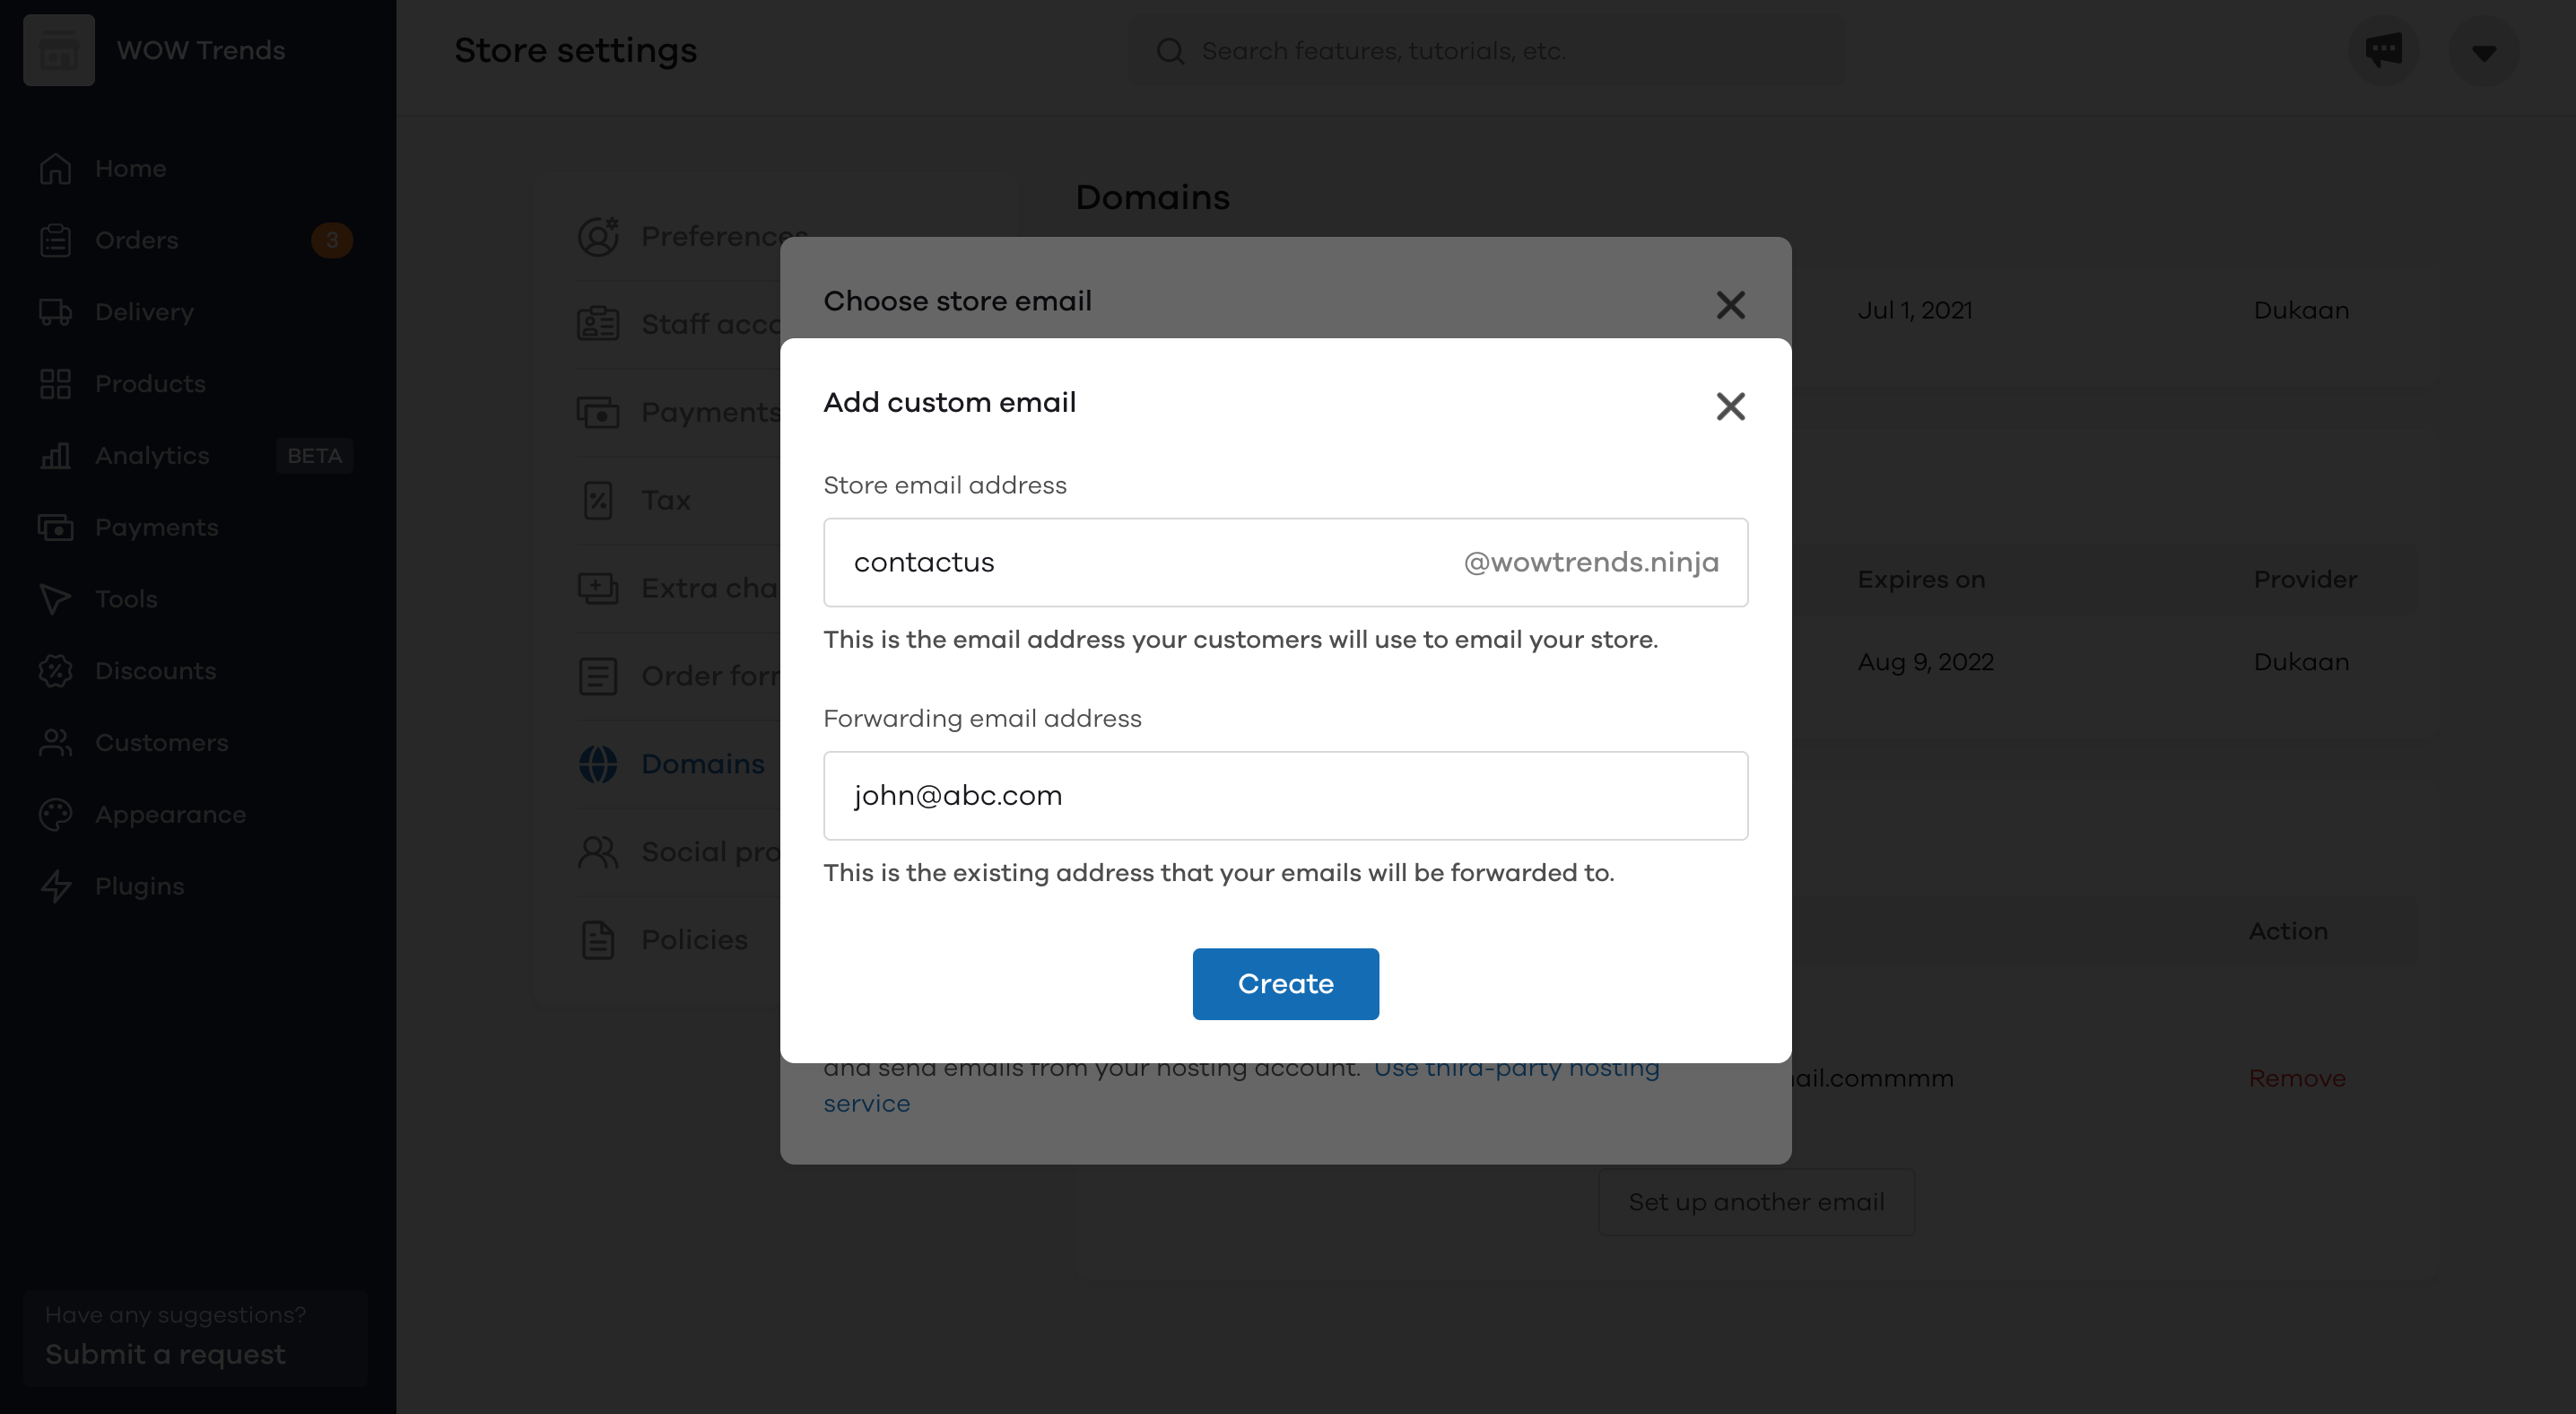
Enter your Store email address and Forwarding email address respectively. On entering both the fields, Click on Create.
For example, in the above image, we enter the store email address as [email protected] and the forwarding email address as [email protected]
Using third-party hosting services
If you use a third-party hosting service like G Suite or Zoho, you can receive emails on your hosting account. Click on Use third-party hosting service.
G Suite
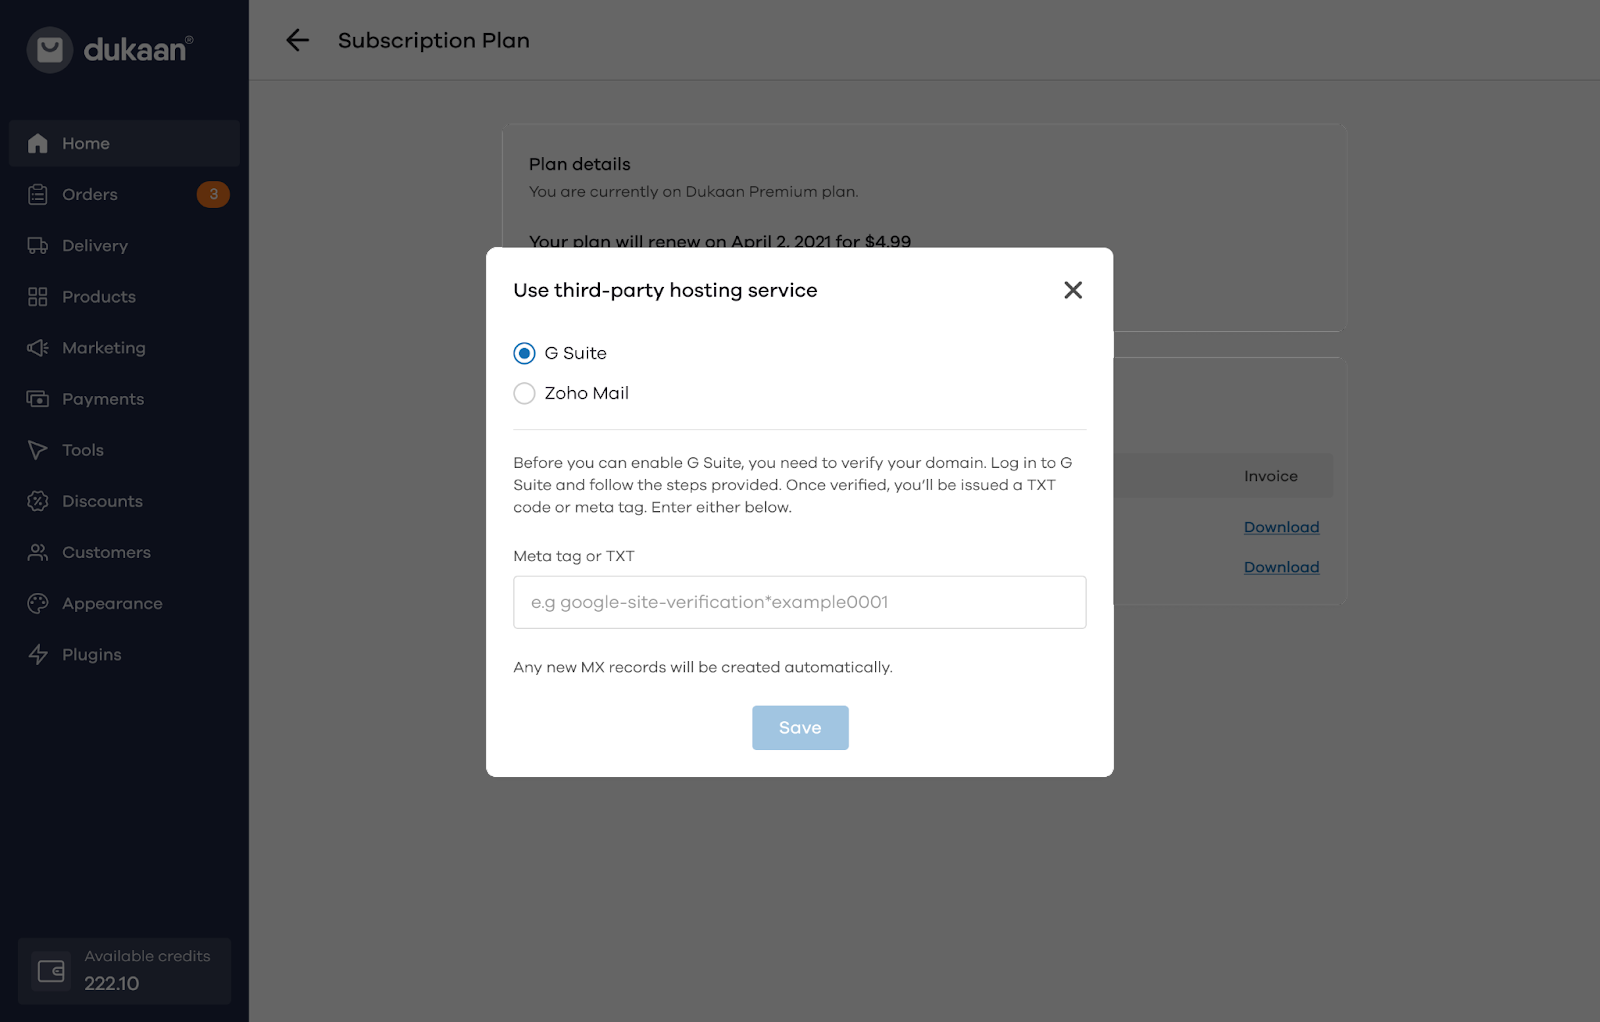
To enable G Suite, you need to verify your domain. Log in to G Suite and follow the steps provided. Once verified, you’ll be issued a TXT code or meta tag. Enter either of them in the text box below. Click on Save after entering the TXT code or meta tag.
Zoho Mail
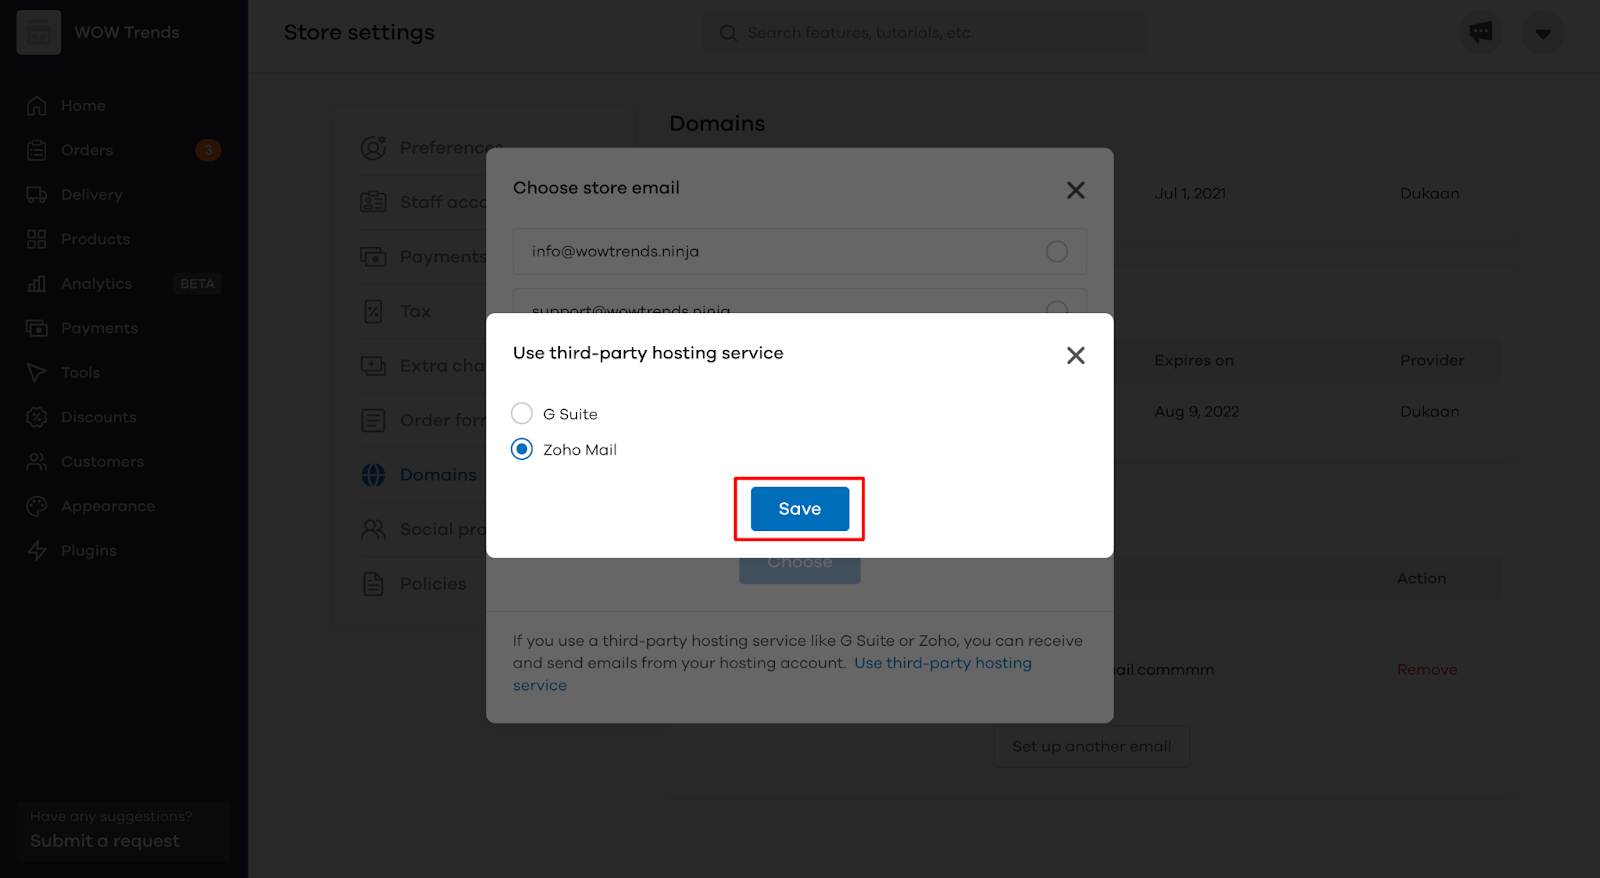
If you select the Zoho Mail option, you will see the Save option. Post this, you need to set up your store domain and address on Zoho to receive emails from your customers.
Read More
How to use the Preferences section on web?