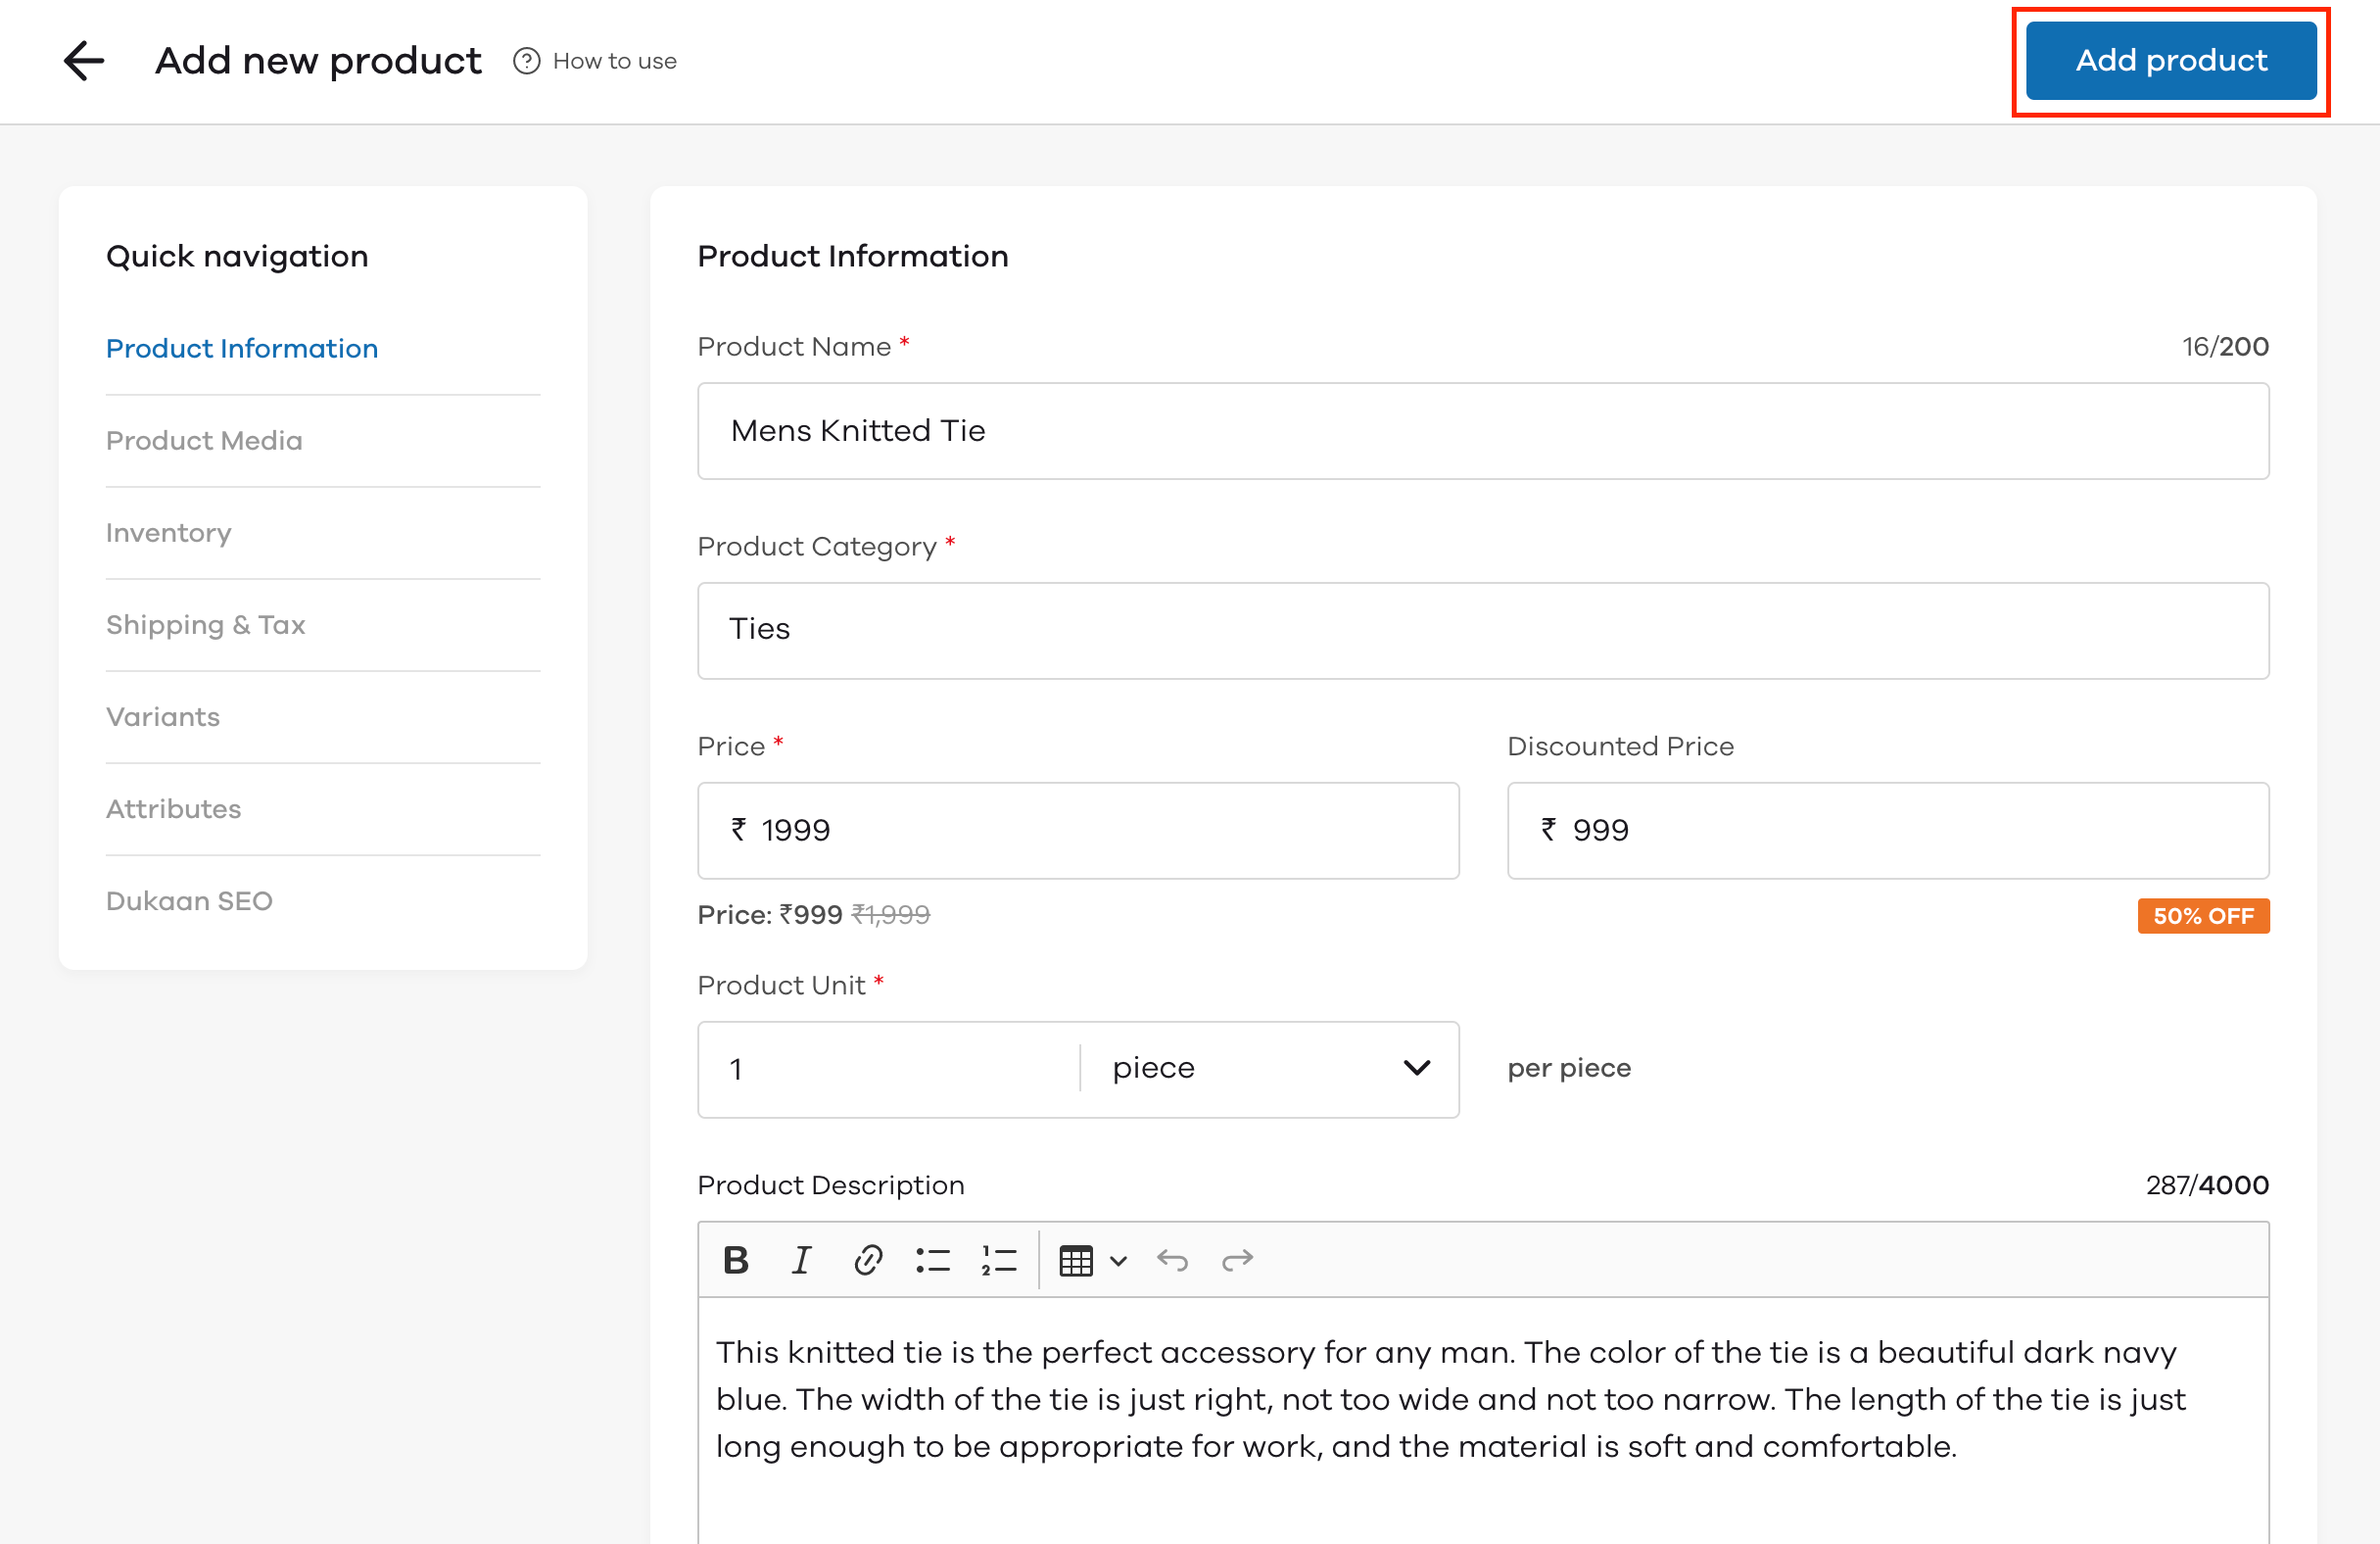
First, click on Products, upon clicking on products, the Add new product screen opens. Here you will be able to add the product information, media, inventory, shipping & tax details, variants, attributes, and SEO details (If the plugin has been installed).

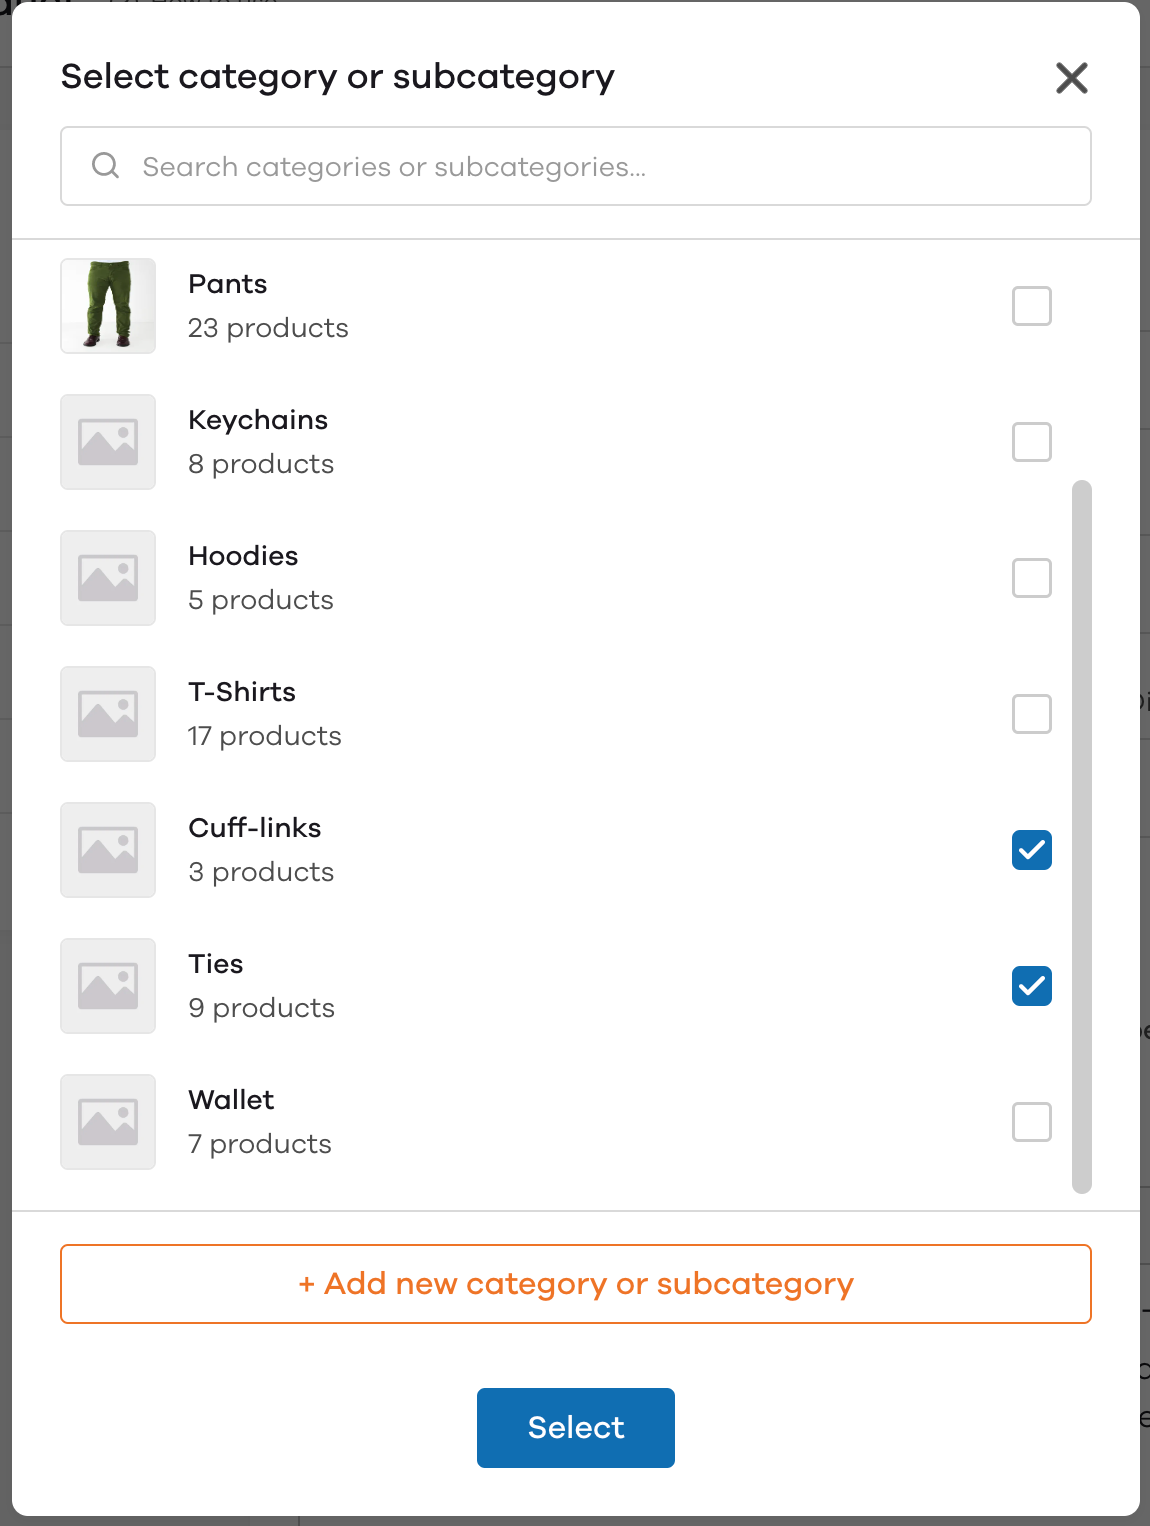
Every product you create needs to be assigned to a category. To choose the category of the product, click on Select categories. After doing so, the following screen will appear. Here you can choose one or more categories for your product. If your product does not have the required category, click on the Add new category button to add a new category.
For example; Here, I have selected the categories - Ties and Cuff-links because I want to show the product under both categories.

With Add Inventory, you can add the available inventory for each product. This option notifies you when your product goes out of stock. Once this inventory reaches 0, the product will be turned out of stock automatically and customers won't be able to order this product unless you update the inventory again.

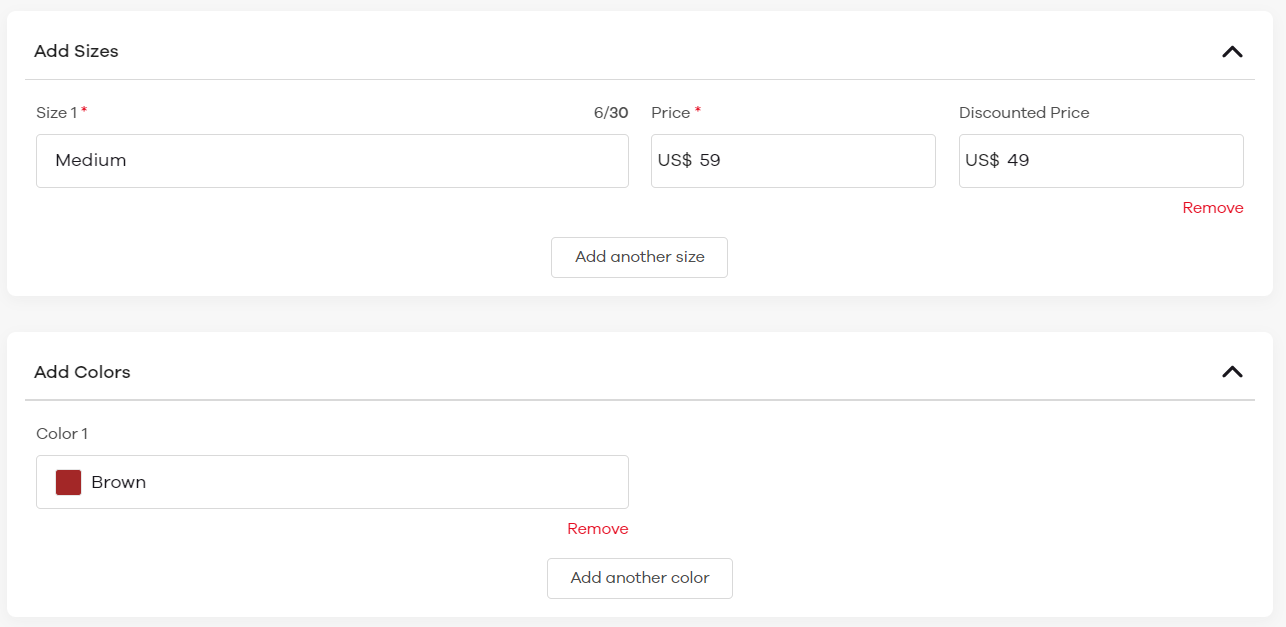
If you have additional sizes for the product or the product has multiple colors, you can add them from sections - Add Sizes and Add Colors - respectively. In the below example, I have added a Brown color Medium-sized t-shirt at a discounted price of USD 49.

Once done, click on Add Product button and the product will be added to your store.
Note: If you're a Restaurant or Hotel, while adding a new product you'll see options to Add Variants and Add-ons, instead of Sizes and Colors.
To add a variant, click on Add Variant button and enter the variant name, Price, and selling price. To remove a variant, click on the Remove button highlighted in the red color.

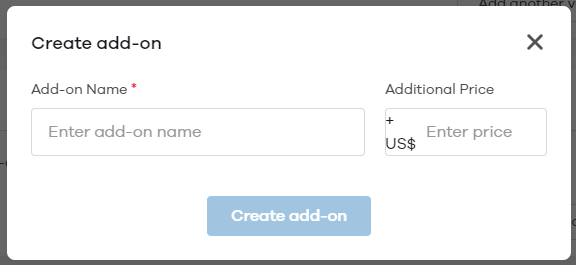
If you offer add-ons on a food or beverage item, you can do that as well. Click on Add add-on button and then click on Create new add-on. Enter the add-on name and its price and save it.

If you want to make an add-on compulsory, click on the checkbox. This add-on will be added to the product when a customer places the order.
