Introducing the "Slim Panel" in Conversations
We're excited to introduce a new feature in Conversations that we believe will make using our platform even better. It's called the "Slim Panel," formally known as "Contact Details" and it's designed to make it easier for you to find the information you need and move around the system without any hassle.
Imagine this Slim Panel as a sleek and slim sidebar located on the right side of your screen. It's like a control center for your Conversation experience. You can make it bigger or smaller, depending on your preference. This means you can quickly switch between different views, like "Contact," "Appointments," and "Opportunity," with just one click.
Now, let's break down the cool stuff you can do with this Slim Panel:
Feature 1 - Contact:
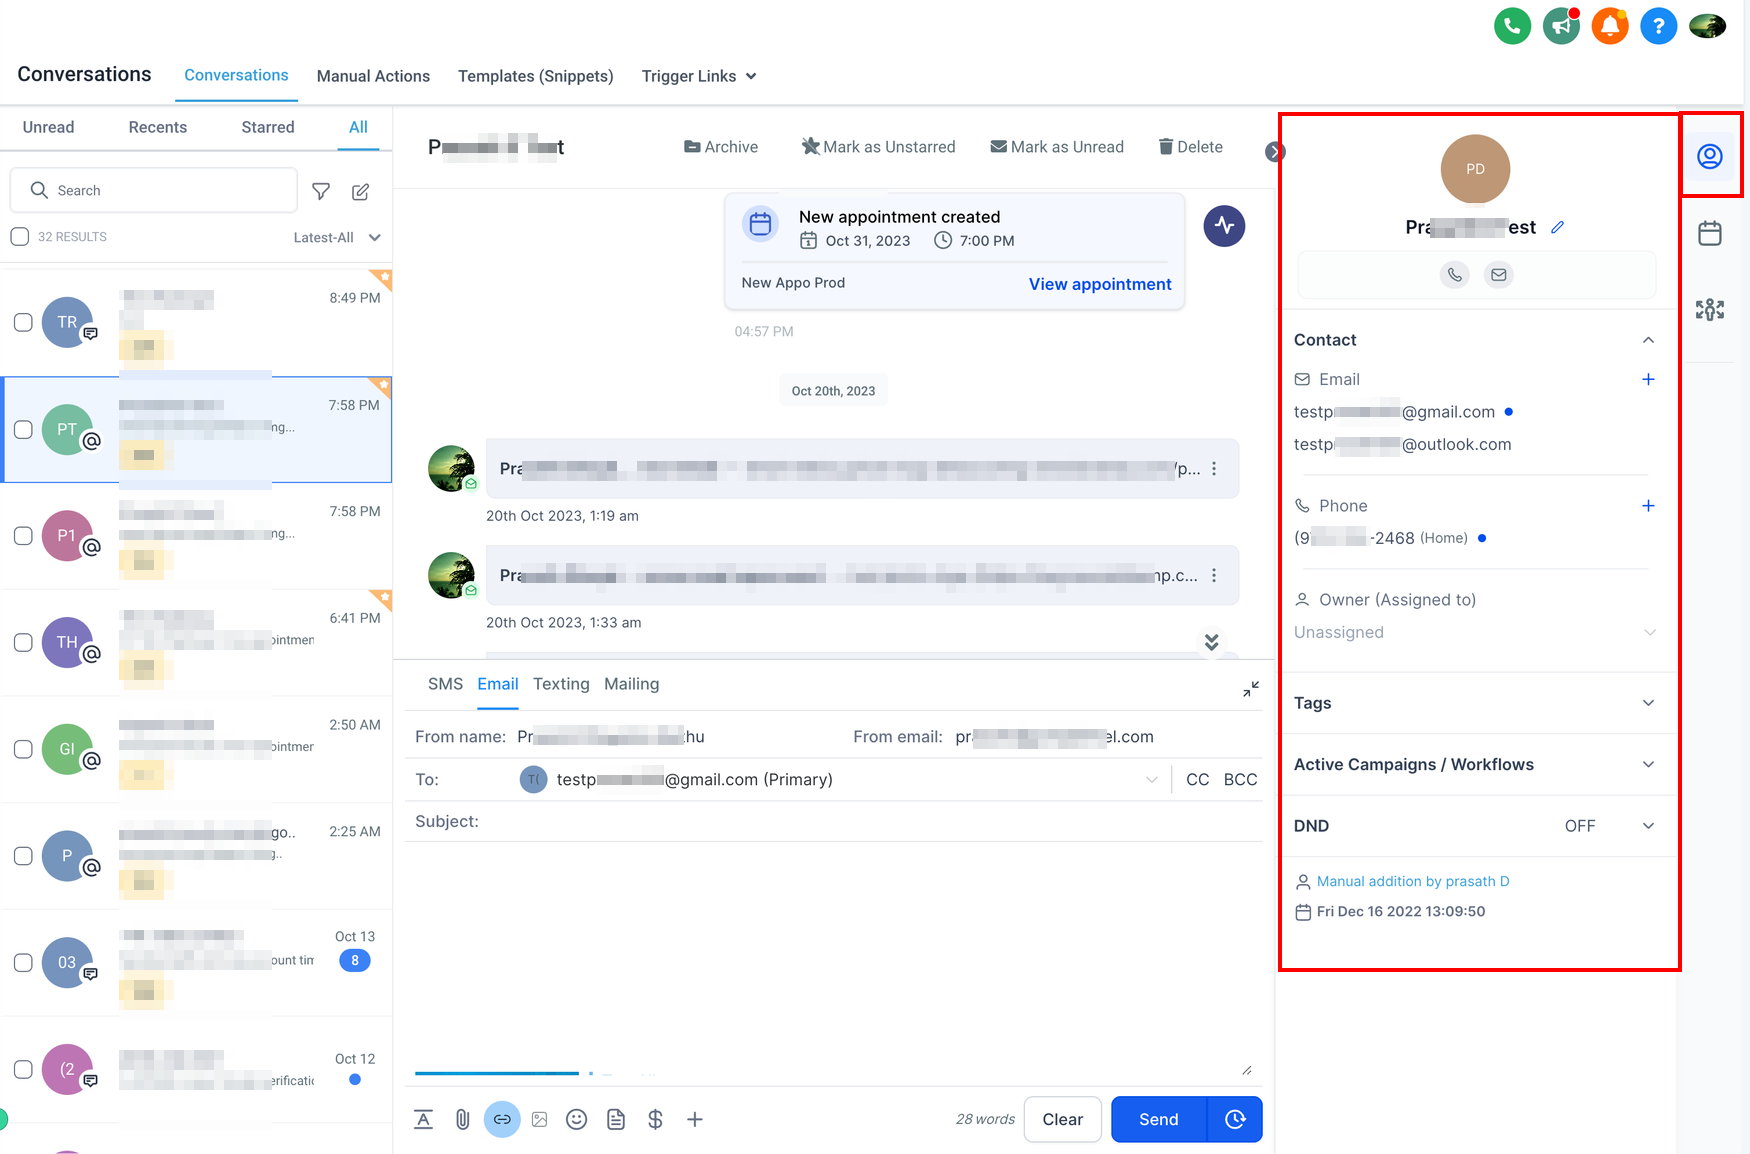
With this feature, managing your contacts becomes a breeze. You can add, change, or update contact details like names, phone numbers, and email addresses. You can even keep track of who owns the contact, add tags, connect contacts to specific campaigns, and set up "Do Not Disturb" settings. It's like having everything you need to stay on top of your contact list in one place.
Click on the Contact icon to access the features;
Contact Icon
To view all of the contact details, including form/survey submissions and notes, click on the circle icon at the top of the contact card on the right-hand side of the page. This will take you to a new page where you can view all the details of your client and have additional fields where you can add customer information.
View and/or Edit Contact Details
To view or change a client's details, just look to the right of your conversation on the page. You'll find the customer's name, contact number, and email address there. Simply click on the desired field to edit it. Alternatively, you can choose who from your team should be in charge of them by clicking "Assign to" under their name and then selecting a team member from the dropdown list that appears.
Add/Edit Tags
To add tags to a customer's details, simply click on "Add Tags” under the customer email on the right-hand side of your screen. Start typing in the tag you'd like to add and, if it already exists, it will appear in a drop-down beneath what you typed in. If the tag doesn't exist yet, hit the plus icon next to the desired tag and it will be added to your tags list.
Workflows & Campaigns
You can view the workflows and campaigns the contact is currently in under the Active Campaigns/Workflows. If the contact is not currently active in a workflow or campaign, there will be none showing here. You can add the contact to a workflow or campaign by clicking on the “+ Add” button. A popup will appear for you to fill in the appropriate details.
Add/Remove DND
To set up Do Not Disturb on channels of your choosing, just click the blue "Configure" button underneath DND at the right-hand side of the page. You can choose to block all channels or pick some specific ones that the client doesn't want to use for communication.
The DND list will restrict all future communications to broadcast out to this contact, even if you tell the CRM otherwise. Simply disable DND to continue the conversation.
Feature 2 - Appointments:
This feature lets you handle your appointments like a pro. You can easily book new appointments, see what's coming up, and check out your past appointments right from the Slim Panel. No more jumping around different screens to manage your schedule – it's all right there.
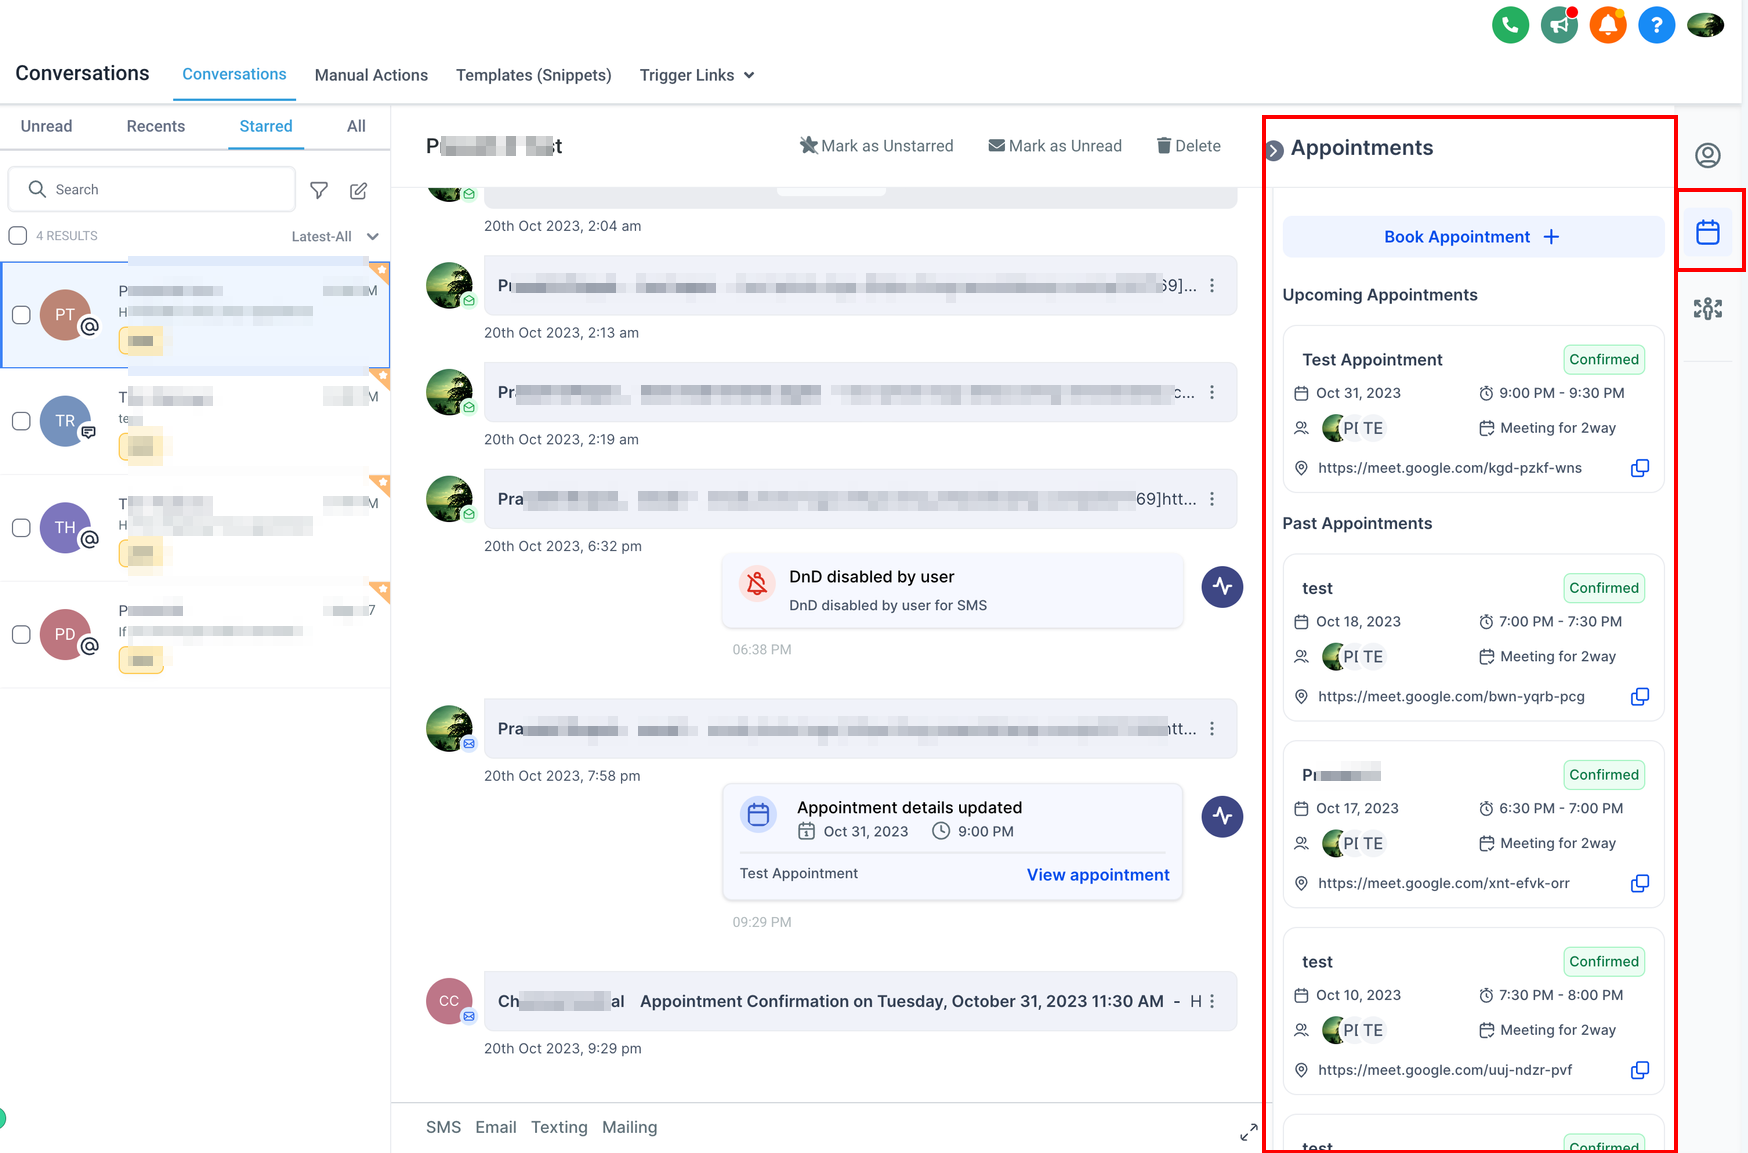
Imagine you're in the middle of a conversation, and you suddenly need to schedule an appointment. With this new feature, you can do it without leaving the Conversation.
Here's How it Works:
- While in the Conversation channel, look for the blue "Book Appointment" button on the Slim panel.
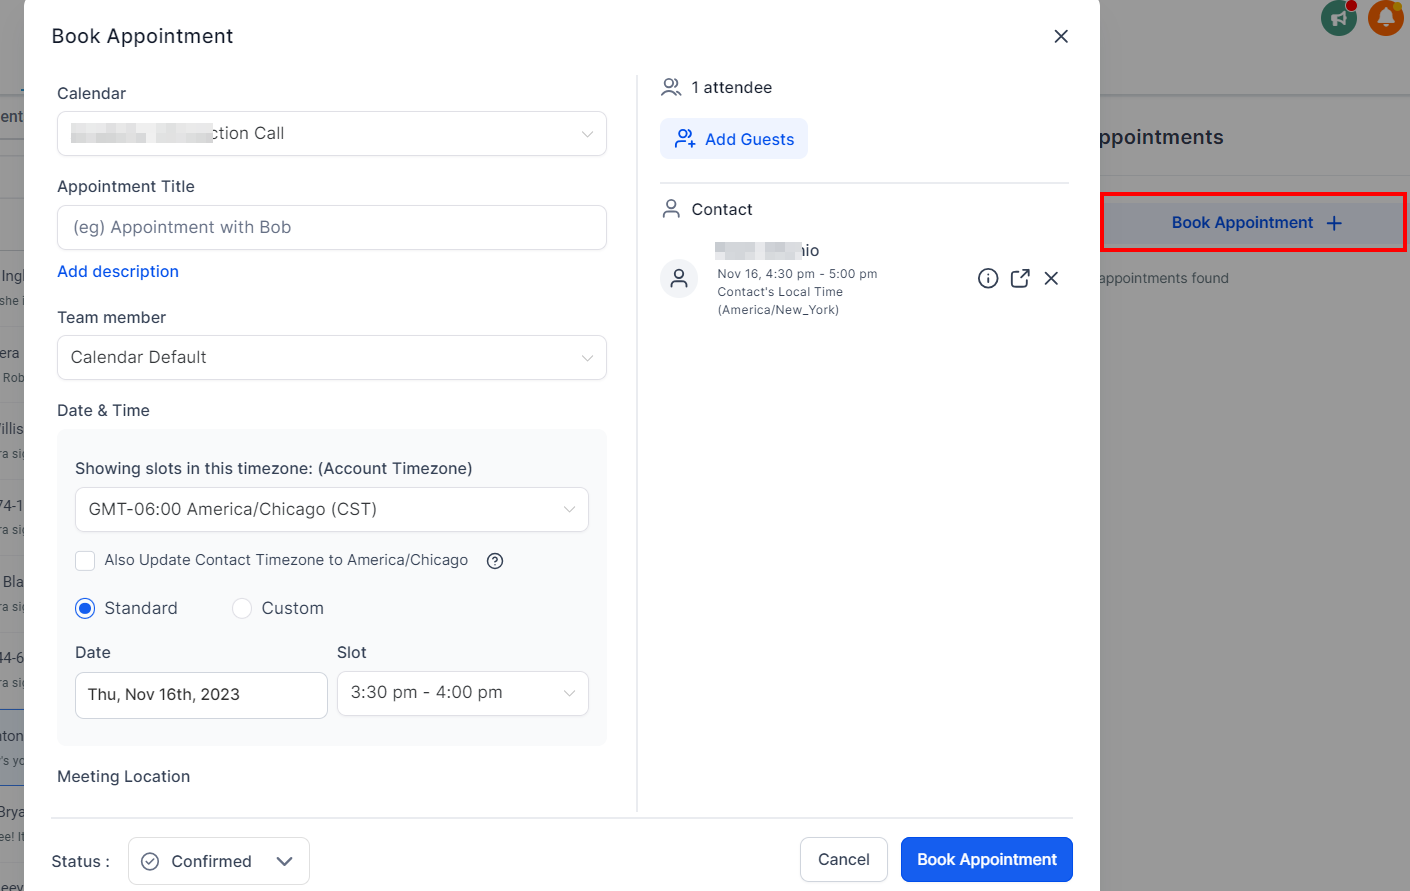
- Click on it, and a window will pop up, allowing you to enter the necessary details.
- First, choose the team calendar you want to assign the appointment to. Add a title and team member.
- Then, select the timezone, date, and time slot that suits your schedule. If you need to set a custom start and end time, you can do so by clicking the "Custom" button in the Slot dropdown.
- If you're using the Calendar Default setting, you can specify whether the appointment is "Confirmed" or "Unconfirmed" from the Appointment Status dropdown. If it's not the Calendar Default, fill in the meeting location and choose "Confirmed" or "Unconfirmed" from the request status dropdown.
- Preview the booked appointment on the upper right side of the form.
Feature 3 - Opportunity:
When it comes to opportunities, you can create new ones, view existing opportunities linked to a contact, and make changes to opportunity details, all in one central spot. This makes it super convenient to keep track of your business opportunities and make updates as needed.
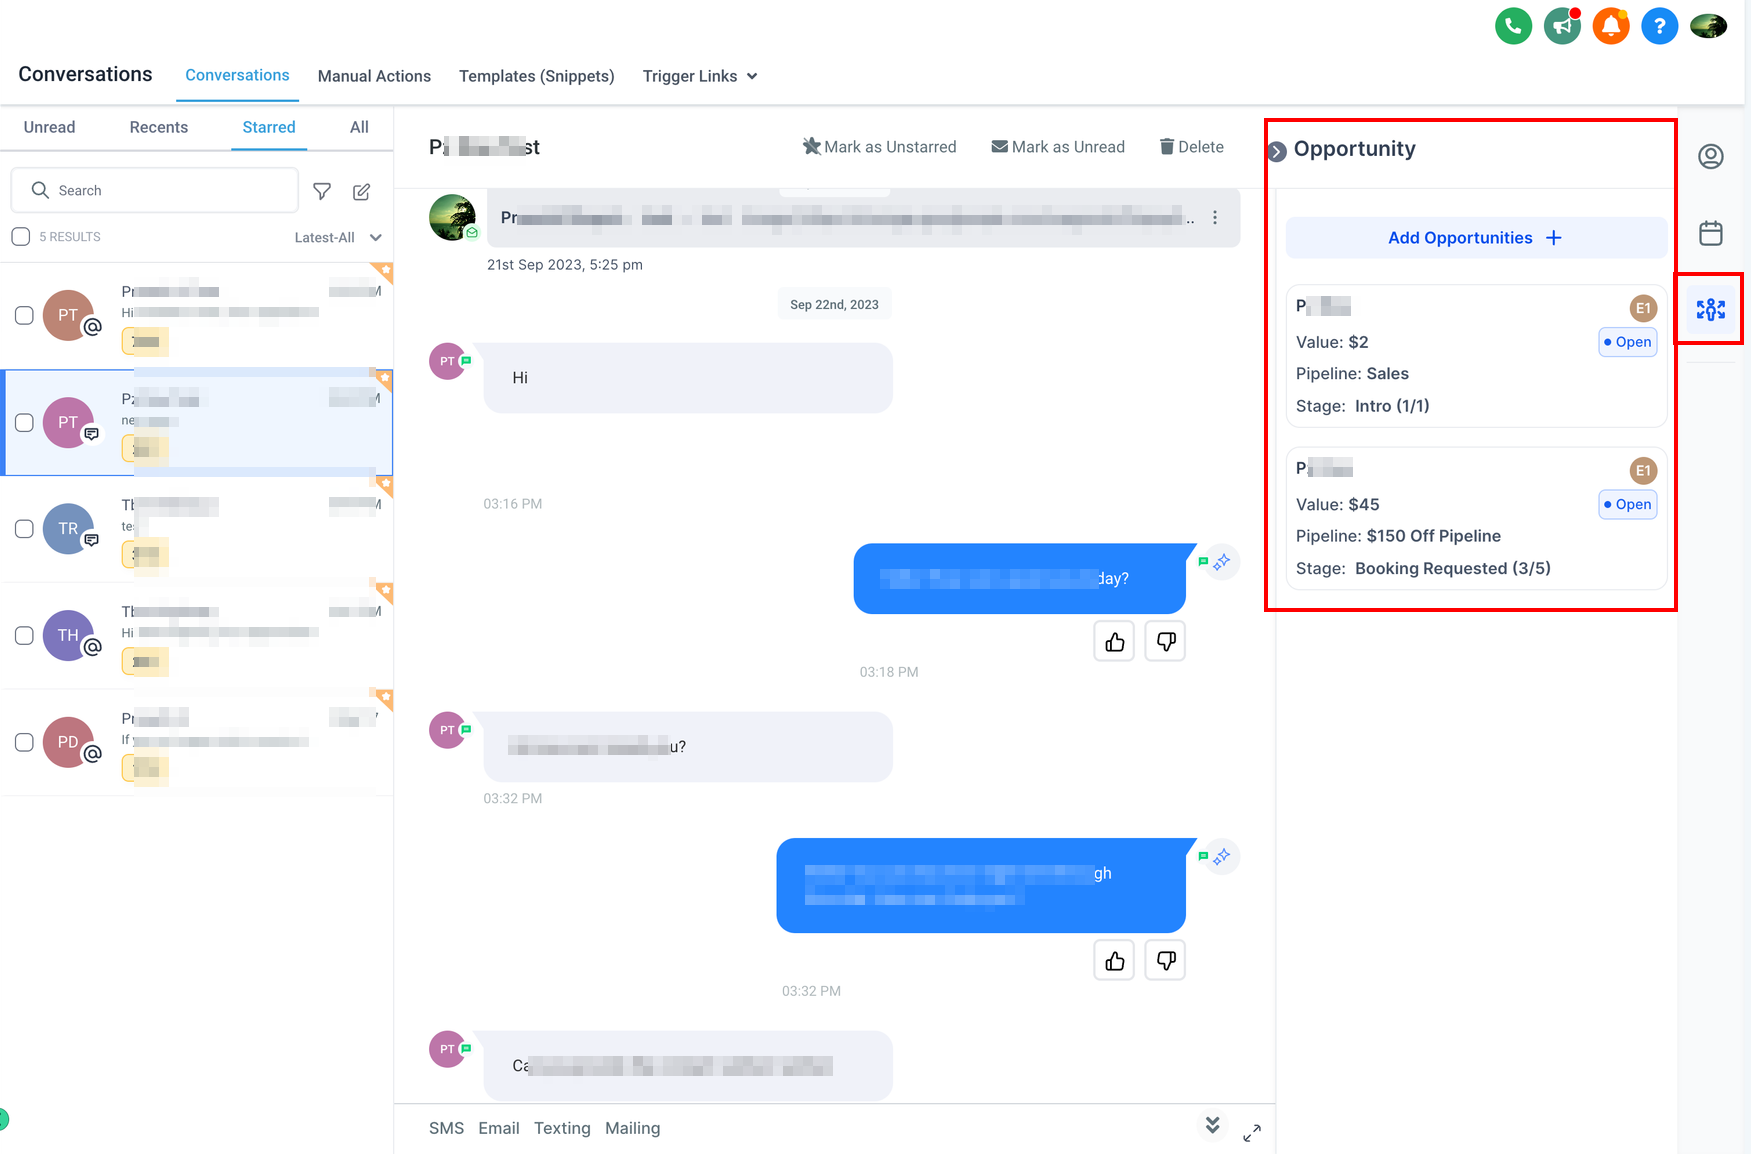
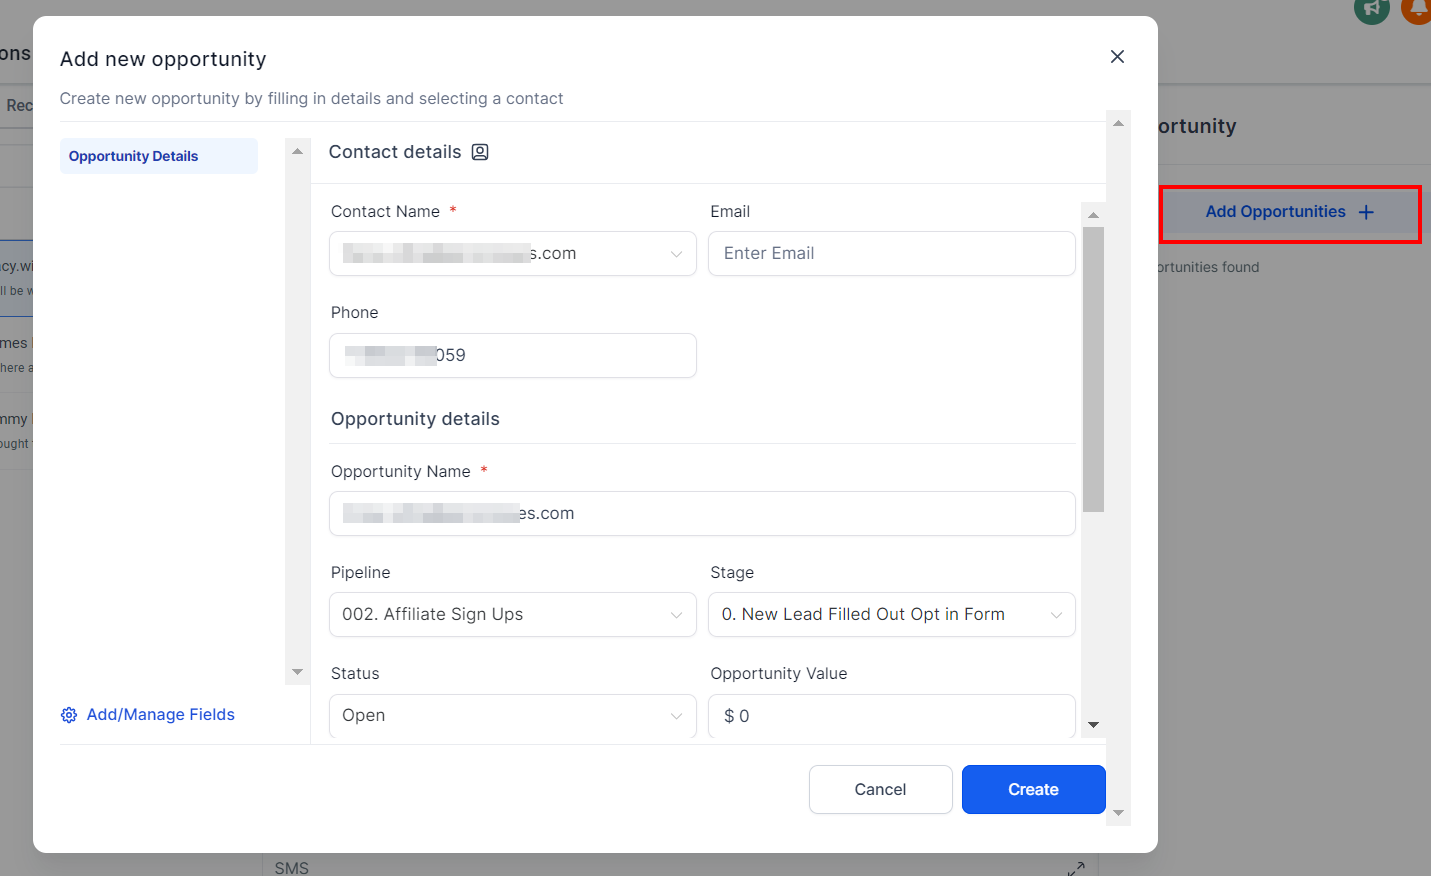
To add an opportunity directly within the Conversation channel, you can simply click on the "Add Opportunities" button:
- While in the Conversation channel, look for the "Add Opportunities" button.
- Click on it, and a window will pop up.
- Here, you can enter the Contact and Opportunity Details - the name, email, phone number, Pipeline, stage, value, and status.
- Click "Create" and you're done! The opportunity is created without the need to switch channels.
So, what's the big deal with all these features? Well, we've made using Conversations more user-friendly. You won't have to click through various sections or modules anymore. Everything is right at your fingertips, making your experience smoother, more intuitive, and more productive.
In a nutshell, the Slim Panel is like your personal assistant in Conversations, helping you keep your contacts organized, manage appointments effortlessly, and stay on top of business opportunities. We believe it will make your life easier, and we can't wait for you to try it out!
Further Reading