How To Use Text 2 Pay
Here's a quick guide on how to start using text 2 pay to collect payments easily.
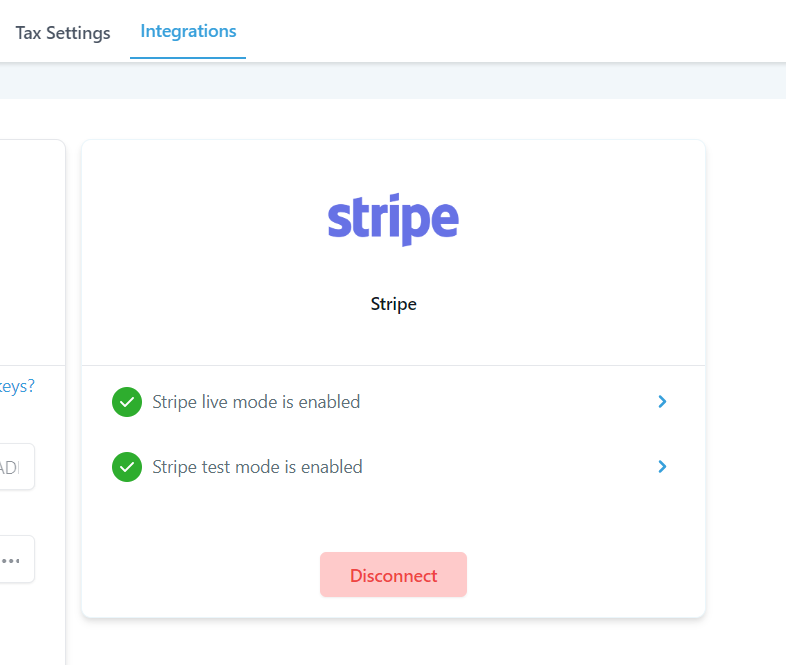
Make Sure Stripe Is Connected
In order to receive payments and use Text 2 Pay, make sure your Stripe account is connected, to do this go to the Payments tab, then Integrations.
Here's a quick guide on how to connect Stripe to your CRM.
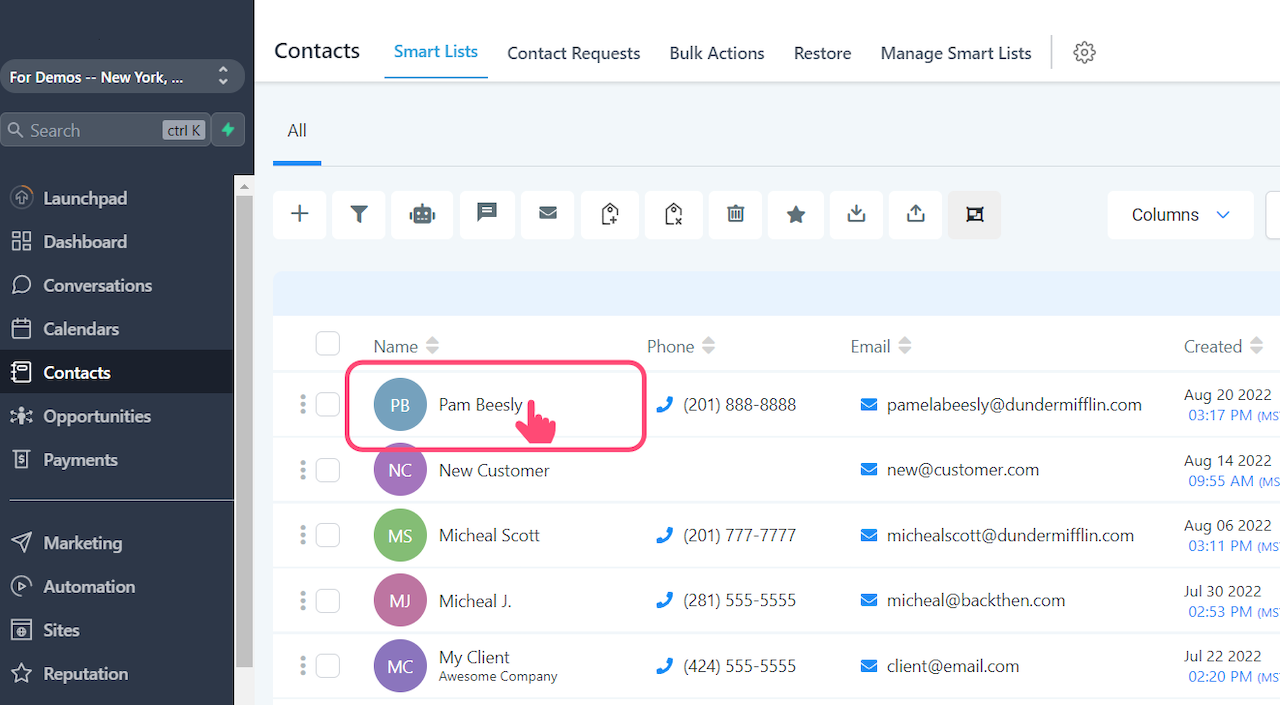
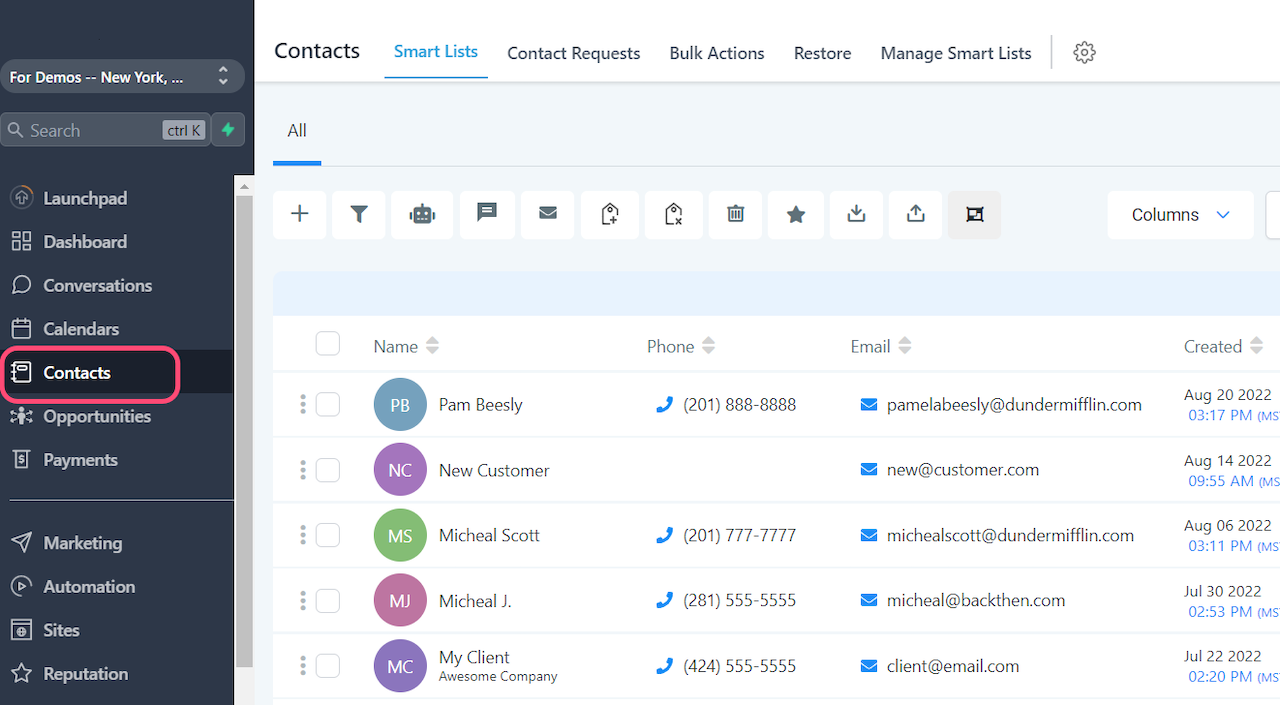
How To Use Text 2 Pay - Contacts Tab
Go to your "Contacts" tab

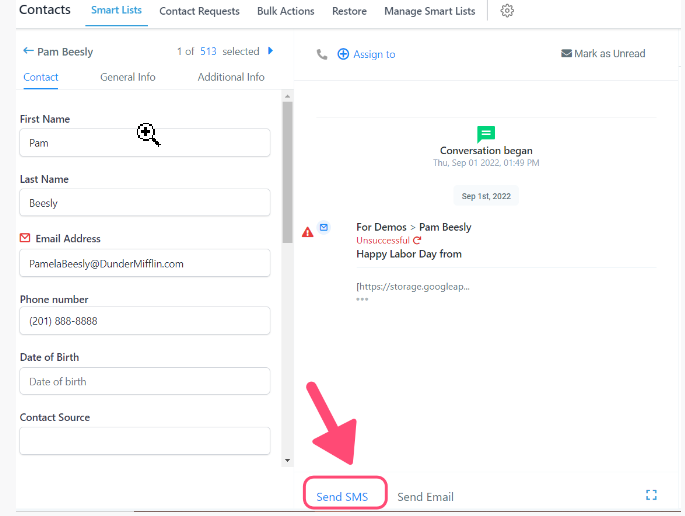
Select The Contact
Choose the contact you're sending the Payment link.
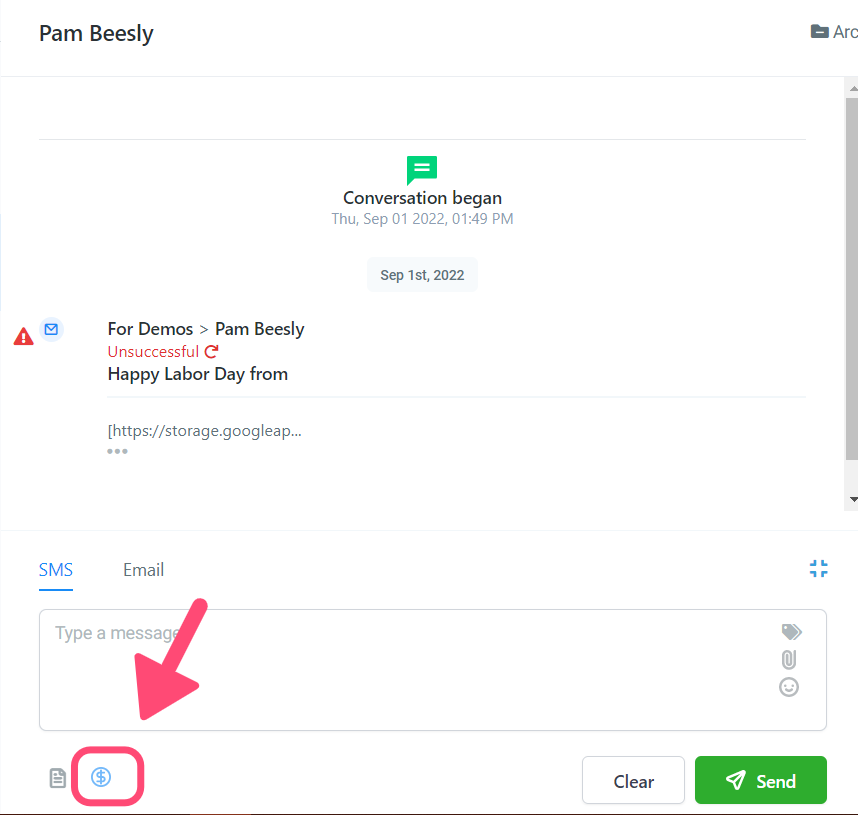
SMS or Email?
Choose between SMS or Email to send the Payment link.
For this example, we're using SMS.

Click On Request Payment
Click on the "Request Payment" Icon.
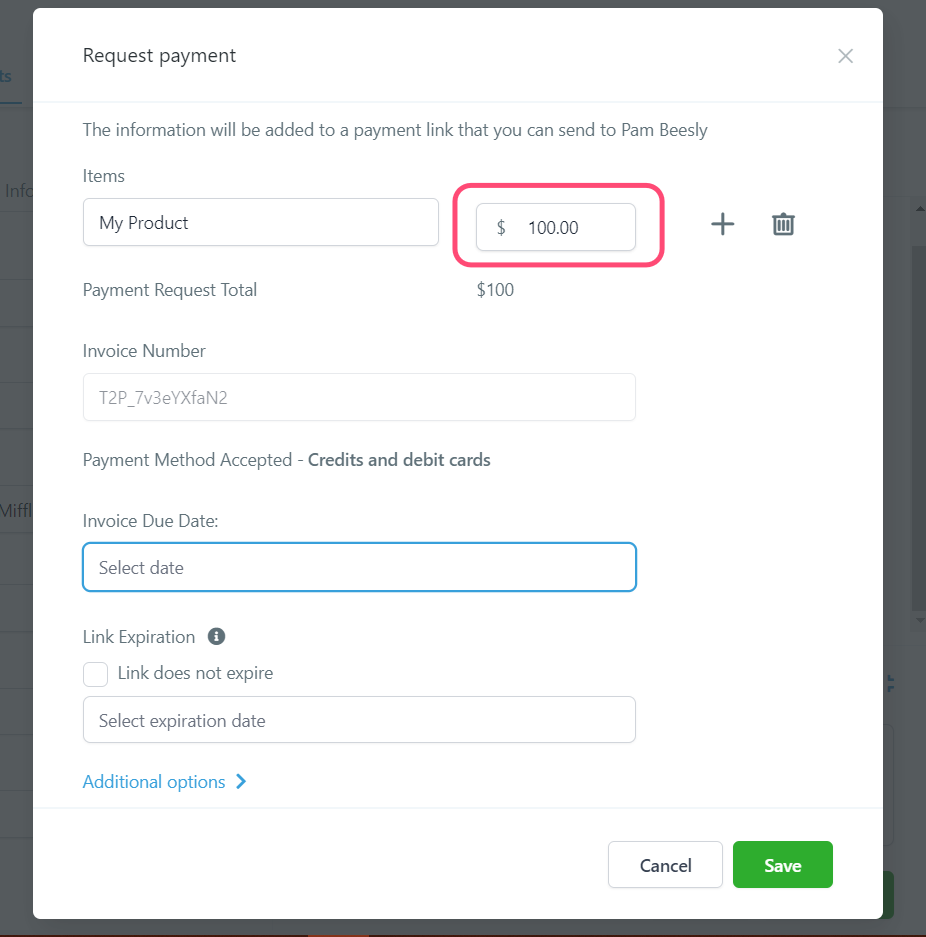
Enter Item Name
Once the pop-up opens, enter the product or service name.
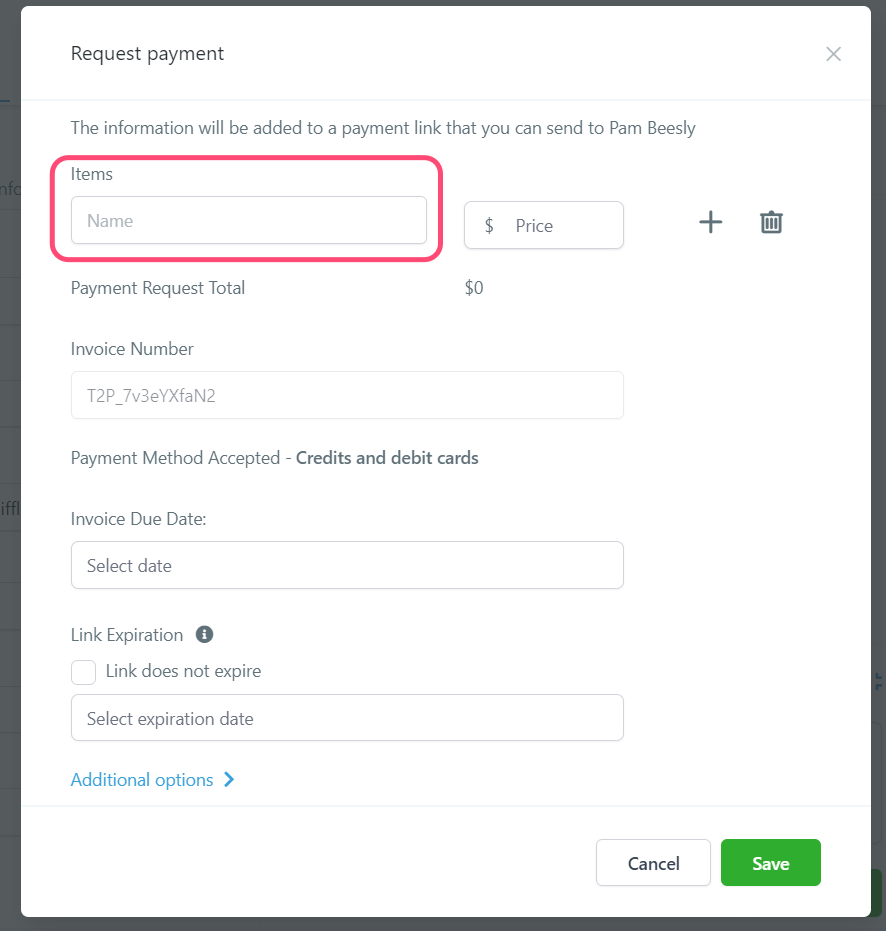
Enter the Price
Type in the price for your product.
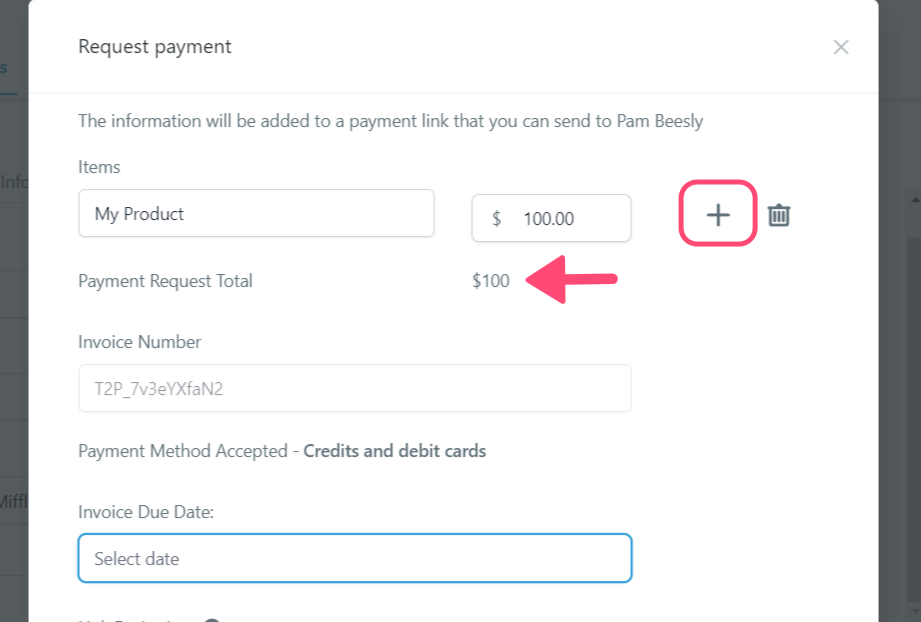
(Optional) Add more items
You can add more items/products in the same payment link. will add up all the prices and will show the total price.Your contact will be able to see exactly which items are included in the invoice.
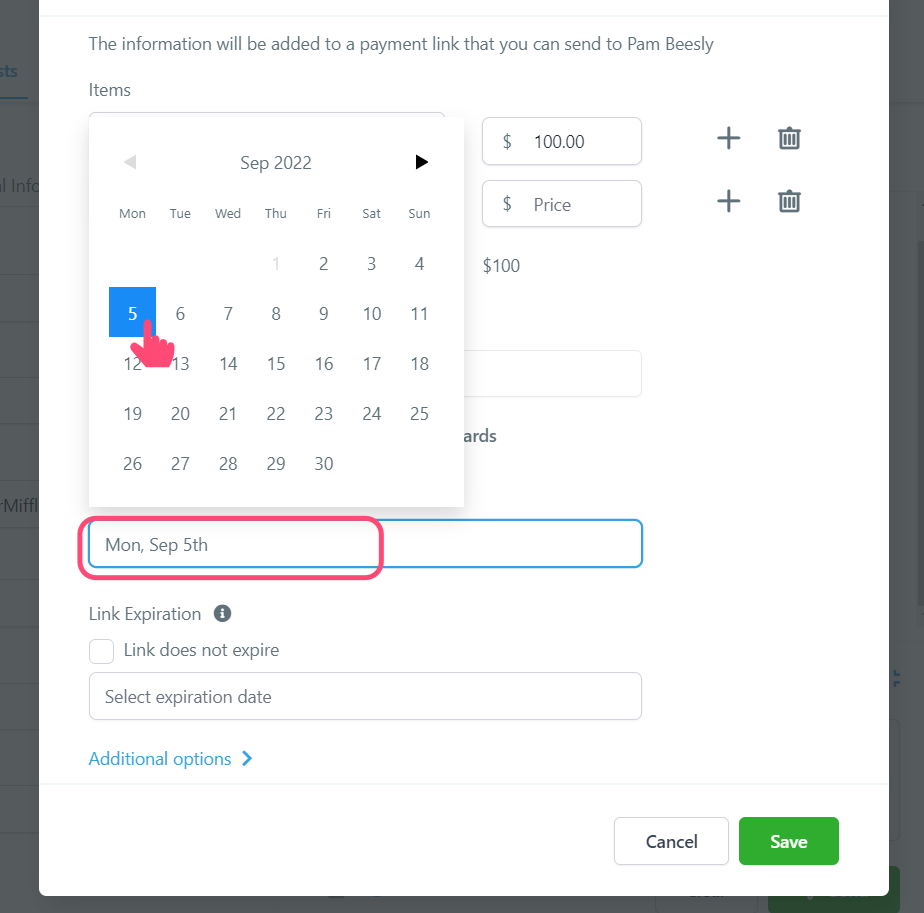
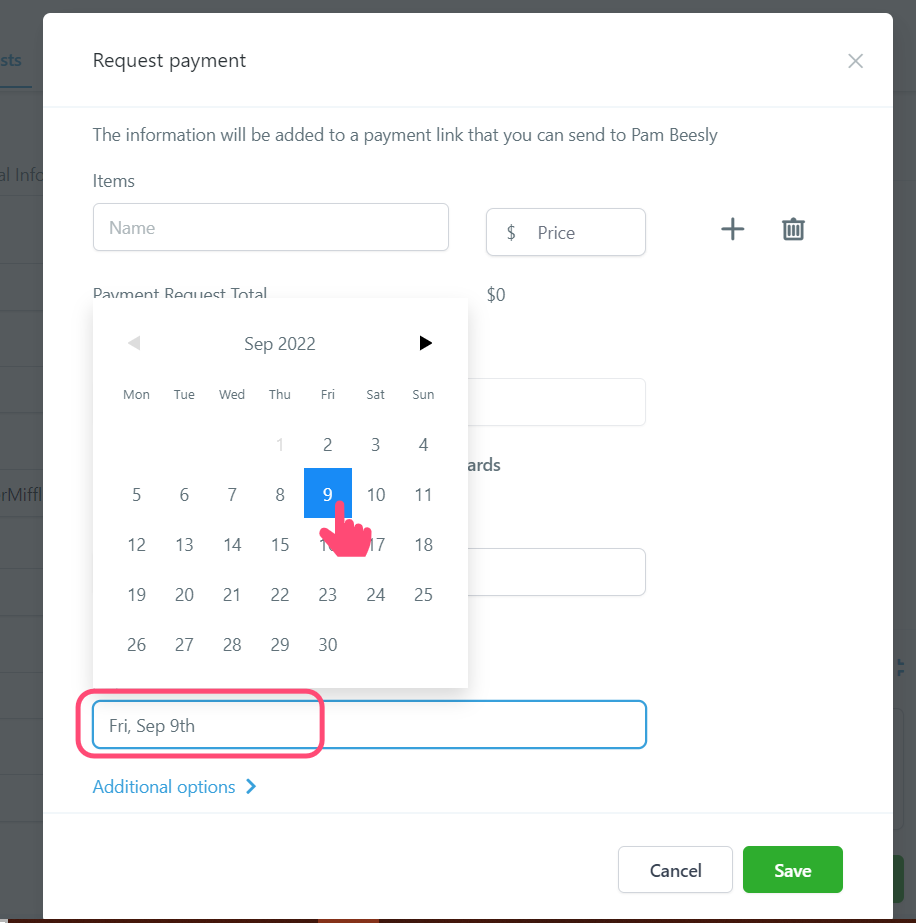
Select A Due Date
Choose the due date for the invoice.
(Optional) Set Up Expiration Date
You can set up an expiration date for the payment link you're creating. For this, simply click on the Expiration Date field.
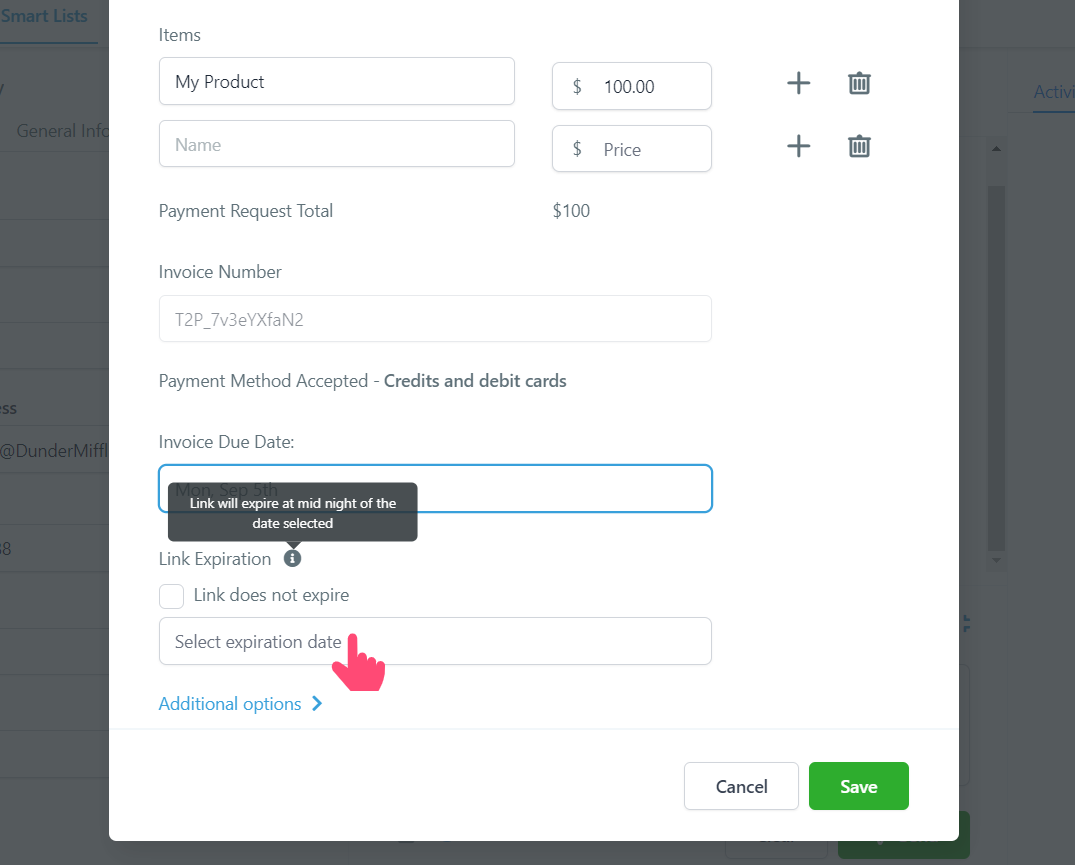
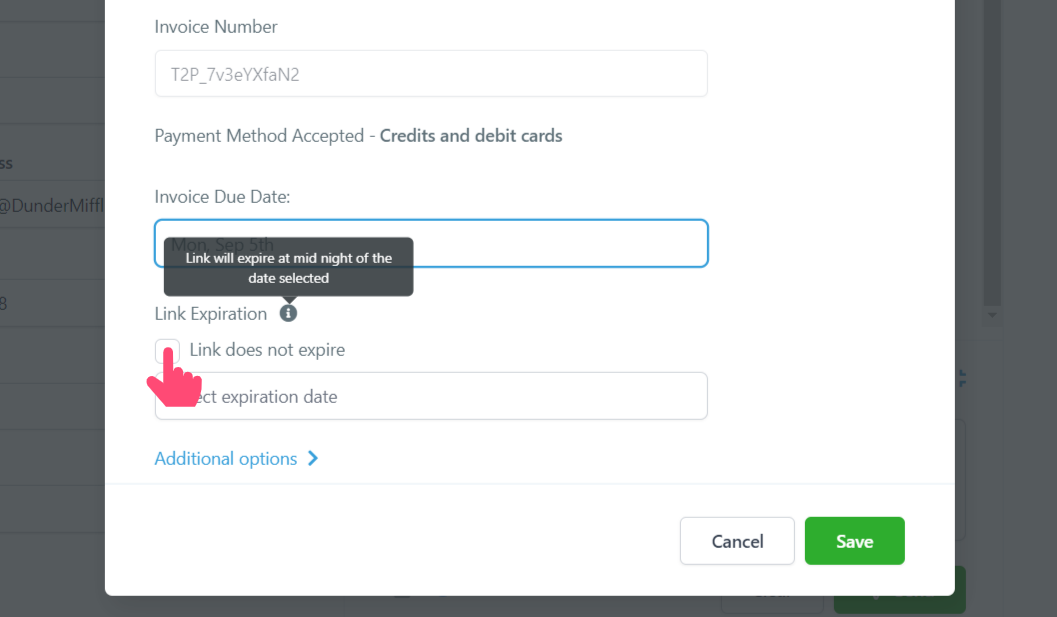
Select Expiration Date
NOTE: The link will expire at midnight of the chosen day.
Disable Expiration Date
If you wouldn't like for your link to expire, check the "Link does not expire" box.
Additional Options
Click on "Additional Options" and make sure the "Live" option is on.

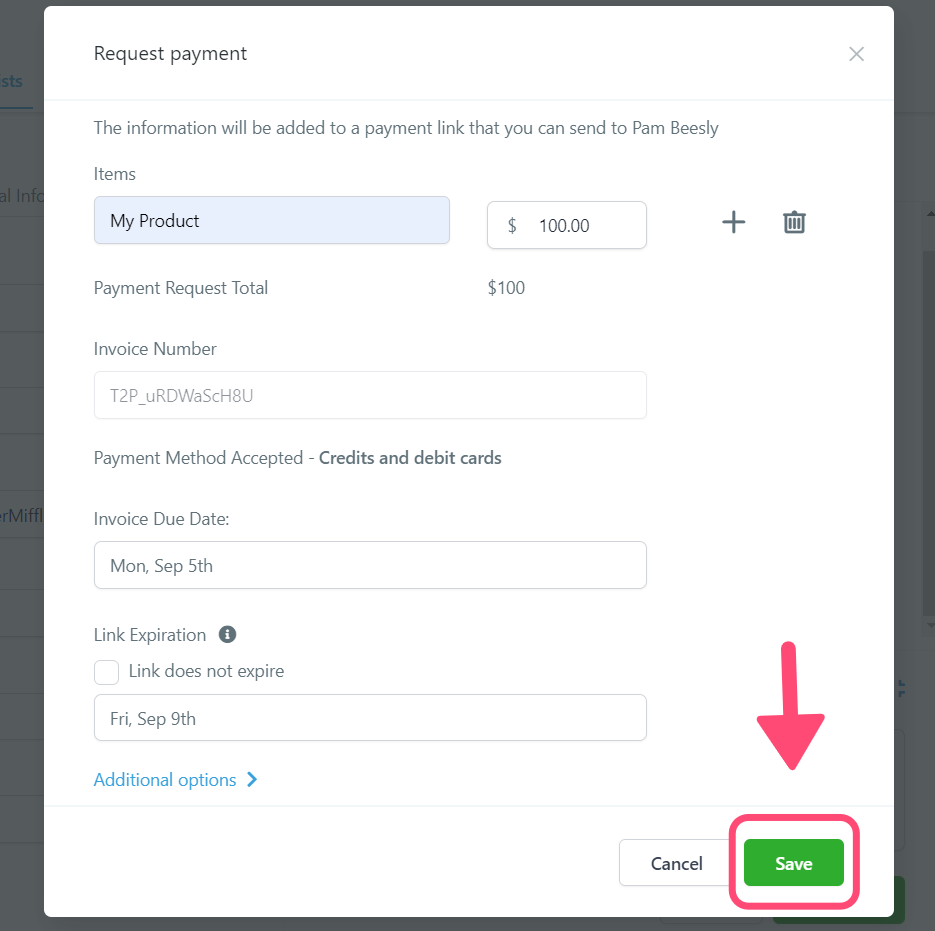
Save
Once you've finished editing, click on "Save".
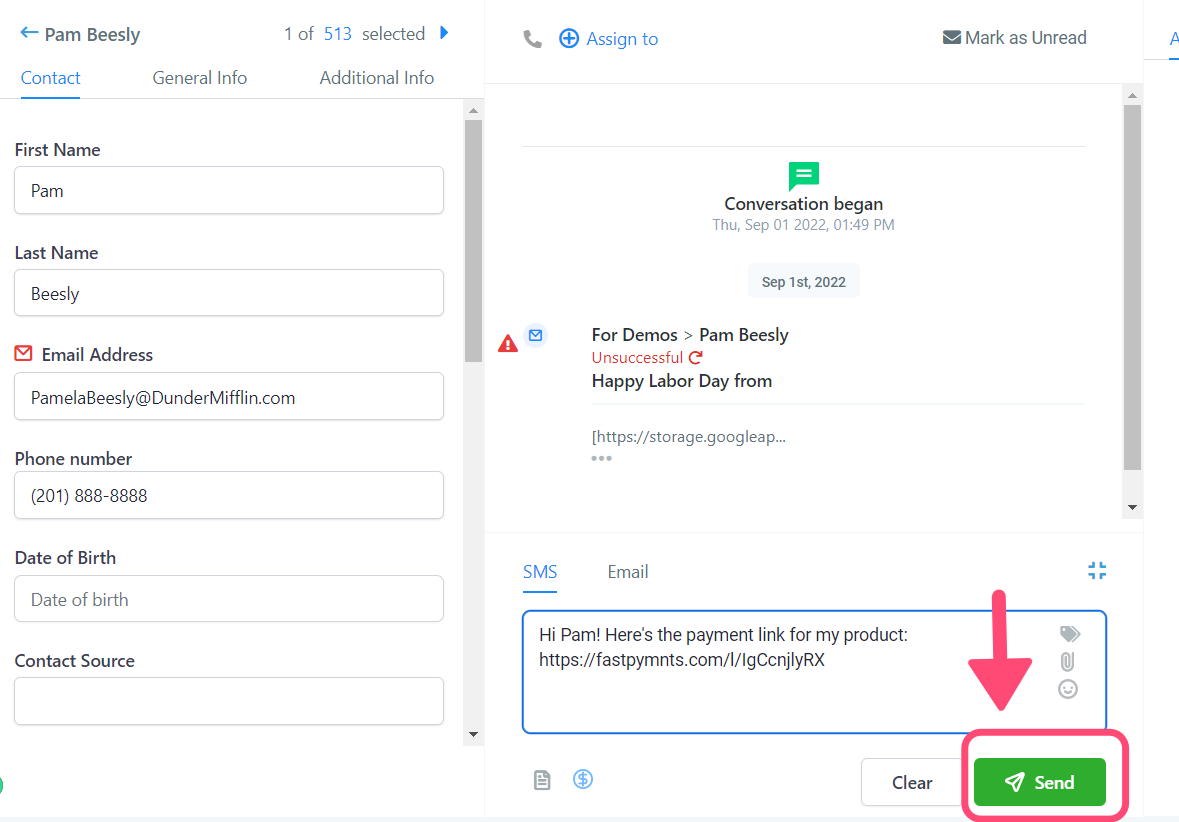
Edit Your Message
You're ready to send out your payment link, now you can edit the message that goes along with it.

For Emails
To send your Payment link via Email, it's the exact same process we showed you on this guide.Simply select Email at the bottom and edit your message.
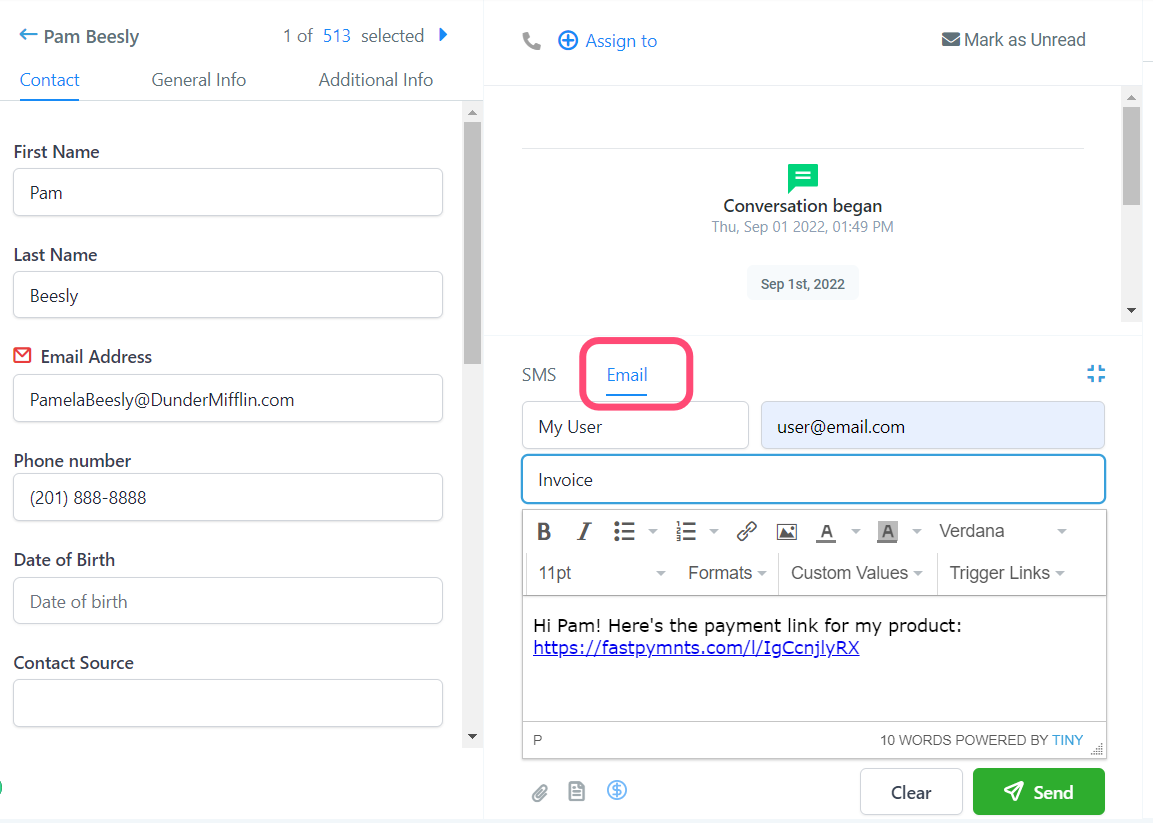
Send it!
After editing your message, click on "Send".
How To Use Text 2 Pay - Conversations Tab
Go to your "conversations" tab
Select The Contact
You can search for your contact on the Search Bar.
SMS or Email?
Choose between SMS or Email to send the Payment link.
For this example, we're using SMS.
Click On Request Payment
Click on the "Request Payment" Icon.
Enter Item Name
Once the pop-up opens, enter the product or service name.
Enter the Price
Type in the price for your product.
(Optional) Add more items
You can add more items/products in the same payment link. will add up all the prices and will show the total price.Your contact will be able to see exactly which items are included in the invoice.
Select A Due Date
Choose the due date for the invoice.
(Optional) Set Up Expiration Date
You can set up an expiration date for the payment link you're creating. For this, simply click on the Expiration Date field.
Select Expiration Date
NOTE: The link will expire at midnight of the chosen day.
Disable Expiration Date
If you wouldn't like for your link to expire, check the "Link does not expire" box.
Additional Options
Click on "Additional Options" and make sure the "Live" option is on.
Save
Once you've finished editing, click on "Save".
Edit Your Message
You're ready to send out your payment link, now you can edit the message that goes along with it.
For Emails
To send your Payment link via Email, it's the exact same process we showed you on this guide.Simply select Email at the bottom and edit your message.
Send it!
After editing your message, click on "Send".