When using Social Planner to publish content on Facebook Groups as a Page, it's crucial to ensure that your Facebook Groups are linked correctly. In this guide, we'll walk you through the process of connecting your Page to a Group and selecting the right Publisher for your content. These steps will make your posts appear on Facebook Groups as your Page, giving your content the professional touch it deserves.
Connecting Your Page to a Group
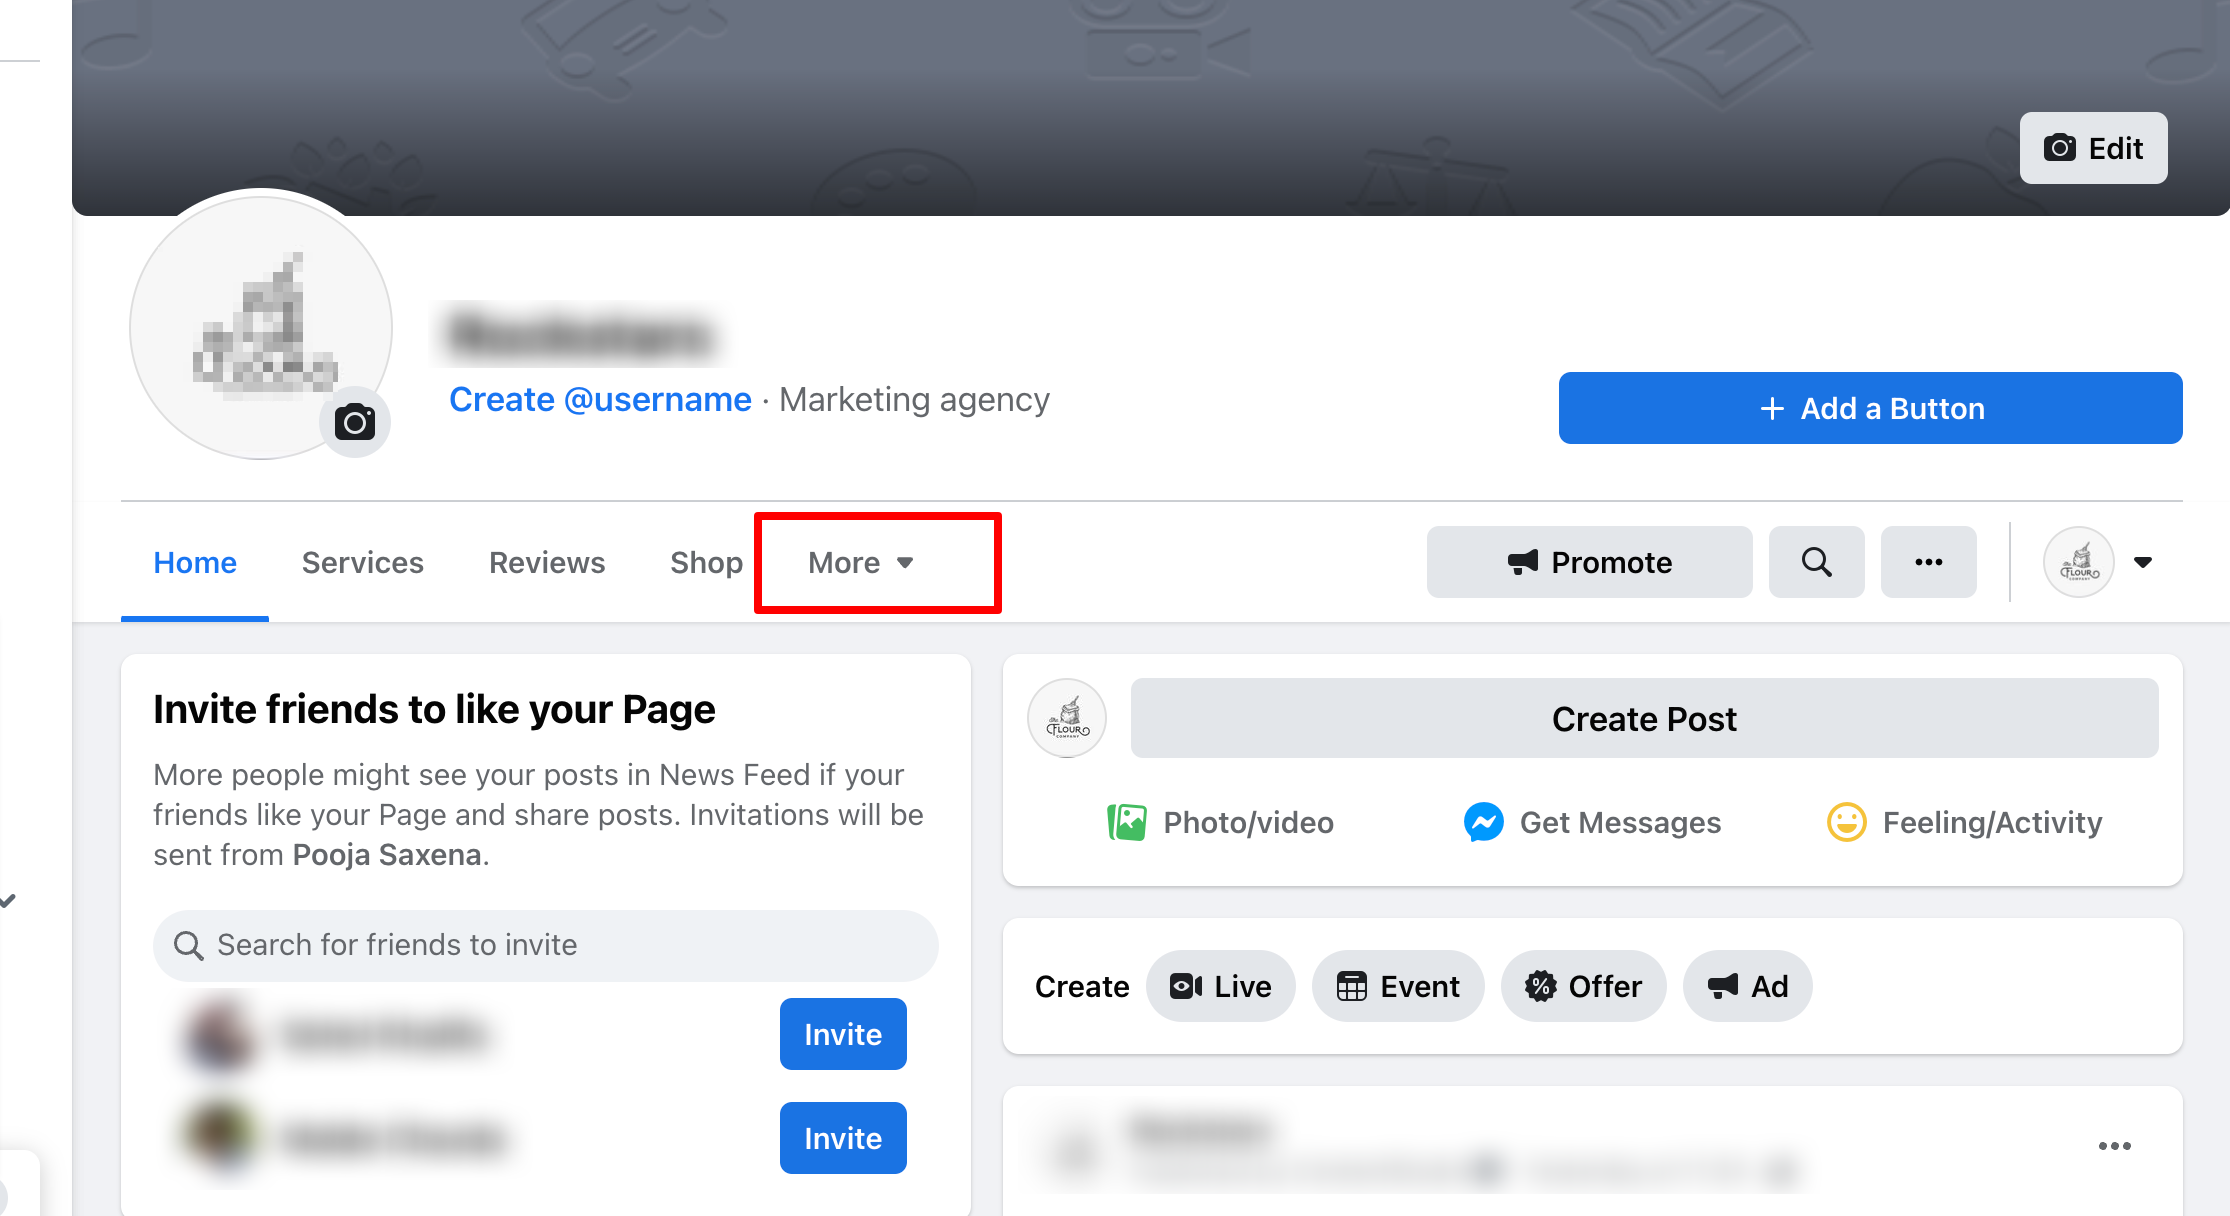
- Access Your Page: To get started, go to your Facebook Feed and click on "Pages" in the menu on the left. Select your Page from the list.
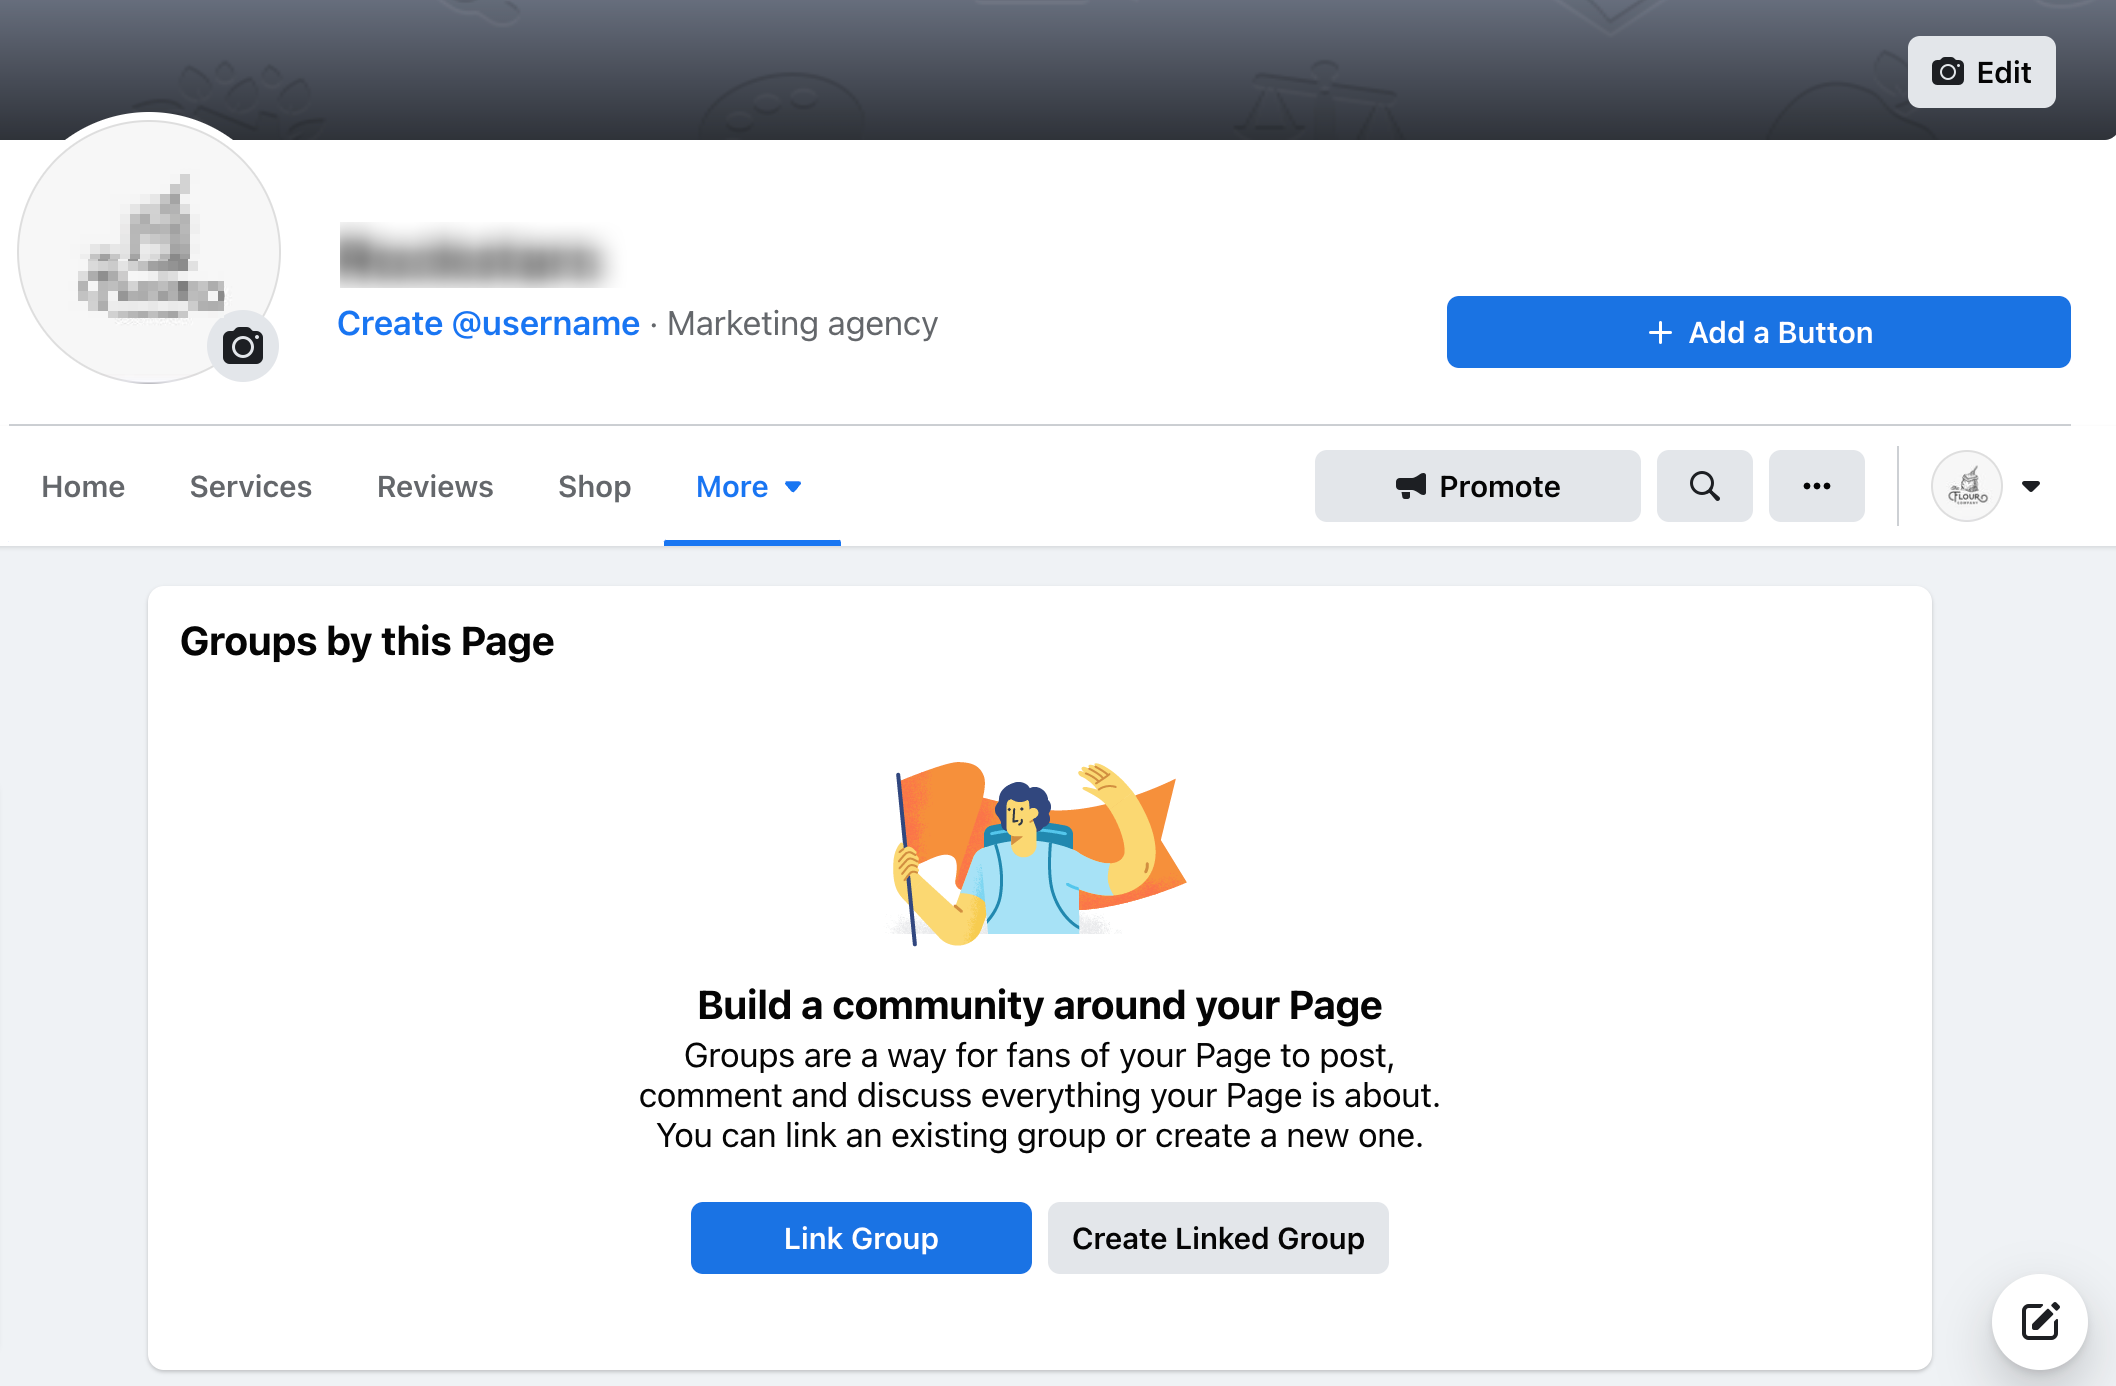
- Link to Groups: Once you're on your Page, click "More," and then choose "Groups." This will take you to a page where you can manage your connected groups.

- Link Group Button: Look for the "Link Group" button and give it a click.

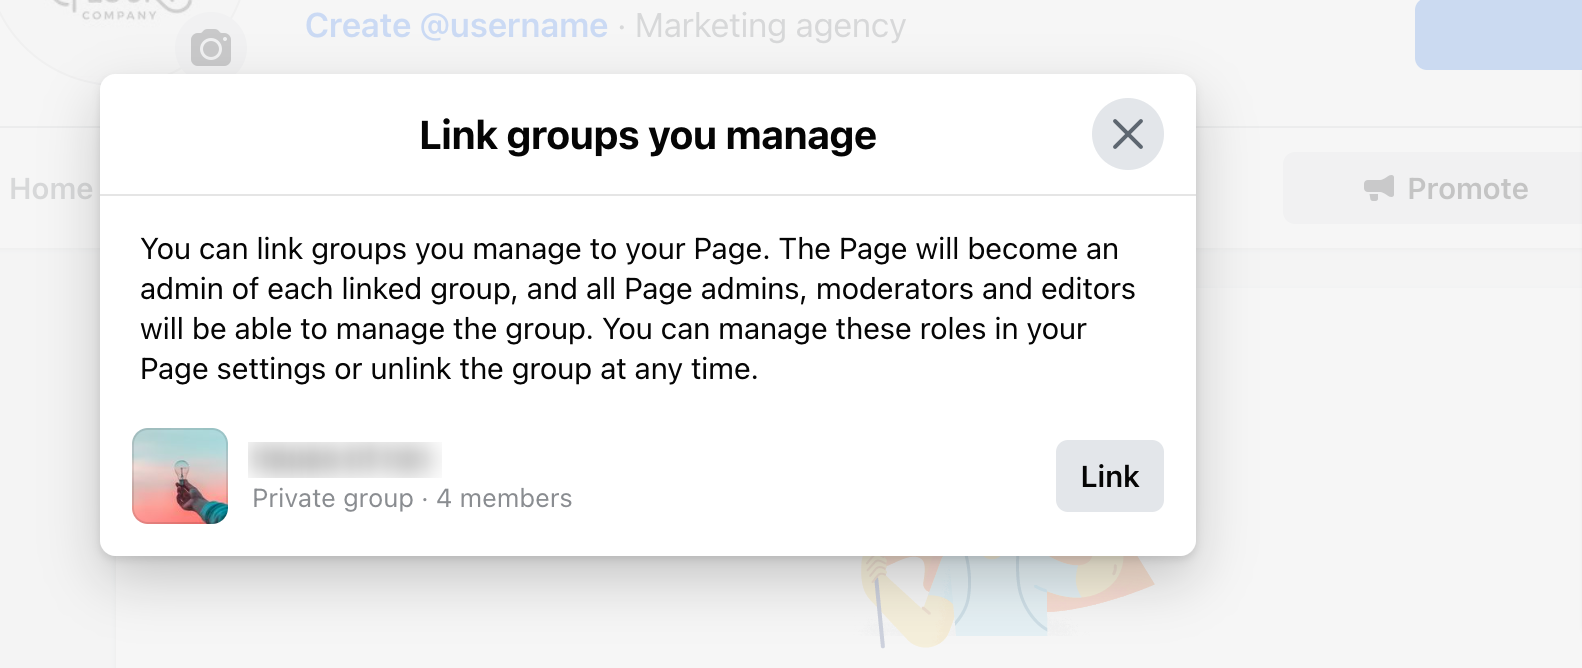
- Choose Your Group: A list of Groups you're a part of will appear. Click on the Group you want to connect with your Page.

- Confirm the Link: Finally, hit the "Link" button to confirm the connection. It's important to note that you must be an admin of both the Page and the Group you're linking.
Selecting the Publisher in Social Planner
- Access Social Planner Settings: Log in to your Social Planner dashboard.
- Navigate to Facebook Accounts: Click on "Settings" and then select "Facebook Accounts."
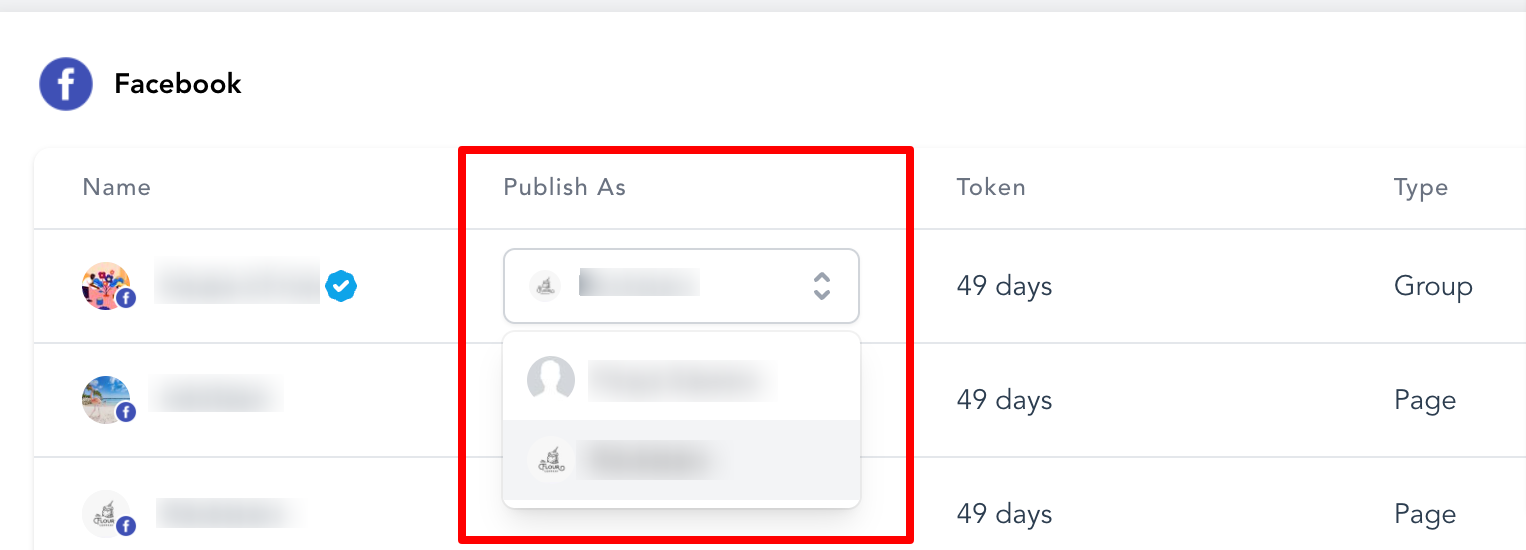
- Choose Your Publisher: You'll find a drop-down list In the "Publish as" column. Here, you can decide whether you want to publish content as a profile or a Page on Facebook Groups.
- Select Your Page: Pick the Page you want to use as the Publisher from the drop-down list. This means that any posts you schedule through Social Planner will be published on the Facebook Group as your chosen Page.

Remember that if you don't select a Publisher, Social Planner will automatically use the user profile connected to the Facebook Group.
By following these steps, you can link your Page to your Facebook Group and set the Publisher in Social Planner to post content as your Page in the Group.