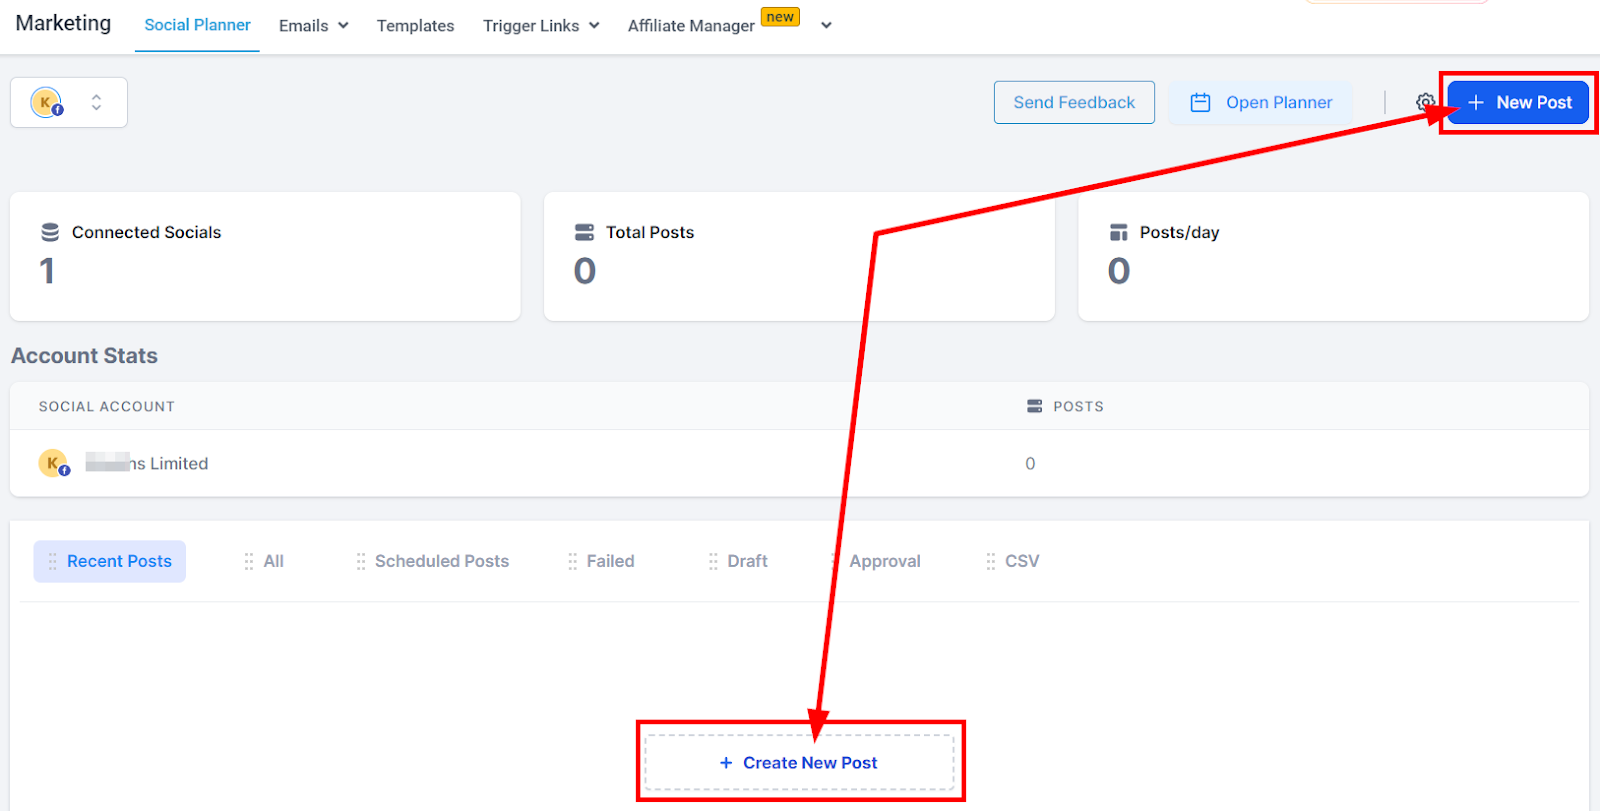
Create New Post
When you're ready to publish new content, all you have to do is click the blue "New Post" button in the top right corner of your page. Alternatively, there's also a "Create New Post" link at the bottom of your posts list. Get creative with adding formatting elements like bolded and italicized text, images, and even videos before hitting the Publish button!

New Social Post
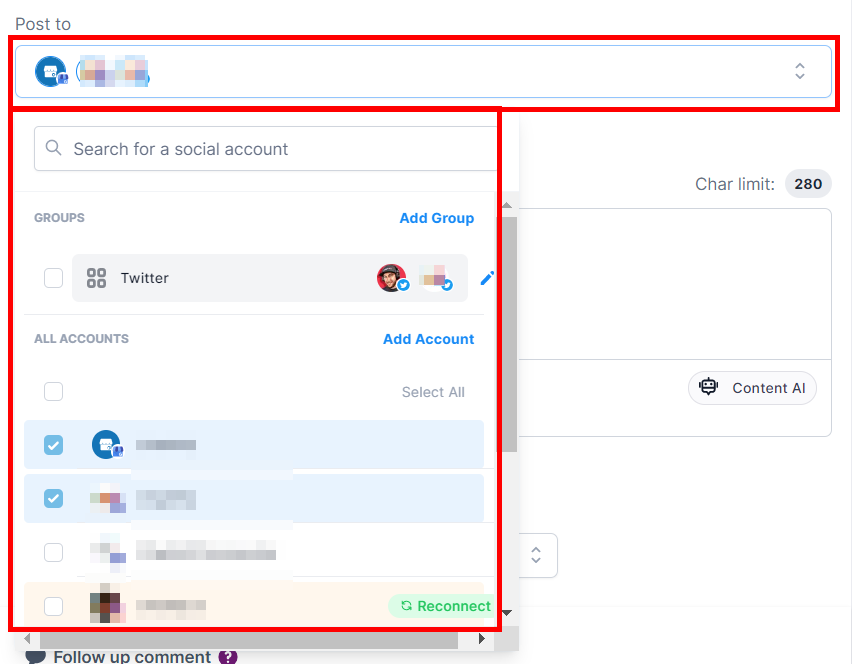
Post To
Select the social media accounts or groups you want to add to the social post.
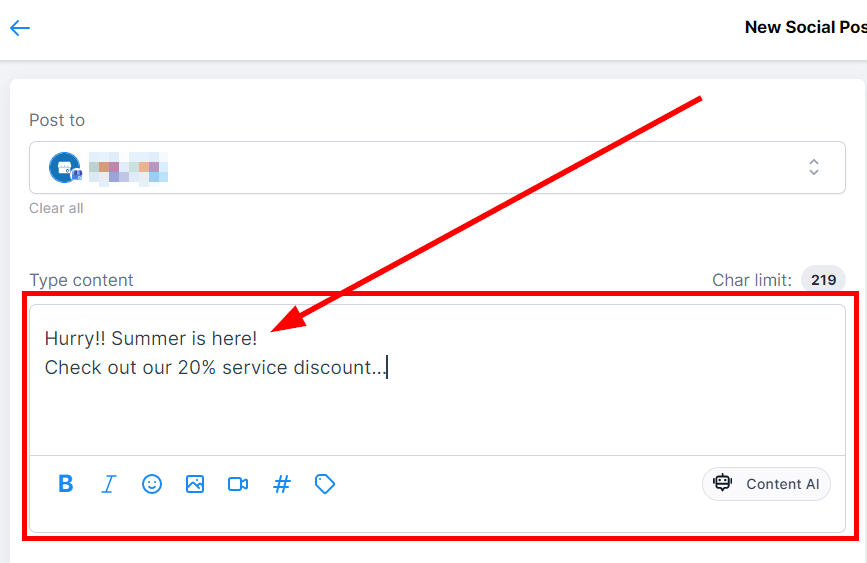
Type Content
Type in brief social content, rich media, hashtags, and more in this field. You have a 280 words limit; make great use of it!
Select Google My Business Options
You can either select the Call to Action, Event, or Offer and also select the button label.

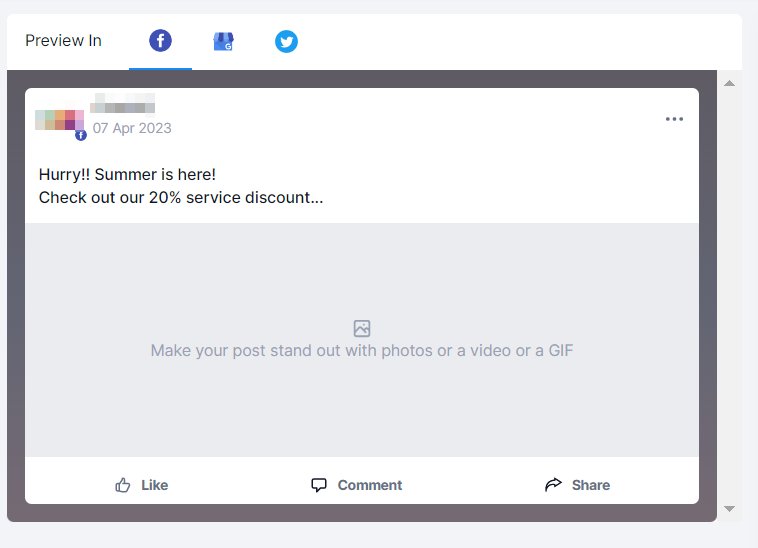
Preview In
You can preview all your content here before you post it.
Save For Later
You can save this update as a draft until you are ready to post it.

Post
When you click on the "Post" button, it gives you three (3) different sending options and delete options to choose from:
- Post Now This will allow you to send this post to the selected social channels/accounts.
- Schedule Post This will allow you to schedule a post for a later date or time. Choose the date and time from the calendar and time slot.
- Send Post for Approval This allows you to send for approval first within your agency or organization. Choose the date and time from the calendar and time slot, and select an approver. You can add notes as well.
- Delete If you want to delete any of your content, click on the delete button, which shows the "Delete confirmation" page. Be sure to want to delete it because it can't be undone.

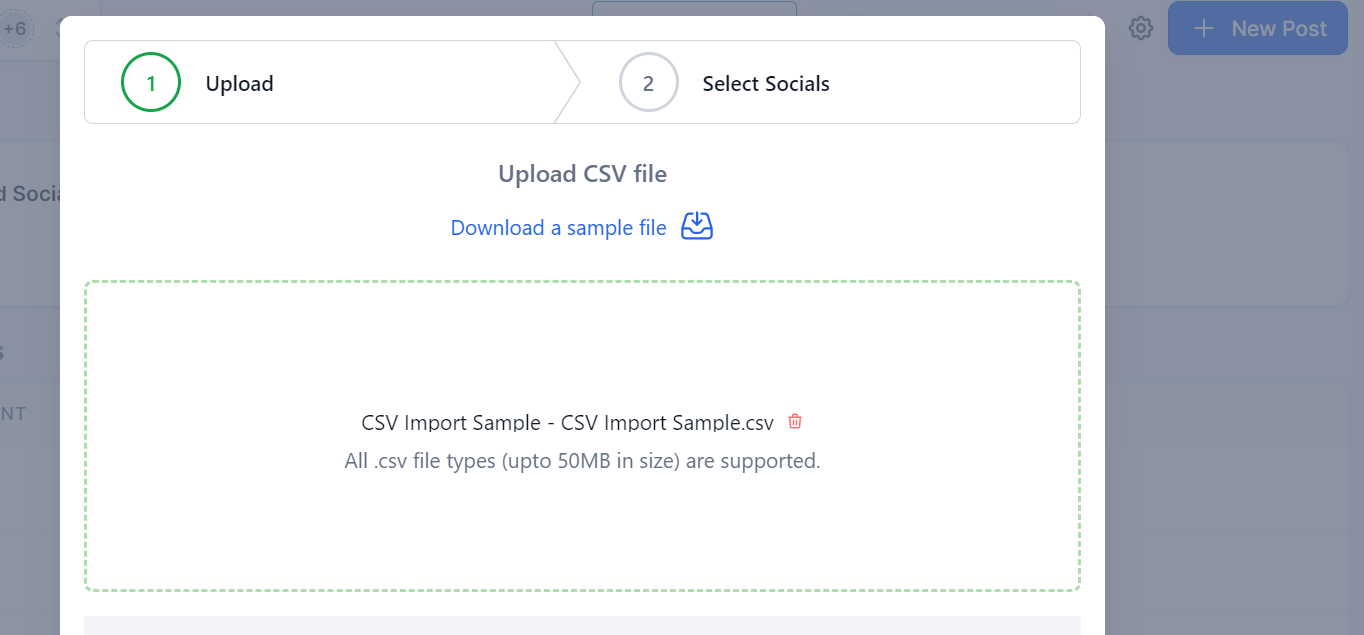
Upload from CSV
Click on the "New Post" button and select the "Upload from CSV" button to direct you to the upload page.

Upload
- The date format accepted is YYYY-MM-DD HH:mm: ss;. You can use 24 Hour format. (example 2025/05/23 20:15)
- The Text column will support captions and hashtags.
- In the link column, it is an OG meta tag, and it accepts one link.
- The image and video column will accept the multiple image(s) and video(s) comma separated. For GIF, it will support one GIF only.
- CSV import supports up to 90 posts per CSV.
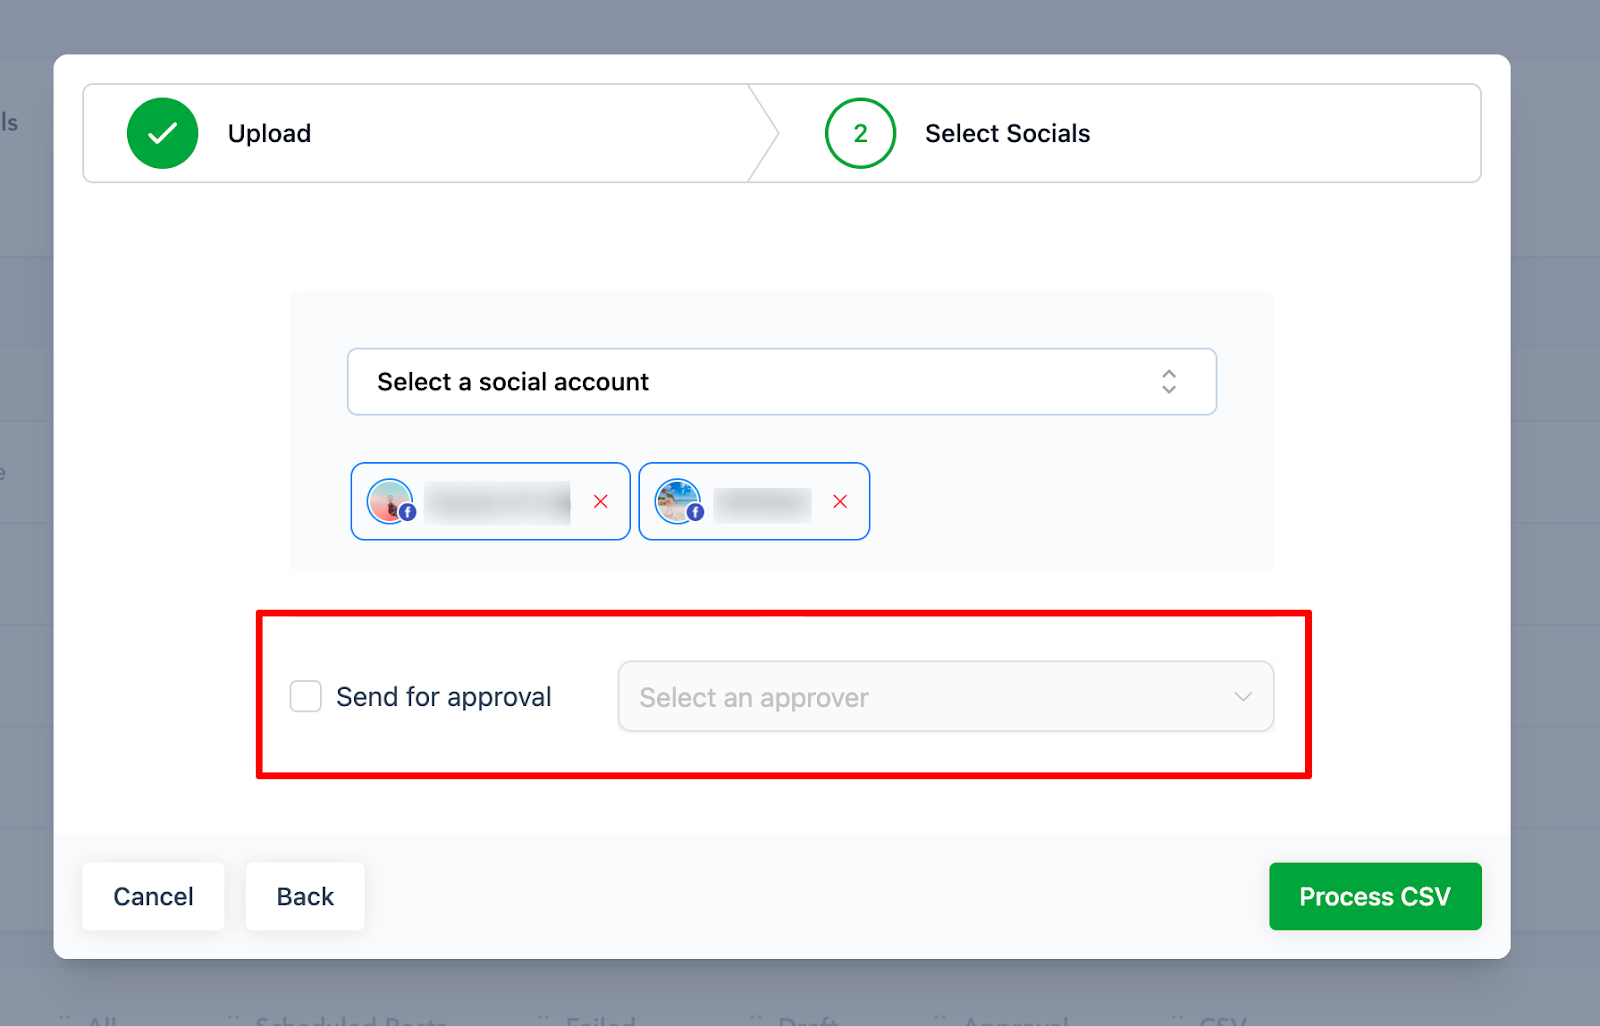
Select Socials
1. Create a new CSV when you click the "New Post" button
2. Once the user adds the CSV file and Selects the Socials, there will be an option to Select an Approver.
3. Once the posts are imported, they are reviewed by the chosen approver. Once approved, they are scheduled on the social calendar.