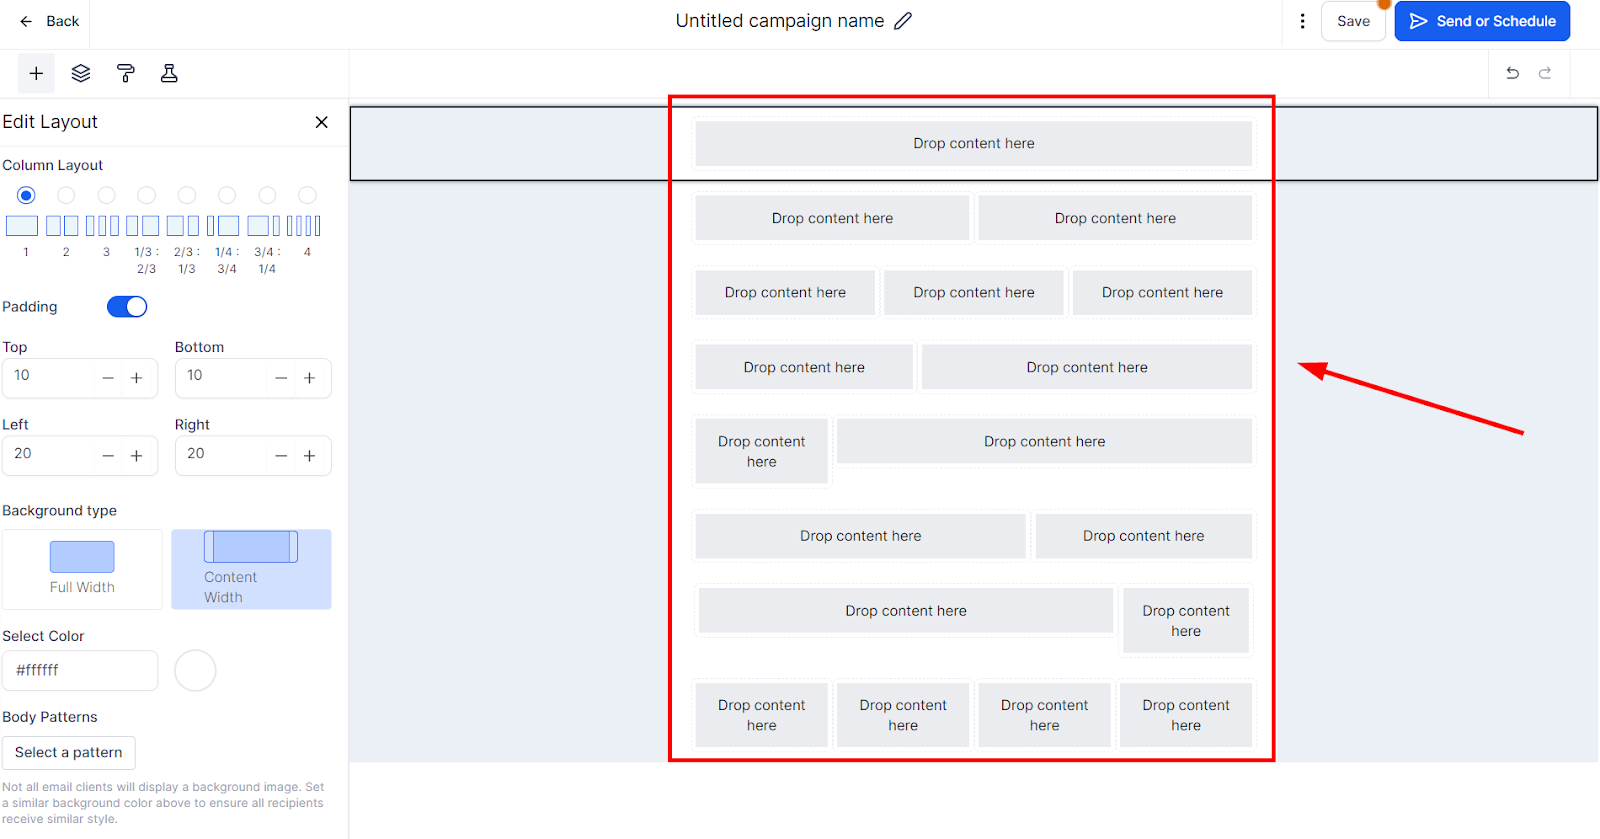
Layout Elements
The first step to adding any element is to add a layout first. Drag and drop any of the layouts you want.
Editing Layout Settings
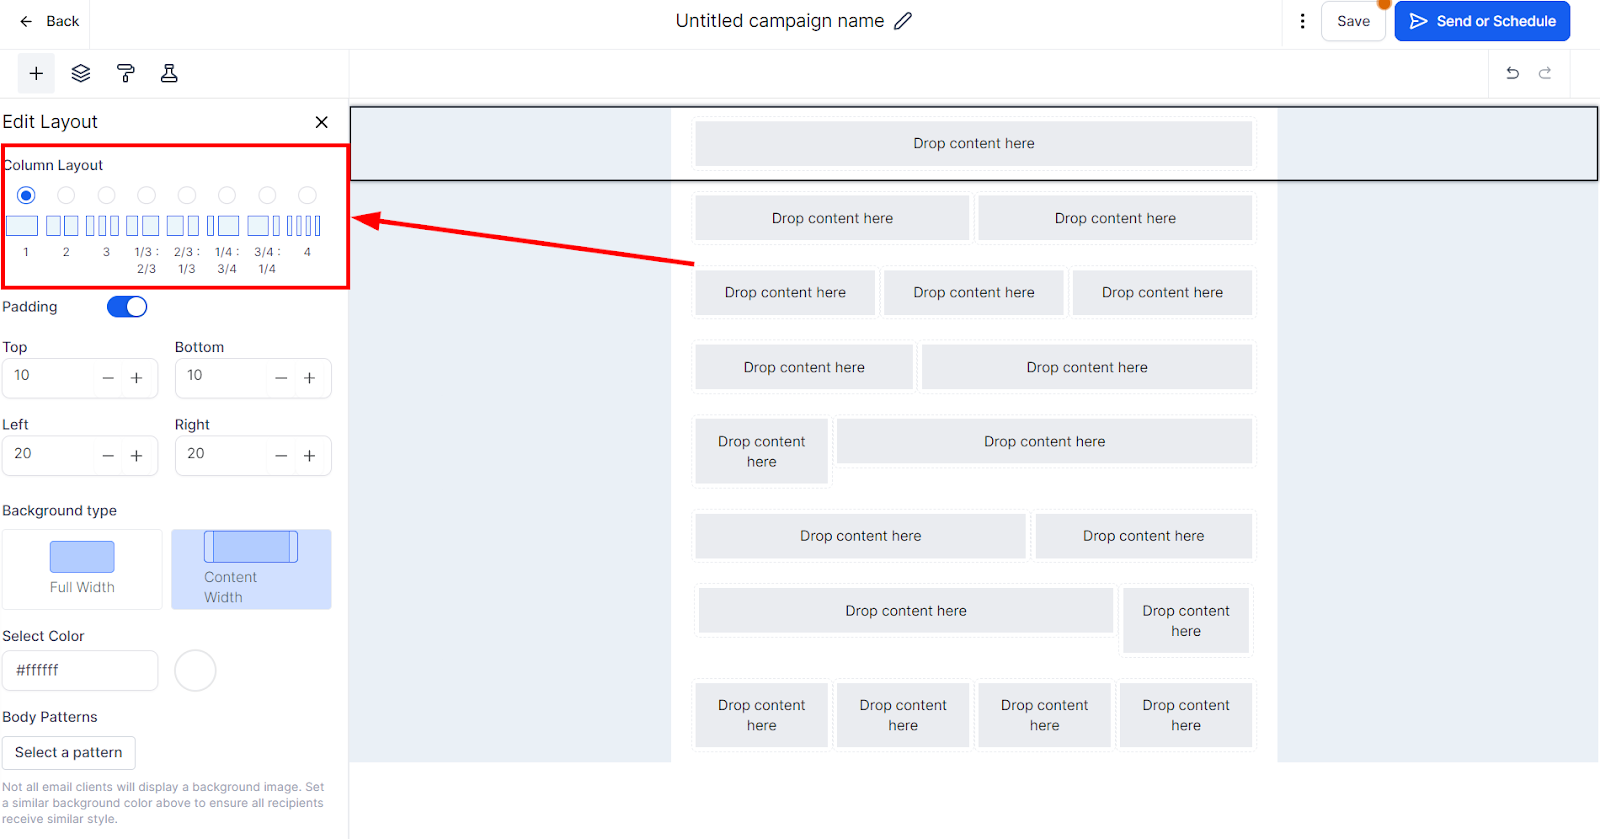
Column Layout
You can easily change the column layout of your email template by selecting from different options such as single, double, triple, 1/3:2/3, 2/3:1/3, and quad (4) layouts. This feature provides you with greater flexibility in designing your email template based on your specific needs and preferences. Simply select the column layout that works best for your email and customize it to achieve the desired look and feel.
For example, we have selected a triple layout under the settings as shown be.
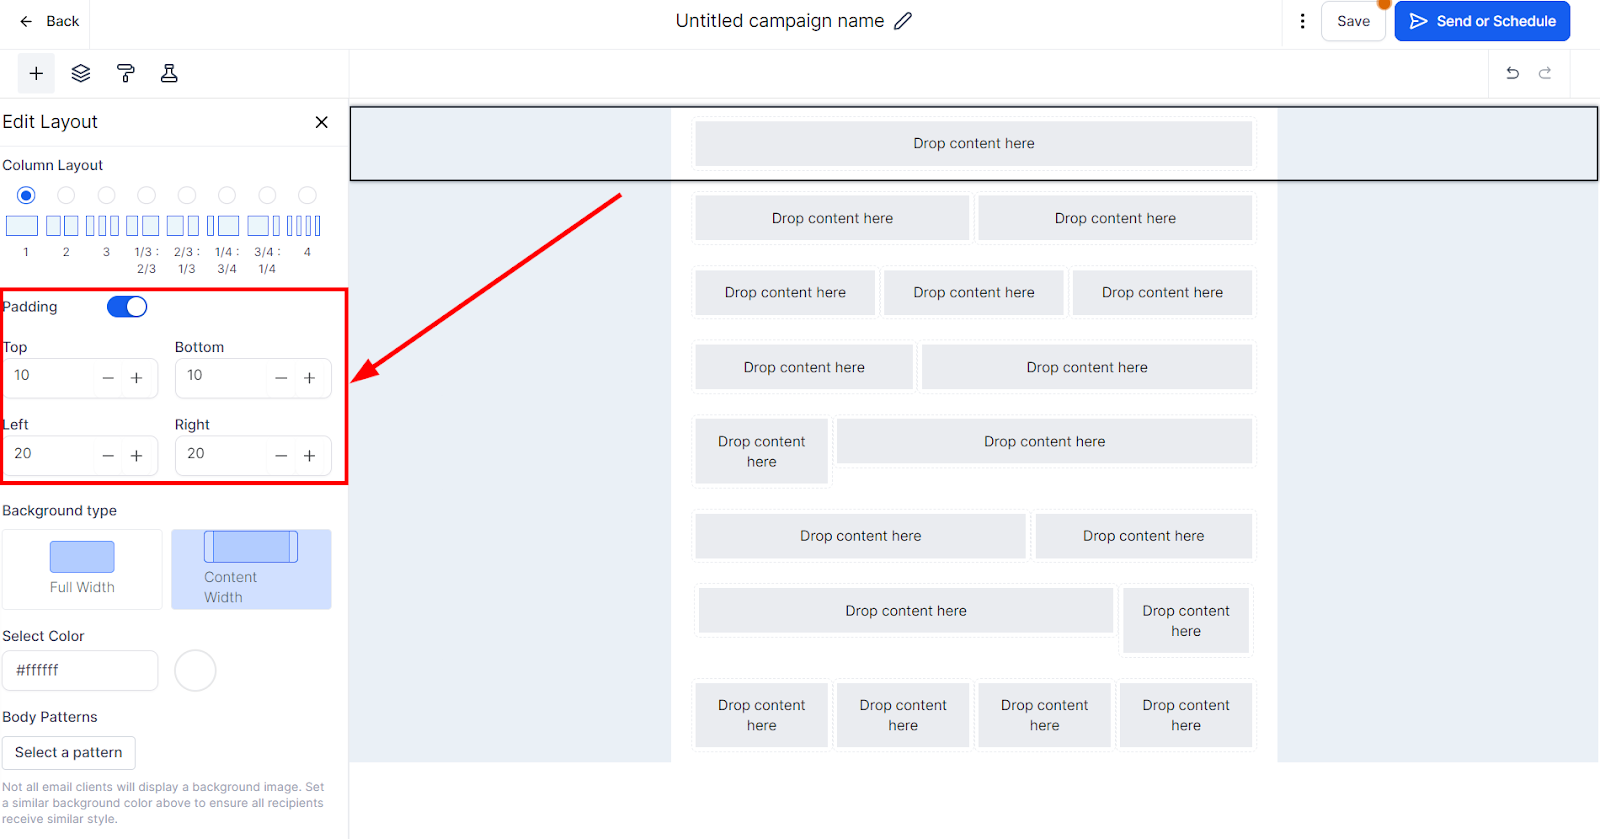
Padding
The next step in creating your email template is adjusting the padding. Padding refers to the spacing around the sections of your email, and you can easily toggle it on or off. If you want to add more space to the top of your email, you can increase the padding using the Top, Bottom, Left, and Right side icons. Once you've adjusted the padding, you will see that your email template appears with a larger layout than before. This feature allows you to create a more visually appealing email with greater flexibility and customization options.
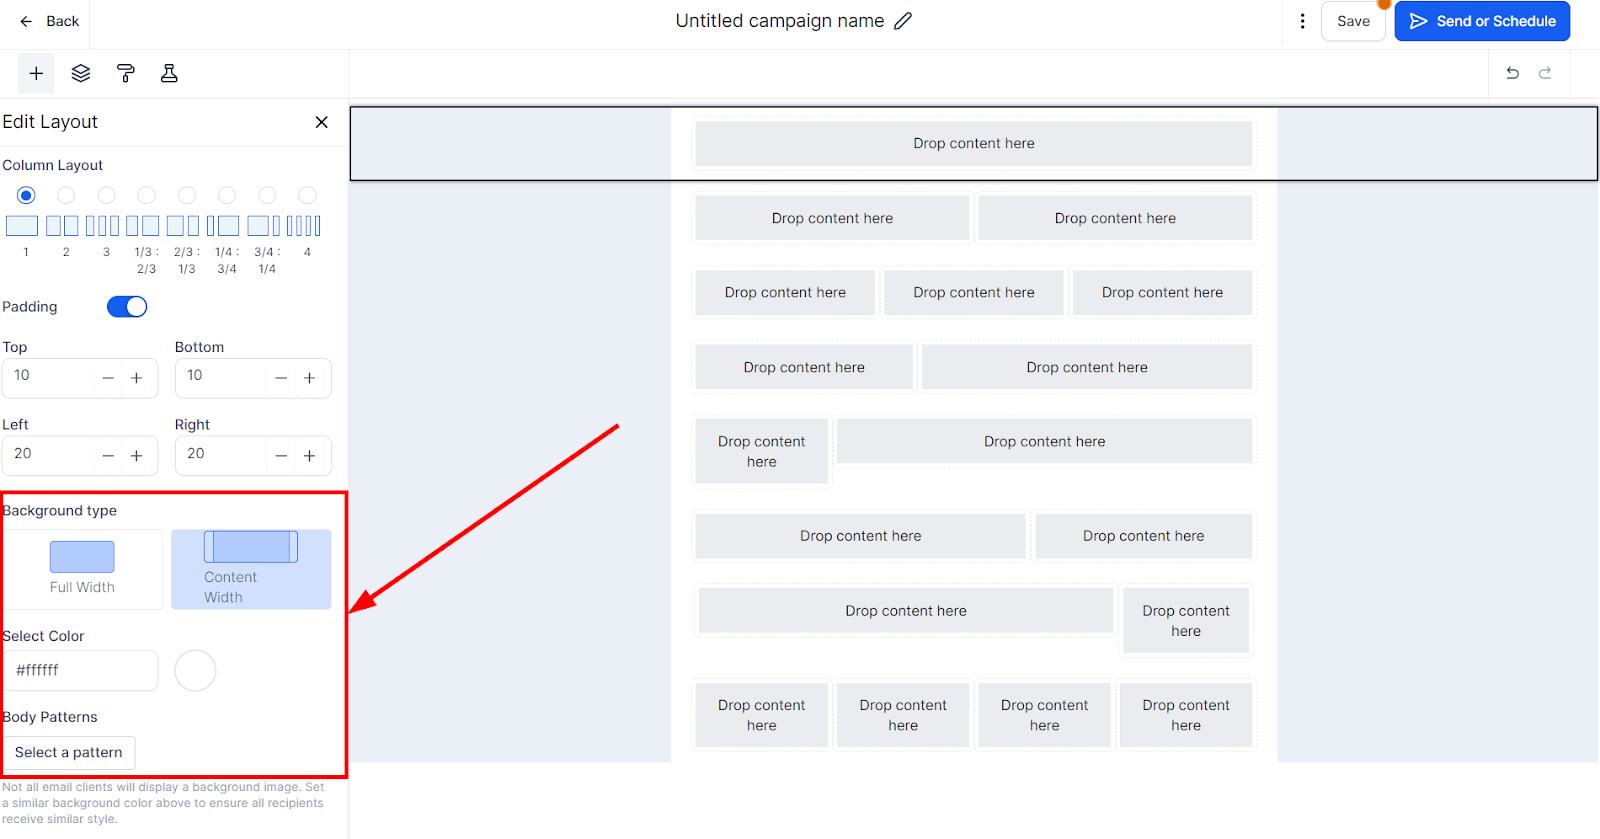
Background Type
After adjusting the padding of your email template, the next step is selecting the background type. You can choose to make your email full-width or contained within the content width. Additionally, you can customize the colors of the background and even select patterns to make your email template stand out. Use this feature to add a unique touch to your email template that reflects your brand's identity and style.
Once you're good with your section settings, go ahead and hit the Done button as shown below.