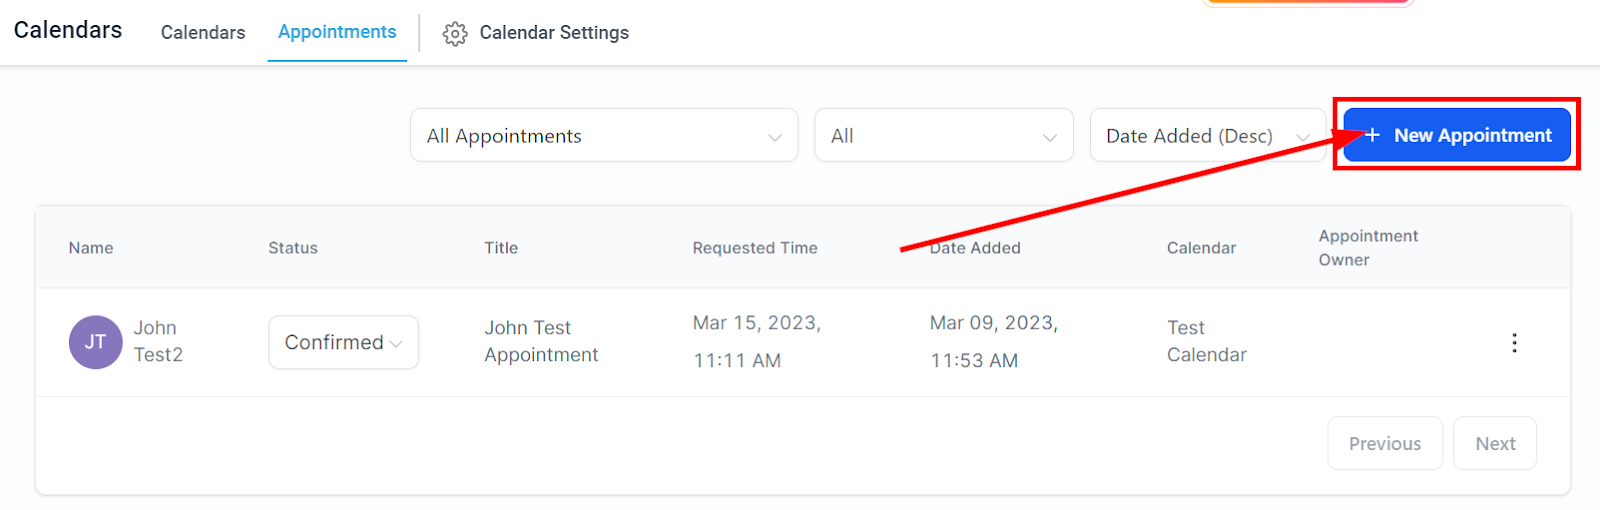
Manually scheduling appointments is done in the Appointments tab within the Calendars section of your CRM. Here you can manually create appointments with your clients, which are useful for phone or live chat sales.
Manually Scheduling Appointments
You can manually schedule appointments in your CRM by going to the Calendars tab, clicking on Appointments at the top of the page, and then clicking the "+ New Appointment" button on the top left.
Appointment Panel Options
You can either Add a new contact or pick from available contacts.
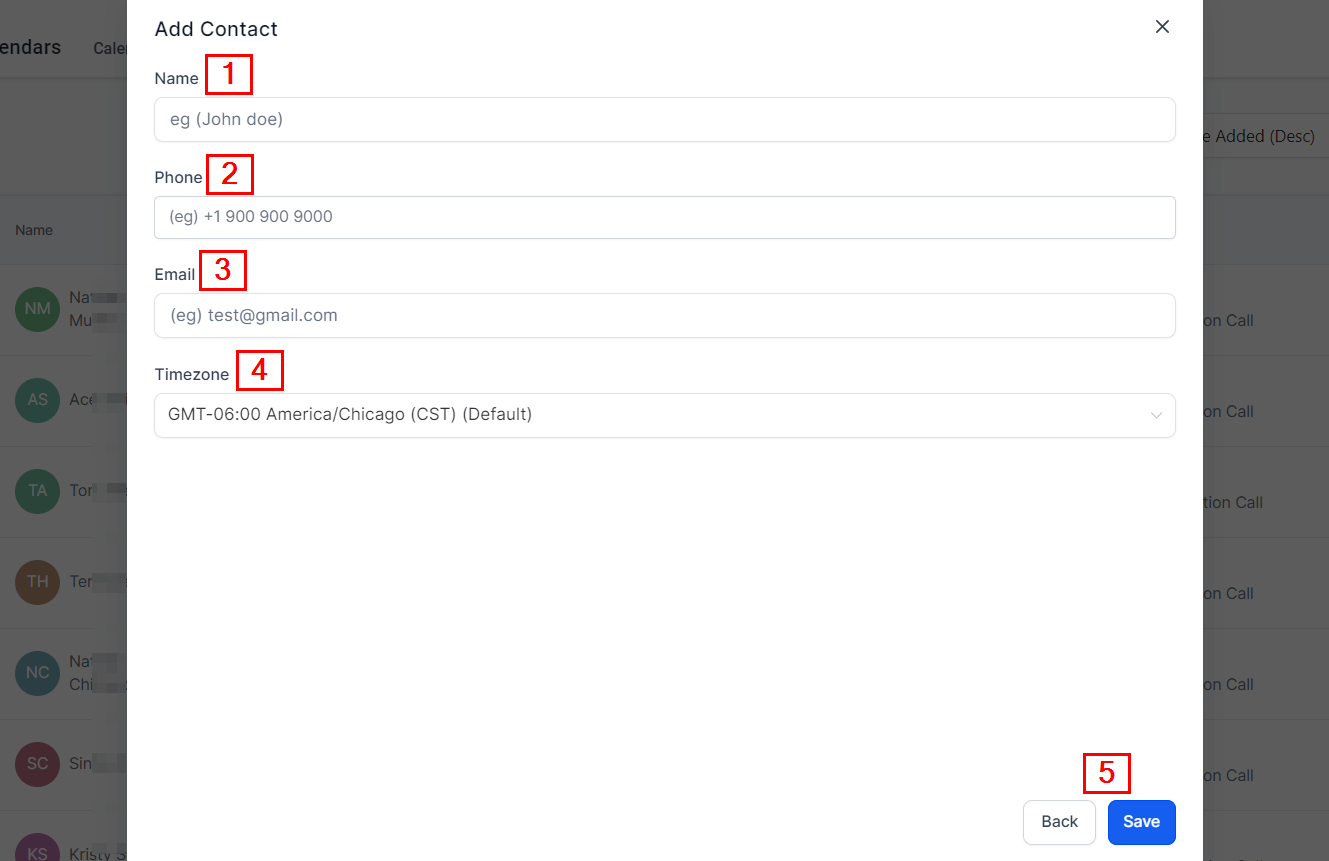
Add New Contact
Contact Name
You will need to input the contact's name here.
Contact Phone
You will need to input the contact's phone number here.
Contact Email
You will need to input the contact's email address here.
Contact Time Zone
The contact's time zone is very important to enter correctly. The follow-up emails and texts will all be sent according to the contact's time zone.
Back/Save
If you want to save the appointment, click "Save"; otherwise, click the "Back" button.
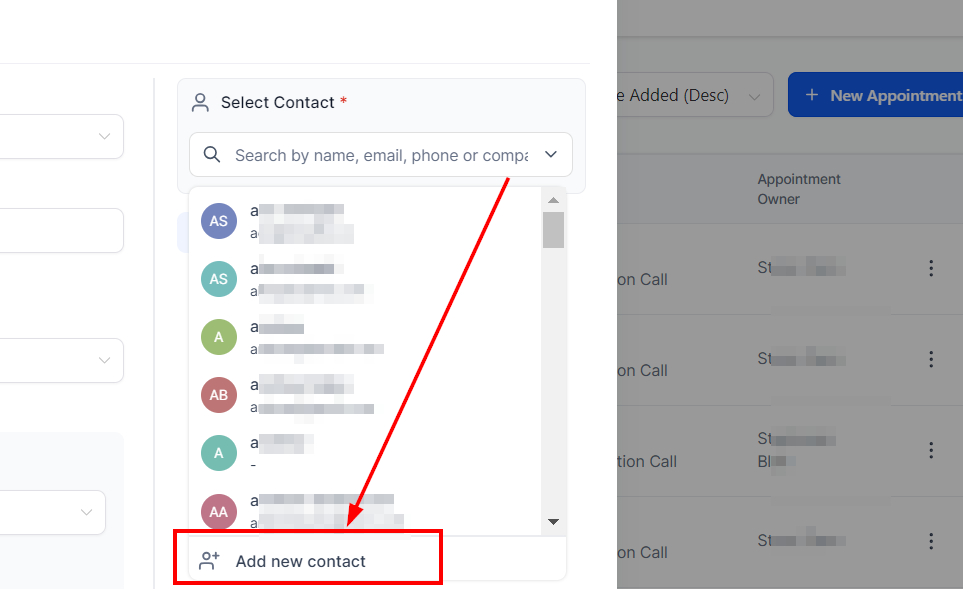
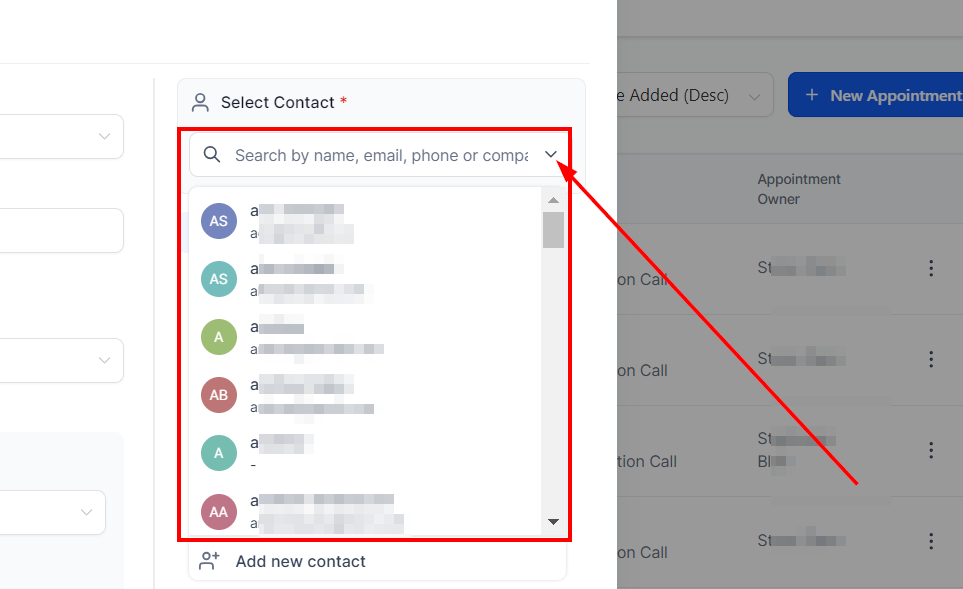
Select from Contacts
You can search for contacts using their names, Email, phone numbers, or company. You can also click on the search bar to drop down the contact options.
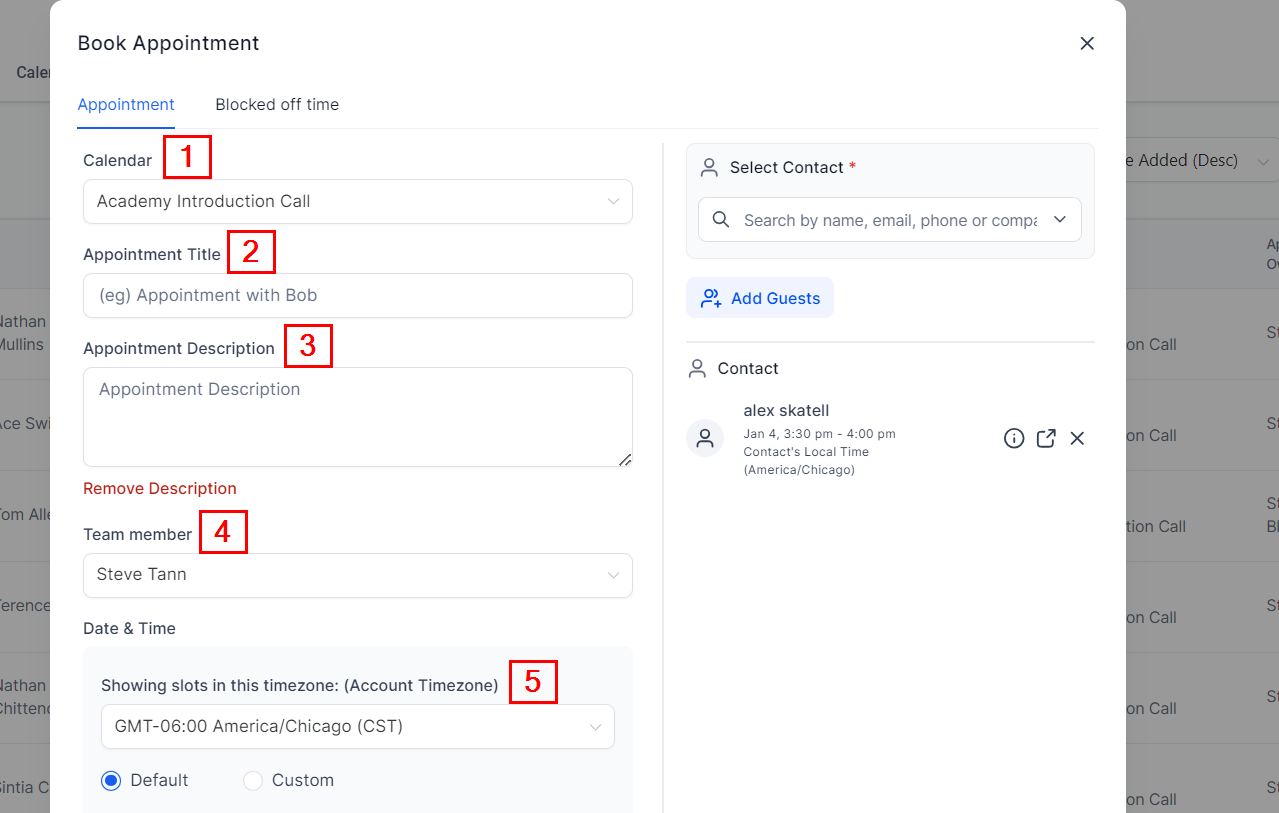
Choose a Calendar
When scheduling an appointment, you must choose a calendar you'd like to book the appointment.
Appointment Title
If you want, you can give your appointment a title. If you leave this area blank, your appointment title will be the default title you created in the specific calendar you chose.
To customize individual calendars, you will need to edit them in the setting of your CRM.
Appointment Description
Click the "Show Notes" button to access the Appointment Description box. This field allows you or your team to take notes while booking an appointment. These notes may be very useful when attending the meeting later.
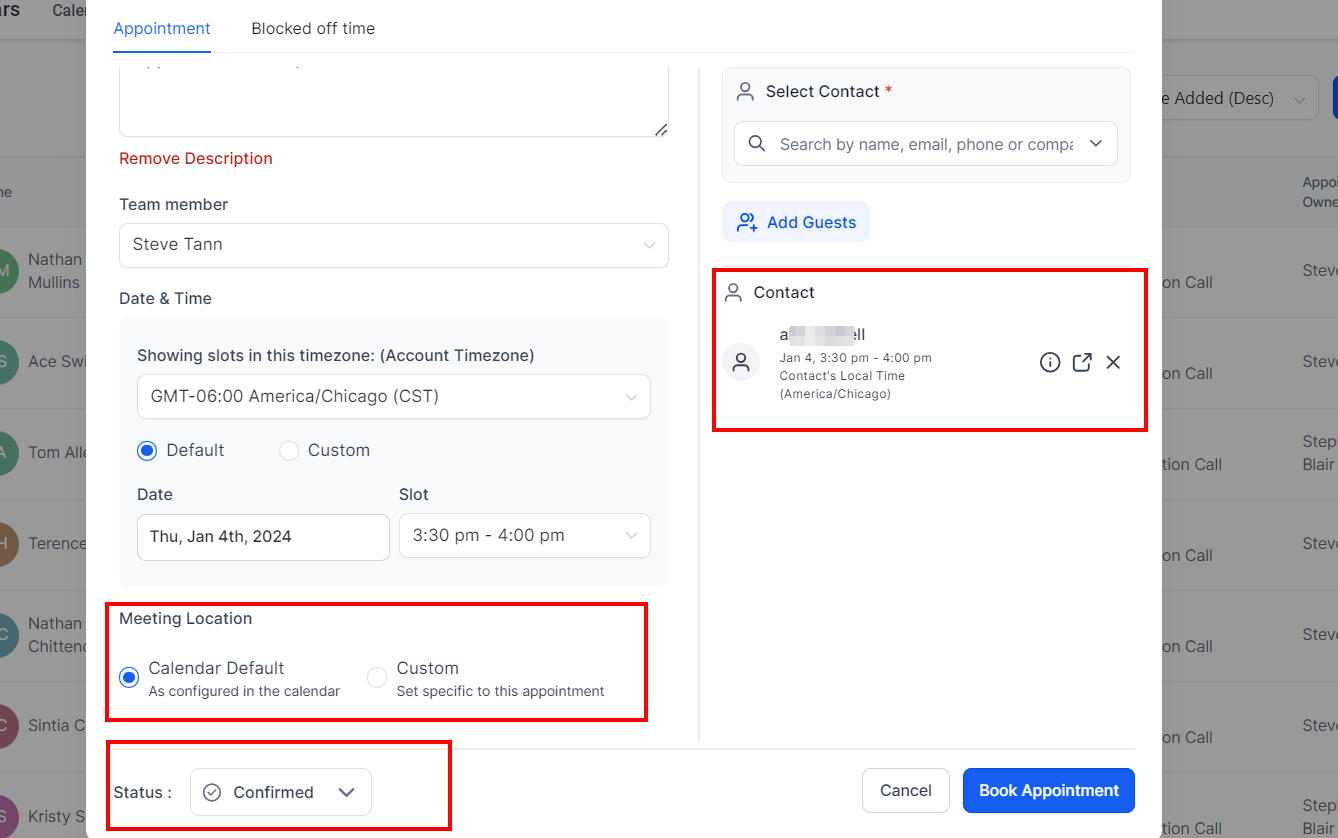
Team Member
You can select the team member you want to assign the contact.
Choose Timezone
Select the timezone you prefer to set this appointment in. You can use the system Timezone or the client's own.
Choose a Day
Next, choose a day on that calendar. The drop-down here will automatically hide any unavailable days. Select and set your available and unavailable days in your CRM's settings and each calendar.
Choose a Time slot.
Just like the day, your unavailable times will not show, and you will only be given the option to choose from available times from whatever day you chose previously.
Meeting Location
You can set a custom meeting location, but like the appointment title, if you leave this area blank, your meeting location will be the default location established in the specific calendar you chose.
To customize individual calendars, you will need to edit them in the setting of your CRM.
Appointment Status
Here you can set an appointment status. You can set the appointment to confirm or invalid, Cancel, Show, or No-show status.
Using these appointment statuses, you can create robust automation in your CRM for future follow-up!
Preview
You can preview your appointment here.