Prerequisites with WhatsApp Cloud (Meta)
Create a New Meta Developer App
First you need to follow the “Set up Developer Assets and Platform Access” step from this guide here https://developers.facebook.com/docs/whatsapp/cloud-api/get-started
This will create a Facebook Developer App with the WhatsApp product enabled
Next you can configure your phone numbers in the “Whatsapp” section of your new Facebook Developer App. Once your phone number has been added sucessfully you will get a “Phone Number ID” and “WhatsApp Business Account ID”, save these two values to use in the steps below. See the attached screenshot where to find these values
Create a System User In Meta Business Manager to Grant access to your App
You will need to create a system user in your business manager account with the required access to use your new Meta Developer App with WhatsApp access. Follow this guide here https://www.facebook.com/business/help/503306463479099?id=2190812977867143
✅ When generating an access token you must enable ther permissions “whatsapp_business_messaging” and “whatsapp_business_management”
Add Your New Whatsapp Chat Inbox
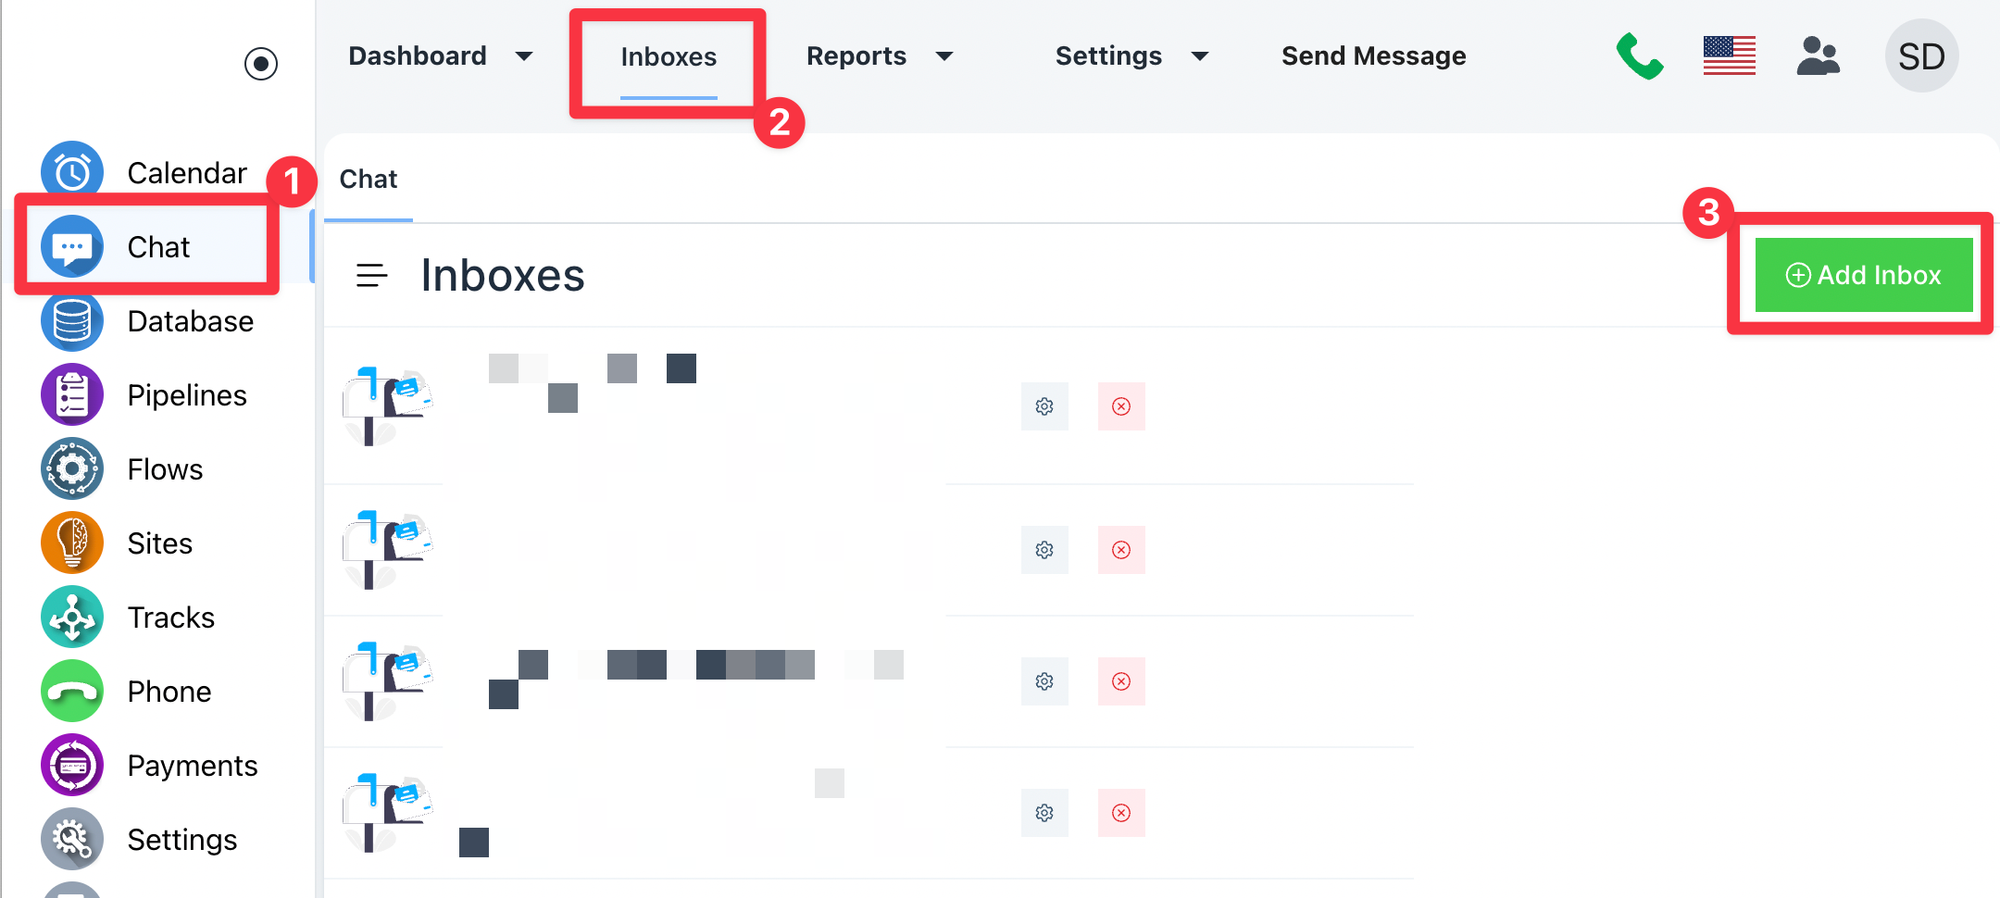
Create a new Chat Inbox
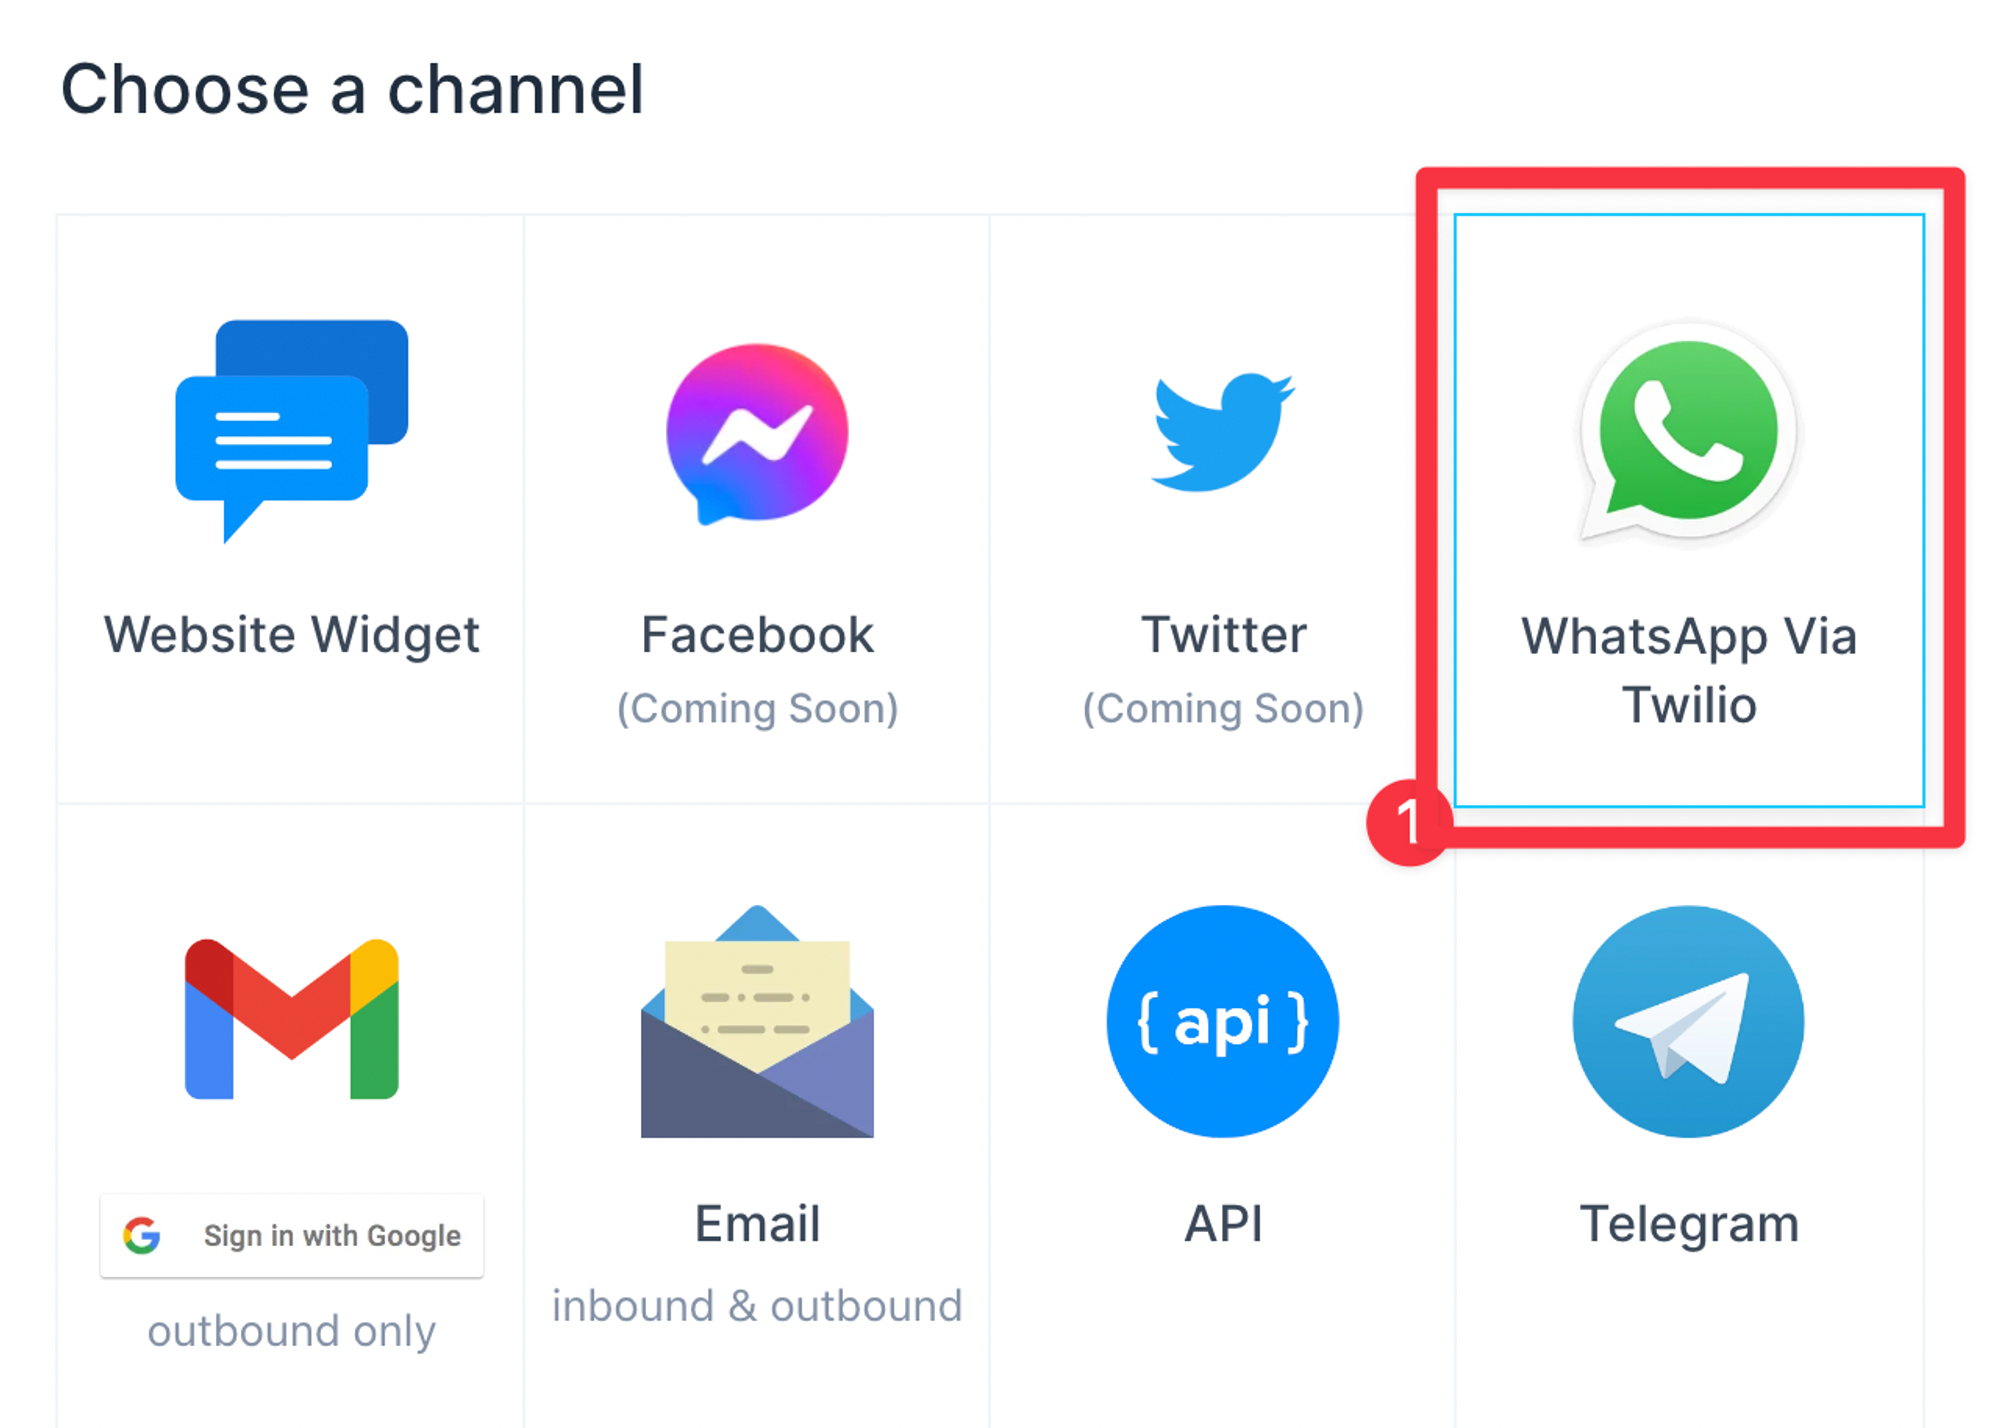
Select the WhatsApp Option
Next you will be prompted to enter some information relating to your Meta Developer App and configure your new Inbox
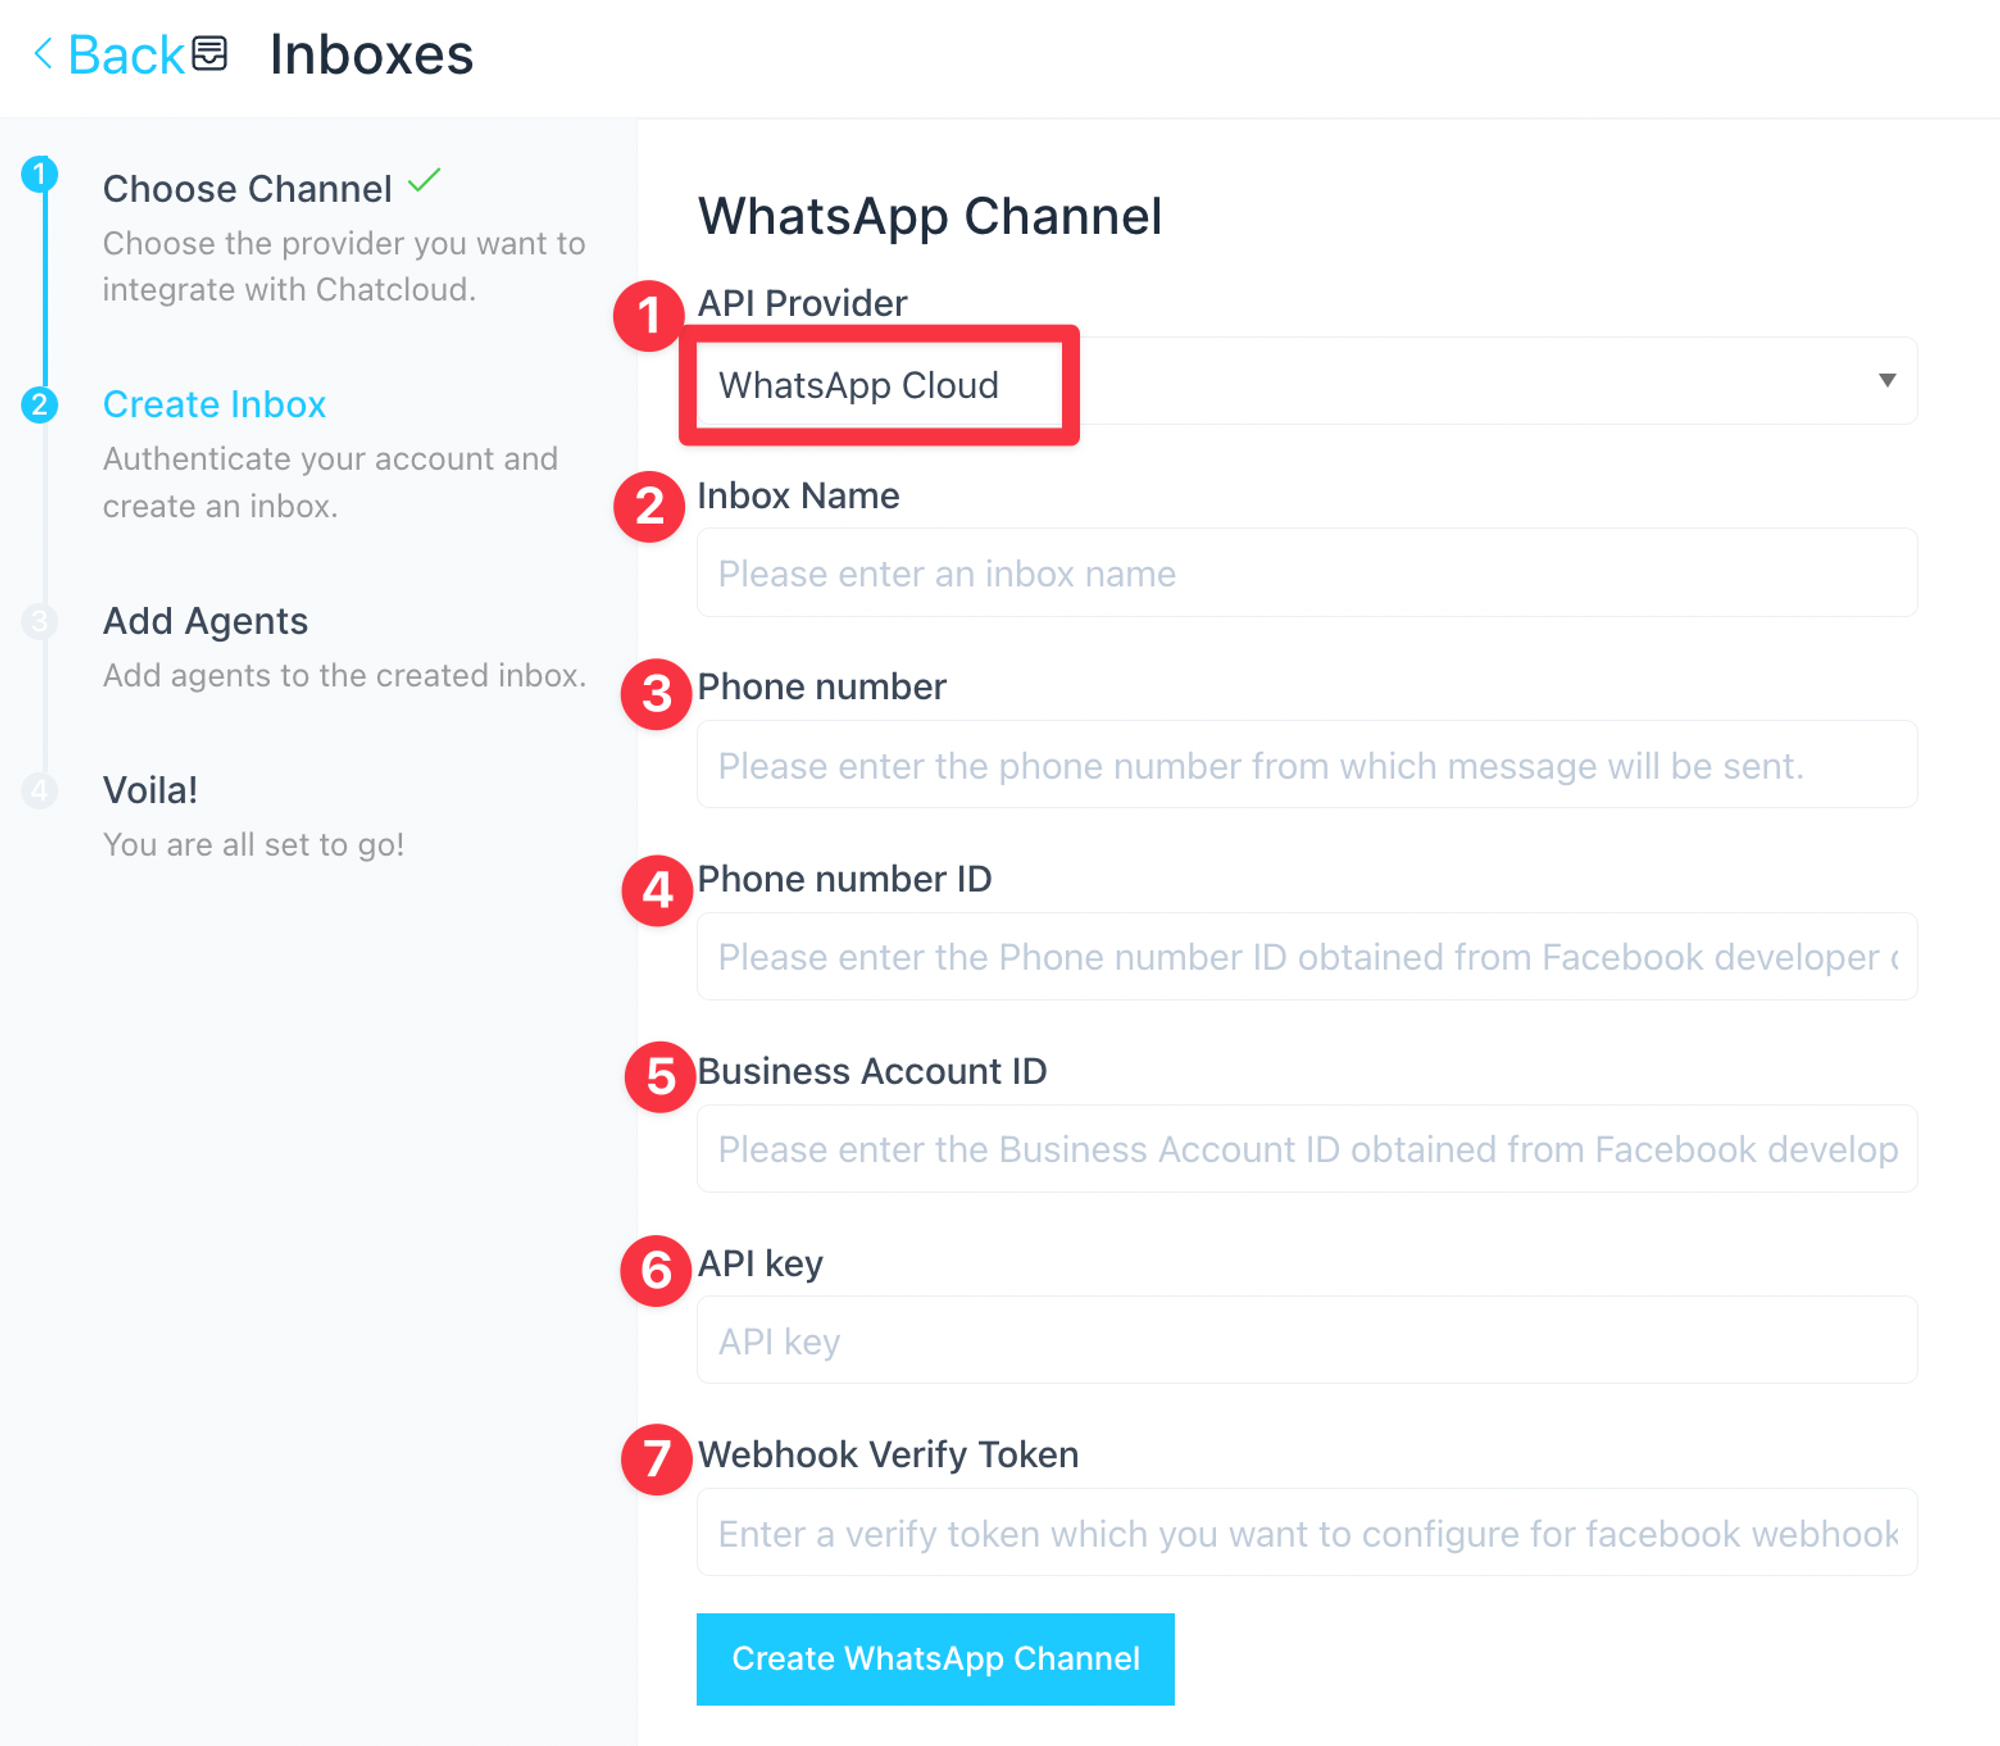
- API Provider = Make sure you have “WhatsApp Cloud” selected
- Inbox Name = Give your new Inbox a name you will recognize like “My Business WhatsApp”
- Phone Number = Enter the same phone number you have configured in the Meta Developer App
- Phone Number ID = Enter the Phone Number ID you created earlier in this guide
- Business Account ID = Enter the Business Account ID you created earlier in this guide
- API Key = This is the access token for the System User you created which can access your Meta Business Account
Here is the link for API Key:
7. Webhook Verify Token = Here you will want to put in a long 12-24 character long code. (Save this to use on the next step)
Send Webhook Notifications from Meta to your New Inbox
Tell Meta to Send Webhook Notifications to your New Inbox
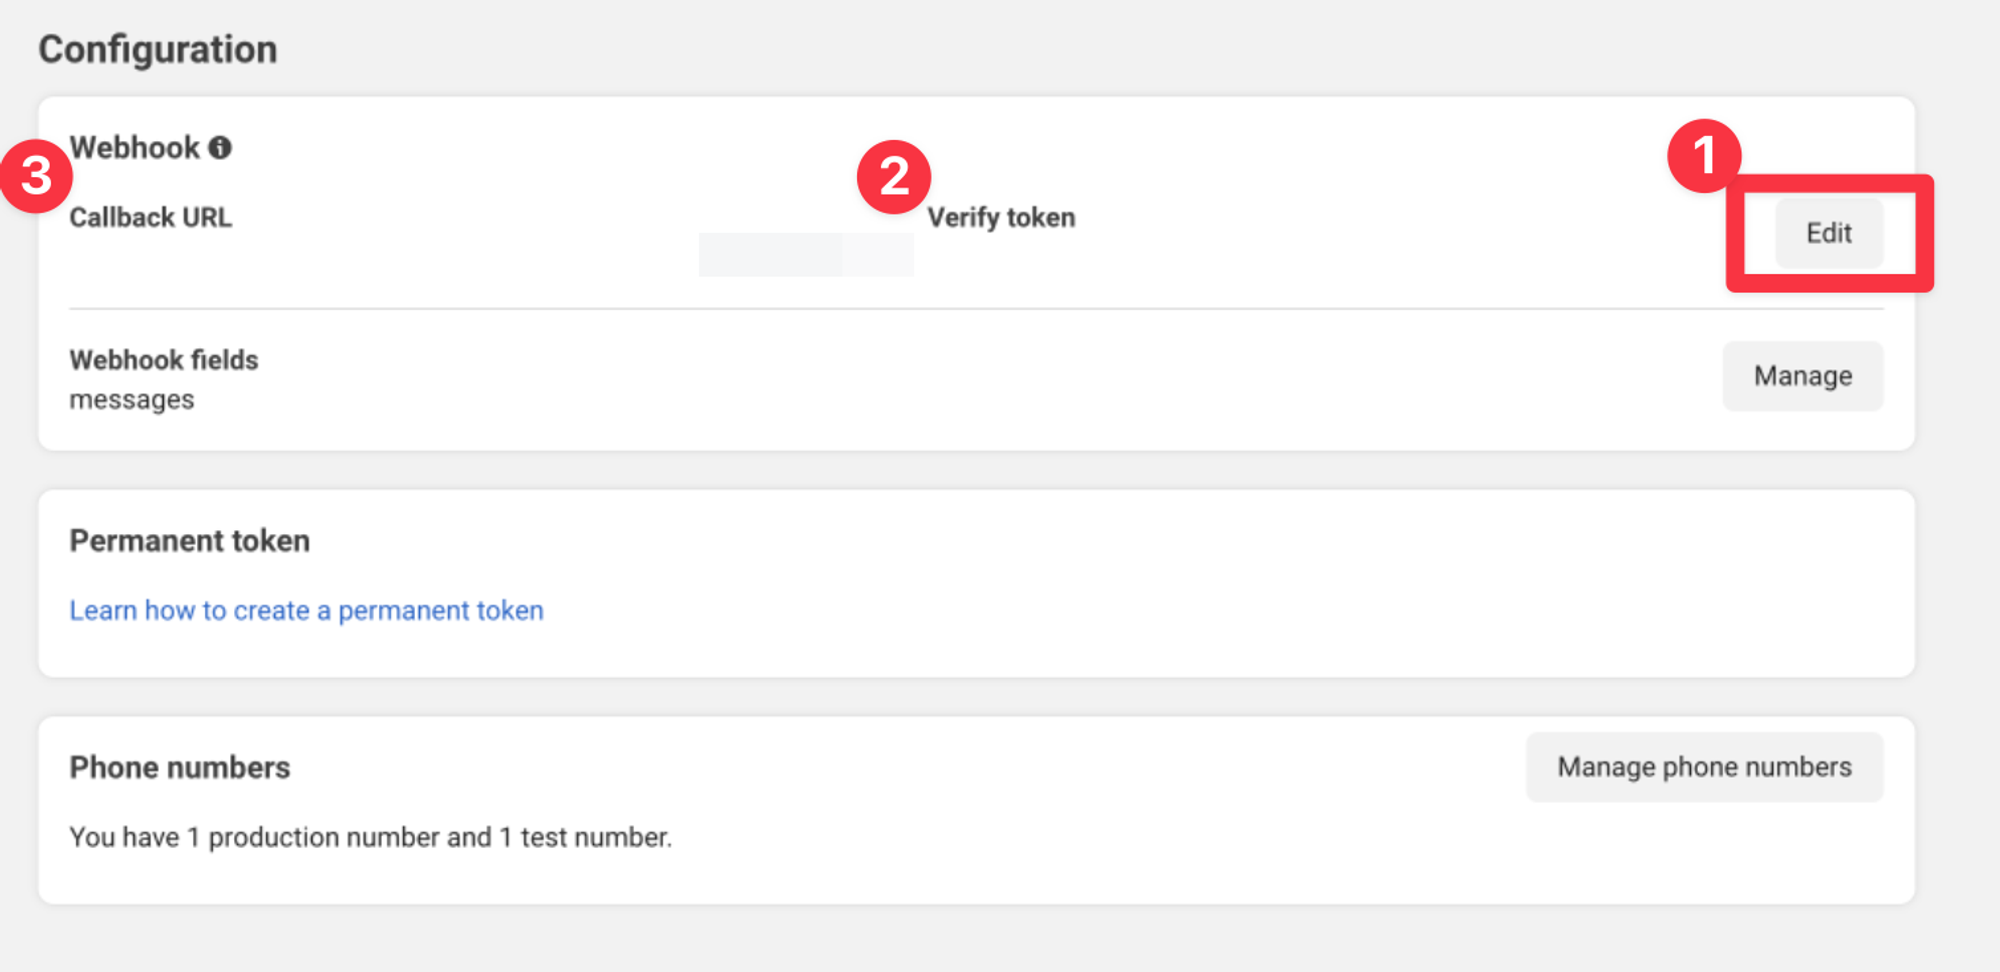
Back in your Meta Developer App navigate to the “Configuration” section. On this page you will set the “CallbackURL” to “https://app1.chatcloud.ai/webhooks/whatsapp/+17145551212”
⚠️ Please note the URL above includes your phone number with “+” and the country code (1 for US). Replace the “+17145551212” with the correct phone number you previously configured.
ℹ️ Meta only allows ONE Callback/Webhook URL per Meta Developer App. If you have or plan to have multiple WhatsApp inboxes they will all work with the same Webhook URL and messages will be routed to the correct Inbox
Last you will need to paste a value for the “Verify Token”. This is the same 12-24 character long Webhook Verify Token you generated in a previous step above.