What is the Tinker theme?
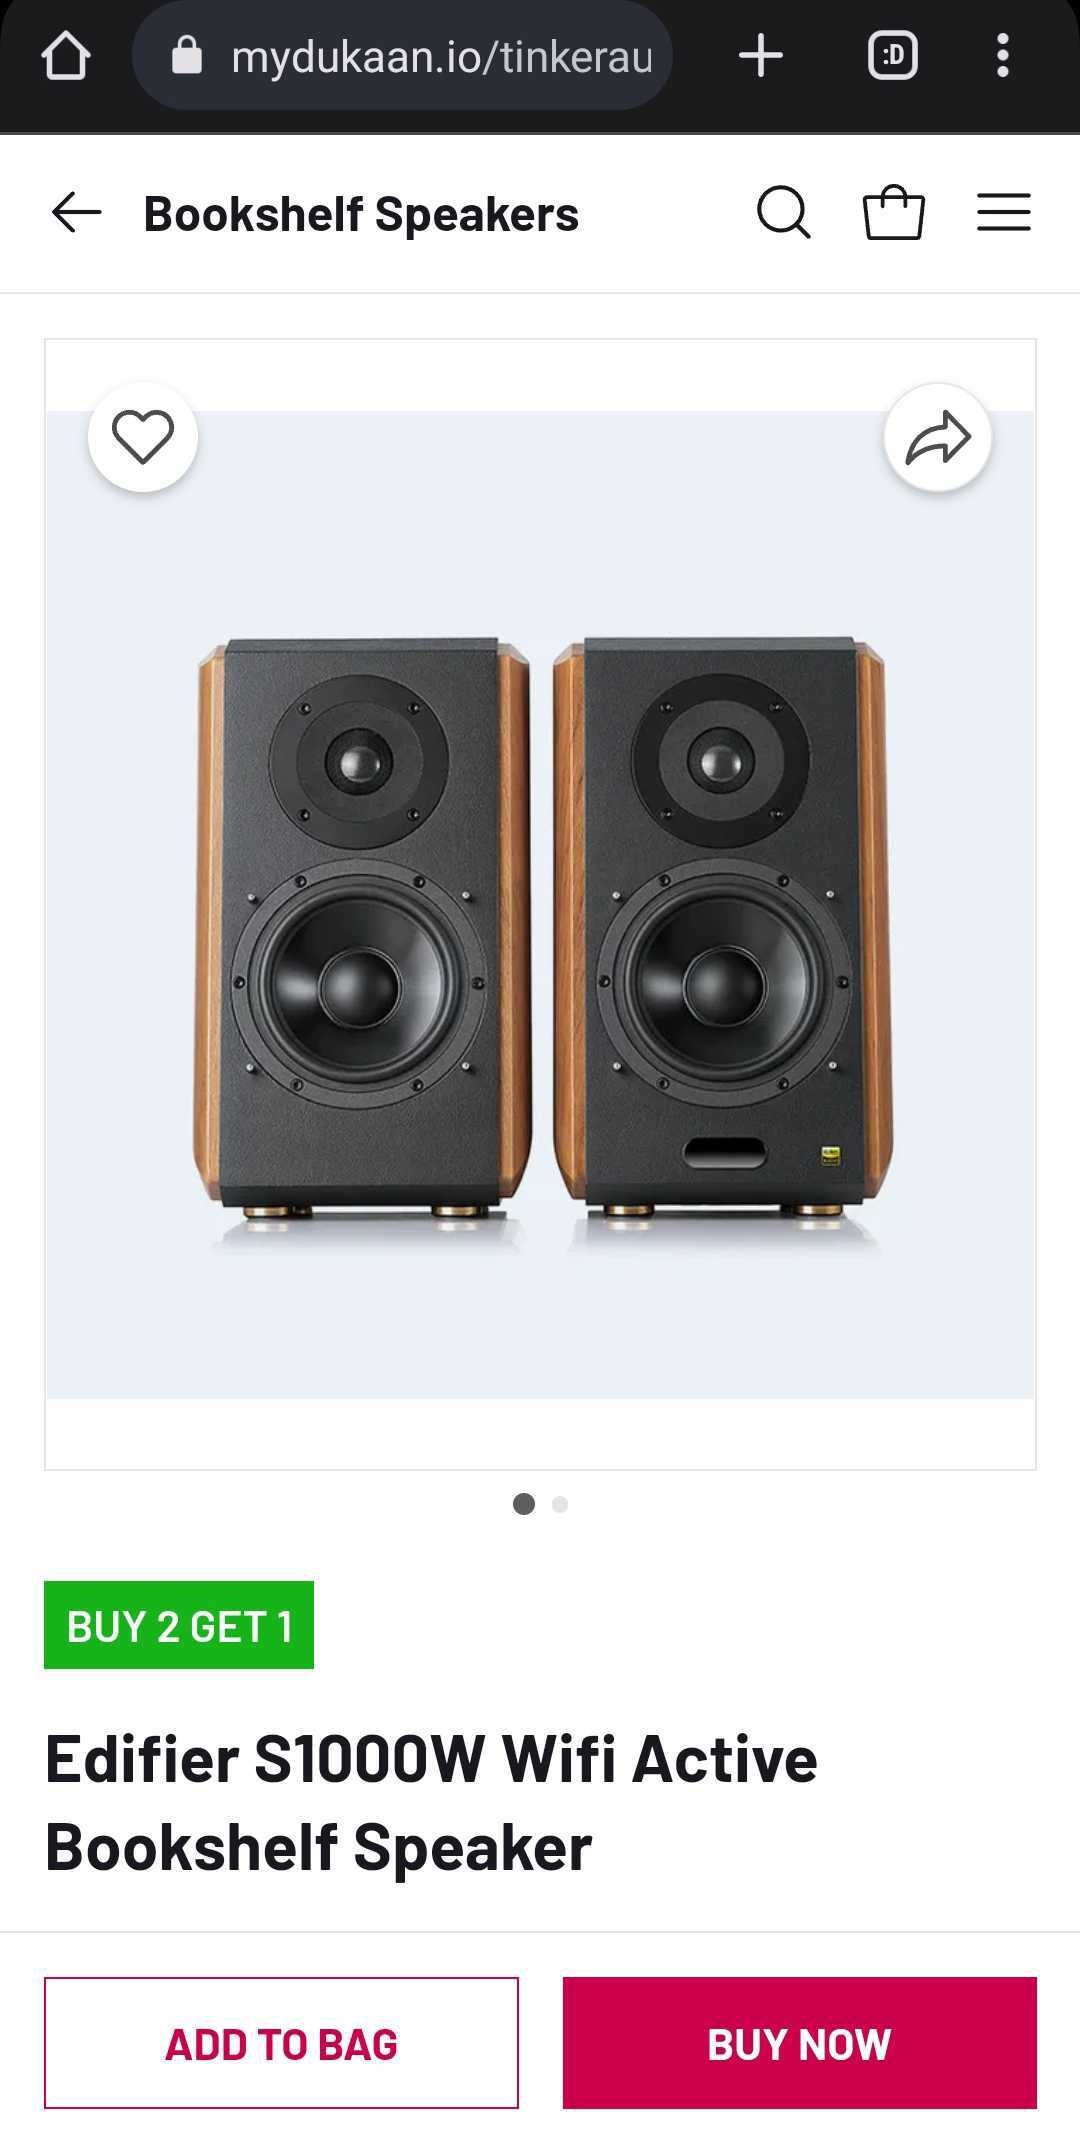
The Tinker theme is an ideal choice for websites that specialize in electronics, gadgets, as well as fashion and other product categories.It has a stylish layout for the entire storefront and allows you to showcase your brand's unique story and products. With multiple hero sections and a prominent featured product area on the homepage, this theme is sure to grab the attention of your visitors.
In addition, the Tinker Theme is known for its speed, ease of use, and customization options, making it a popular choice among Dukaan store owners.
Start selling with confidence and style with the Tinker theme! 😎
How to apply Tinker theme?
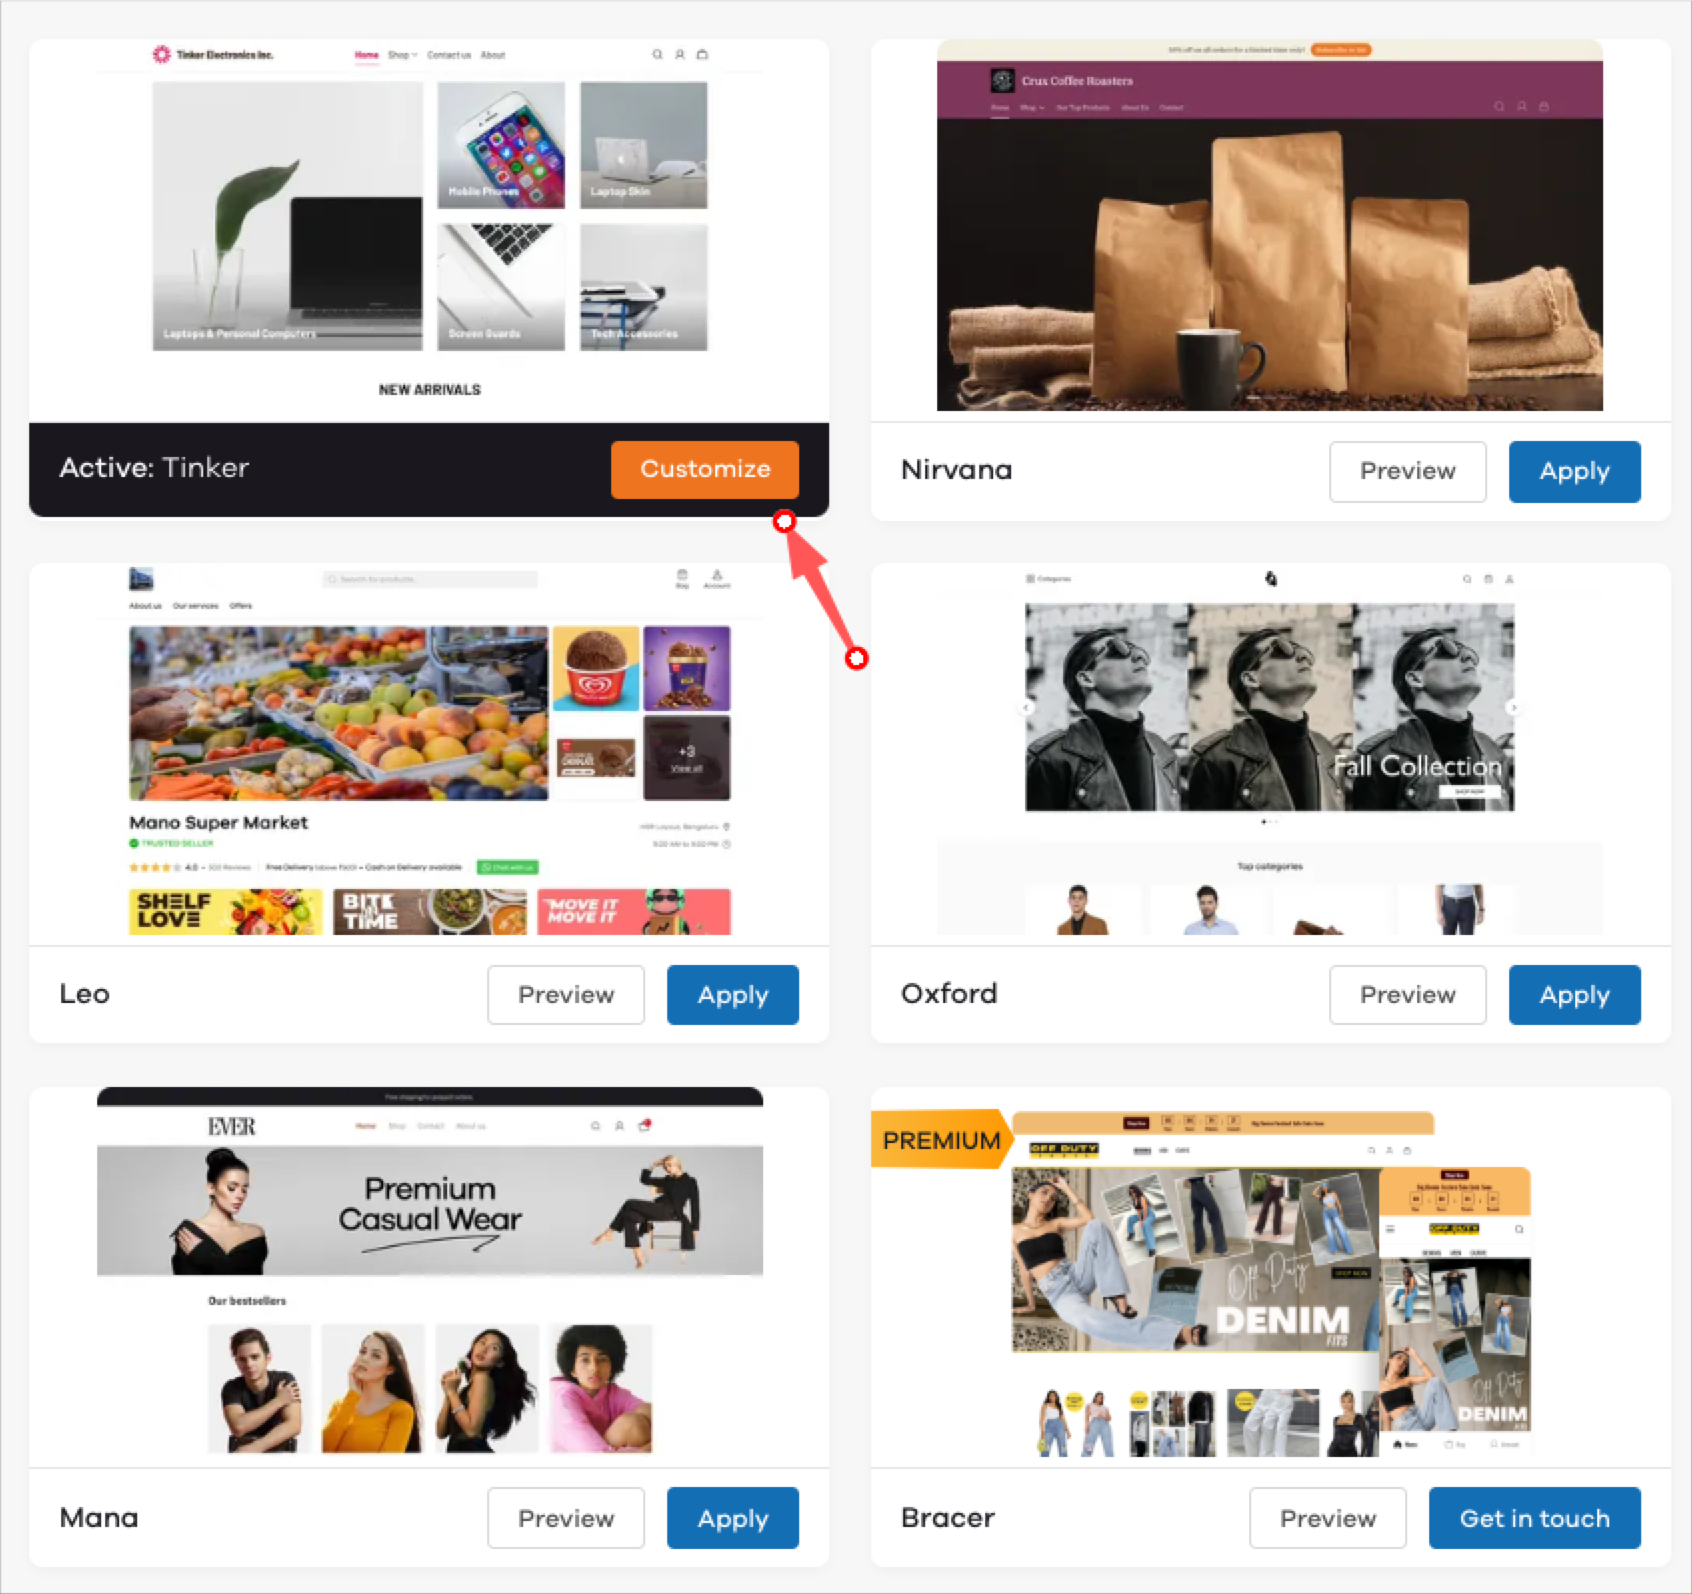
To use the Tinker theme, go to Appearance. Now, click on Apply to choose this theme for your store.
Once applied, click on Customize to make changes to the theme as per your choice.
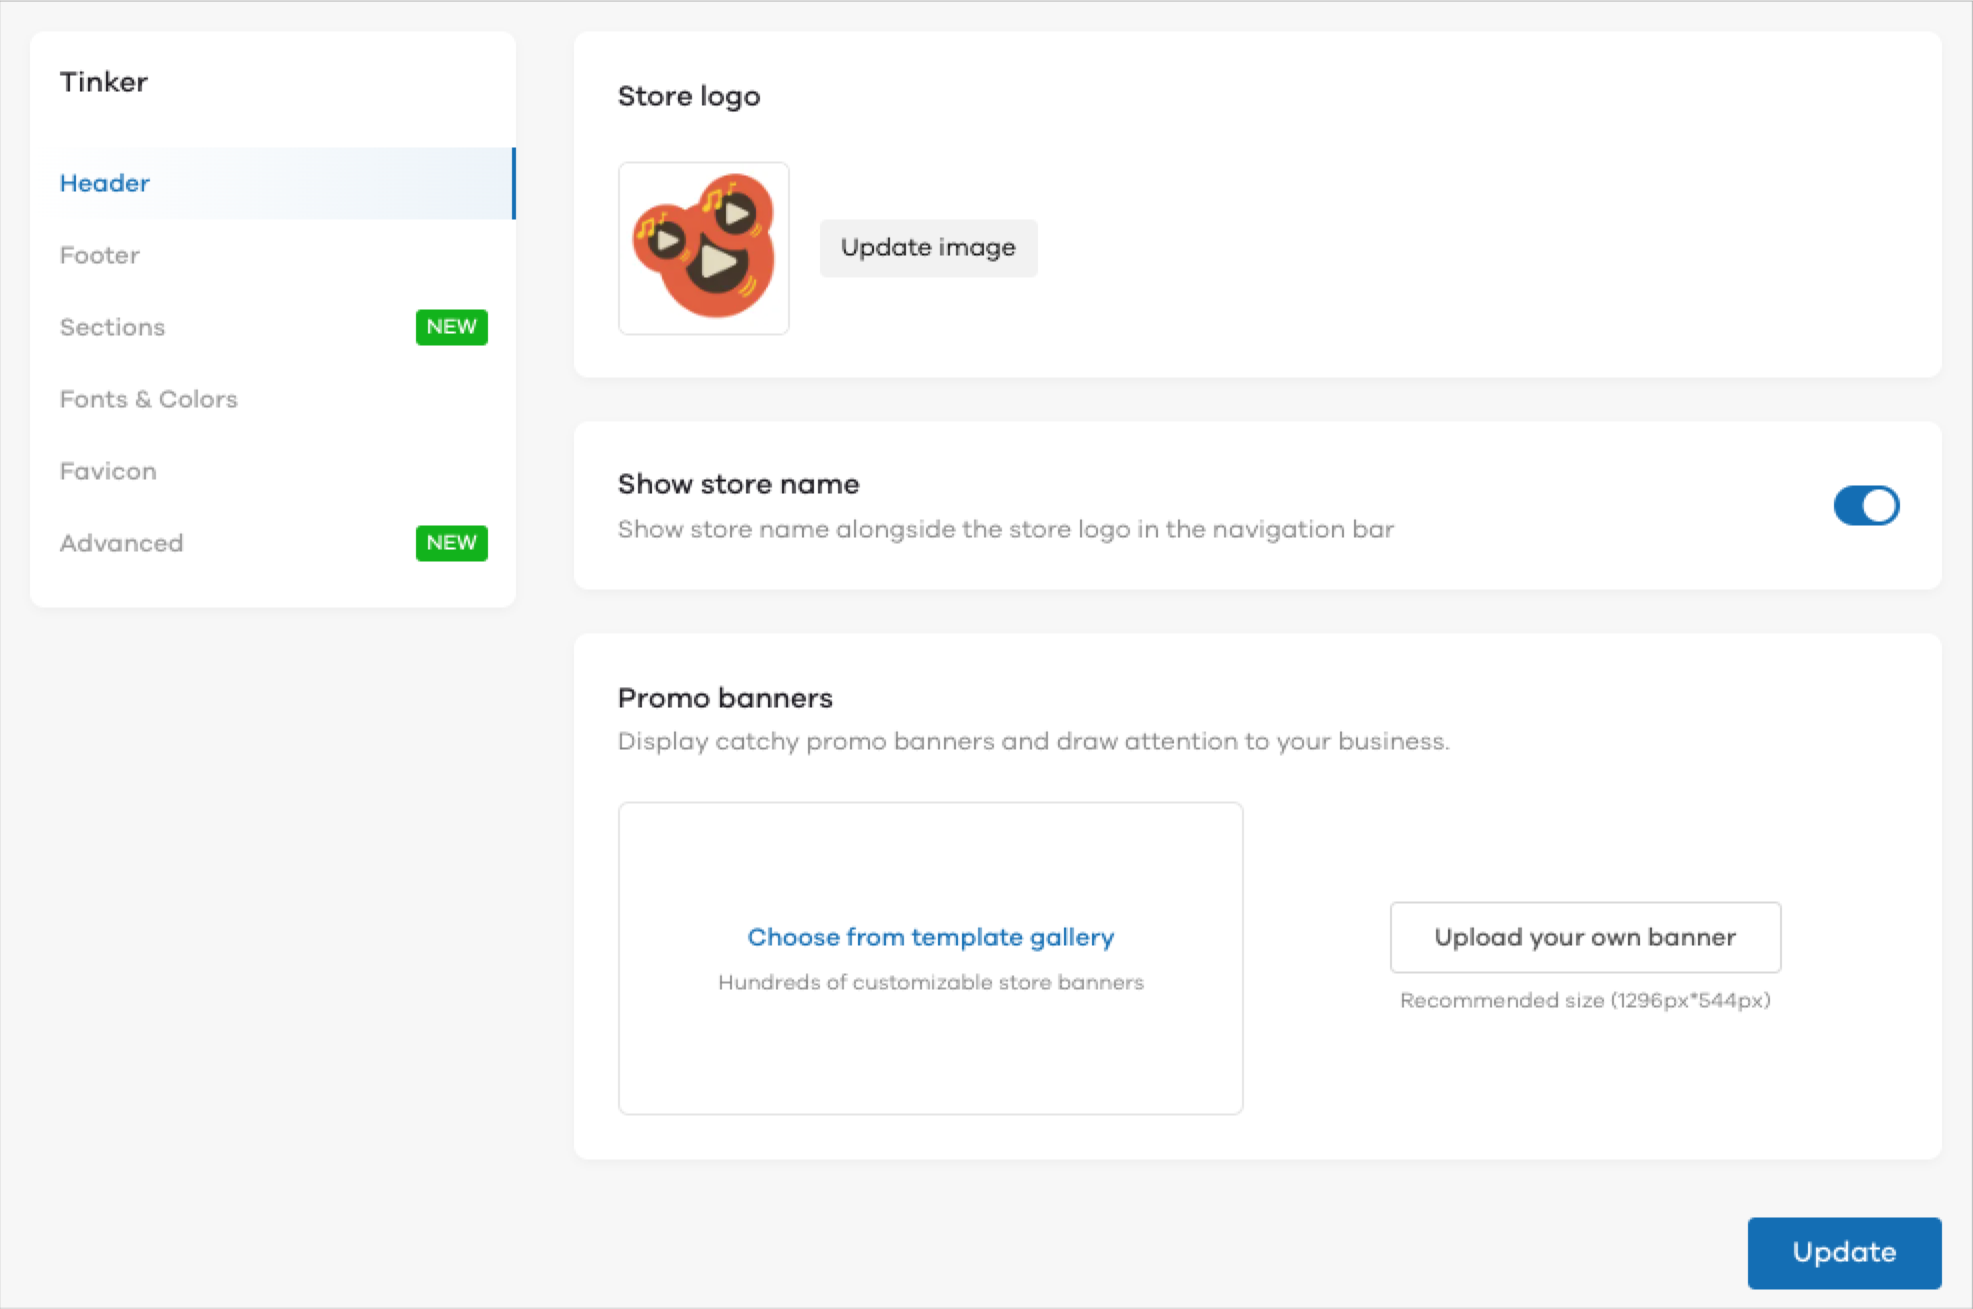
Store Header
In the Header section, you can make changes to the top section of your store:
- Store Logo - Add your store logo that will be shown on your storefront
- Store Name - When you enable this option by clicking on the toggle button, your store name will be shown alongside the logo of your store. If you wish to show only the logo, turn it off again.
- Promo Banners - You can choose to display three banners on the top section of your store. You can either choose from the template gallery and set the banners easily or if you want to upload the banners of your choice, click on add your own banner button. The recommended image size is 1296px X 544 px.
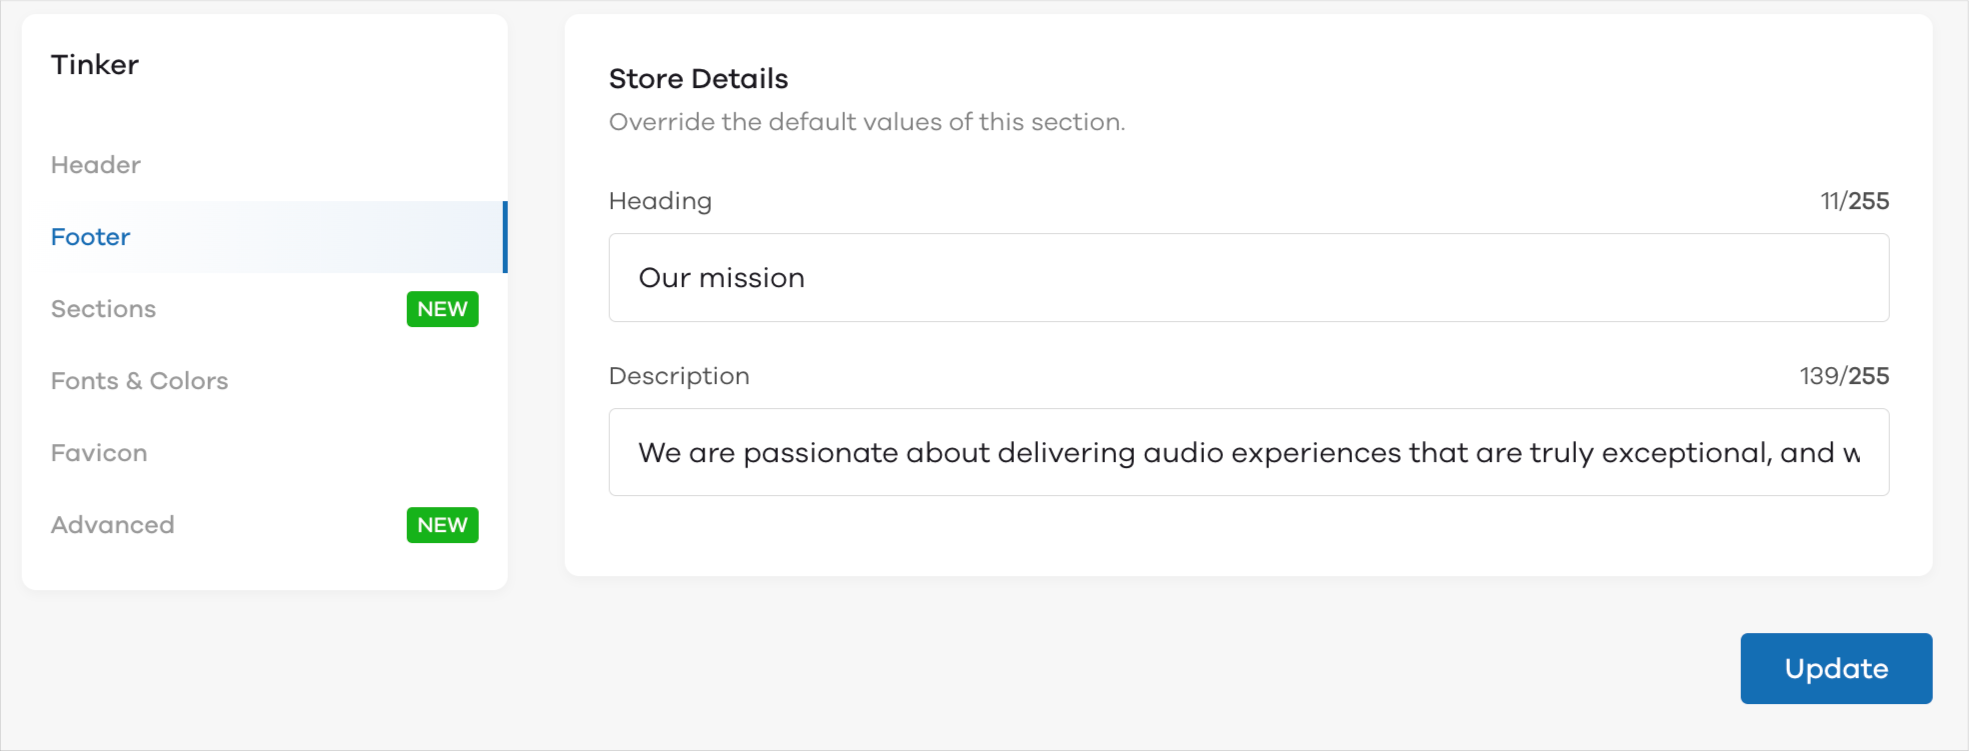
Store Footer
Use the Heading and Description section to add more details about your business in the footer section. You can add any details in this section or customize the existing text.
Store Sections
Through sections, you can add multiple sub-parts on the homepage of your store including images with text sections, featured products and featured videos.
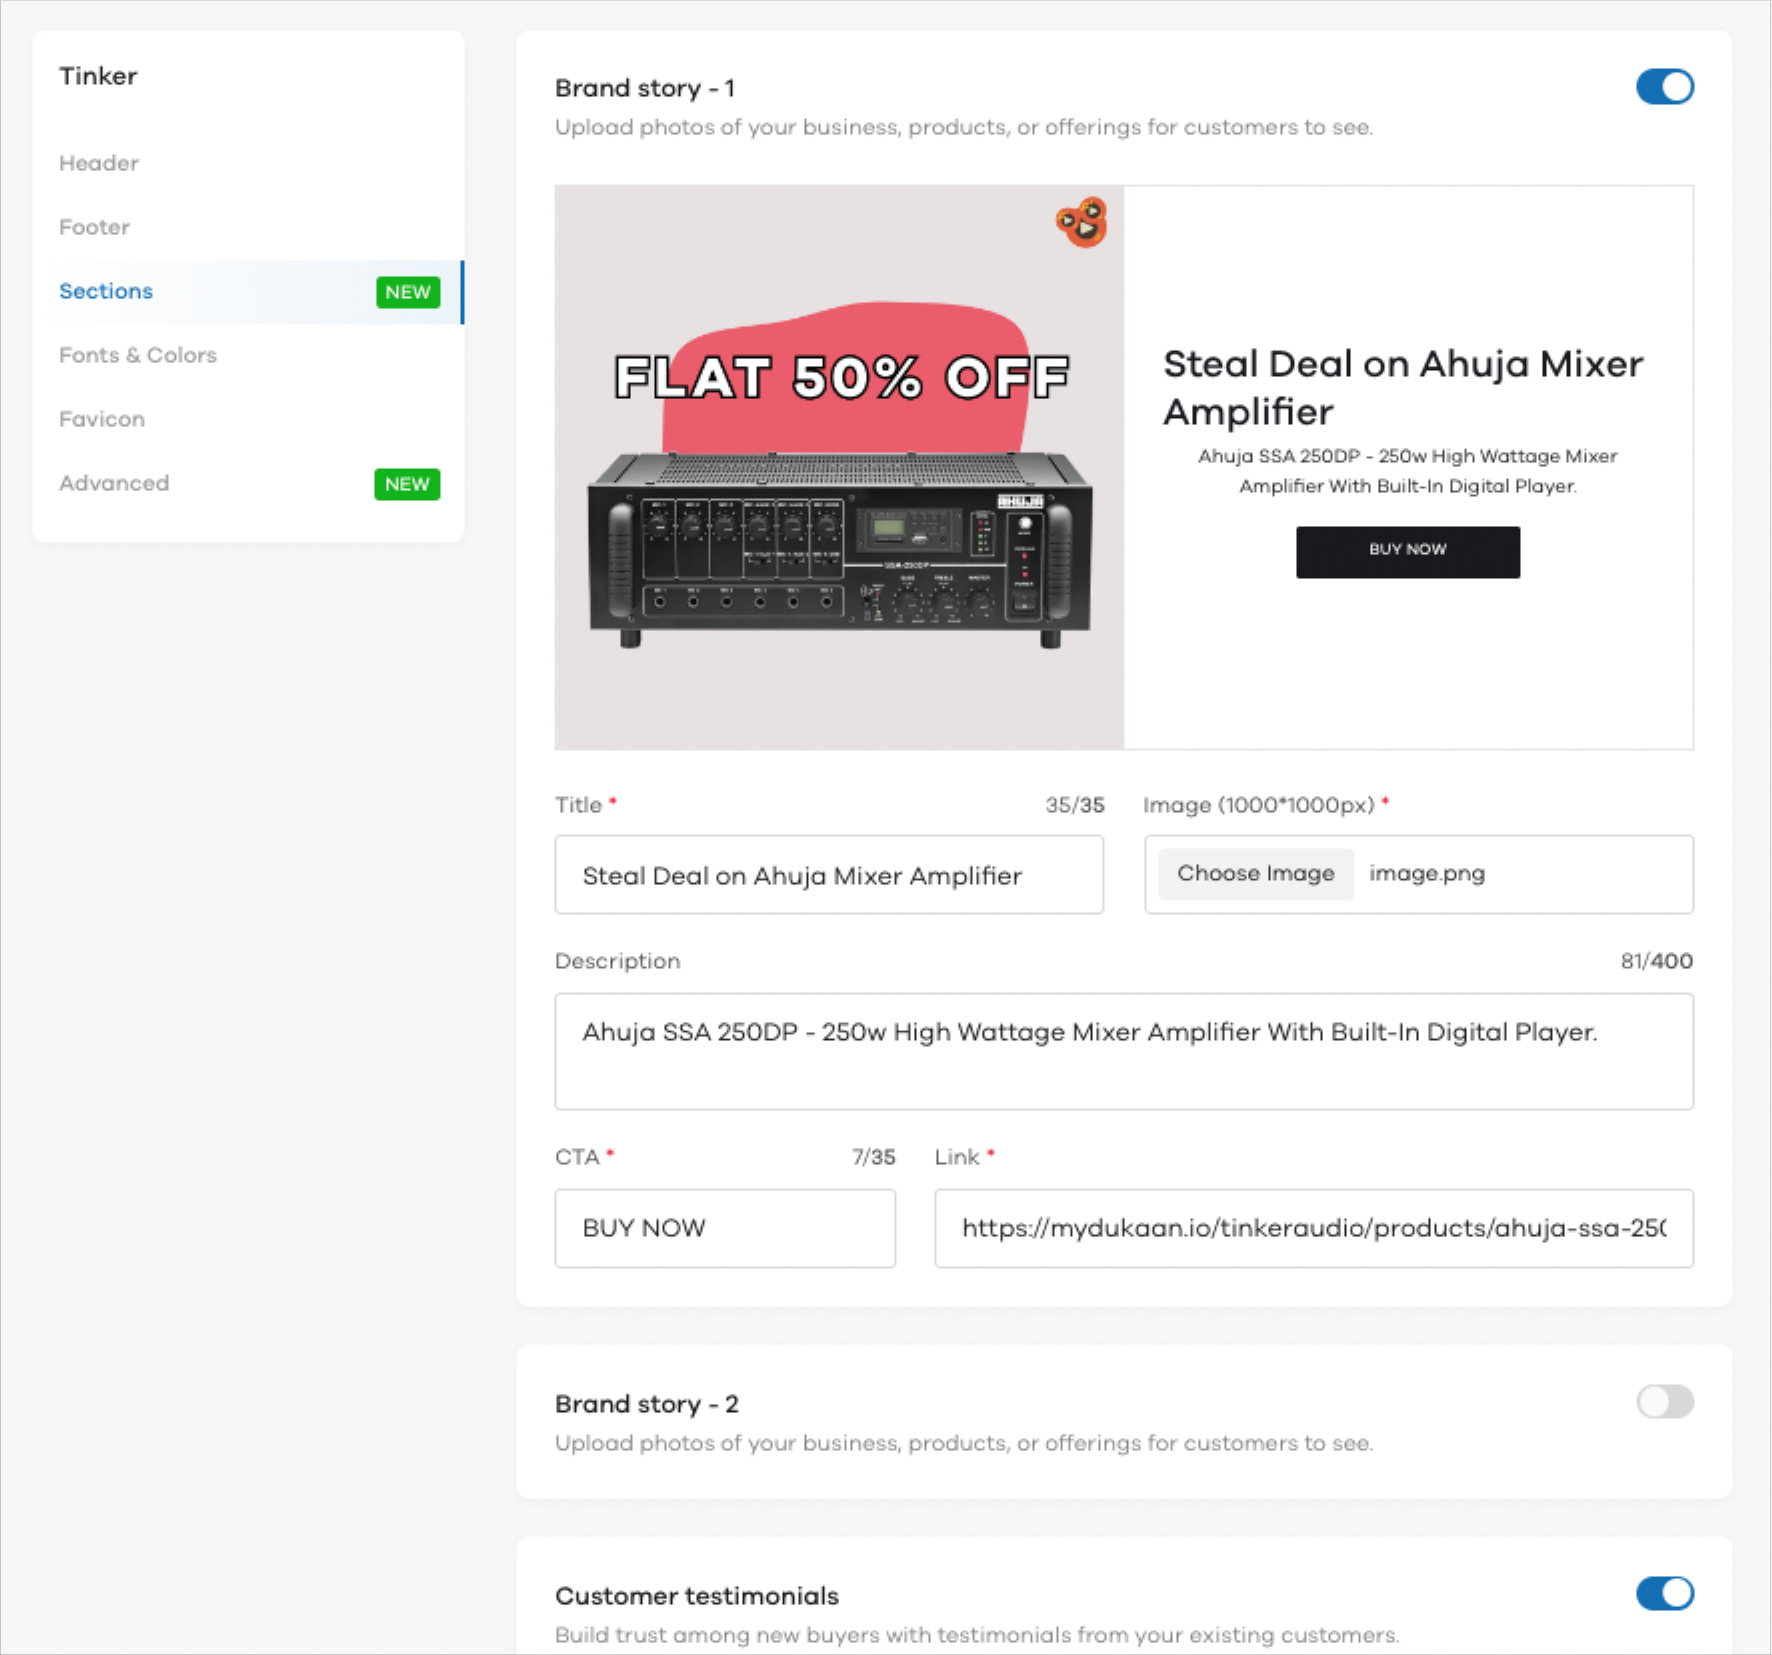
1. Brand story-1 & Brand story-2
Feature your brand story or highlight a product or category to be featured along with the product photo or anything that'll be a great addition to your website.
2. Customer Testimonials
With this section, you can showcase top customer reviews on your homepage to build trust among your new customers along with adding an image for the reviewer along with the ratings.
To add this section, enable Customer Testimonials by clicking on the toggle button. Now, you can add up to 3 reviews with testimonial content, star ratings, customer name and image as well.

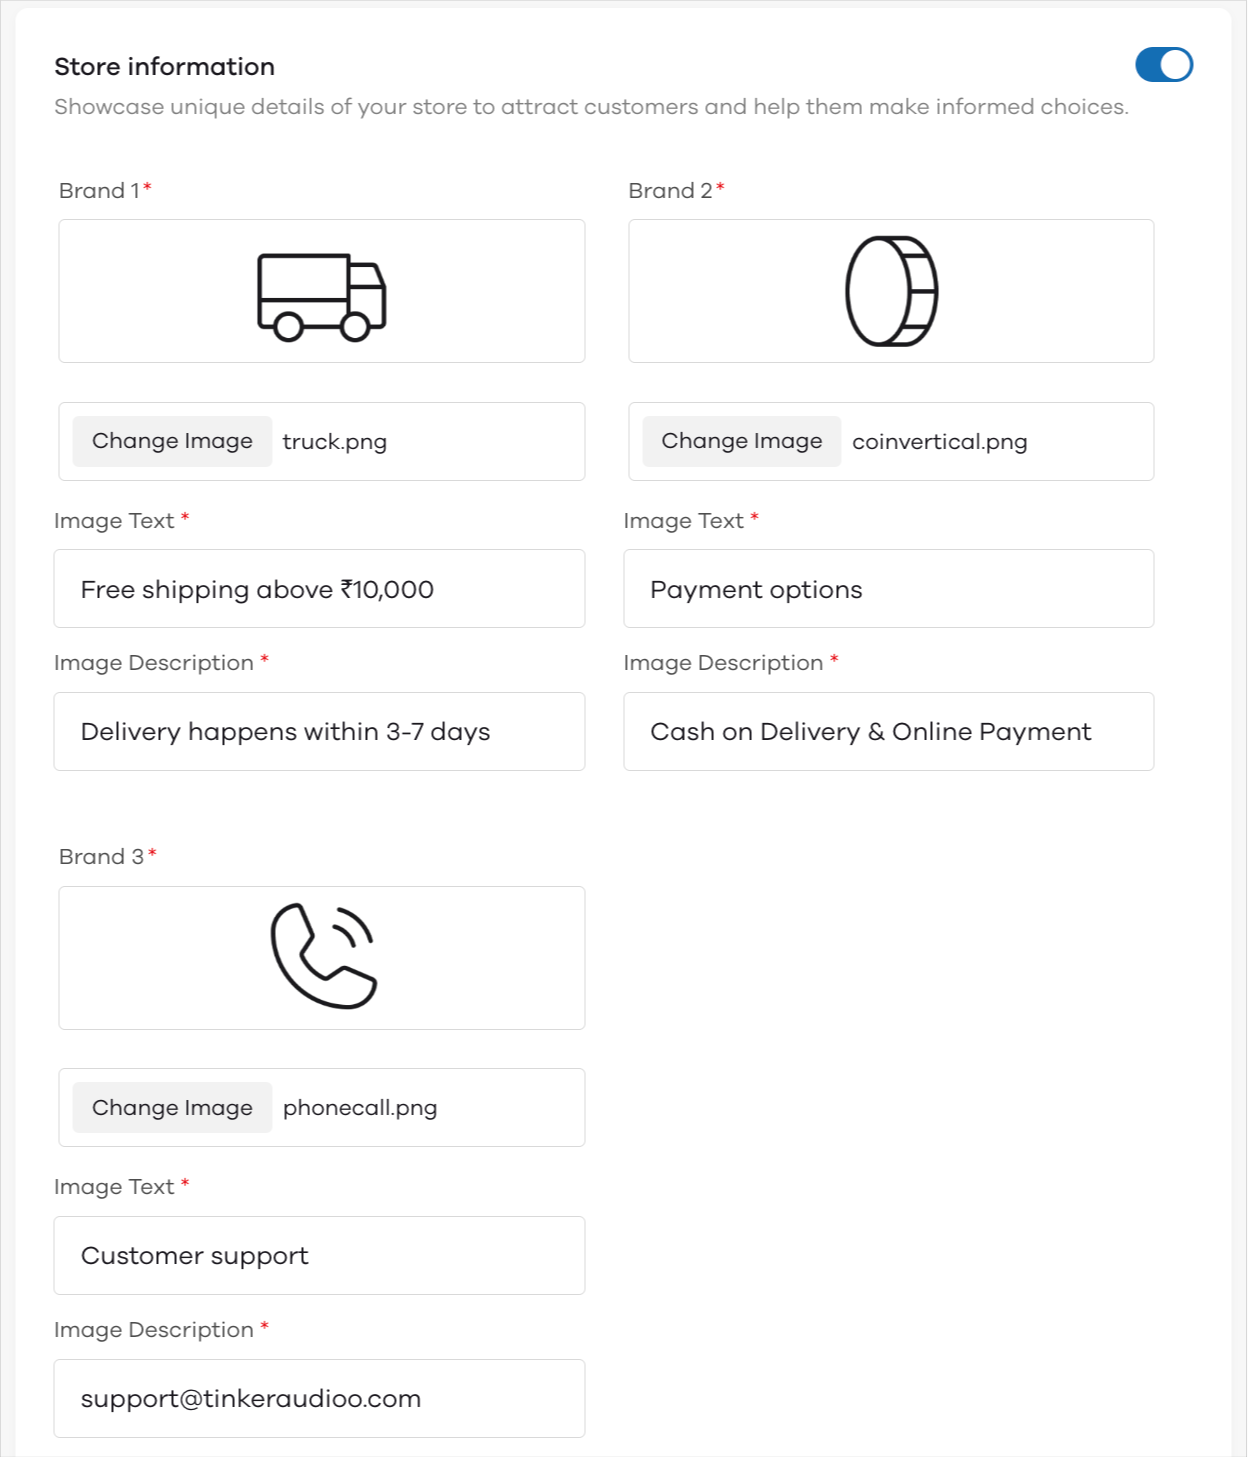
3. Store Information
Got any special features you'd like to highlight on your store like delivery charges, payment methods, contact number, etc. You can add them via this section or you can upload your own photos and highlight other important information. All the text along with the images can be customized.
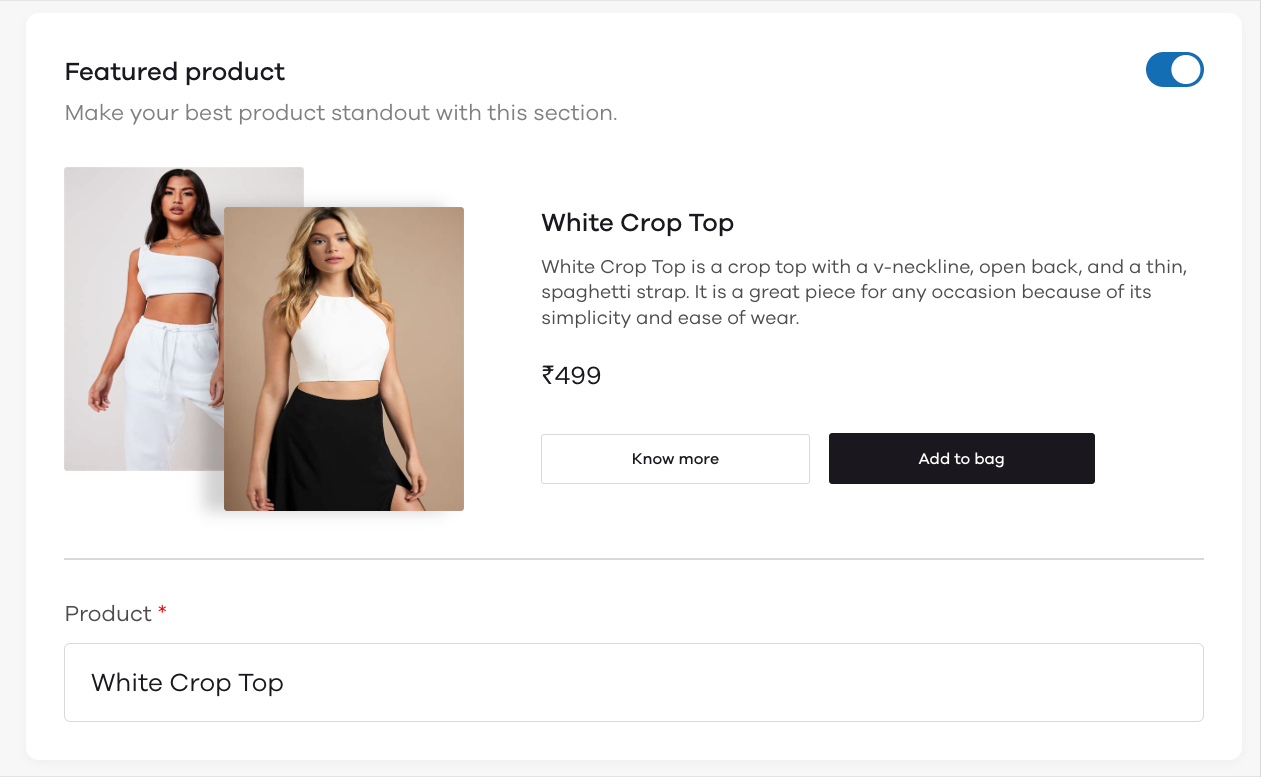
4. Featured Product
The featured product section allows you to feature a single product on your homepage and highlight it.
Simply toggle the featured product section and choose the product you want to highlight on your homepage.
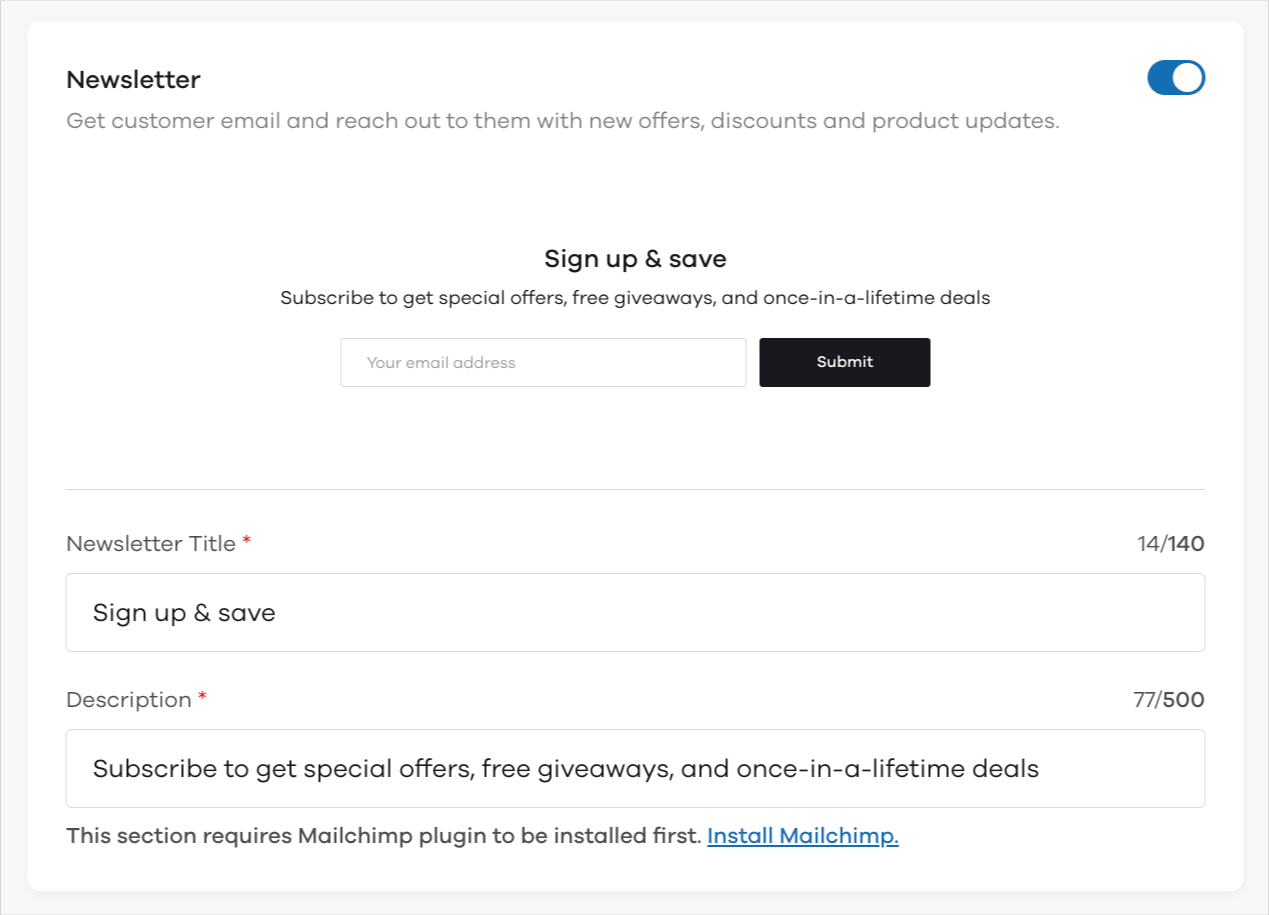
5. Newsletter
With this section, you can collect your customers' email addresses to market new products, offers, and discounts to get them back to your website.
To add this section, enable Newsletter by clicking on the toggle button. Now enter the title and description to make it personalized to your brand.
Note that you need to install the Mailchimp plugin before you can collect emails.
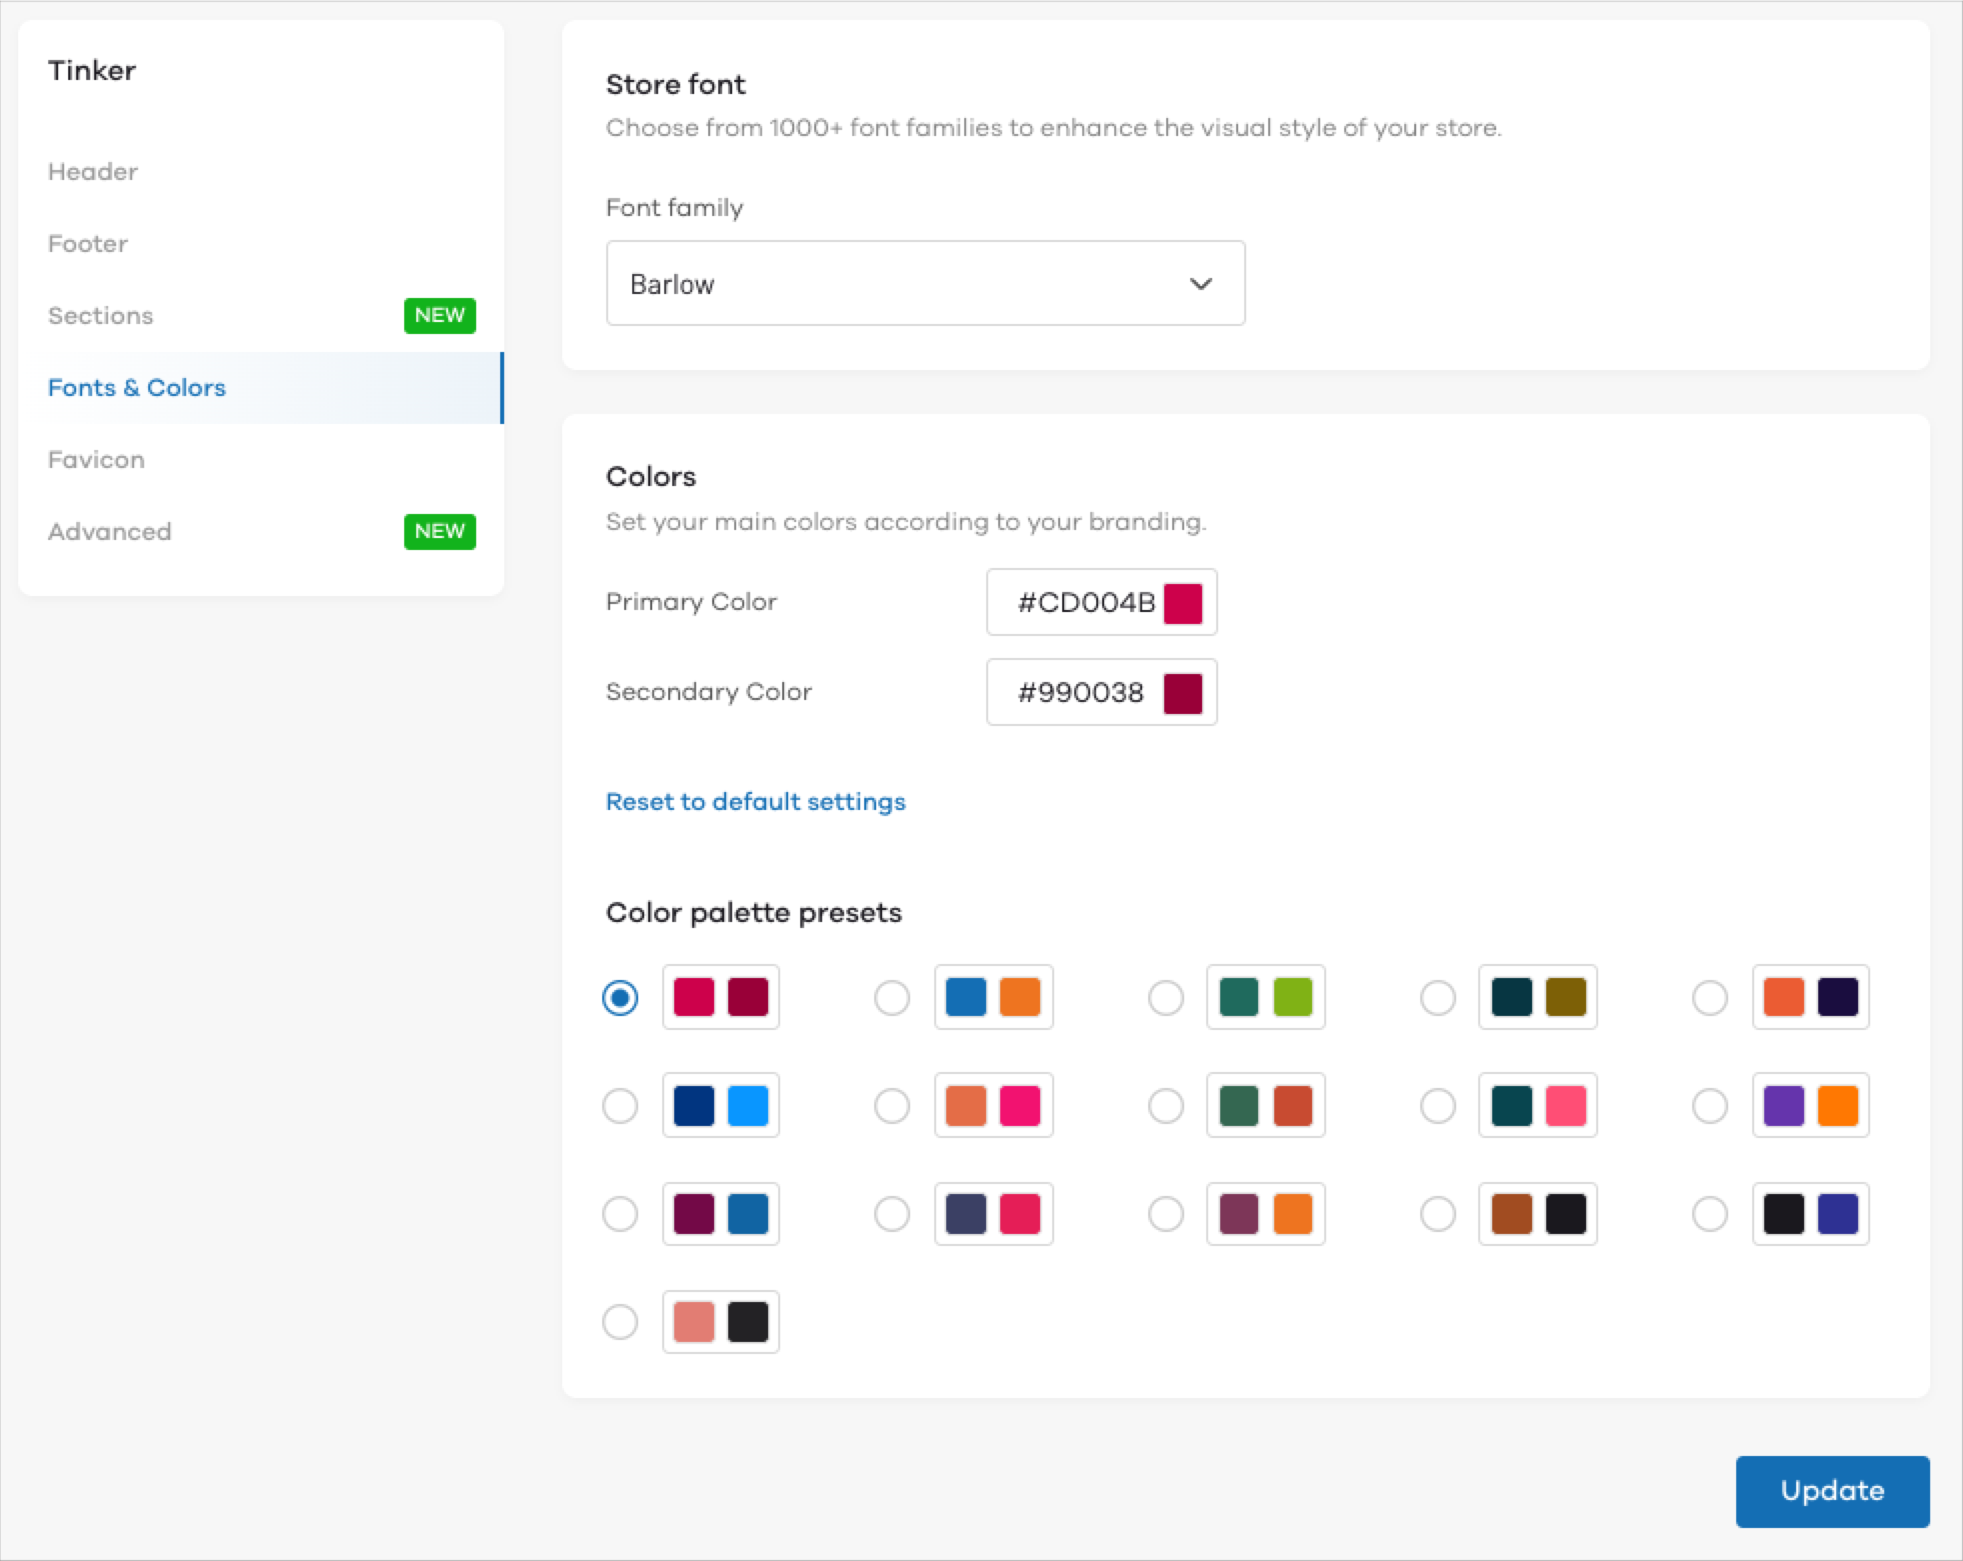
Fonts and Colors
The Fonts and Colors section allows you to change your store's entire color scheme and fonts.
To edit this, click on the font family dropdown and choose from over 100+ different fonts for your store.
You can choose to edit the color scheme by adding a primary and secondary color for your store. You also have the option to choose from the existing color presets below.
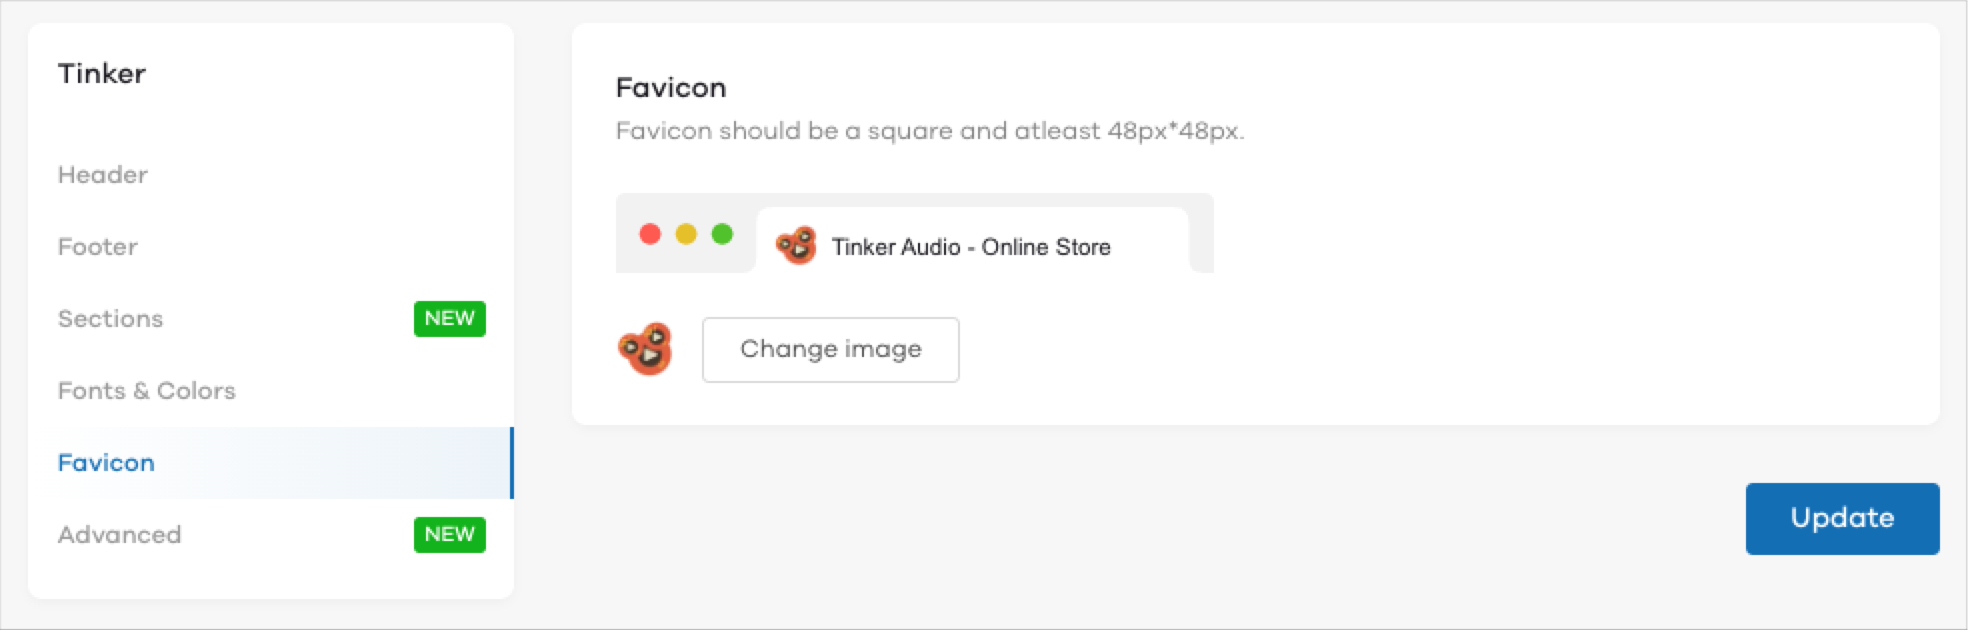
Store Favicon
Once you click on Favicon, you can see an option to change it. A favicon is also known as a website icon or URL icon. It is a file containing one or more small icons, associated with a particular website or web page. You can change it to show your brand's short logo or any other image.By default, Dukaan's logo is shown as a Favicon if left unchanged.
To change the Favicon, click on the Change Image button and upload the desired image.
Once you've made all the changes, click on the Update button to save the changes.
Advanced
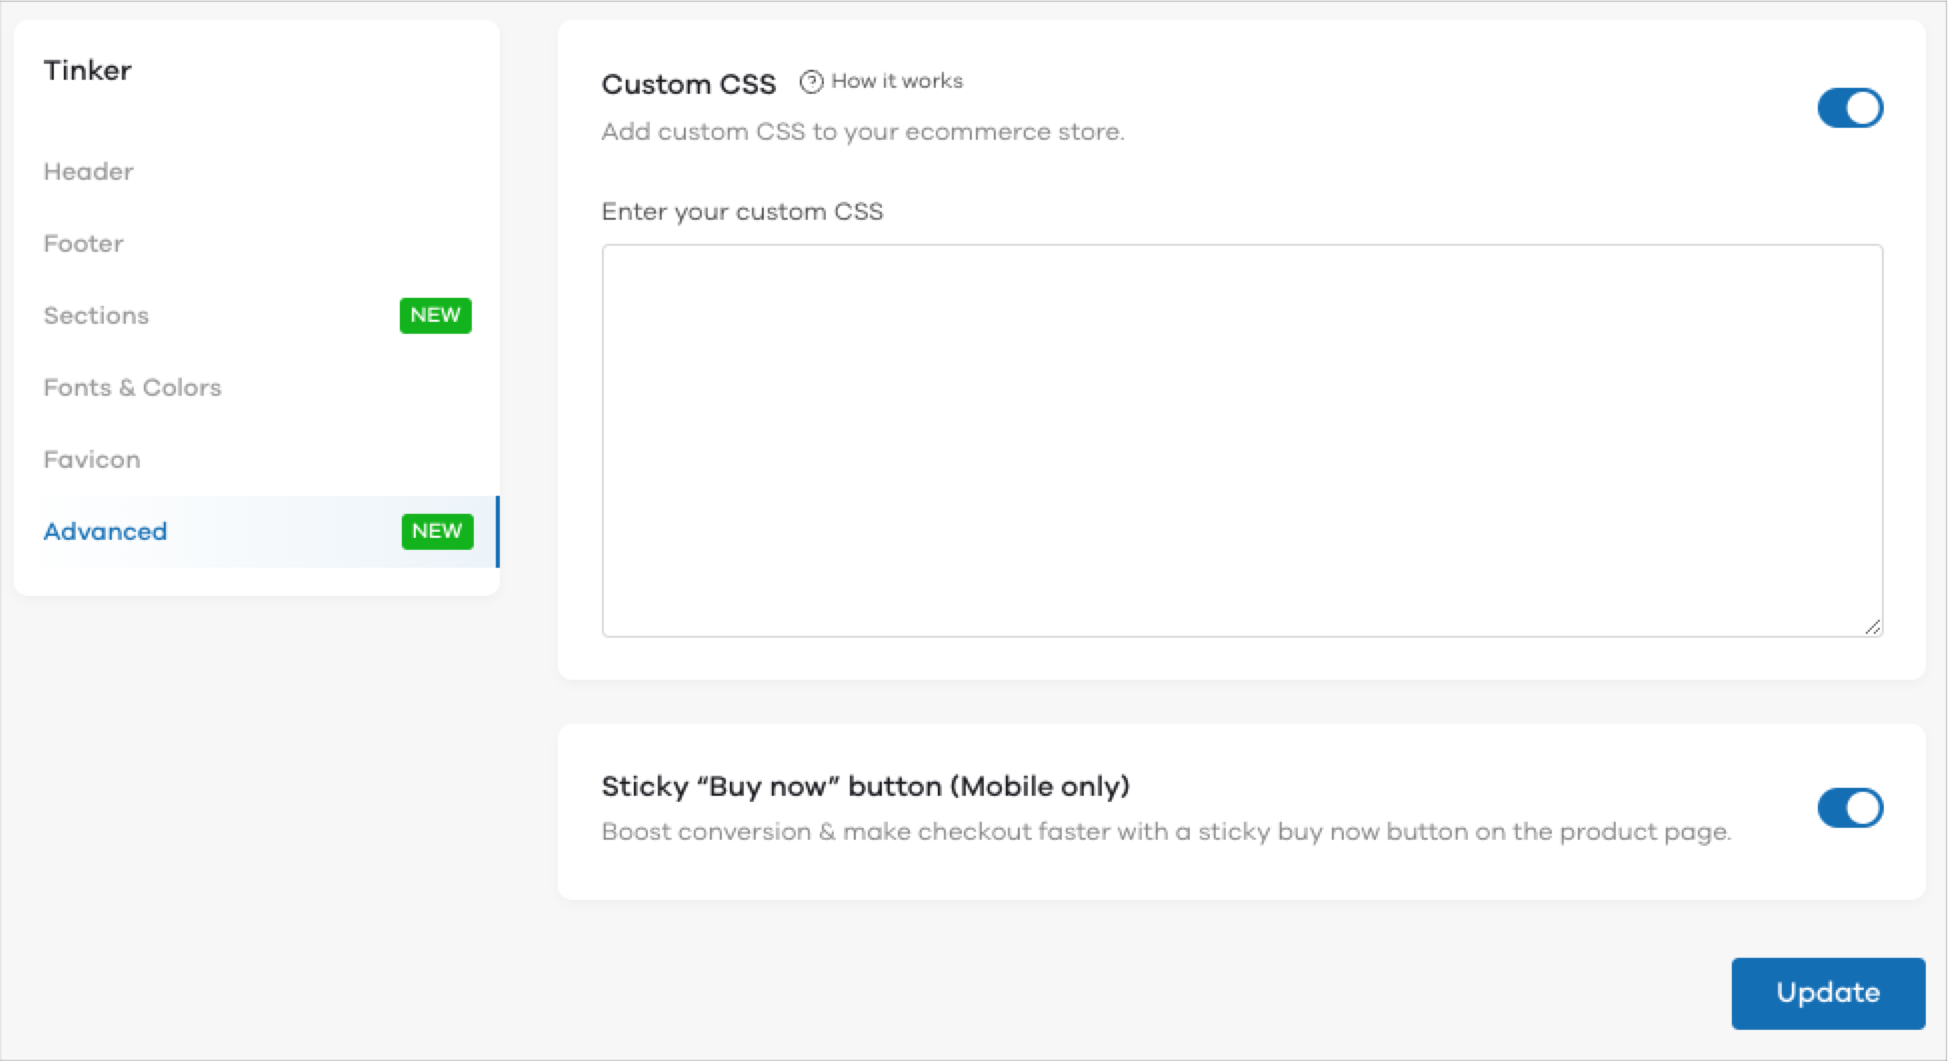
- Custom CSS With the Advanced section, you can choose to add custom CSS to your storefront and change the design for it, as per your liking. To know more about how to add custom CSS to your storefront, click here.
- Sticky "Buy now" button This will make the "Buy now" button sticky on all product pages in the mobile view.