What is a hellobar?
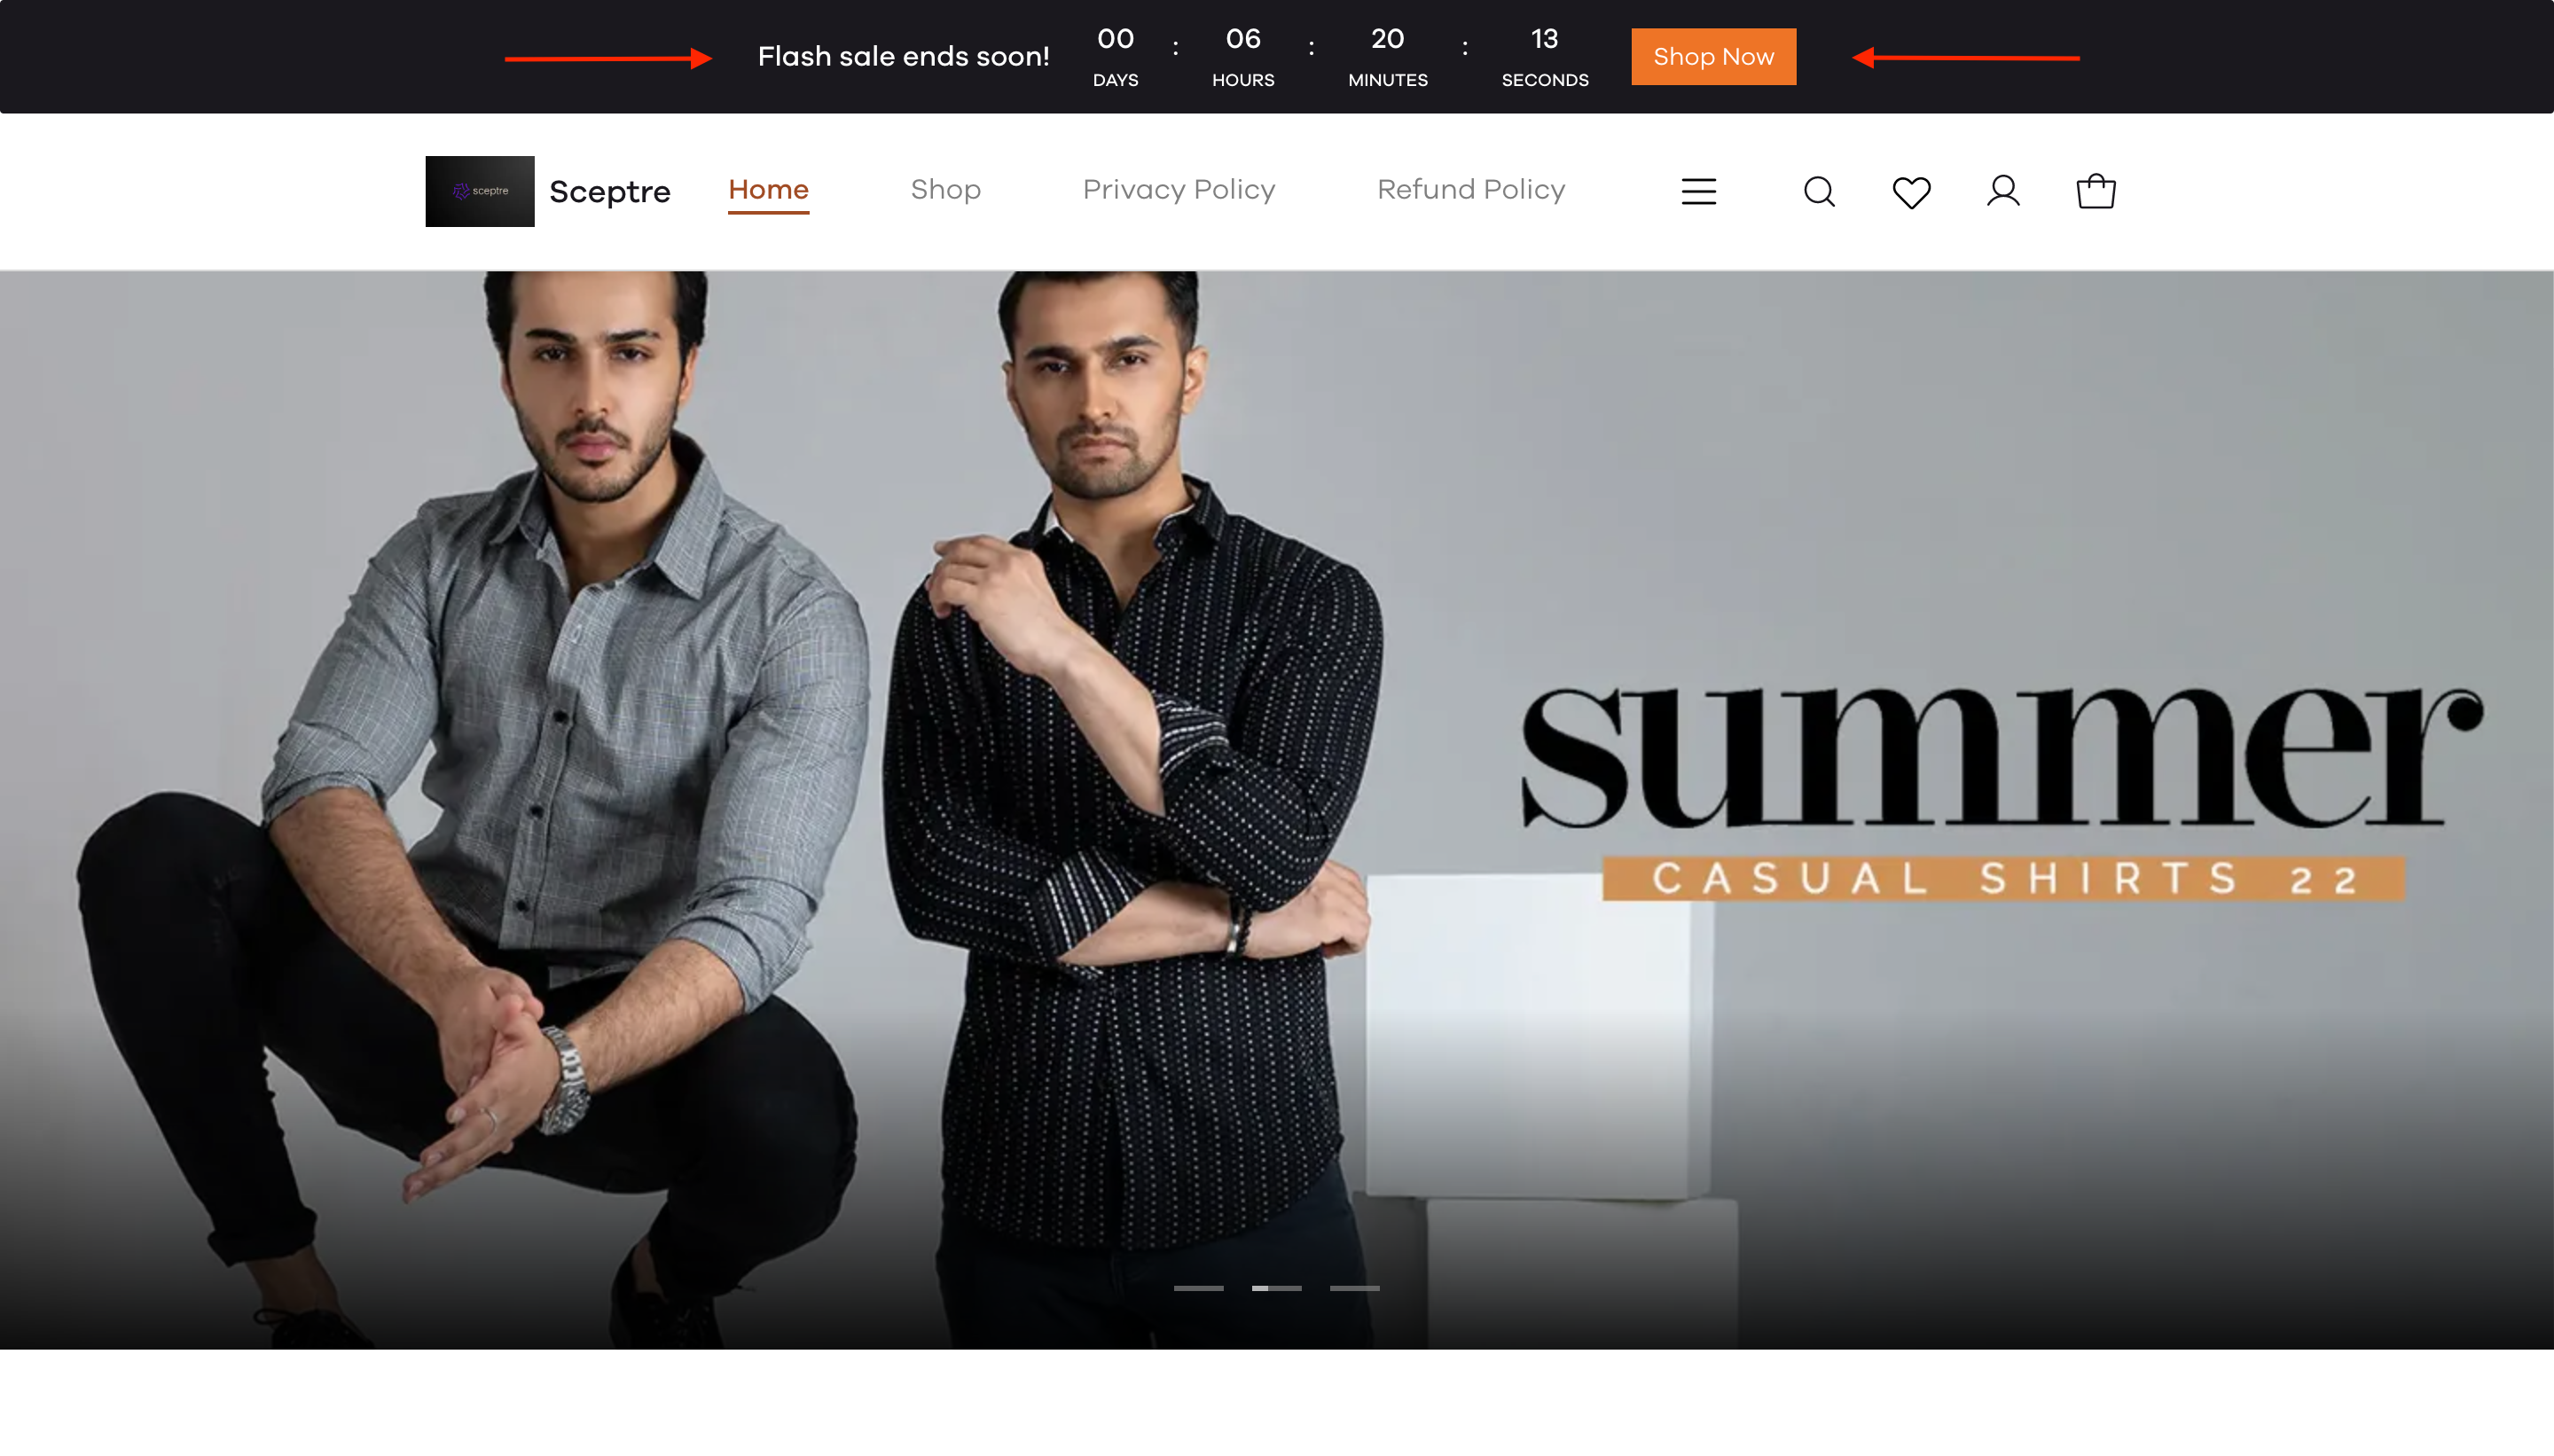
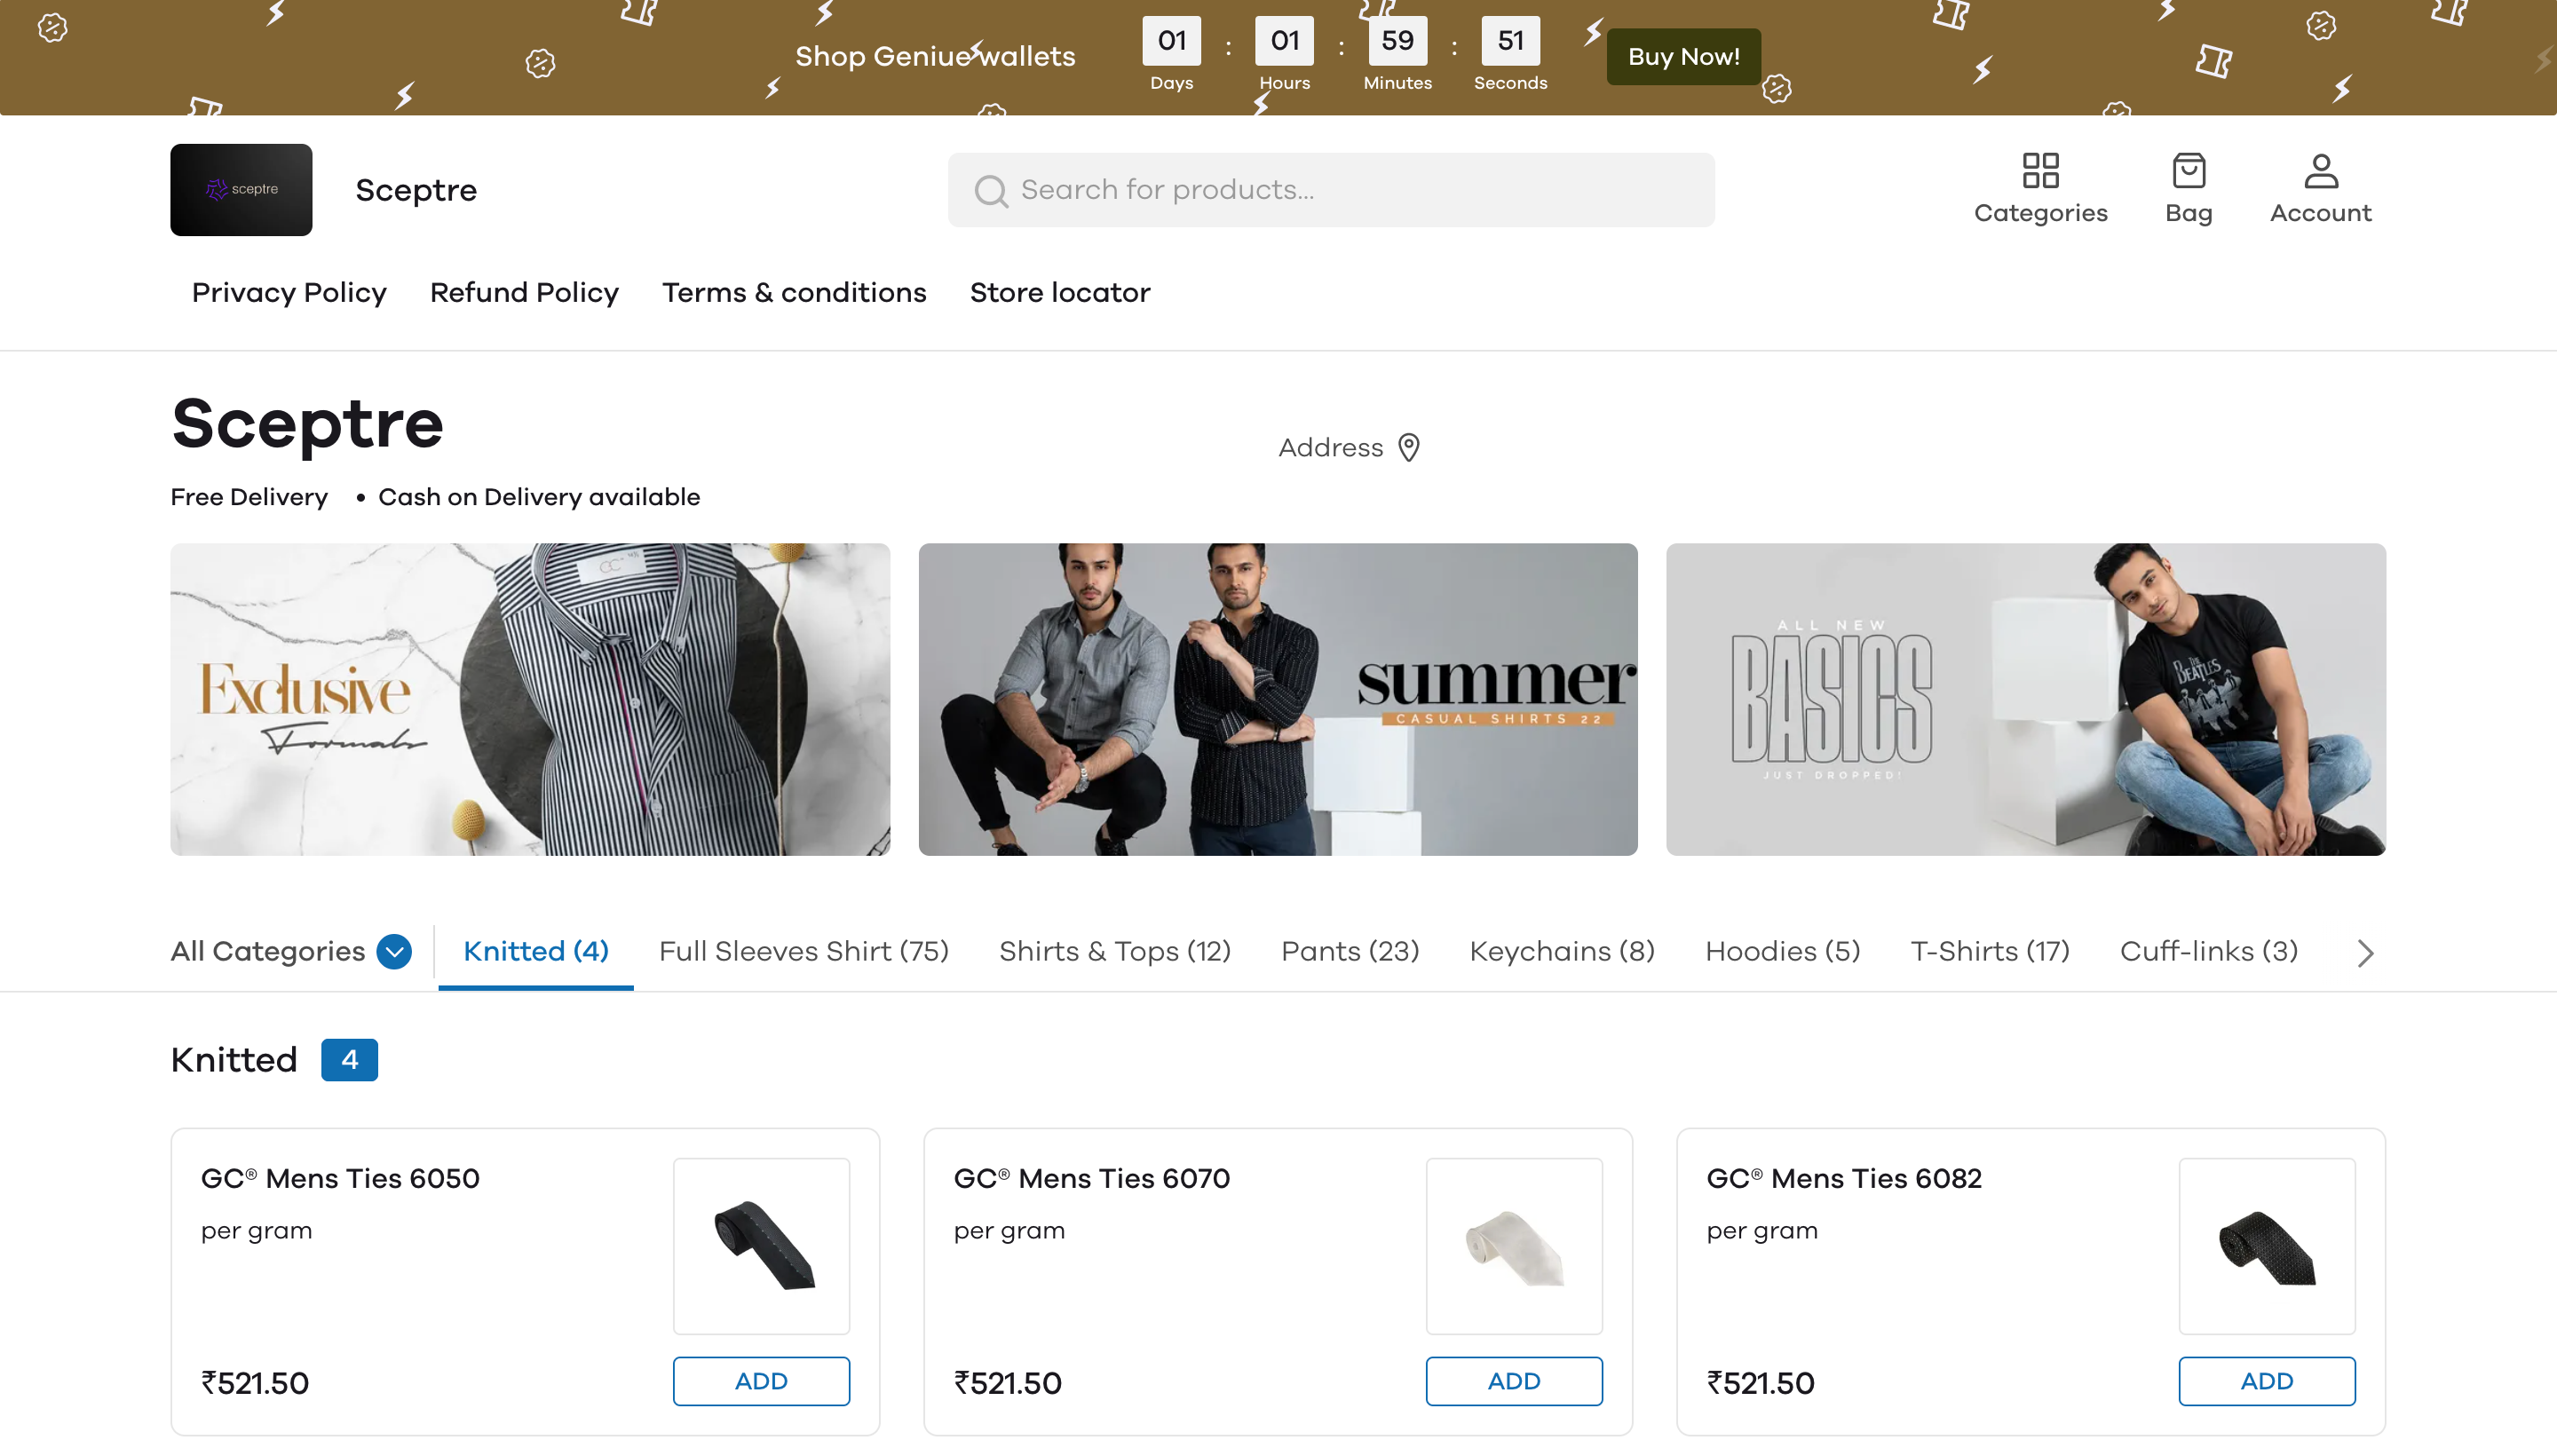
A hello bar is a banner that sticks to the top of your website, which you can configure to appear on any (or specific) pages. Given below is a sample of how the hellobar will look on your storefront.
How to install the Hellobar plugin?
To install the plugin; First, go to the plugins section on your Dukaan dashboard. Search for Hellobar. When the plugin appears, click on Install plugin. Upon the installation of the plugin, click on Settings.
How to customize the hellobar?
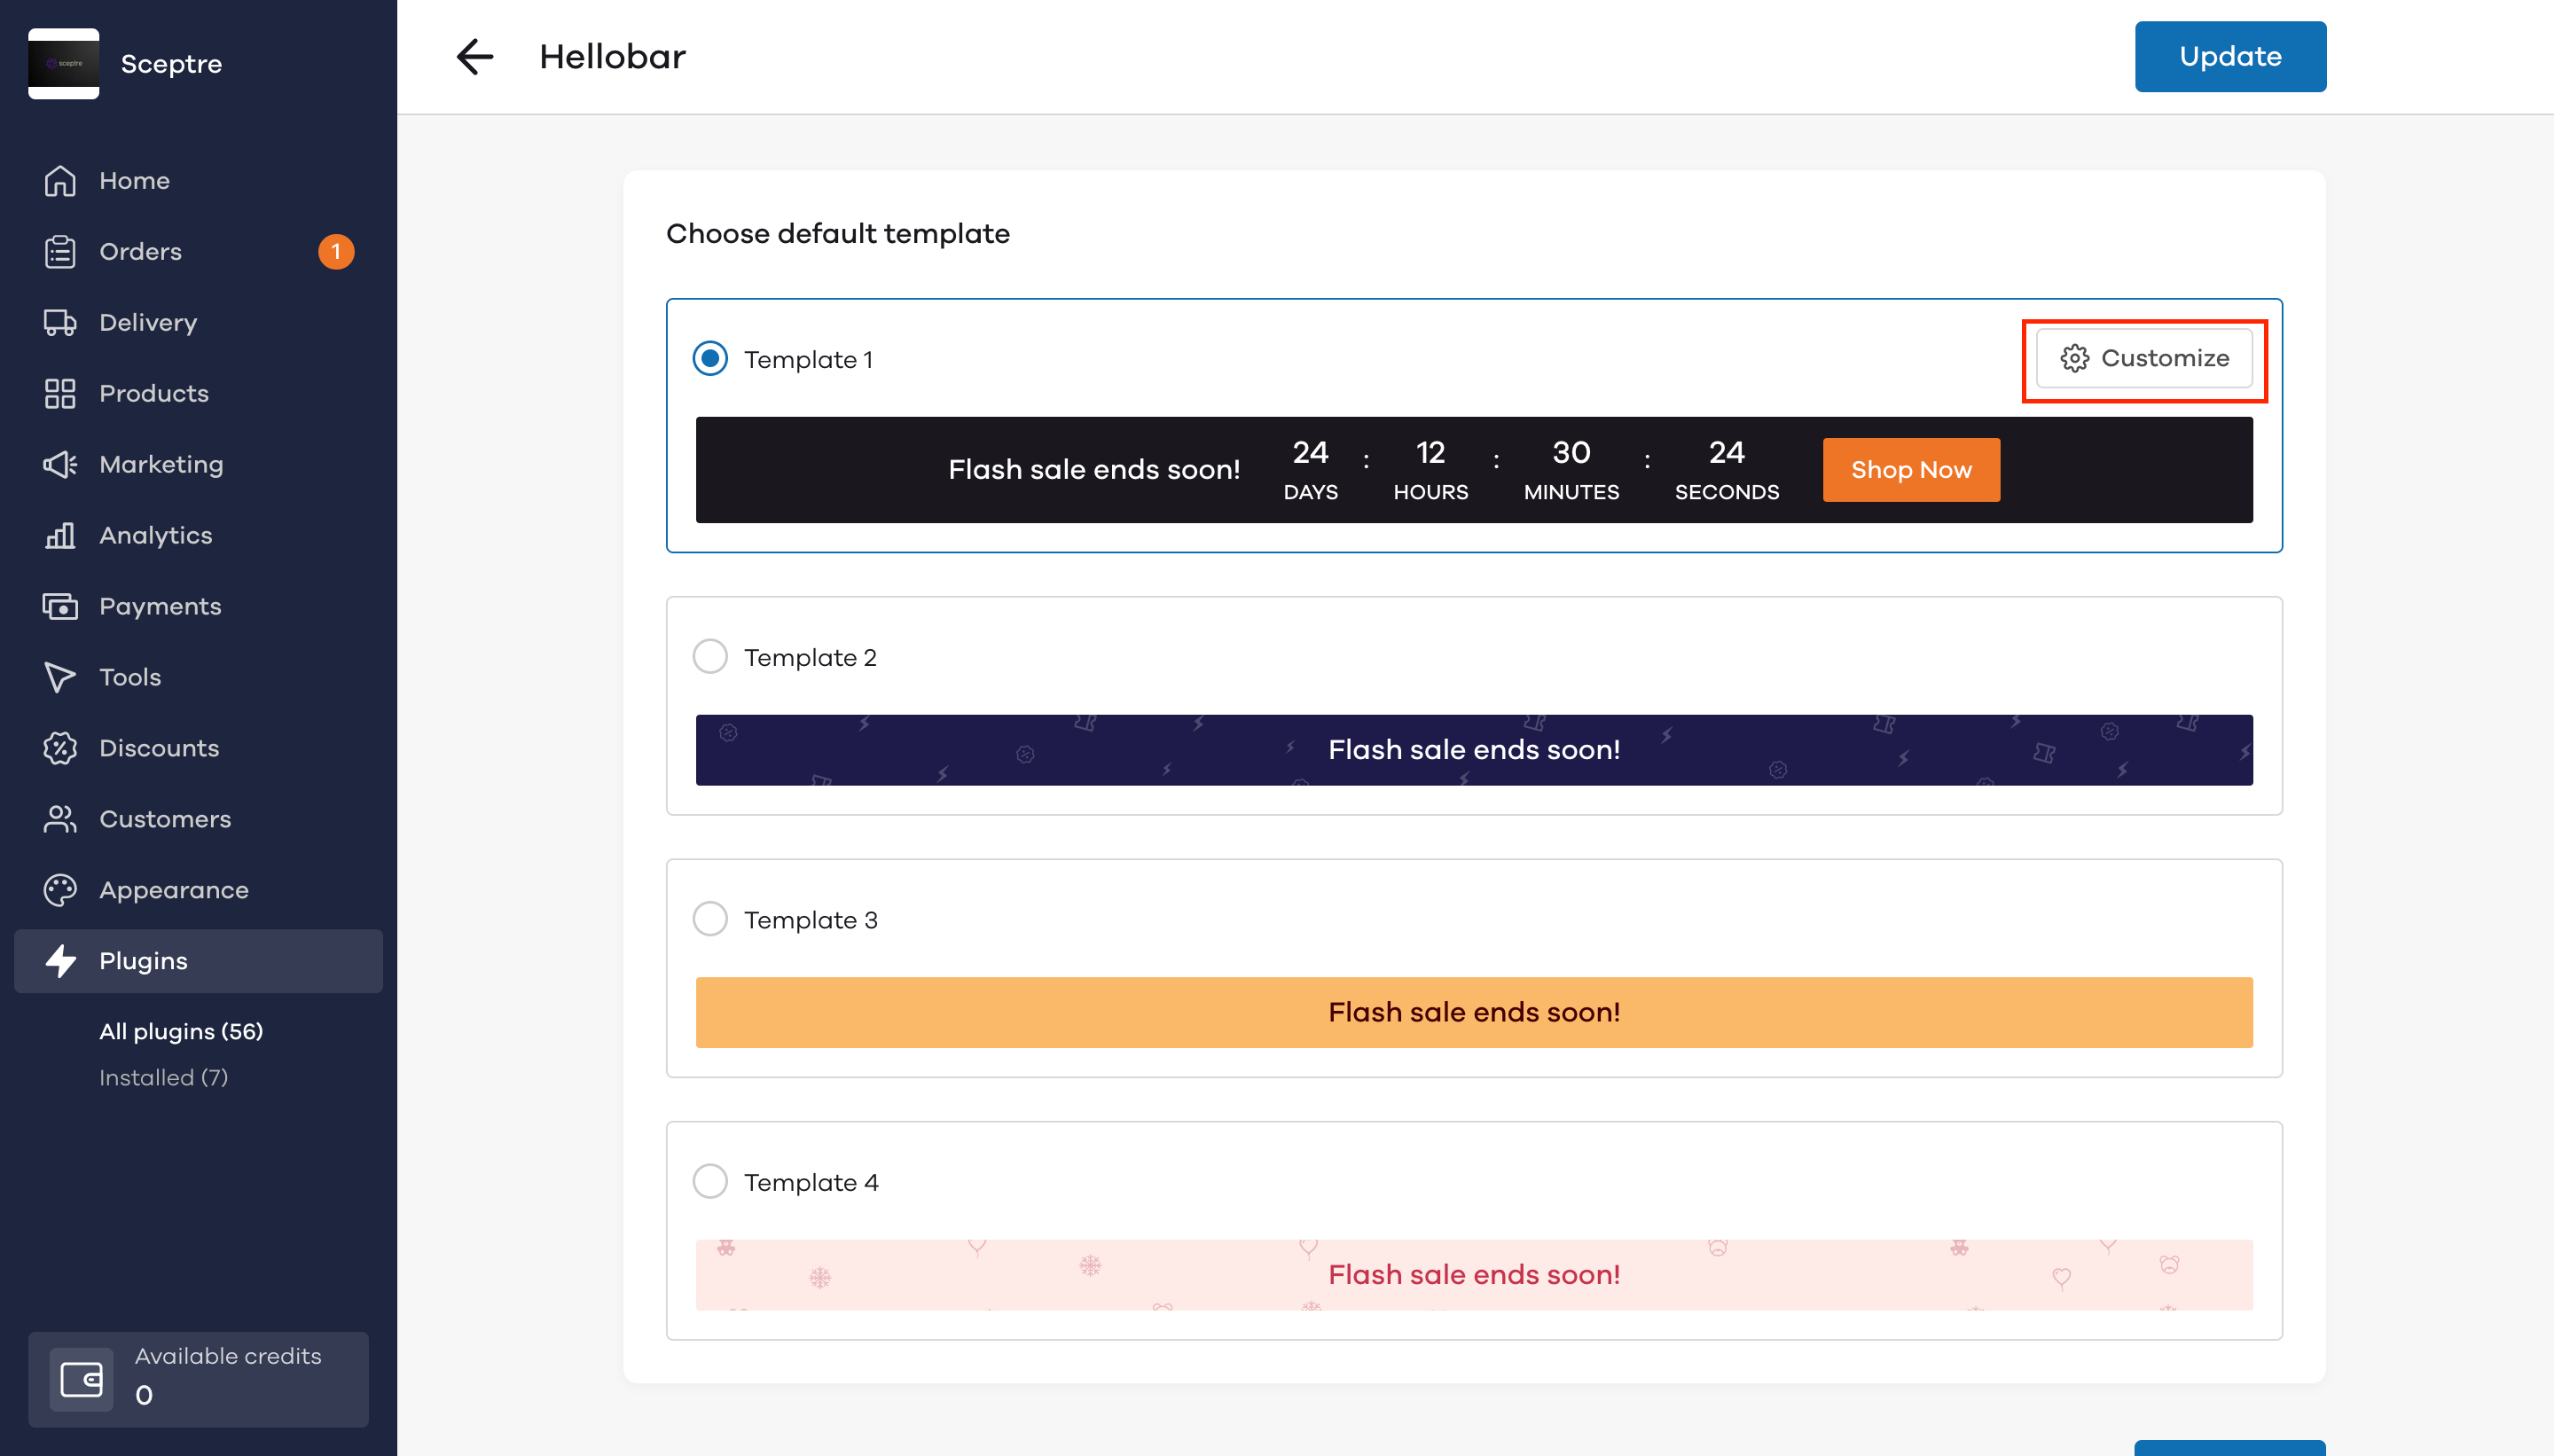
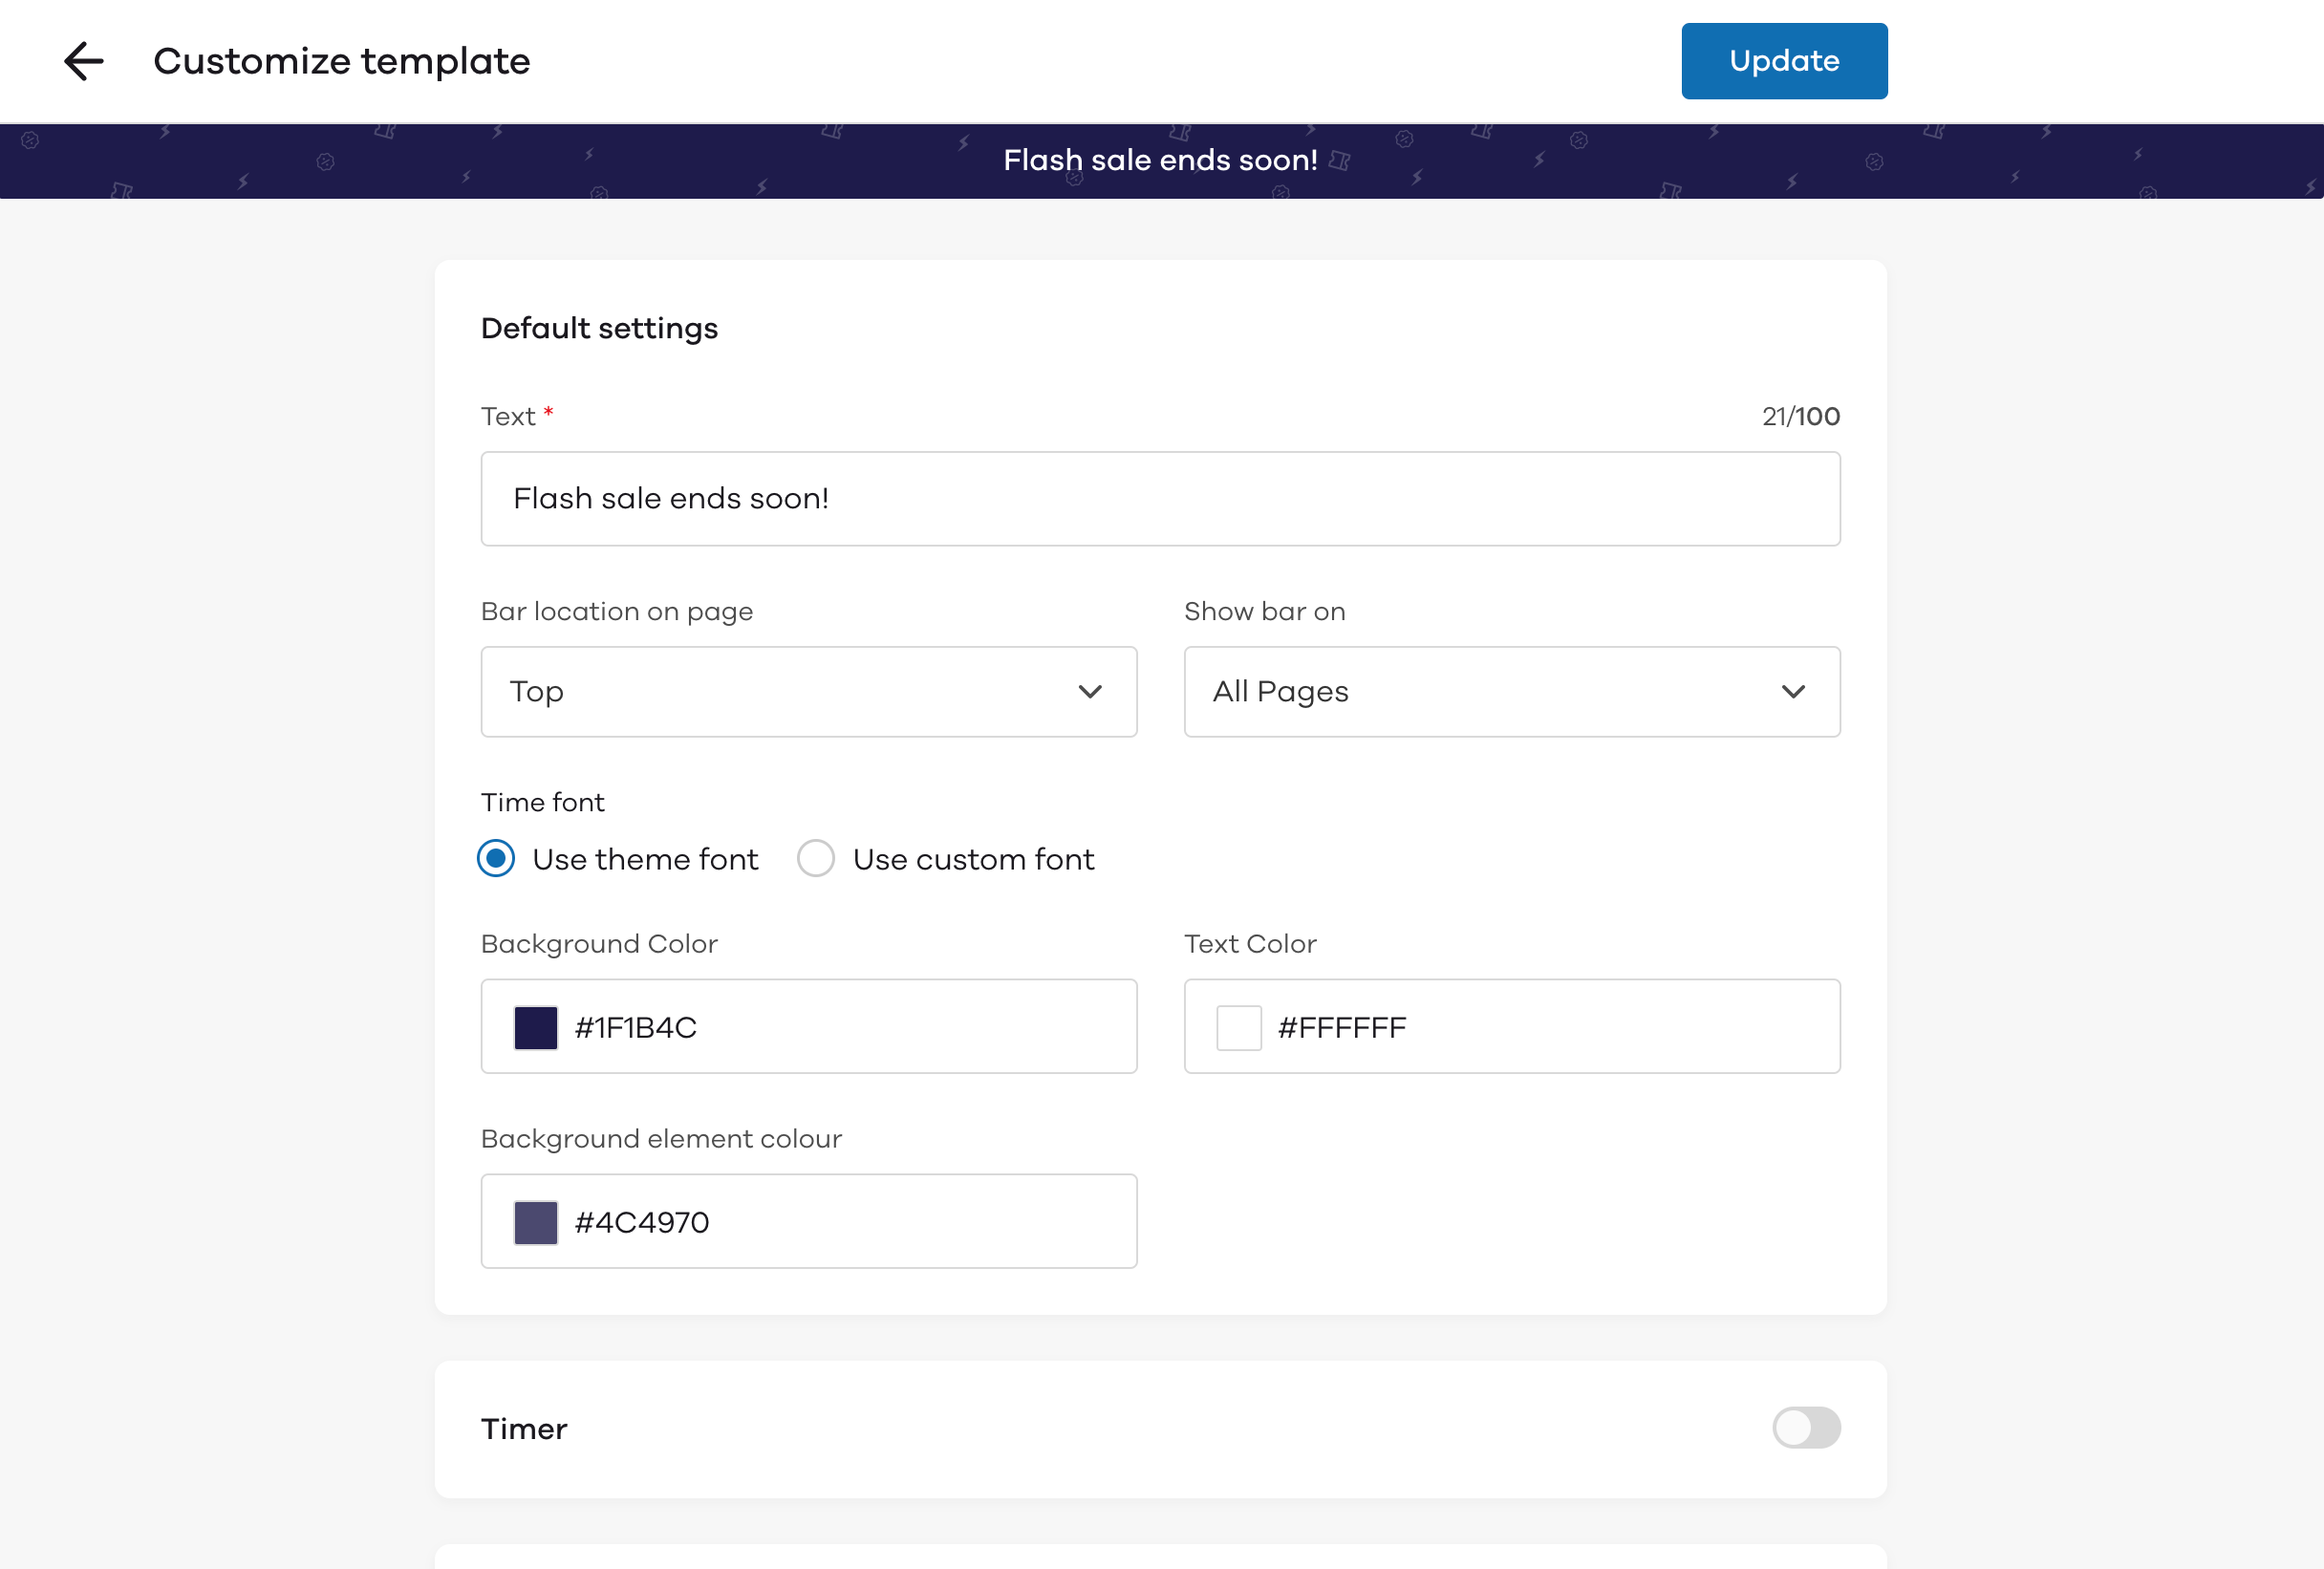
After clicking on Settings, the hellobar dashboard appears. Here you can choose the desired hellobar template. Once you've chosen your default template, click on Customize. Upon clicking on customize, the following screen appears.
How to edit the default settings?
In the default settings, you can choose to edit the following:
- Text: The user can edit the text that will be visible on the hellobar. To edit the text click on the textbox below Text.
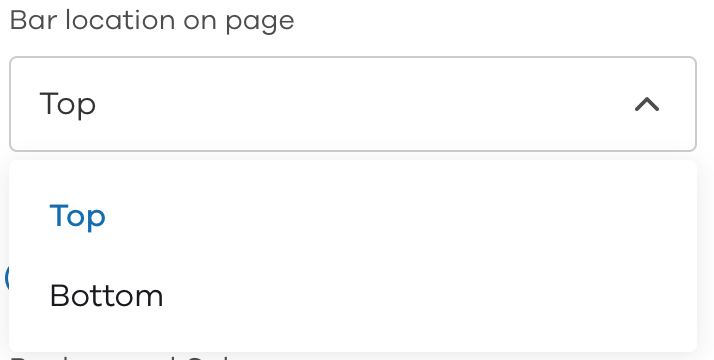
- Bar location on the page: To edit the position of the hellobar on the page, click on the button below Bar location on page. You can choose whether the hellobar will appear on the top or the bottom of the page.
- Show bar on: Here you can choose whether you want the bar to appear on all pages or only on the homepage. To choose the location, click on the button below
- Background Color: Here, you can edit the background color of the hellobar. To edit the color click on the color code given below Background color. Upon clicking the color code, the color picker will appear. You can choose the desired color or enter the hex code of the color based on your requirements.
- Text Color: Here, you can edit the text color of the hellobar. The procedure to edit the text color is similar to editing the background color.
- Background element color This option will only be available on templates 2 & 4. Here, you can edit the text color of the elements on the hellobar. The procedure to edit the text color is similar to editing the background color. P.S. an image of the elements in the hellobar is given below.

- (Note: The highlighted regions are the elements)
How to add a timer to the hellobar?
(Note: The text limit will be reduced if you choose to activate the timer on the hellobar)

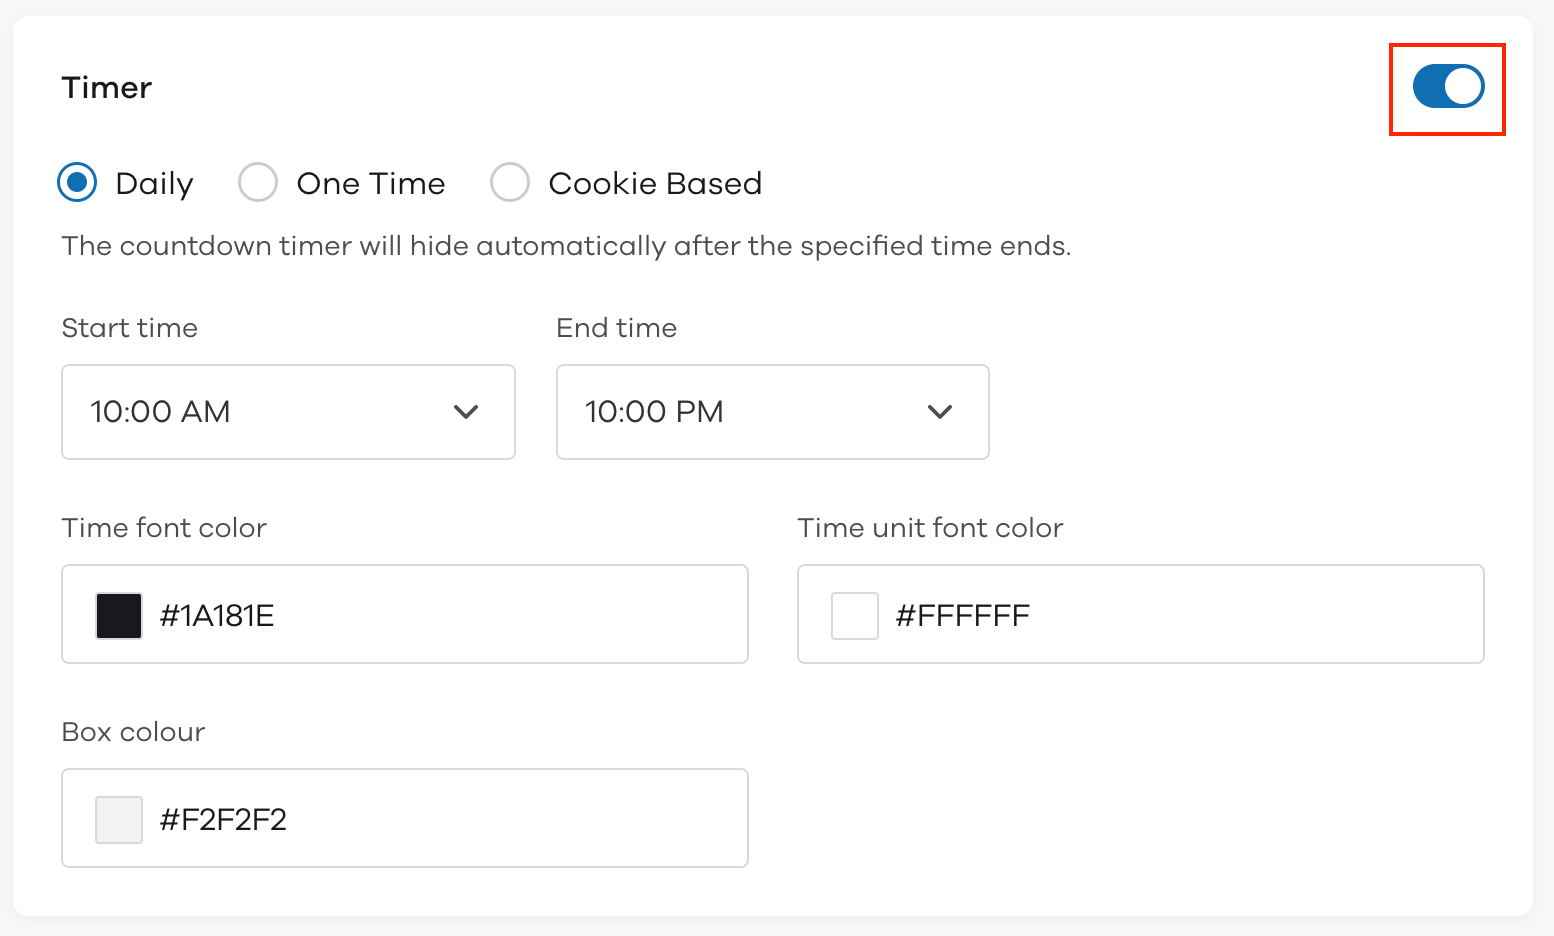
To add a timer to your hellobar, activate the toggle beside the timer. Upon activating the toggle, the following appears:
You can choose how often to show the timer on the hellobar:
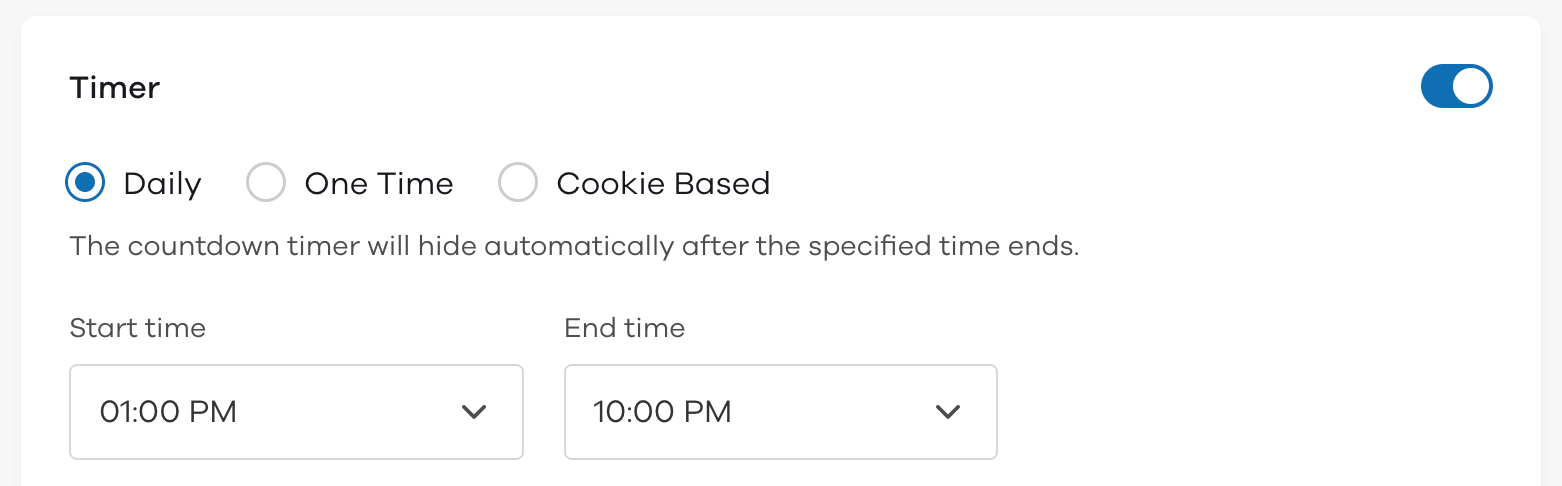
- DailyThe timer will be shown every day if this option has been selected. To choose the time frame within which you want the timer to appear, click on button below Start time and End time respectively. Upon clicking the button you will be able to edit the desired time frame.
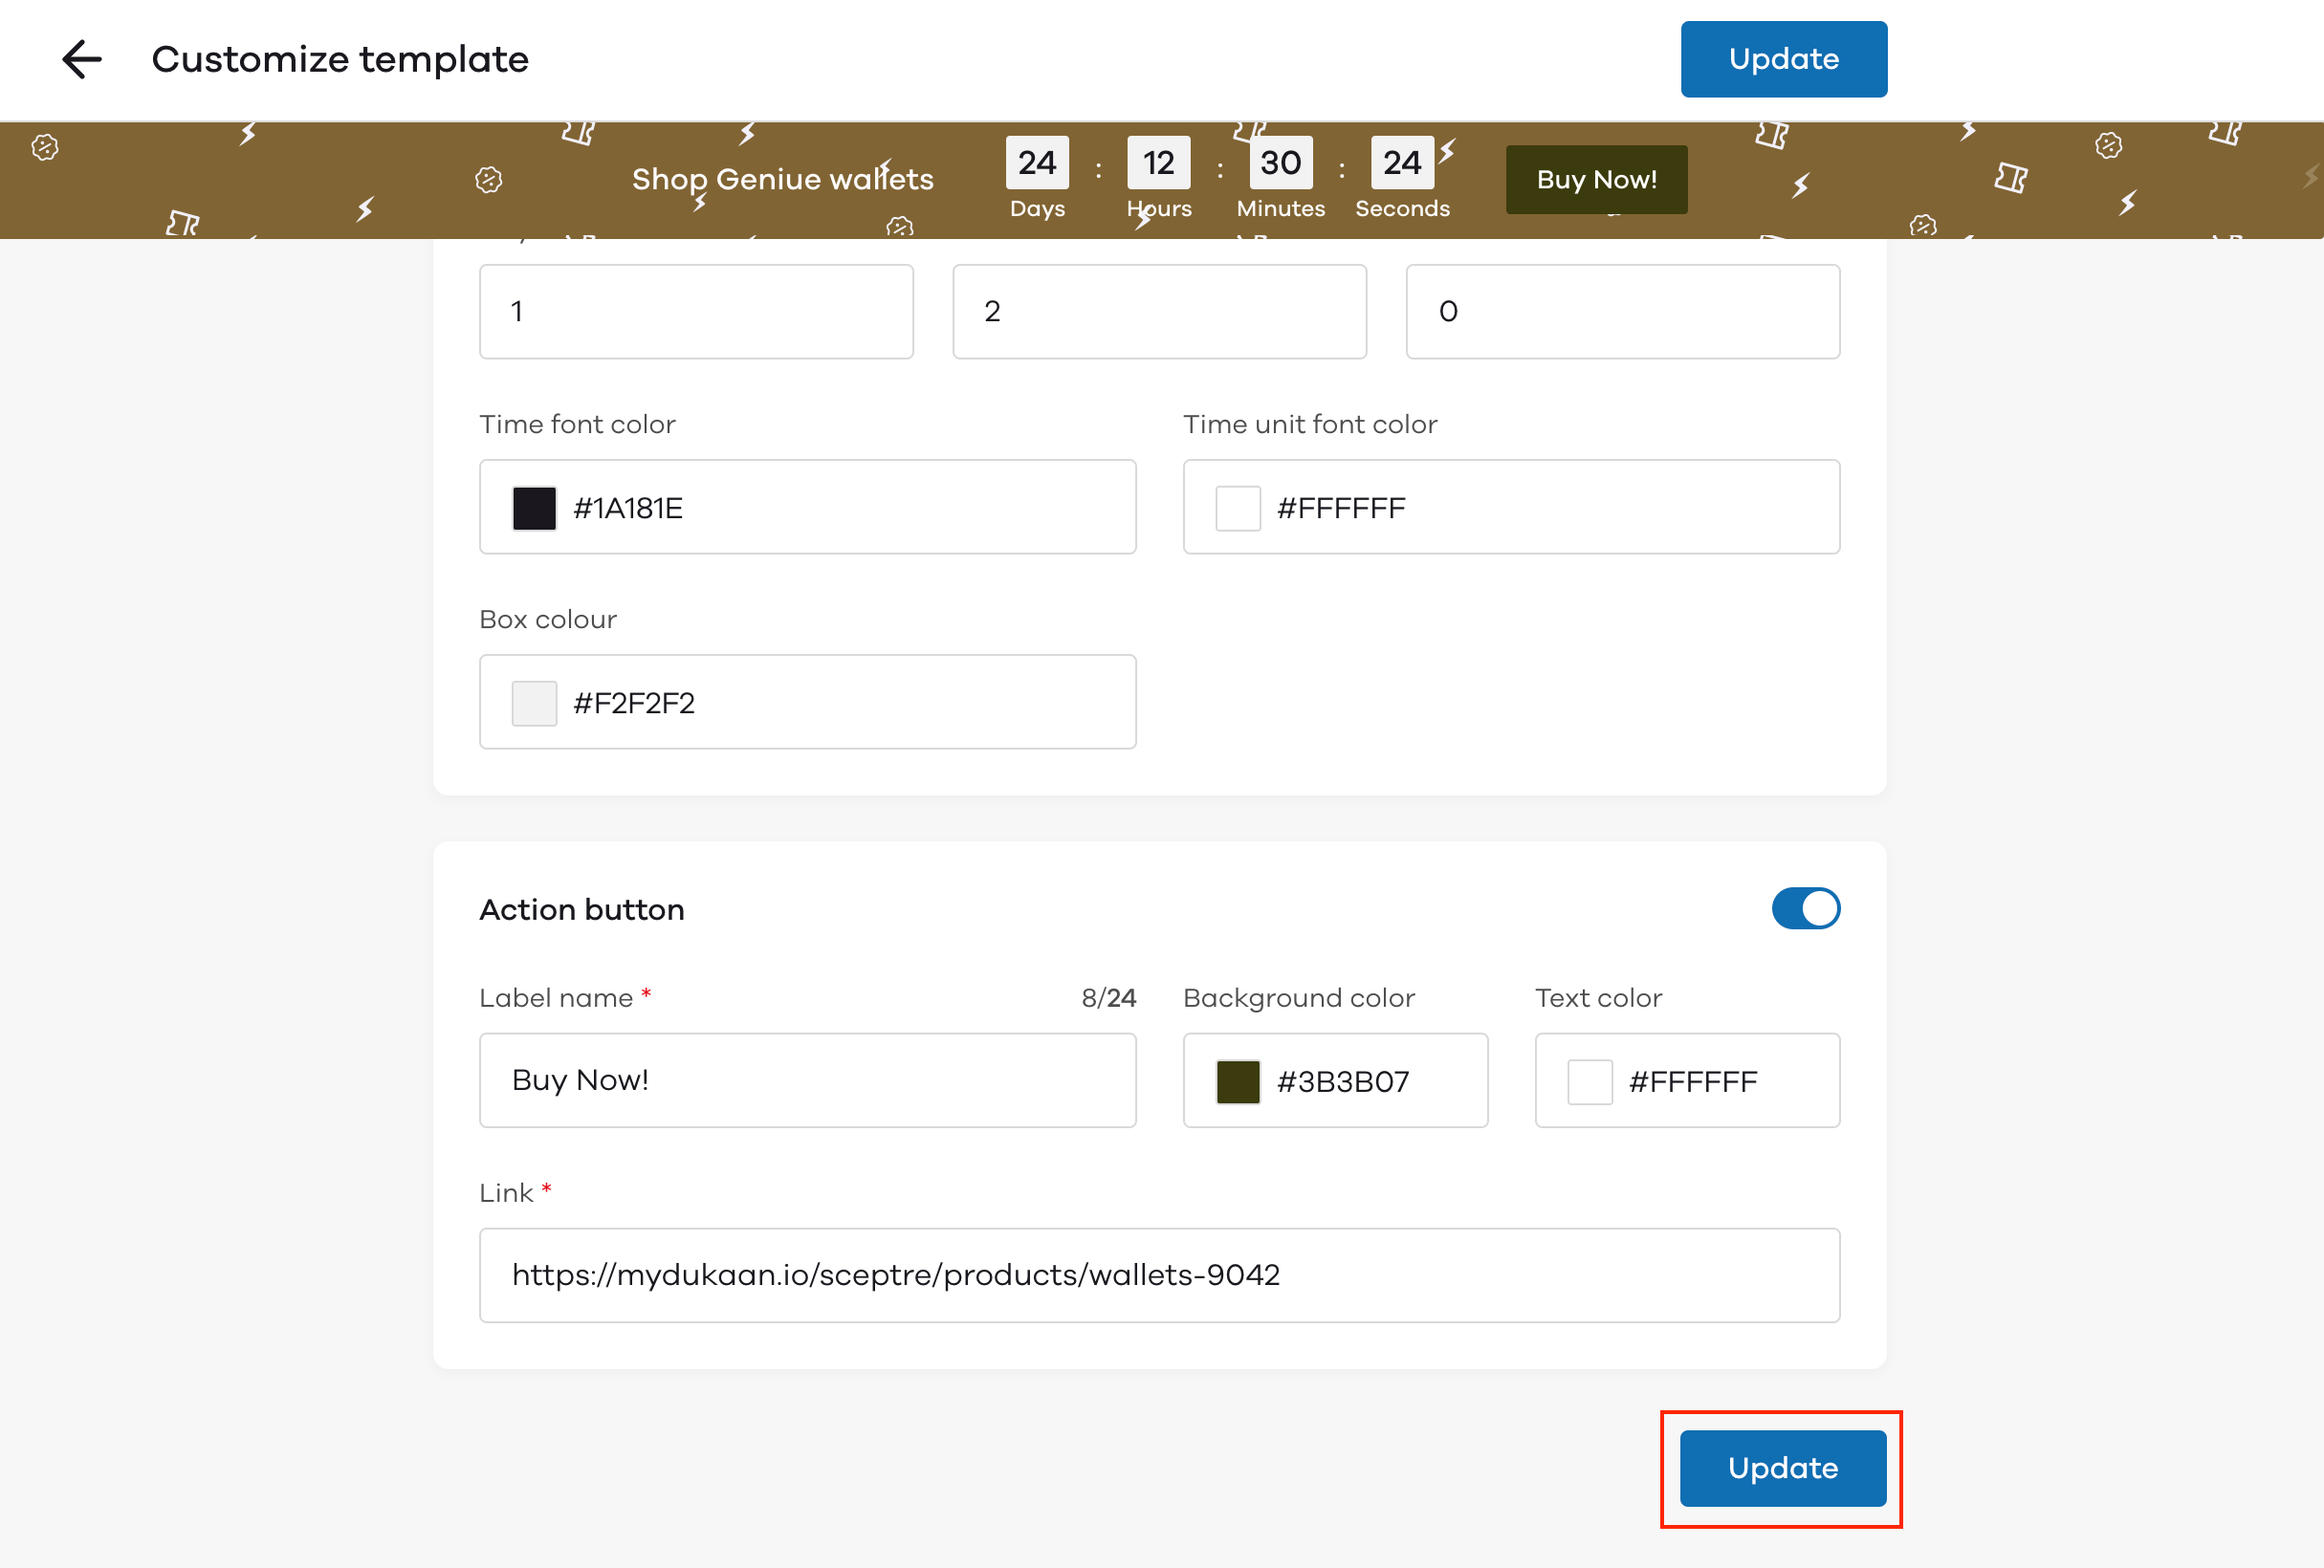
- One time If you choose this option, the timer will be visible only once within the time frame you specify. Here you can choose the total duration within which the timer will be present on the hellobar. You can enter the total number of Days, hours, and minutes within which the timer will appear, by entering the details in the textbox given below each field.
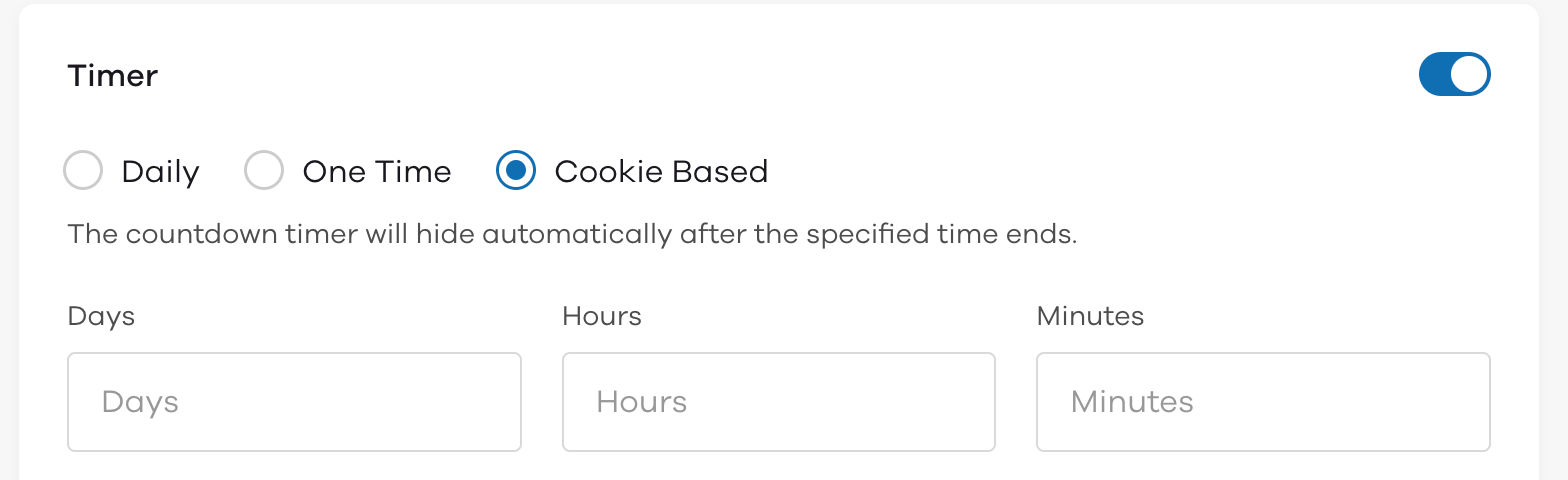
- Cookie-based. The timer will be shown only to the sellers whose cookies have been activated. Here, you can also enter the duration of Days, hours, and minutes by entering the values in the textbox given below each of the respective fields.
In each of the options, you can edit the color of the Time font color, time unit font color, and box color. To edit the colors, click on the color code given below the above-specified fields. Upon clicking the code, a color picker will appear wherein you can choose the desired color or you can also enter the hex code of the color based on your requirements.

How to add an action button to your hellobar?
(Note: The text limit will be reduced if you choose to activate the action button on the hellobar)
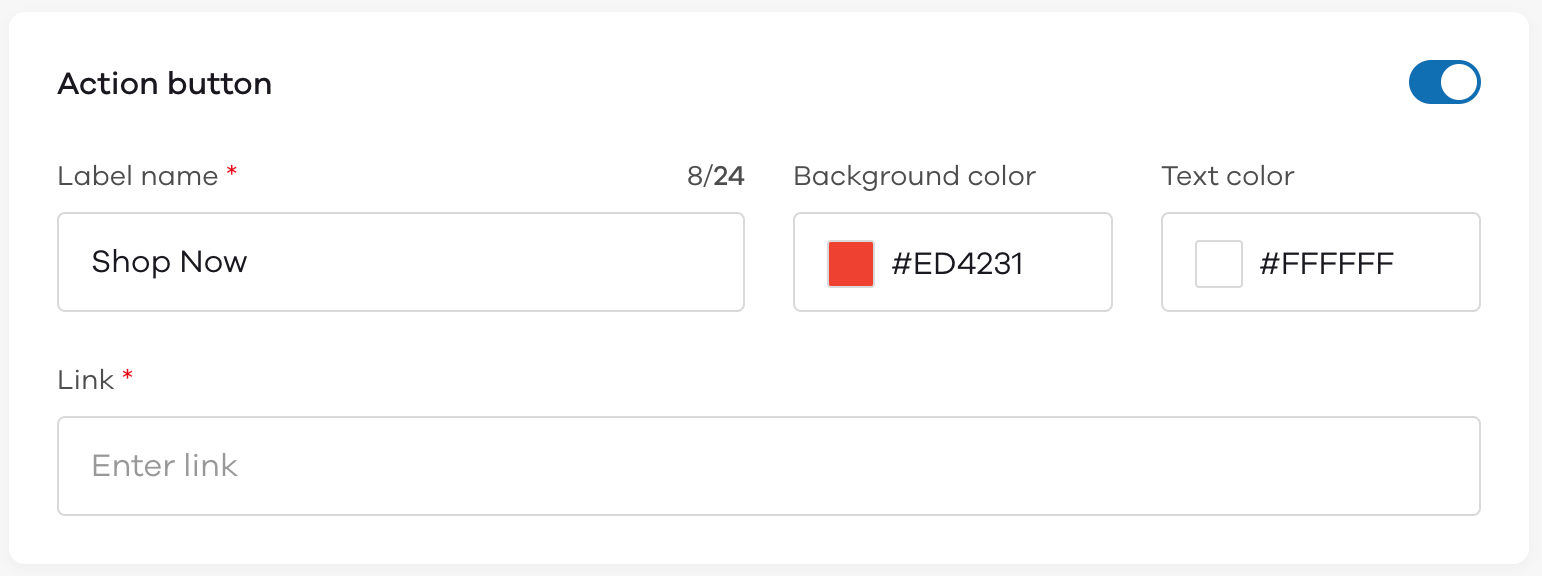
Upon activating the action button you can edit the following:
- Label name The label name can be entered in the textbox below the Label name.
- Background color, Text color To edit the background and text color, click on the color code below the respective fields. Upon clicking on the color code a color picker will appear wherein you can either select the color you want in the spectrum or you can also enter the hex code of the desired color.
- Link In this section, you can enter the link to which you want the customer to be redirected to, upon clicking it. The link needs to be entered in the textbox below
After you have entered the required details, click on Update.
Upon clicking on Update, your storefront will have a hellobar present in the location you have specified.
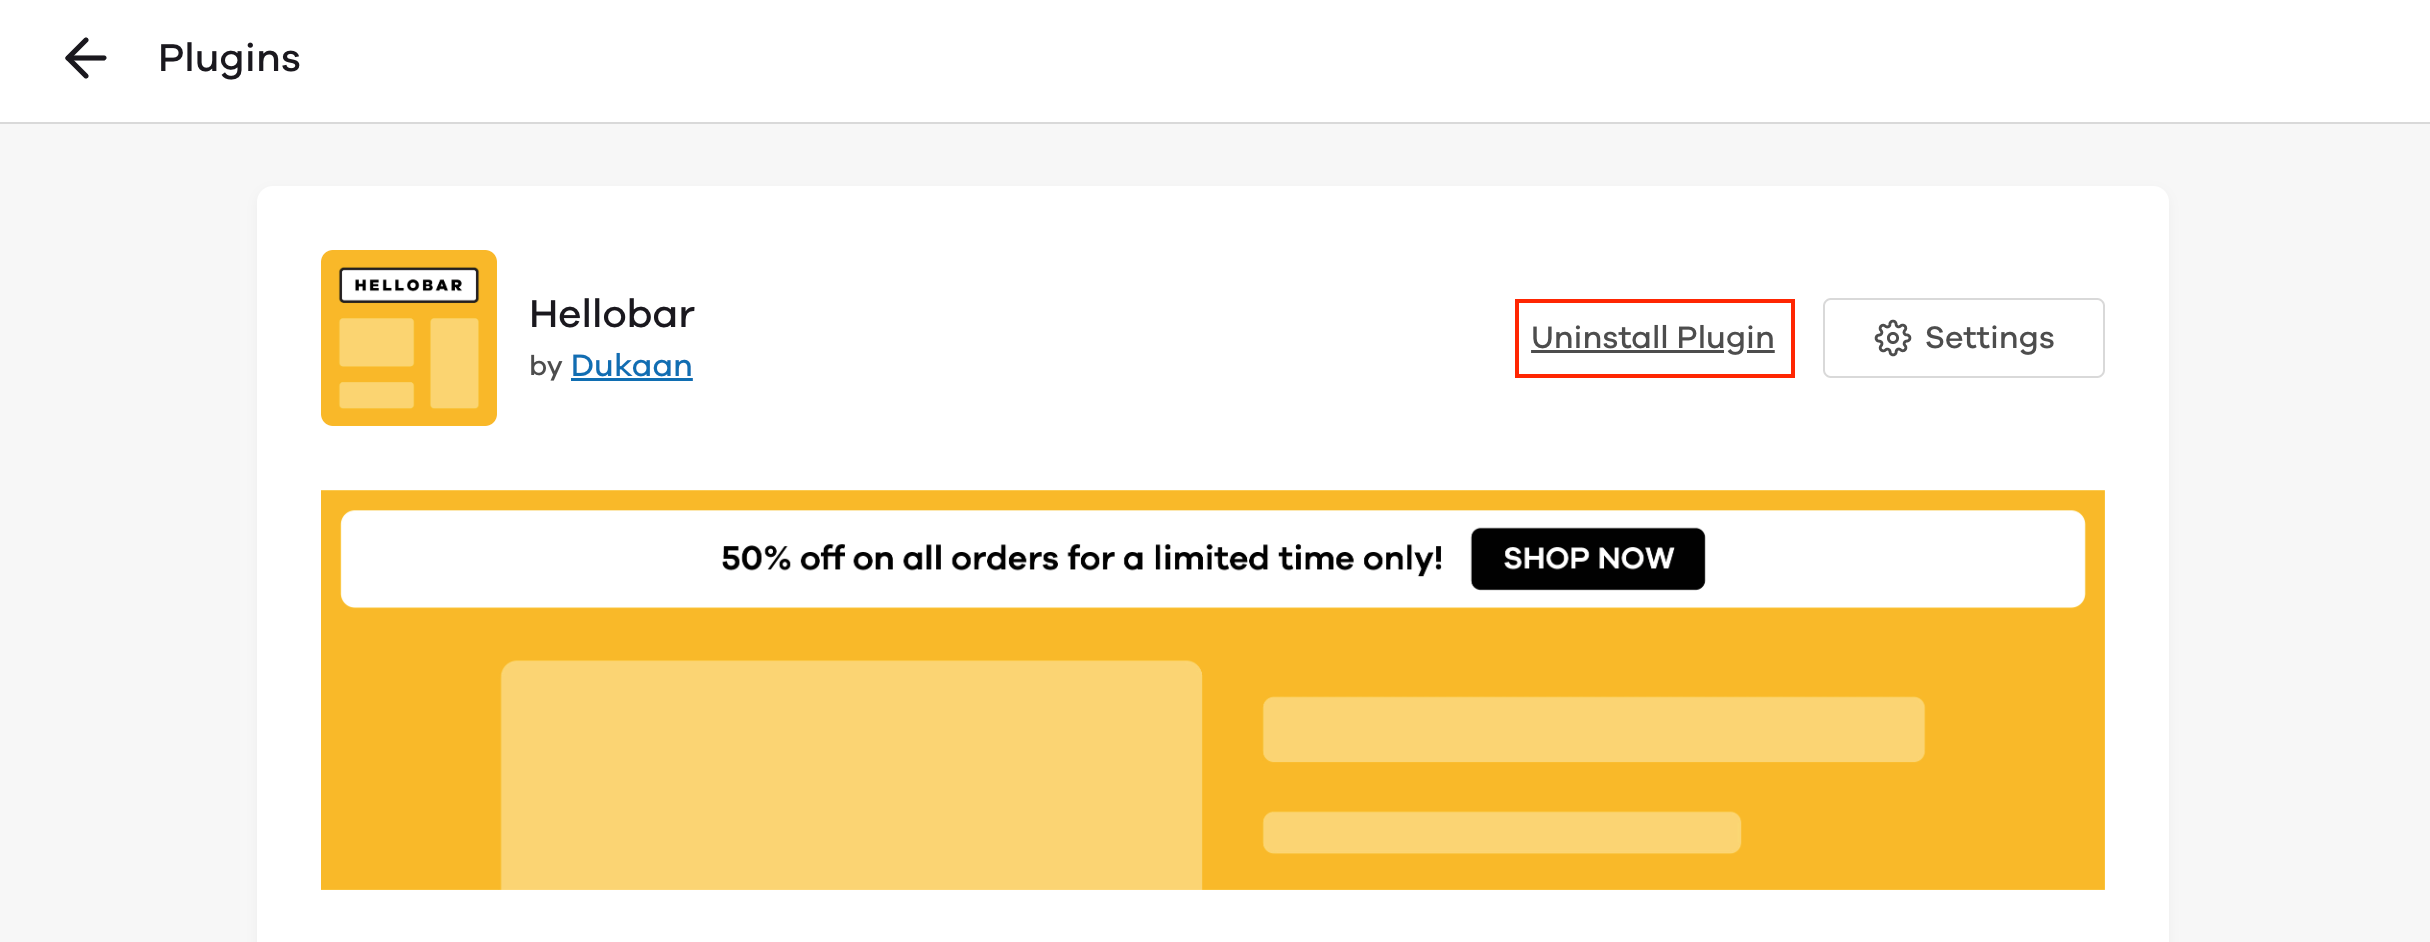
How to uninstall the plugin?
To uninstall the plugin; First, go to the Hellobar plugin page. In the plugin page click on Uninstall Plugin.
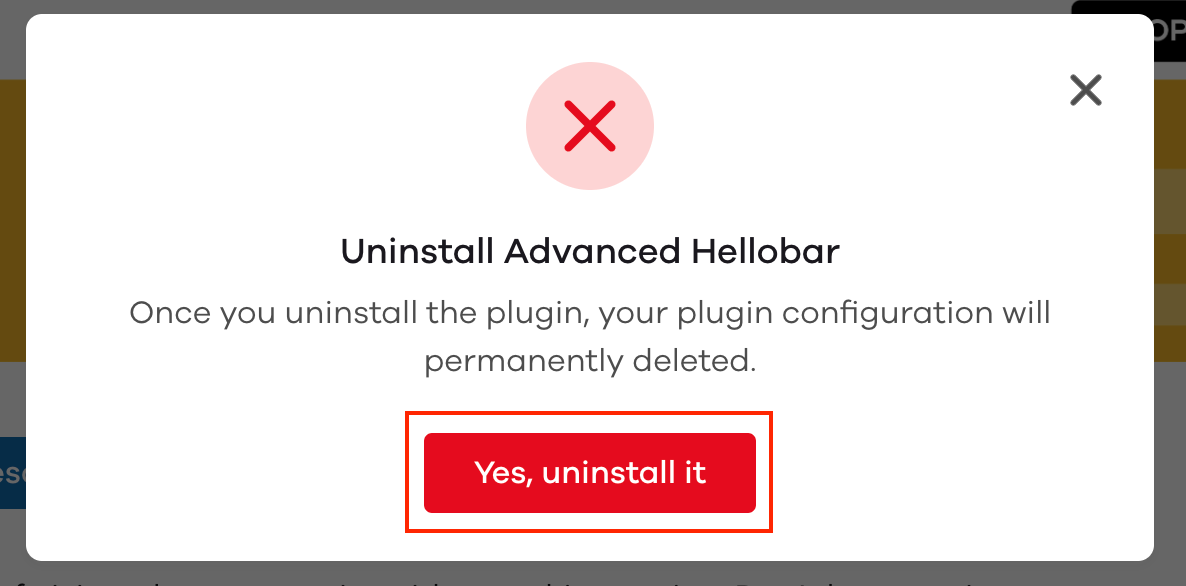
Upon clicking on Uninstall plugin, you will be informed that all of your plugin configurations will be permanently deleted. If, you still wish to uninstall the plugin, click on Yes, uninstall it.
Video Tutorial:
Read more:
How to use the Wishlist plugin?