What is Google Merchant Center?
Google Merchant Center lets you manage how your online product inventory appears on Google. Upon installing the plugin, you can start uploading product feeds that can be linked to your Google Ads account for marketing with Google Shopping Ads.
How to install the plugin?
To install the plugin, first; go to the plugins section and search for "Google merchant center". When the plugin appears, click on Install plugin. Upon installing the plugin, click on Settings.
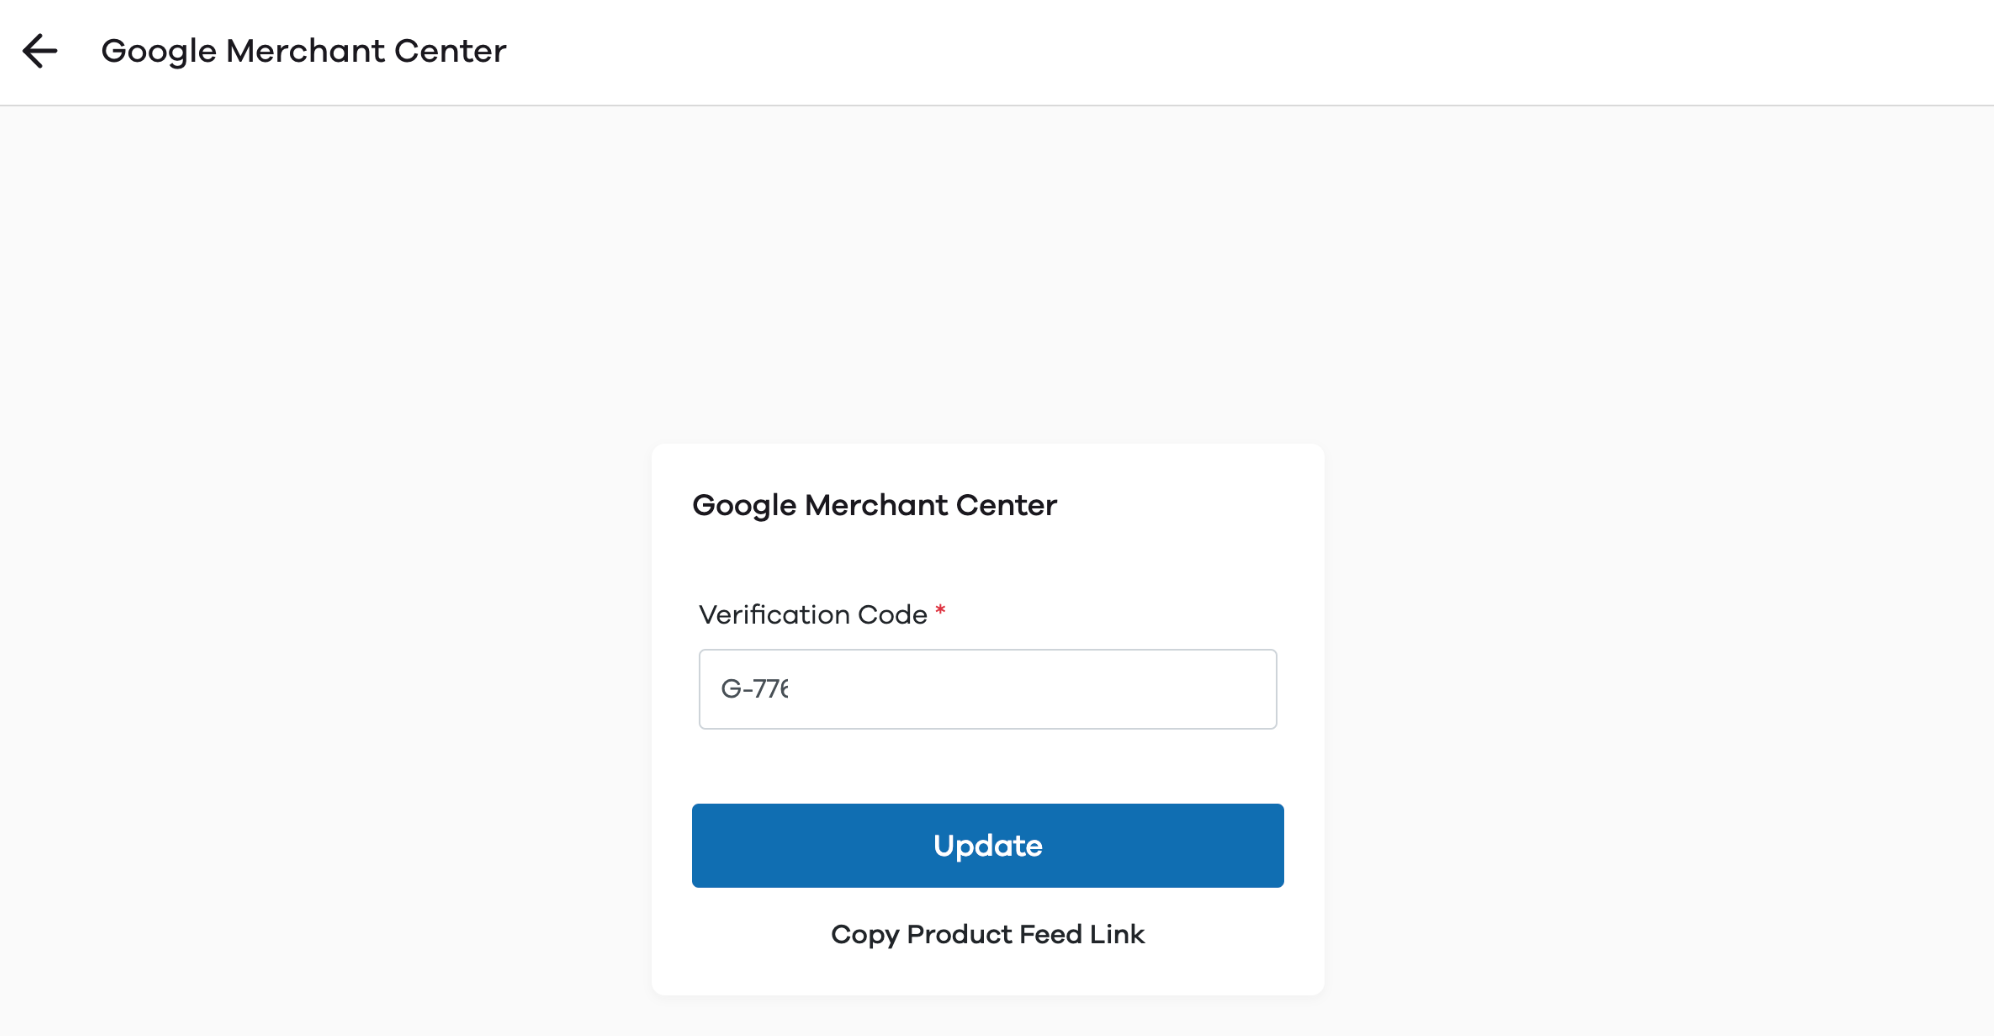
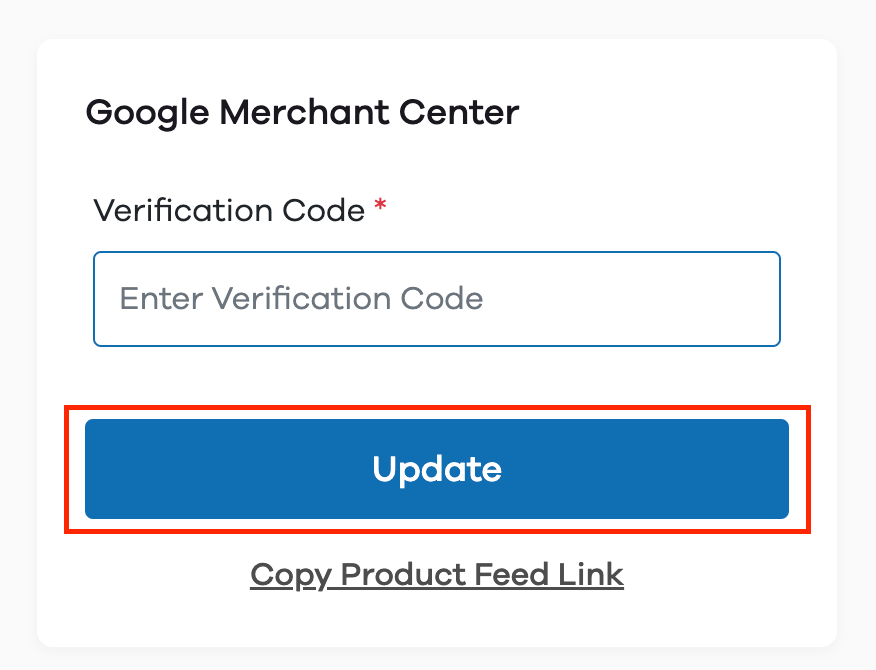
Upon clicking on Settings, the following screen appears.
How to get GMC verification code?
- Sign in to your Google Merchant Center account.
- From the navigation menu, click the tools icon Merchant Center Settings [icon].
- Select Business information under “Tools”.

- Click the Website tab
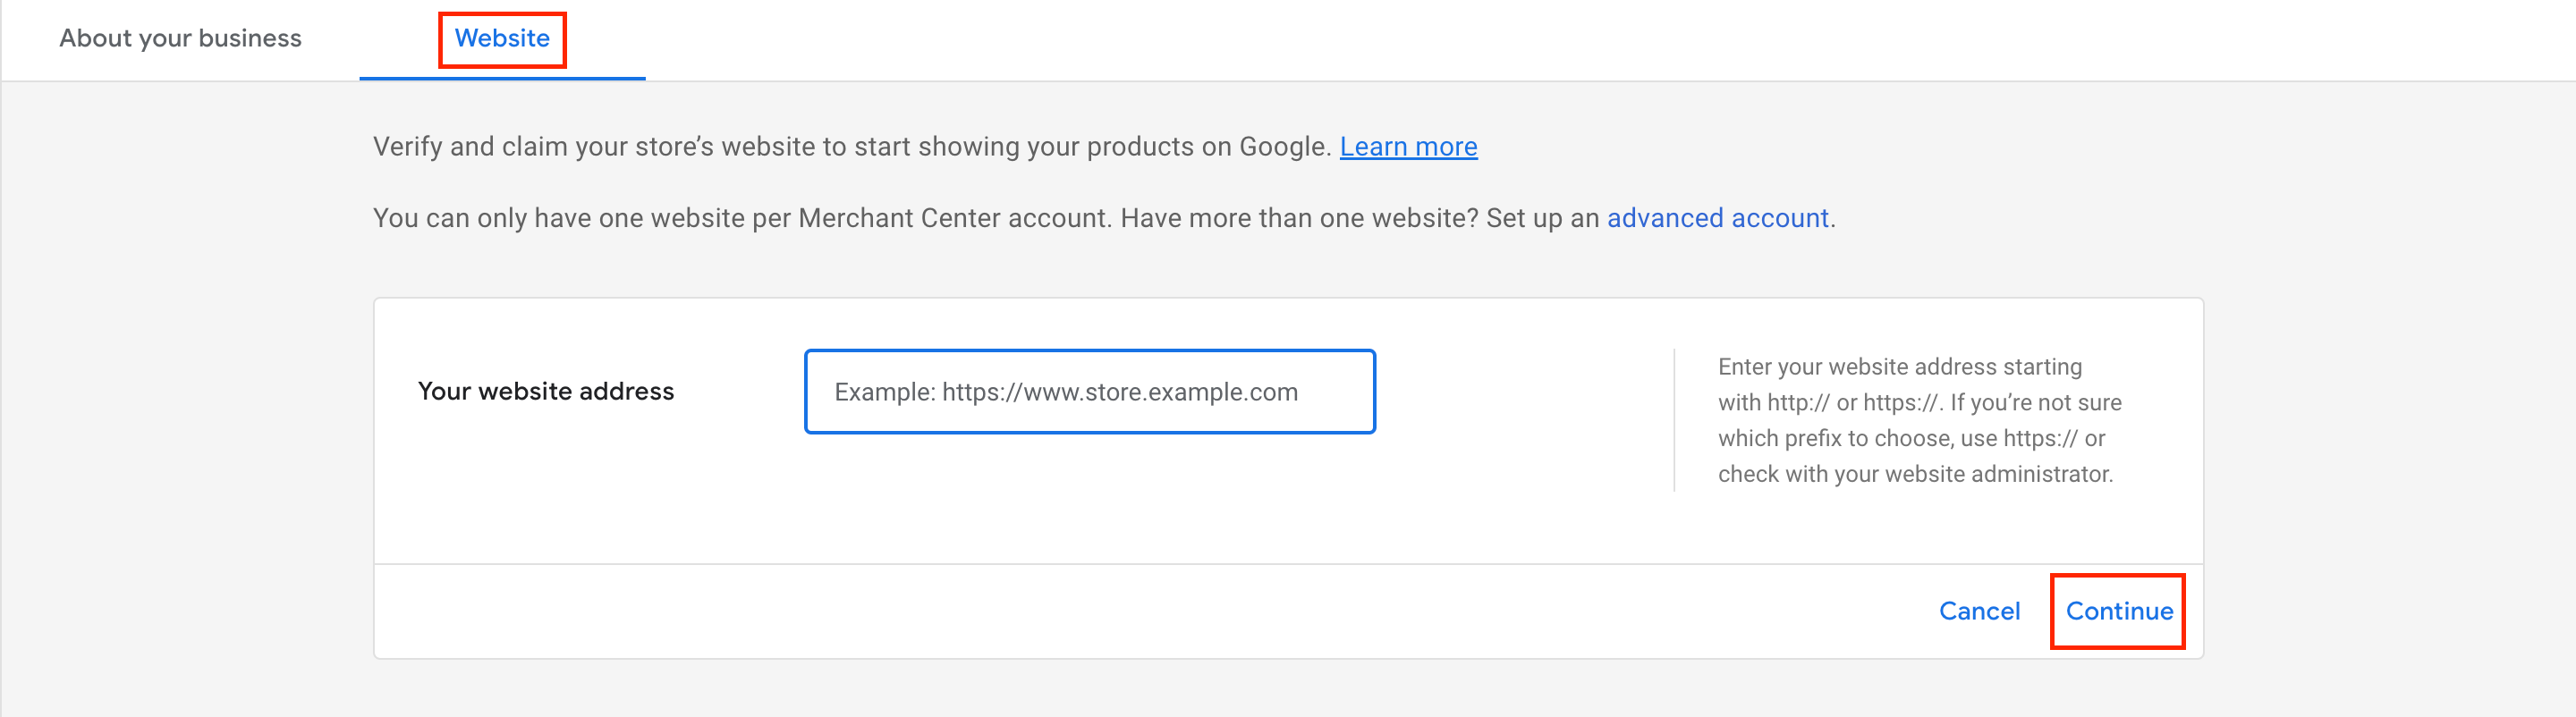
- Enter the URL in the textbox beside Your website addresss. (Note: In order to use Google Merchant Center, you will need a custom URL. mydukaan.io/store_name will not work)
- After you've entered the URL, click Continue.
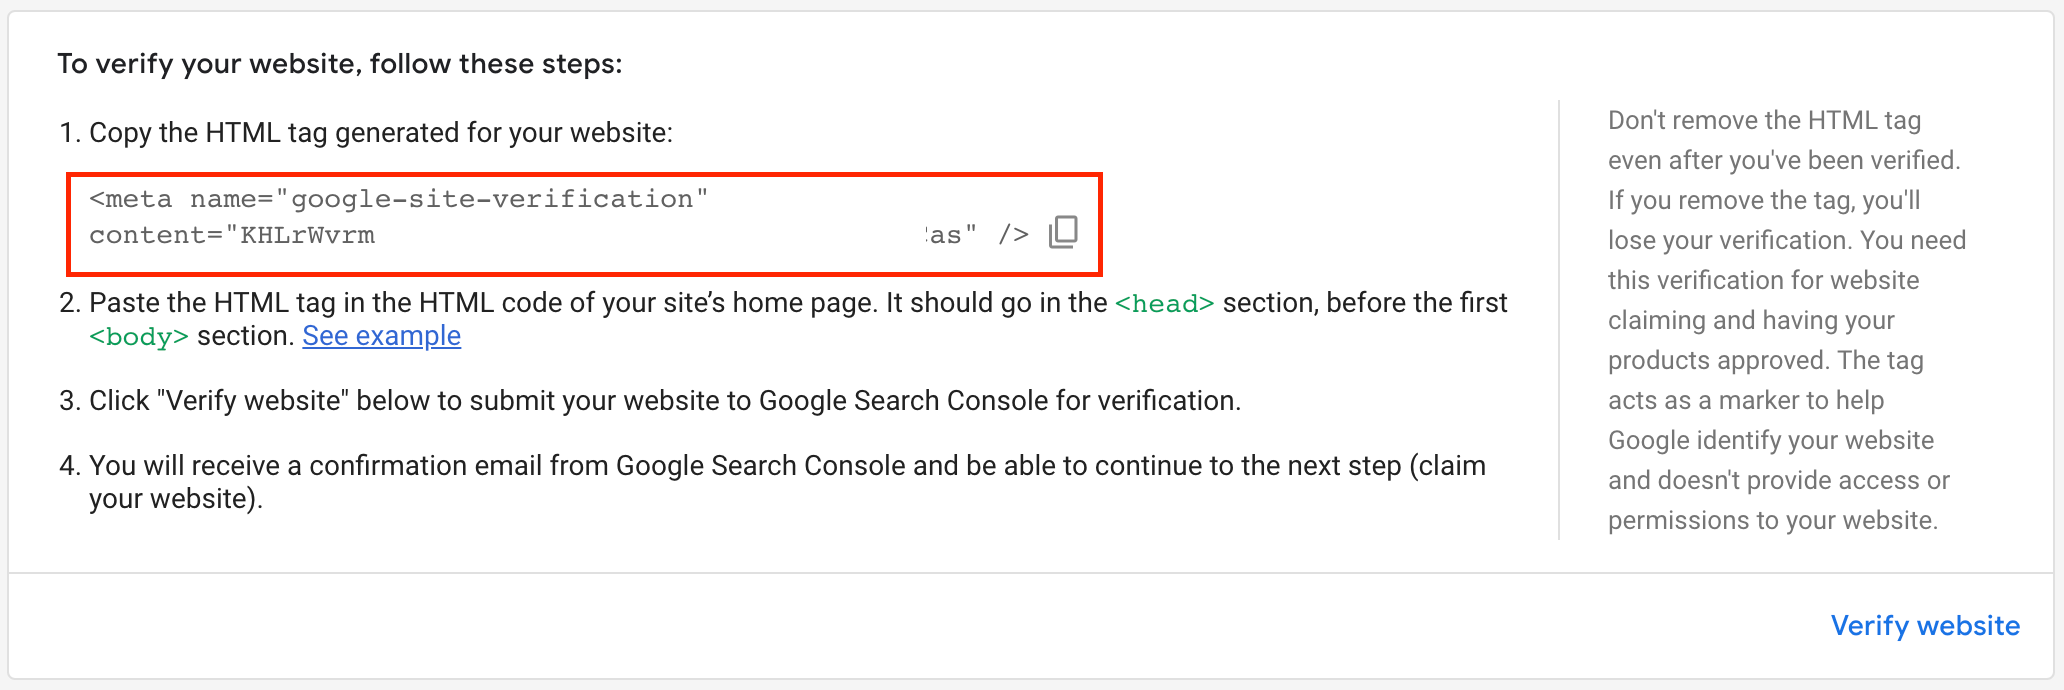
Once you've clicked on Continue, if your website is unverified and unclaimed, you will get an option to Verify your website. Here, select the method Add an HTML tag or upload an HTML file to your website.
Upon selecting the above method, you will get an option to copy the HTML tag for your website. Click on the Copy to clipboard button.
Now that you have connected your account to Google merchant center, you will need to enter the products onto the merchant center.
To enter the products onto the product feed, click on Copy Product Feed Link. Upon clicking it, a link will be copied to your clipboard.
The link consists of the product feed which is in the format required by GMC.
How to enter the product feed using the link provided by Dukaan?
New user:
First, login to your account on Google merchant center. After logging in to your account, click on Products.
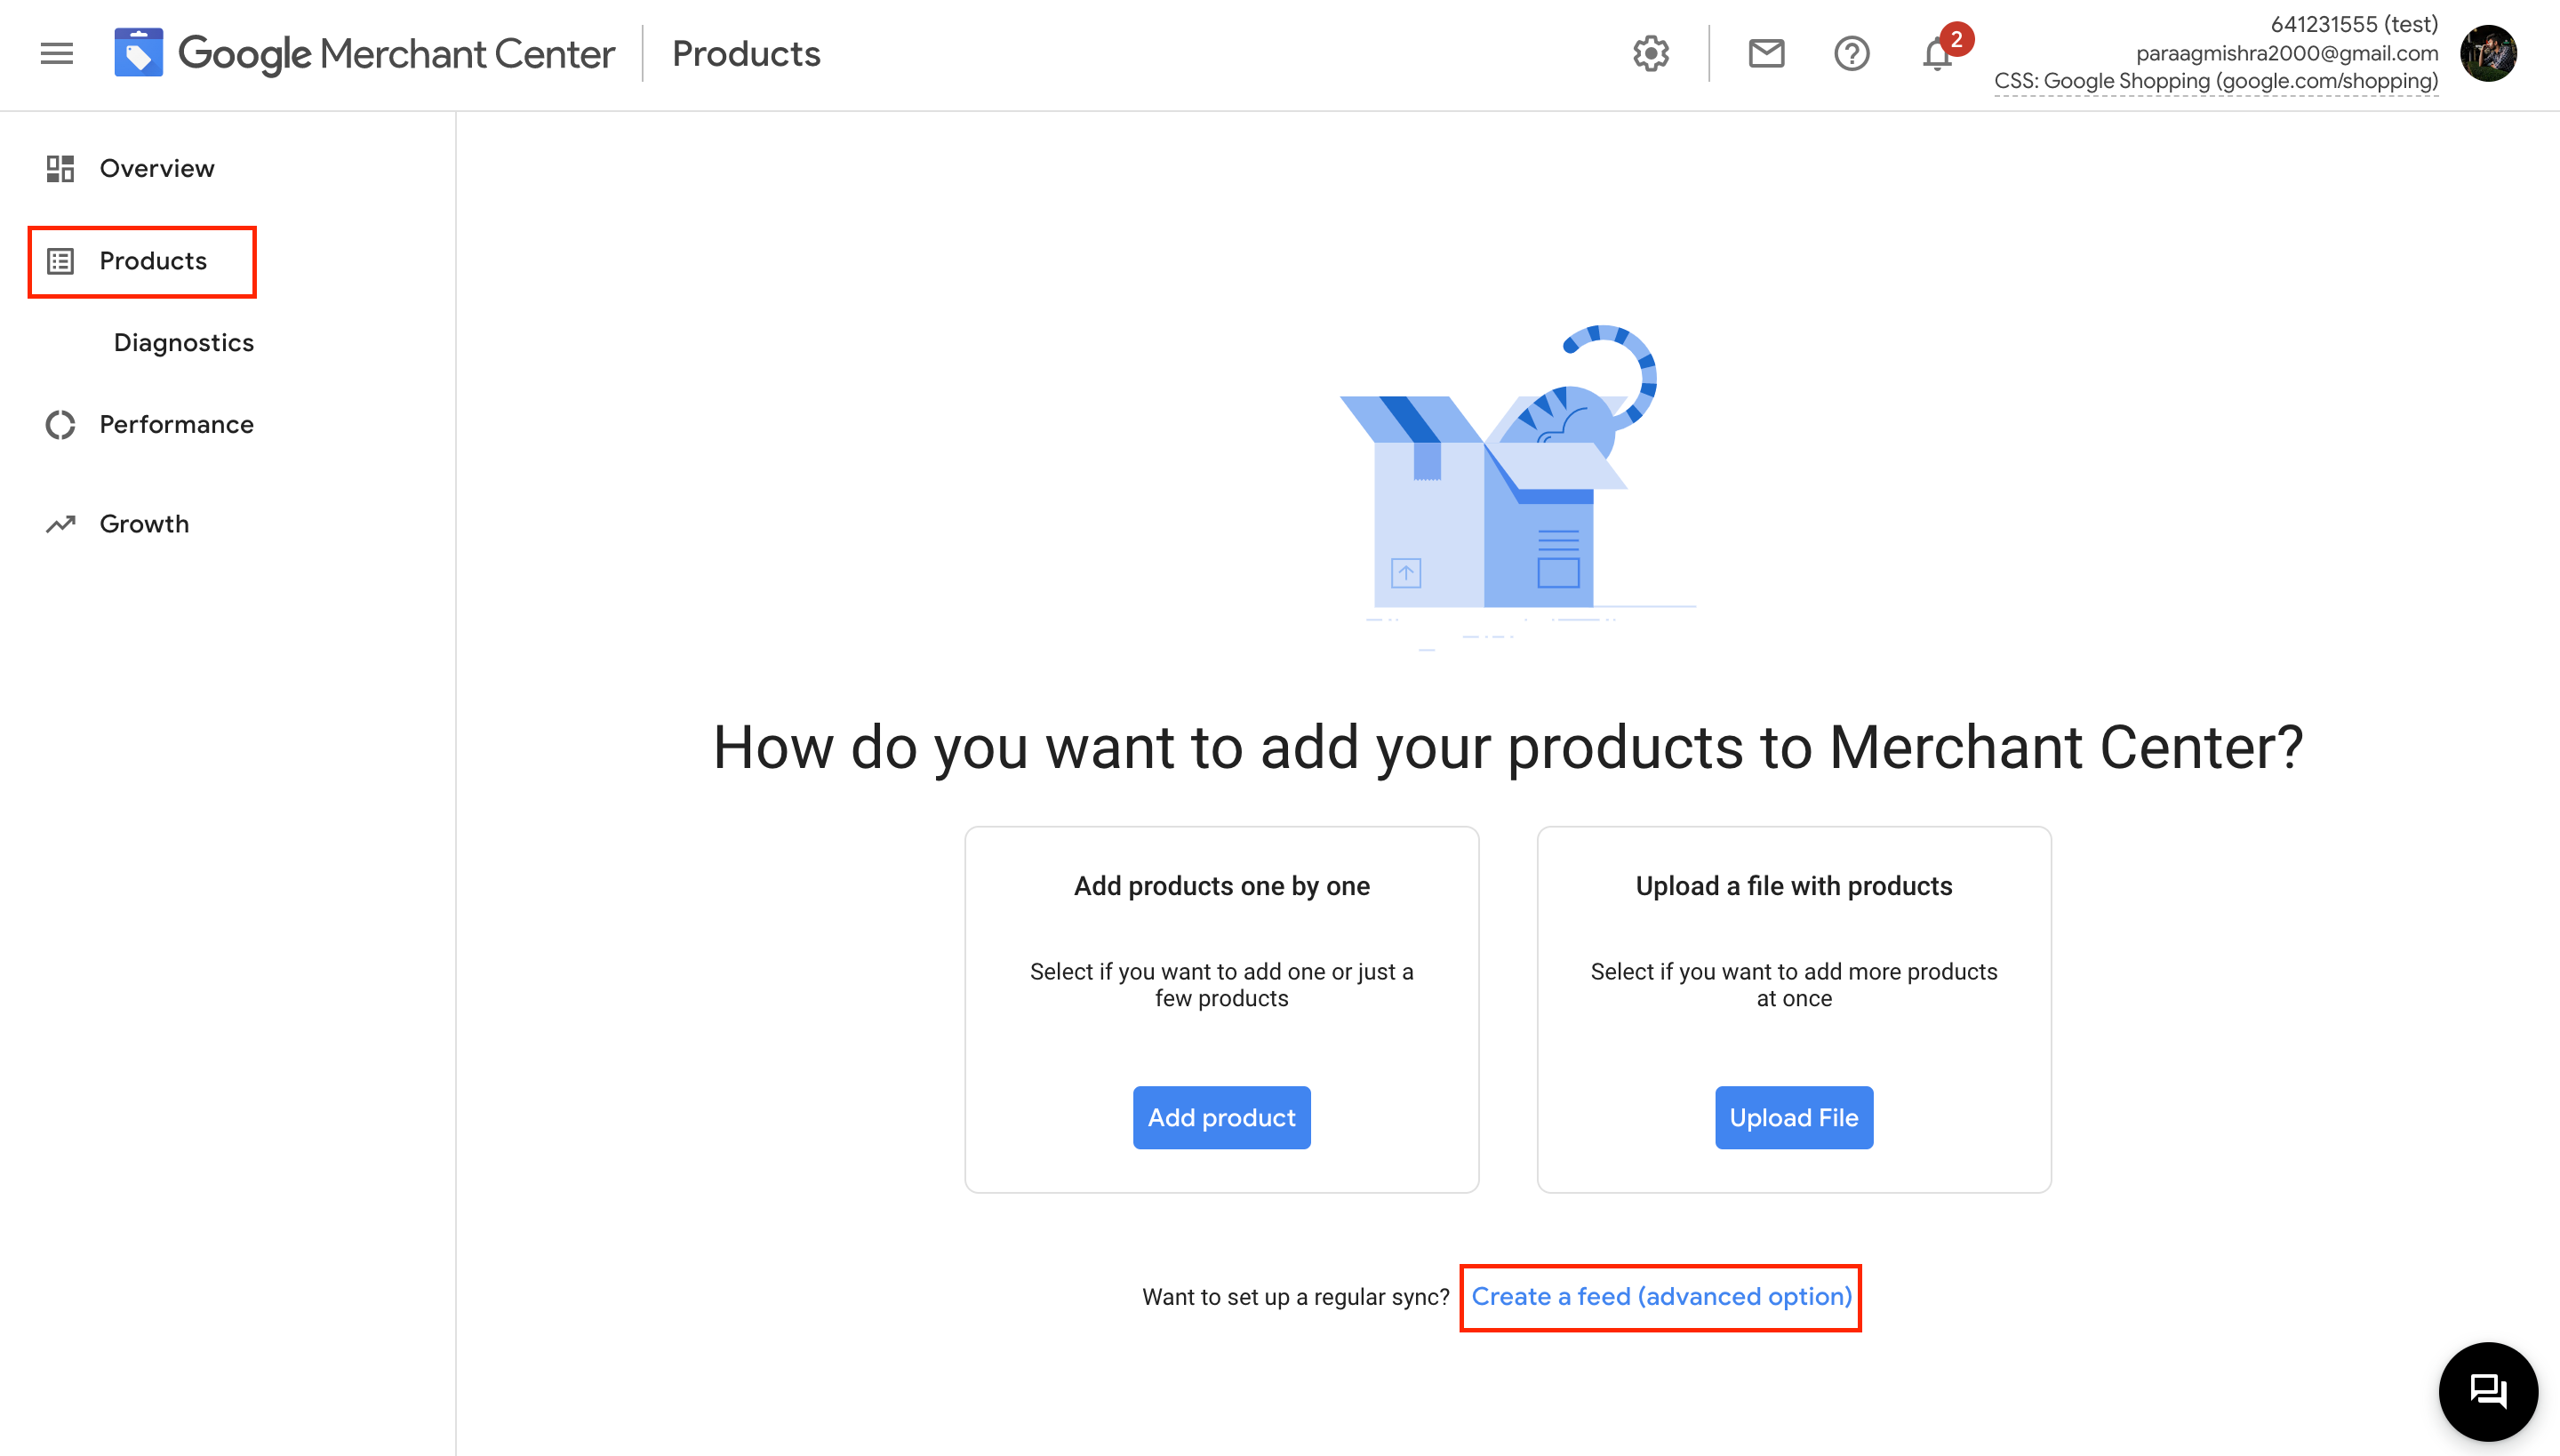
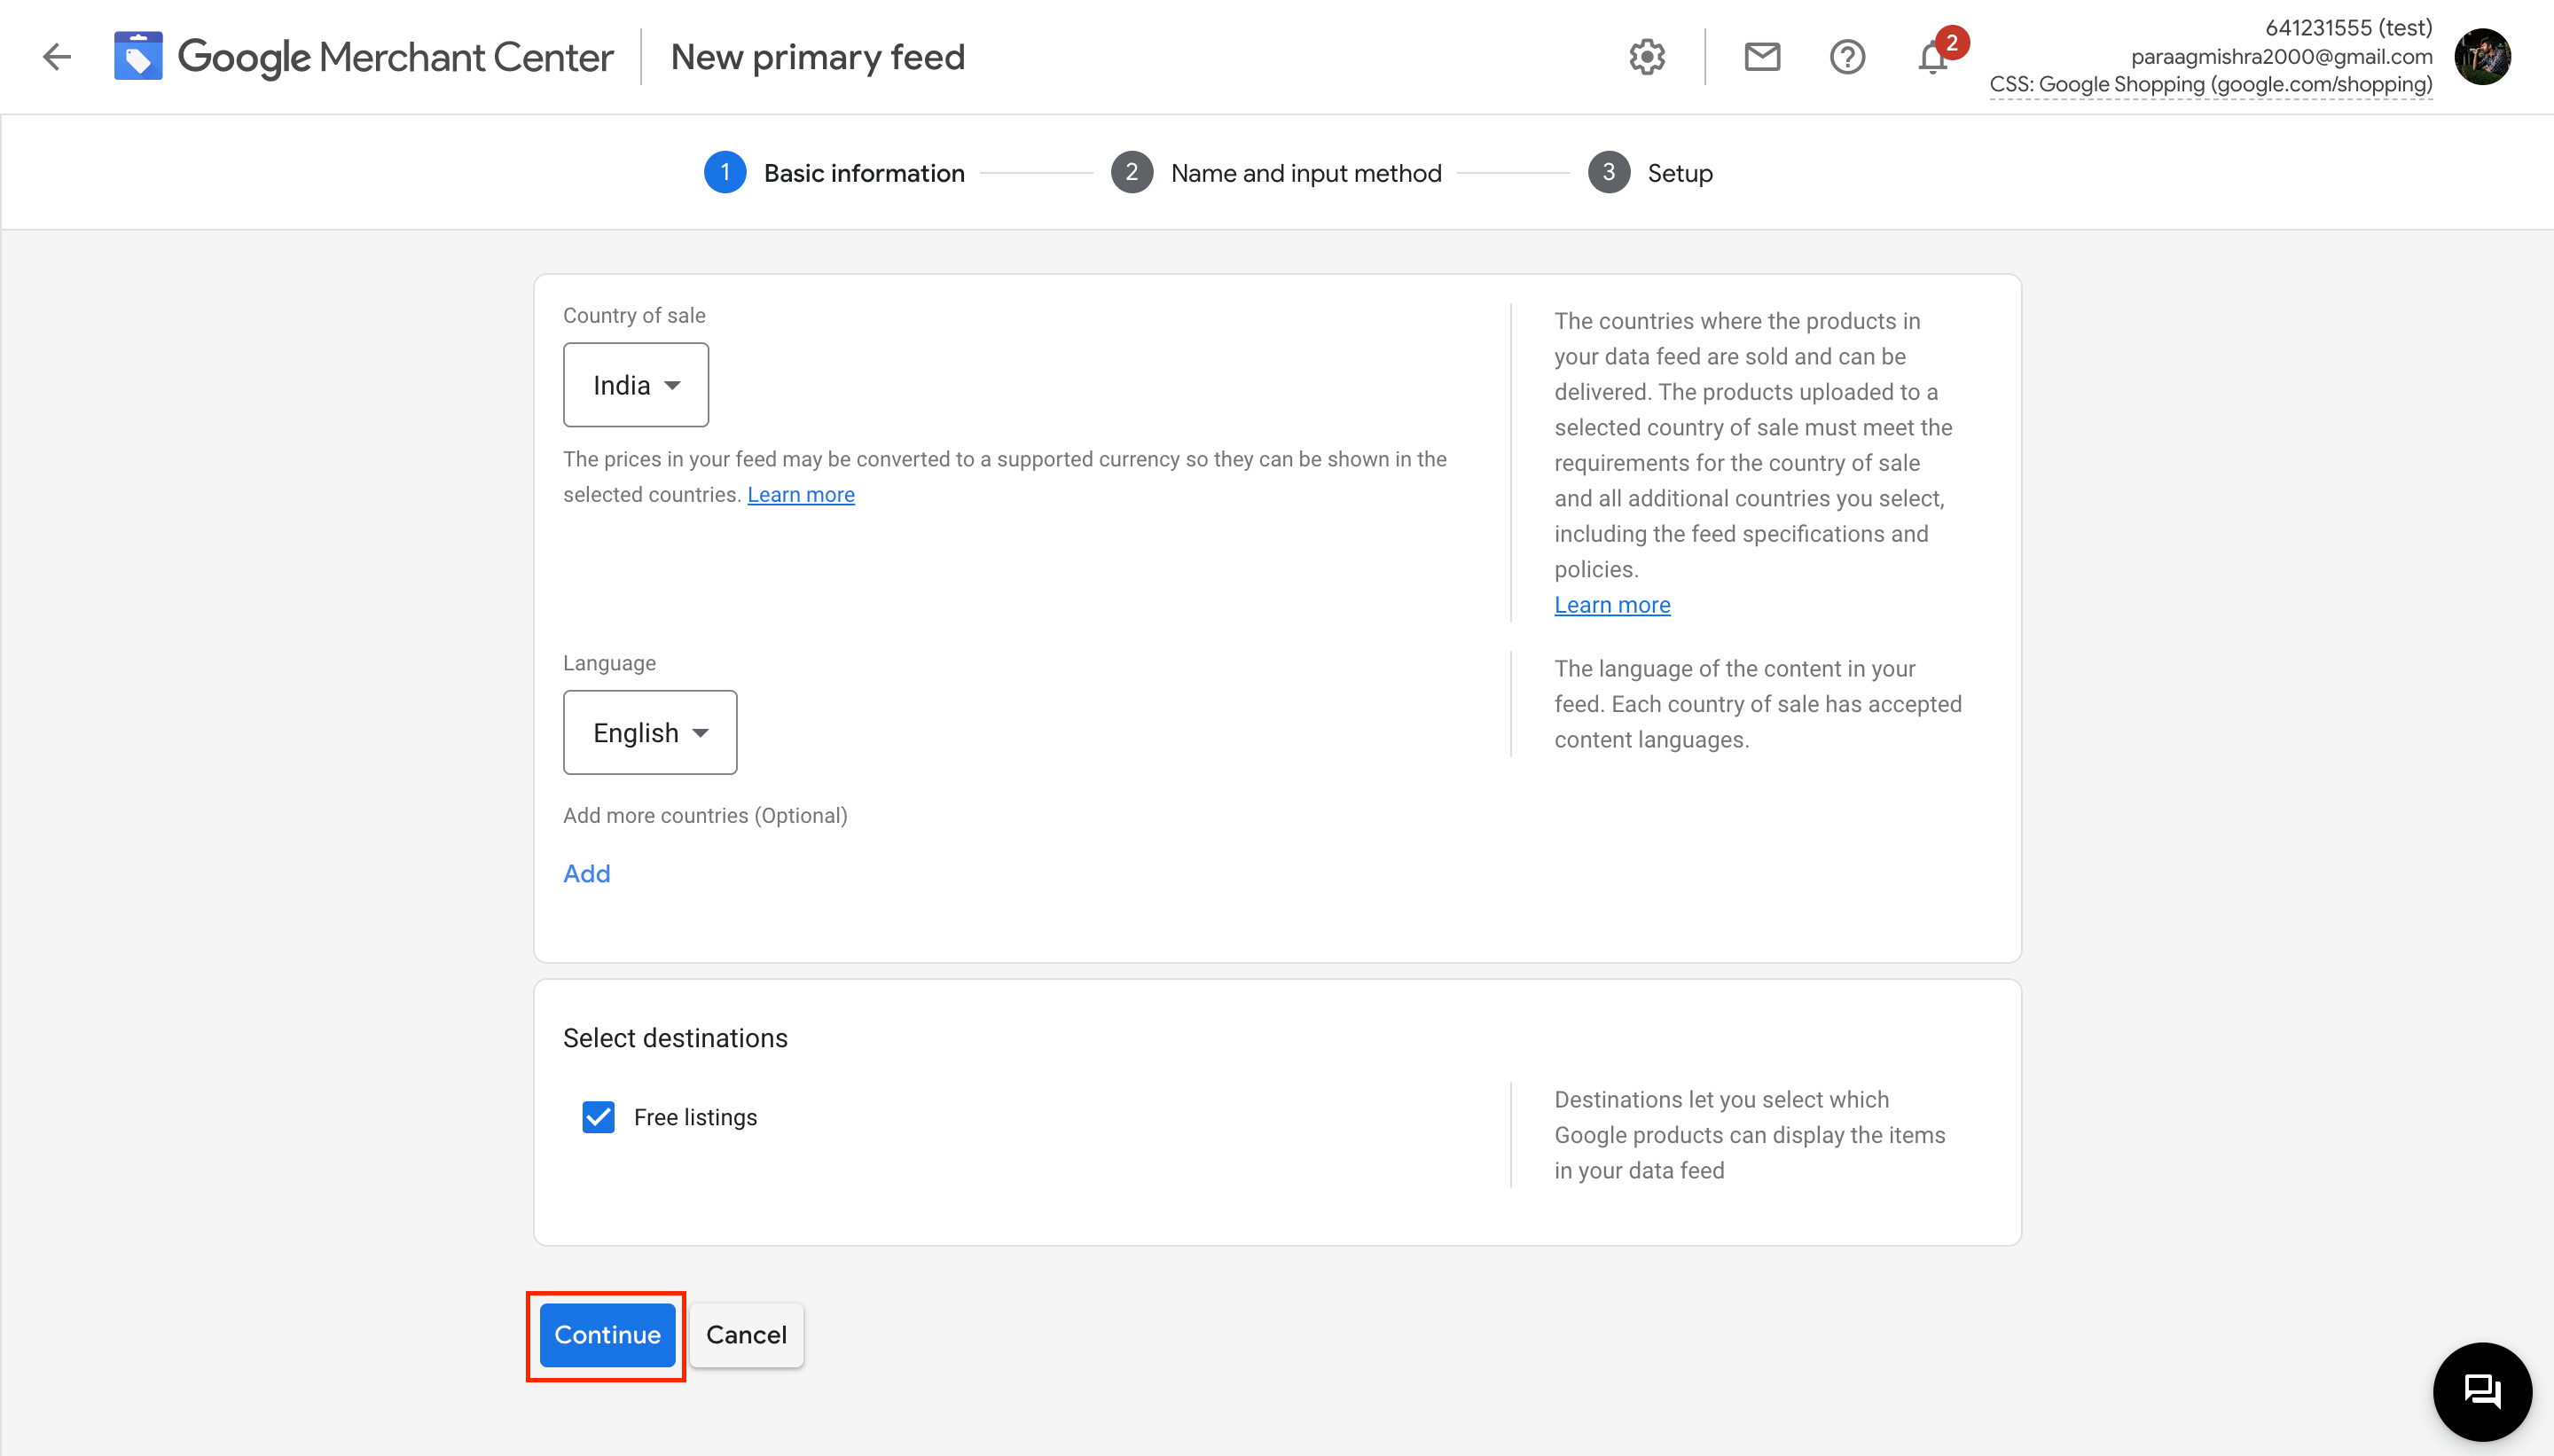
First, you will be taken to the Basic information page. Here, you will need to select the country of sale, and then select the desired language. After choosing both the country and the language, the Select destination option will be visible, select the Free listings checkbox. After you've selected the required details click on Continue.
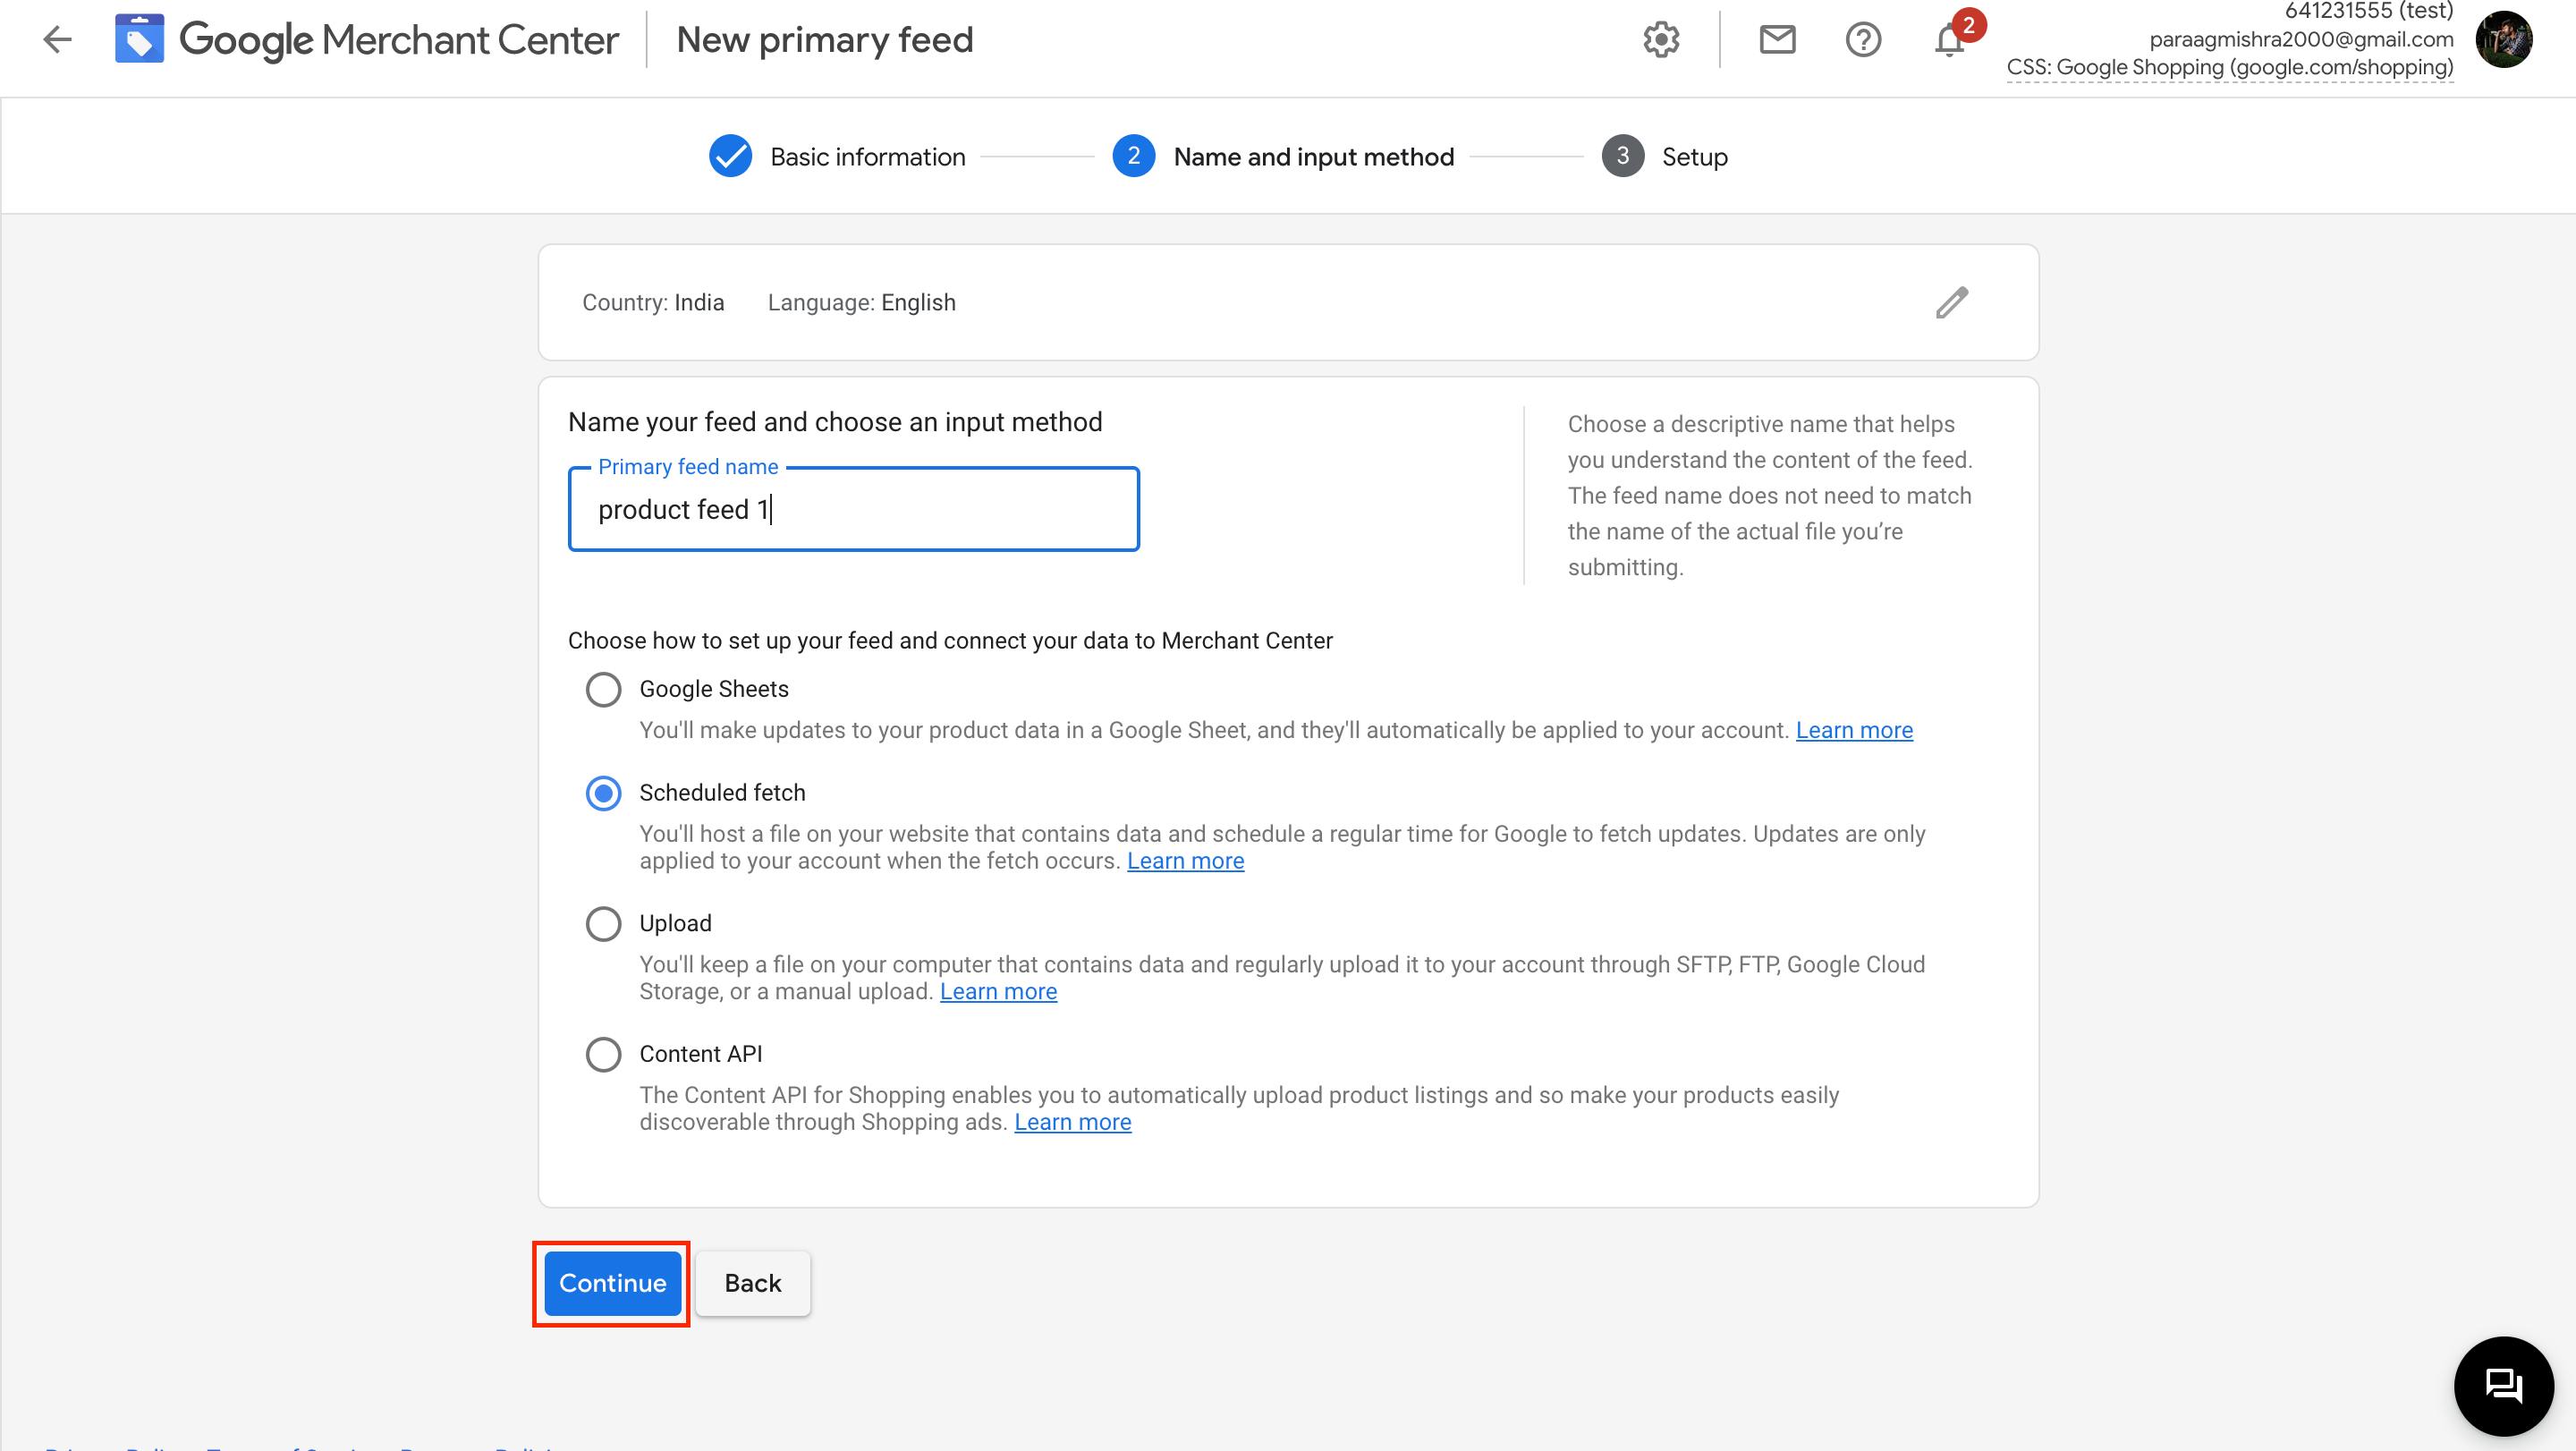
Upon clicking on continue, you will be taken to the Name and input method page. First, enter the Primary feed name. After you've entered the name, select the scheduled fetch option and click on Continue.
Now that you have entered the name and selected how you want to enter the products, you will be taken to the Setup page upon clicking on Continue.
On the Setup page, enter the File name as product_list. After entering the file name you will need to specify when and how often you want the data to be fetched from the URL.
Enter the required Fetch frequency and fetch time. After you've specified the frequency and the time you will need to paste the URL in the File URL section.
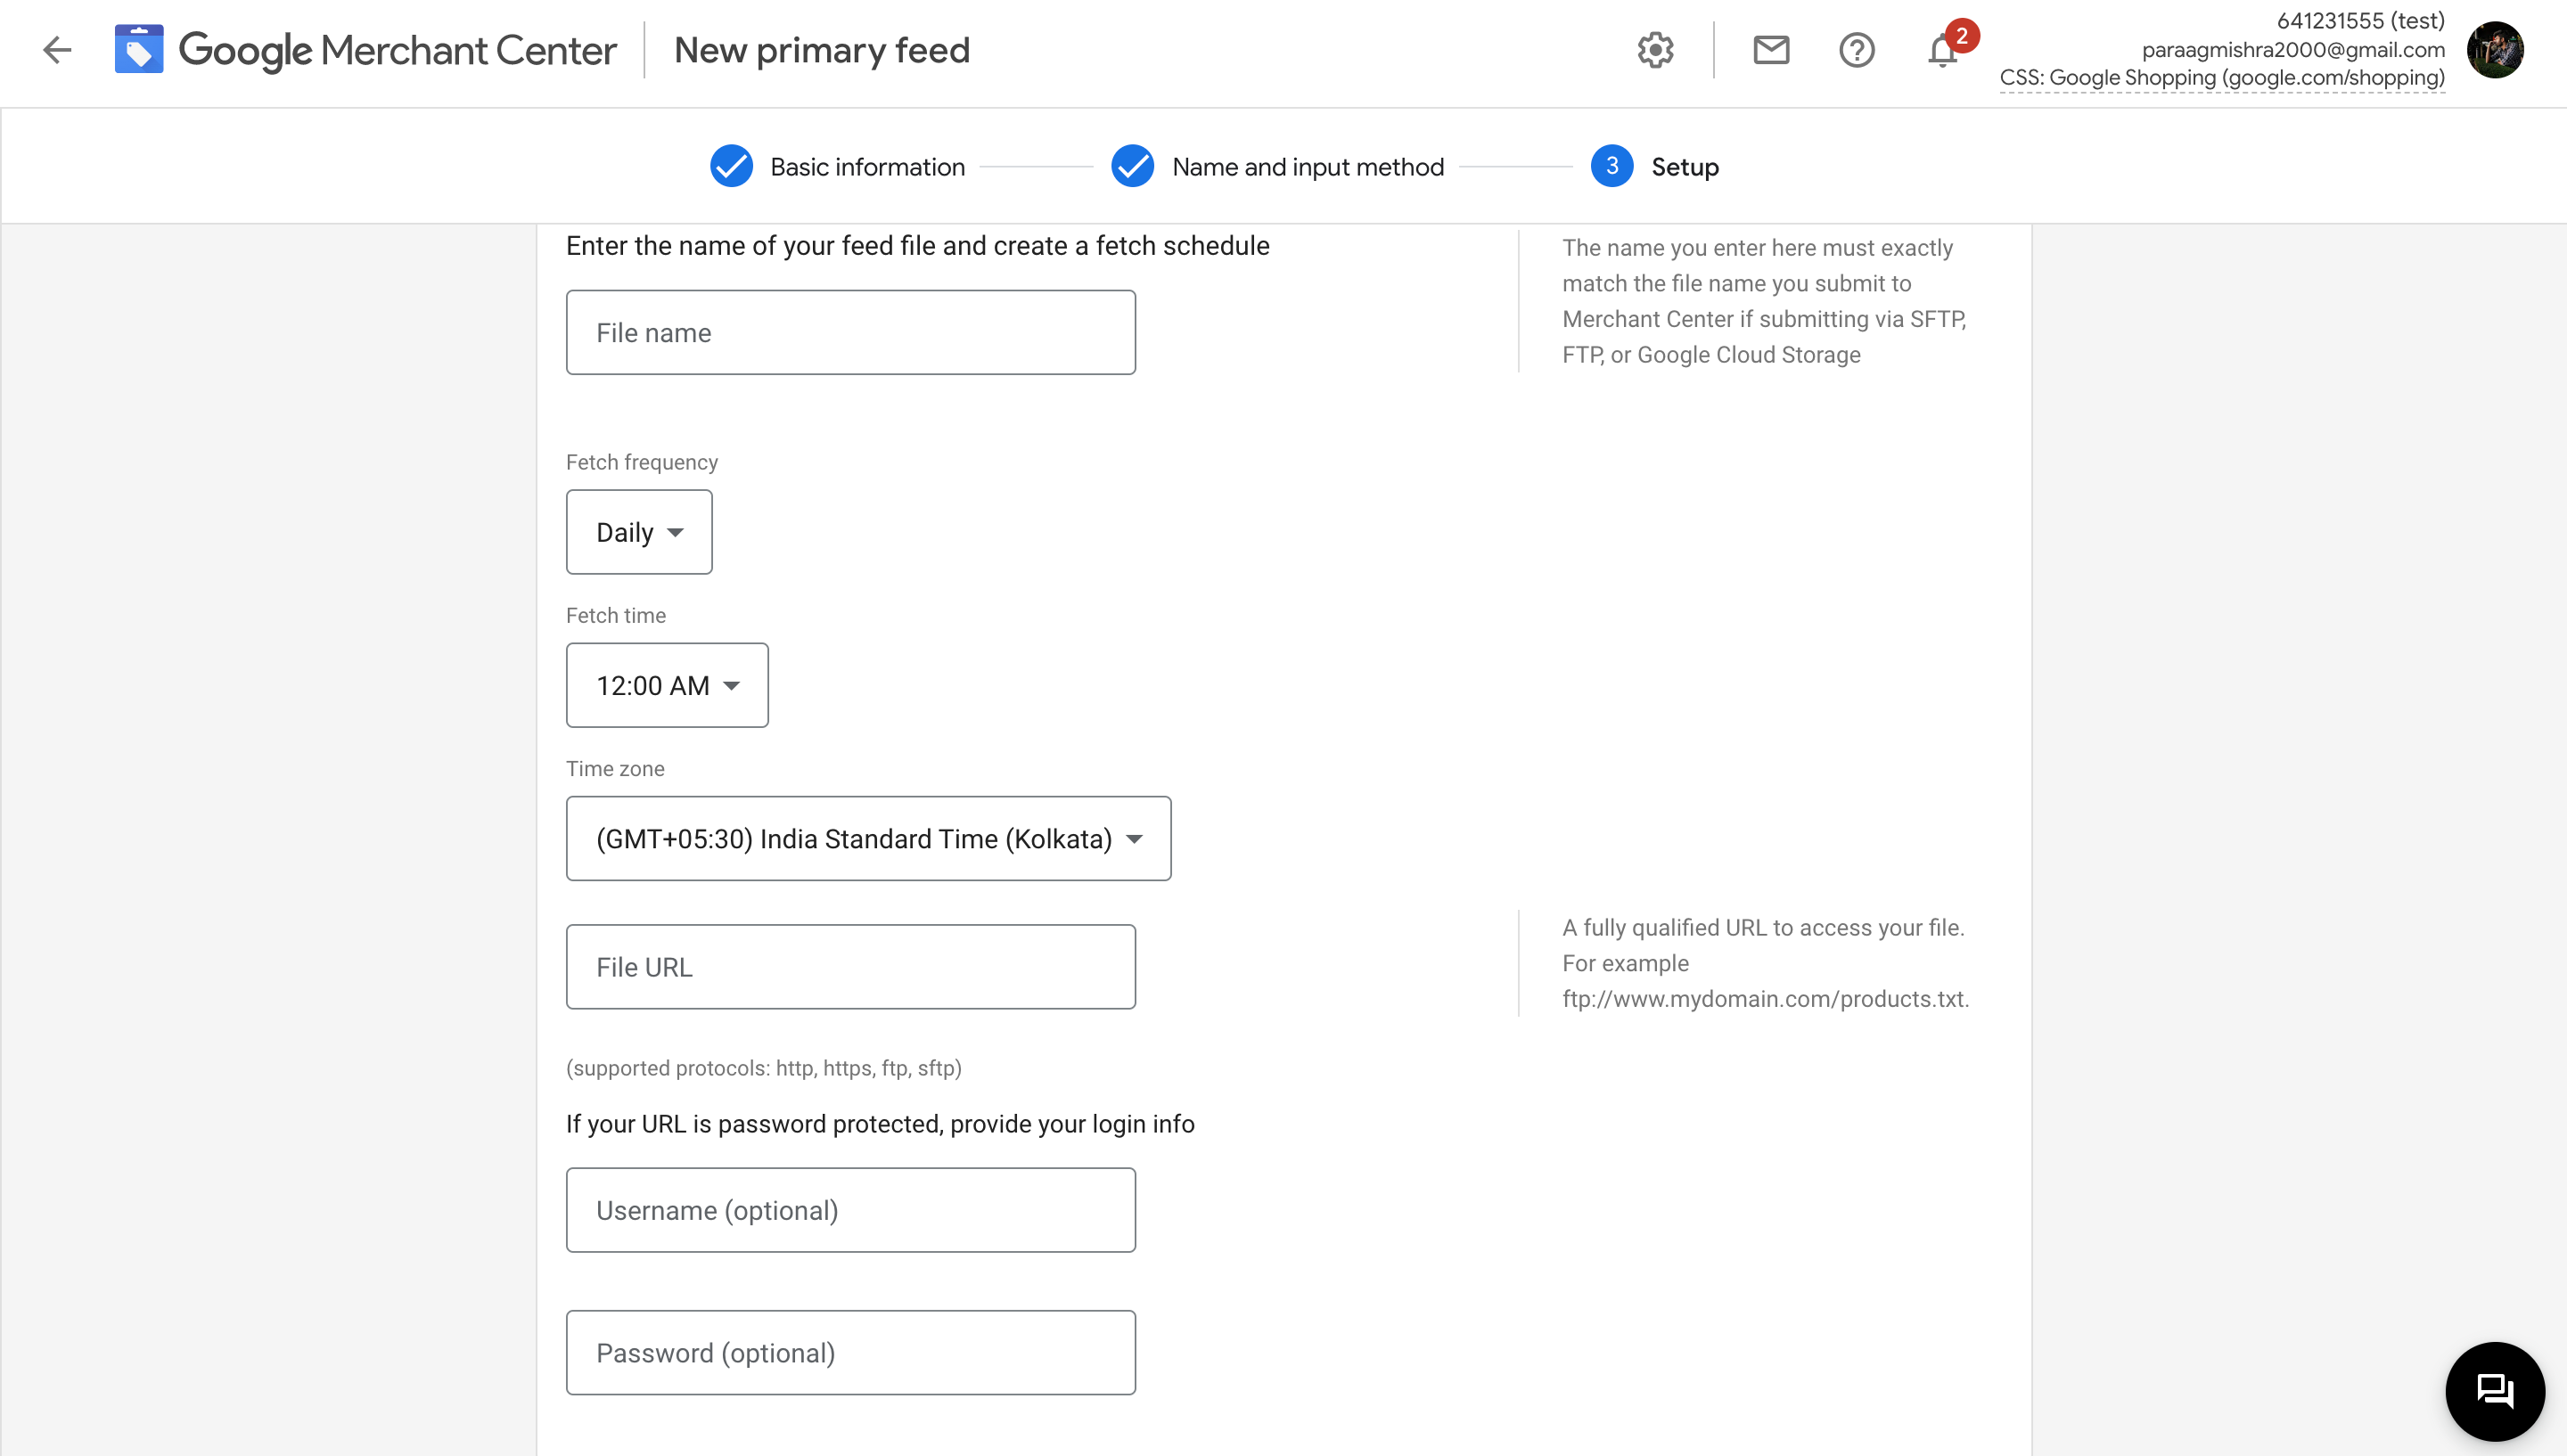
The other fields can be left empty. Upon pasting the URL, click on Create Feed.
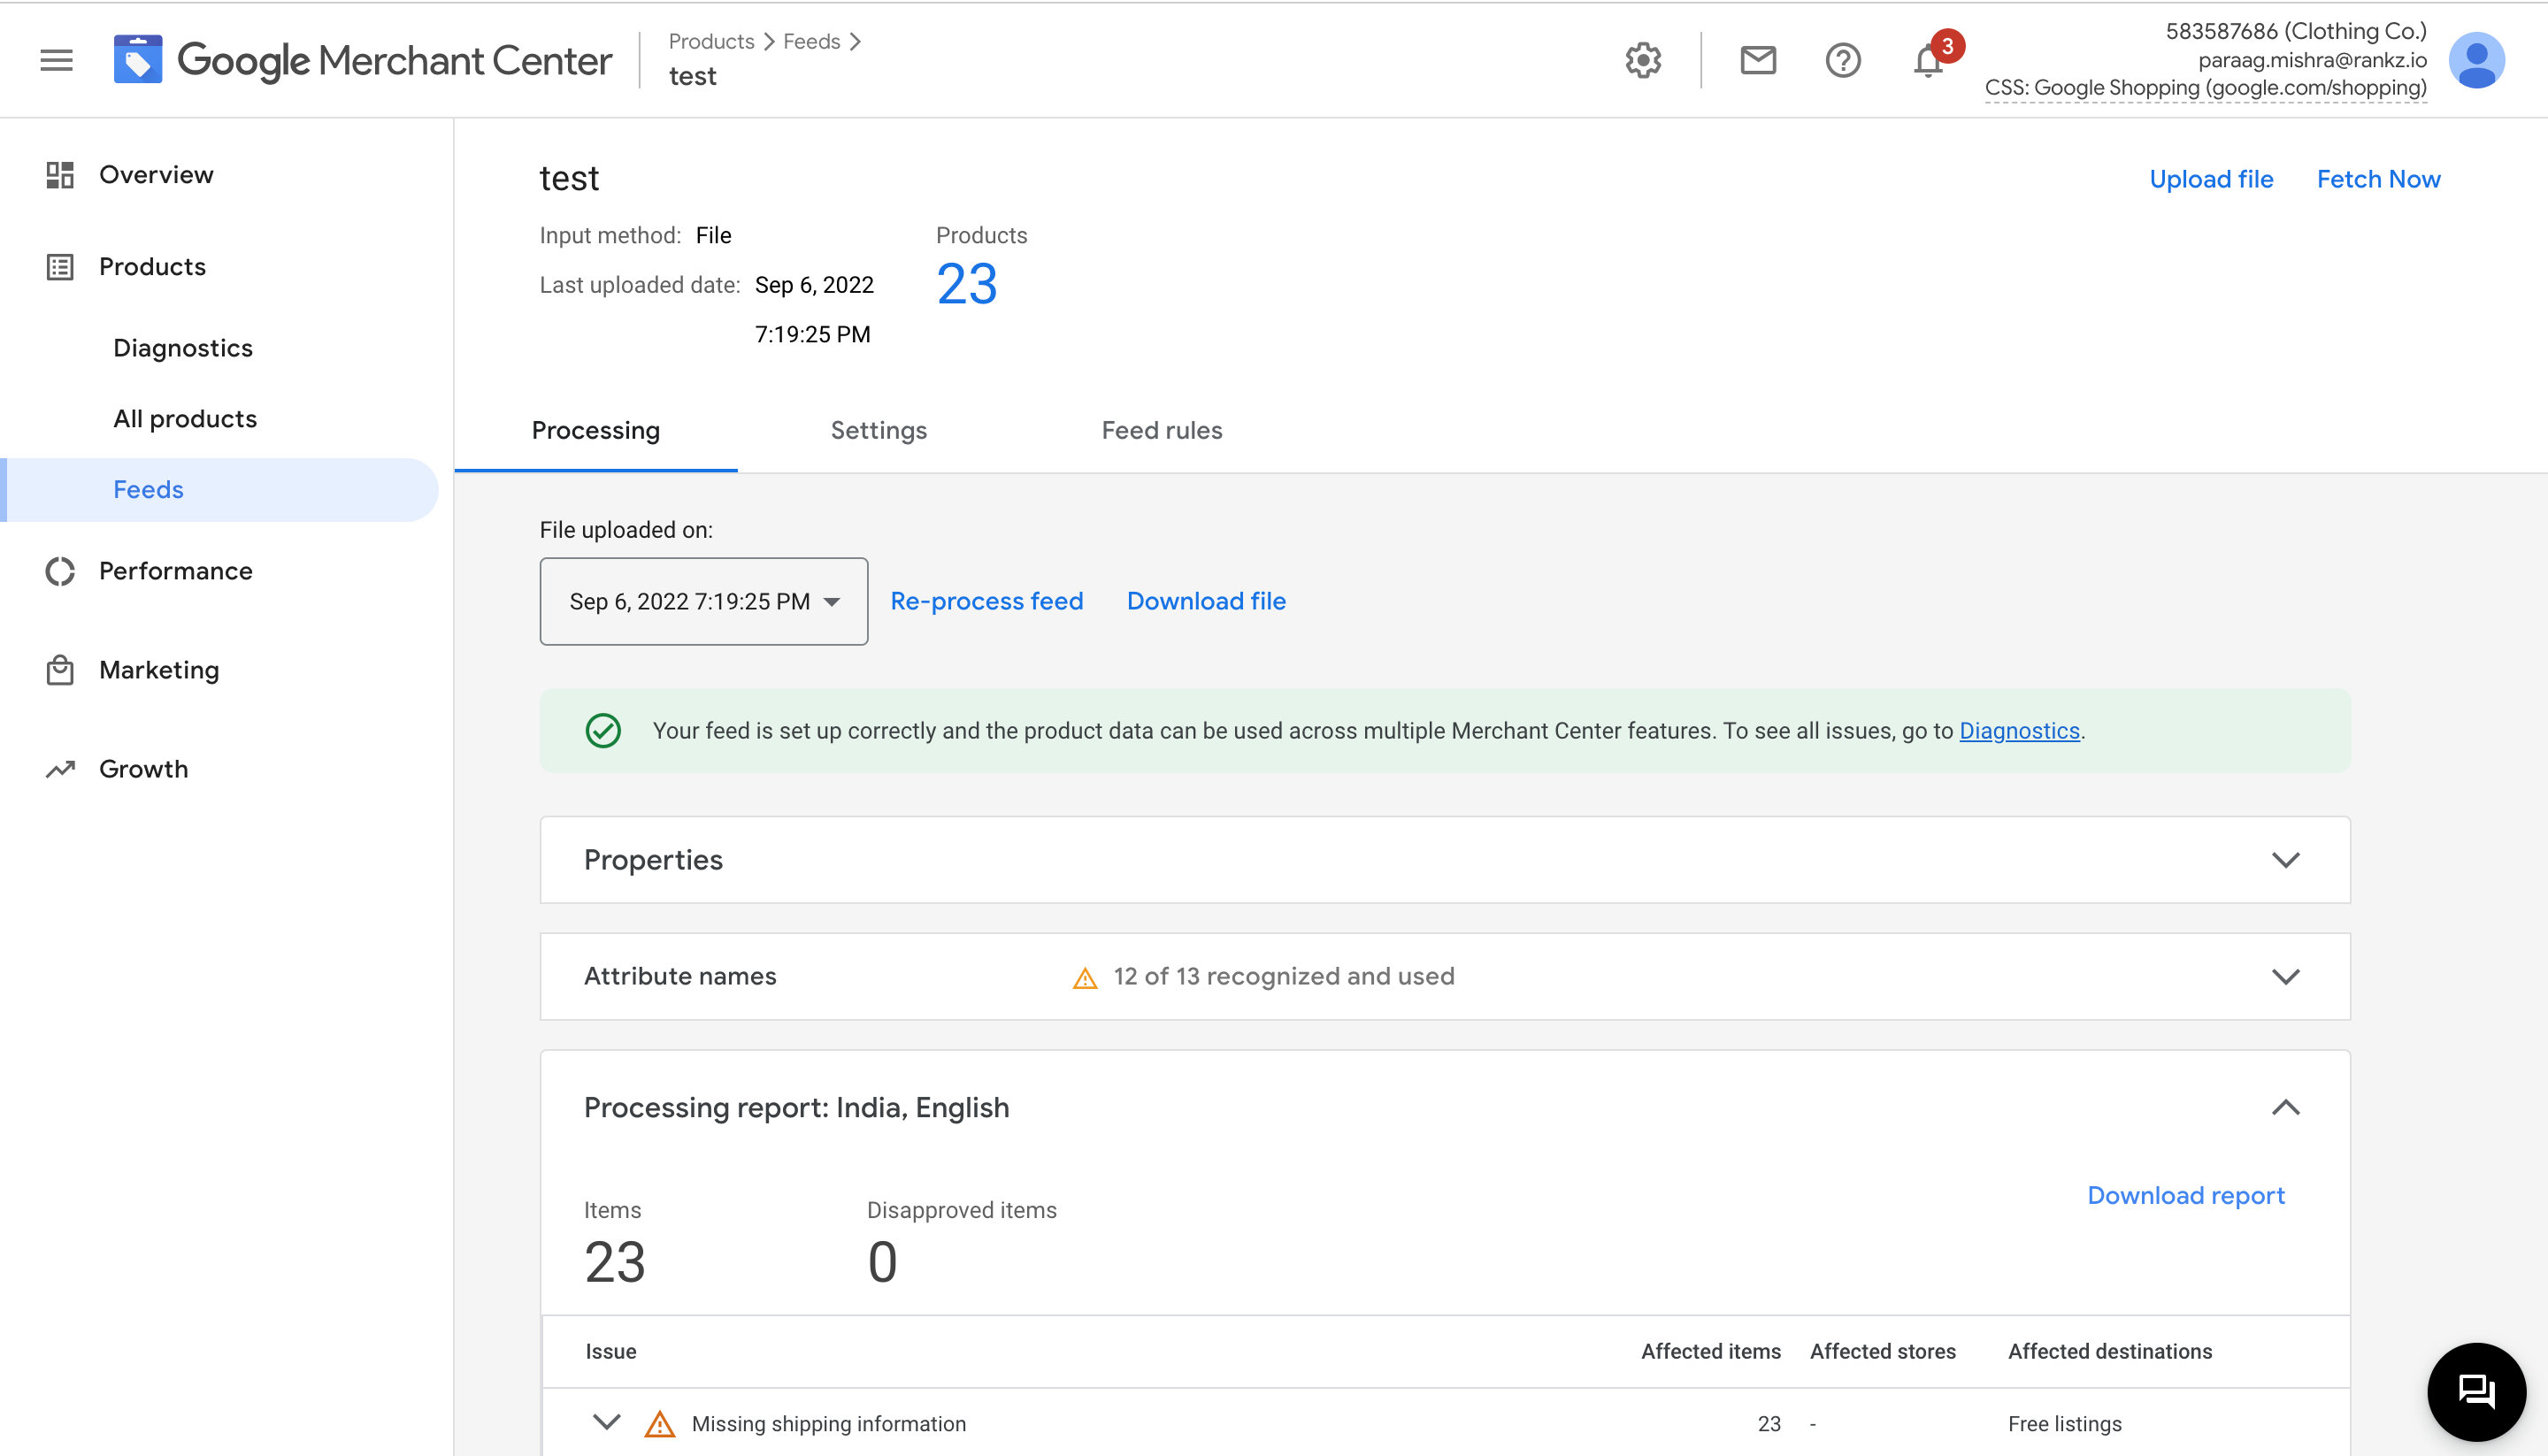
Upon clicking on Create feed, you will be taken to the following page. Click on Fetch now to upload your products instantly.
The product feed will be updated automatically based on the time you have specified in the Name and input settings, hence simplifying your overall effort of uploading products to the Google merchant center.
Read more: