If you're in need of contact info from another CRM or marketing campaign, you'll love the convenience of our Upload Contacts feature. Simply select the upload contacts button to instantly import anything from a single contact to an entire group of contacts – all with no hassle. In an instant, your spreadsheet will be loaded up and ready to get you one step closer to maximum efficiency.

Importing Contacts:
Before importing data into your CRM, you'll need to create a spreadsheet. Make sure to organize it wisely with clearly defined columns so the fields match those of your CRM.
Column Values Format
Those columns should include name, email and phone to ensure proper data entry. Don't forget that all fields will count when going through the import process, so pay attention to each little detail and make sure all fields match. Double check that every column header corresponds with its respective field in the CRM otherwise errors might occur during the import process, or data will not be pulled in accurately.

- Contact Owner
- To assign an owner to your contacts during the import, include the name of the 'User'
- Acceptable formats:
- FirstName LastName (e.g. Logan Paul or logan paul)
- LastName FirstName (e.g. Paul Logan or paul logan)
**Note**: Unless the user has both FirstName and Last Name, the system will not recognize it during upload.
2. Phone Number
- For the vast majority of cases, as long as you format the phone numbers in E.164 (Ex: +1 1234567890) our system will recognize it as valid, irrespective of the default Country picked at the sub-account level
- Additionally, if you have set the Country to the US, the following would work perfectly fine as well
- 123-456-7890
- (123) 4567890
- 1234567890
3. Email Address
- Note: While the default unique identifier is "Email", the system allows you to choose fields other than Email for de-duplication purposes during the Bulk CSV Upload
4. Date Picker
- Acceptable formats:
- mm/dd/yyyy (e.g. 10/28/2020)
- yyyy/mm/dd (e.g. 2020/10/28)
- You can also replace '/' with '-' or '.' and it'll recognize the uploaded fields as a Date field.
5. Tags
- Acceptable formats-
- Value 1, Value 2, Value 3 ...... (e.g. Blue, Yellow, Green or Blue, Yellow, Green or Blue, Yellow, Green)
- You can also replace ', ' with '; ' or ' . ' and it'll recognize the uploaded fields as the aforementioned field.
| Tags (example formats) | Status |
| lowercase | ok |
| UPPERCASE | ok (will be lowercased) |
| ProperCase | ok (will be lowercased) |
| with a space | ok |
| With A Space | ok (will be lowercased) |
| pre-existing tag | ok (maps successfully) |
Steps for Importing Contacts
When importing contacts into your CRM, there are three essential steps to follow: Upload, Map, and Details. The process begins with uploading the contact data file, followed by mapping the fields to ensure proper alignment with your CRM's structure, and finally, reviewing and confirming the details to guarantee accuracy and completeness. This systematic approach ensures a seamless integration of new contacts into your existing database.
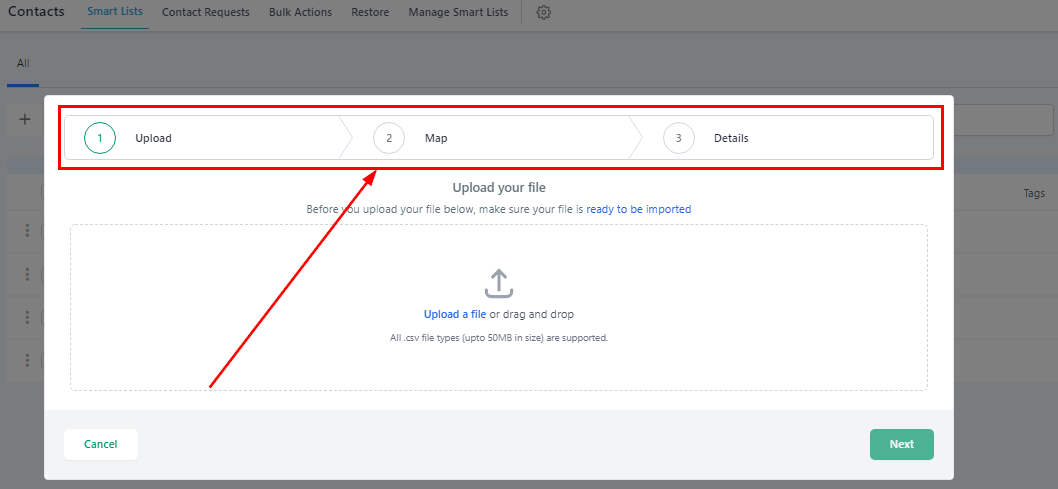
Upload
The first step is uploading the contacts from your device but before you upload the contact, make sure your file is ready to be imported;
All files being imported into the system must:
- Be a .csv file
- Have only one spreadsheet
- Be smaller than 50MB (tip: a typical .csv file with 4 columns and 10,000 records will be ~500kb in size)
- Include a header row in which at least one column header corresponds to a field in the system (i.e the First and last name, Phone number, Email et.c.) for;
1. Uploading ONLY New Records in the system
- Choose 'Add New Records' in Step 3 of the Import Flow
2. Updating ONLY Existing Records in the system
- Choose 'Update Contact Records' in Step 3 of the Import Flow. Or,
3. Both
- Choose 'Both' in Step 3 of the Import Flow

Map
Once you've chosen the correct CSV to upload, it's easy to match your columns from that file with the contact fields in our system. Take a look at the designated preview column to get an overview of how well these columns are matched. You can select from the dropdowns to ensure the correct information is matched in your CRM or choose which columns from your CSV you would not like uploaded into your CRM. Plus, the huge benefit of this matching capability makes it so you won't have to laboriously reformat any details for different base systems. All of your necessary data can fit right into our simple matching process!
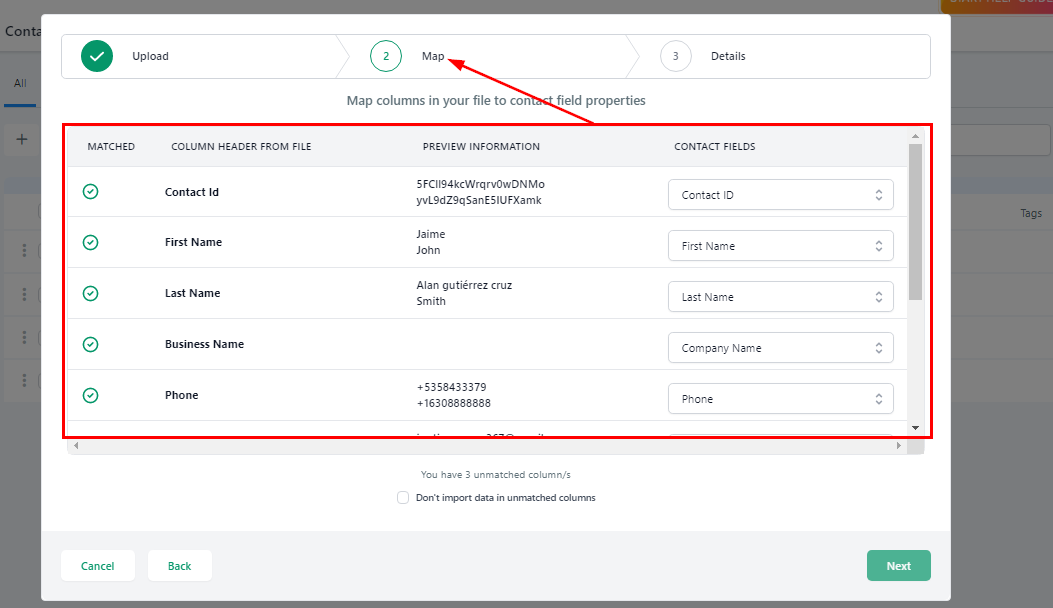
NOTE: If you have an unmatched column(s), you have to tick the "Don't import data in unmatched column" box in other to be able to move to the next step. You won't be able to move to the next step without ticking on it.

Details
This is the last step for importing contacts.
Import Name
This is the name used when importing the contact, you can decide to continue with the default name or you can edit it.
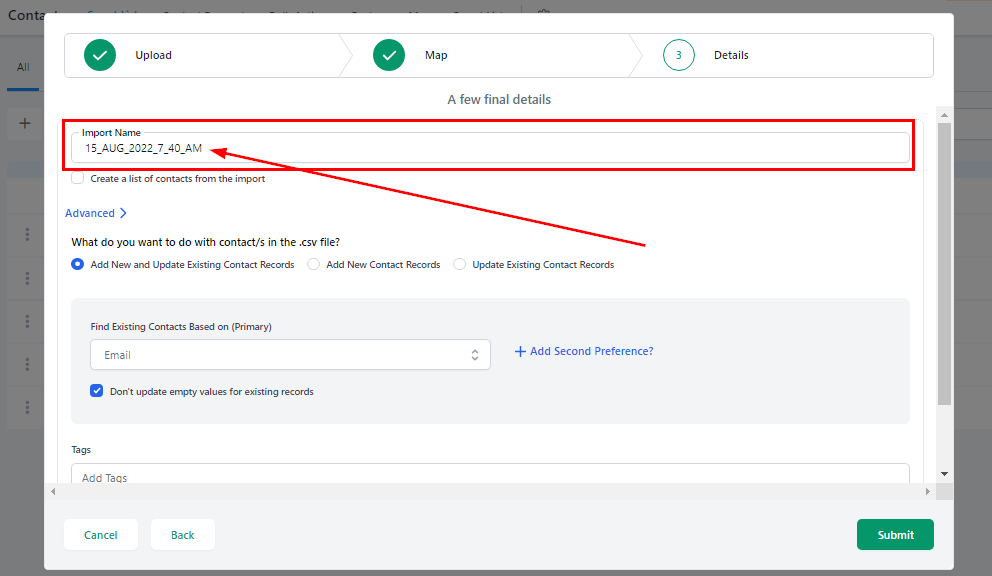
You can also create a new contact list with your import by ticking this box.

Advance
In the Advanced Settings, you can decide what you want to do with the contact in the CSV file, you can either;
- Add New and Update Existing Contact Records
Here you can decide to add the new contacts to a new list and also update the existing contact list in your CRM with these new contacts.
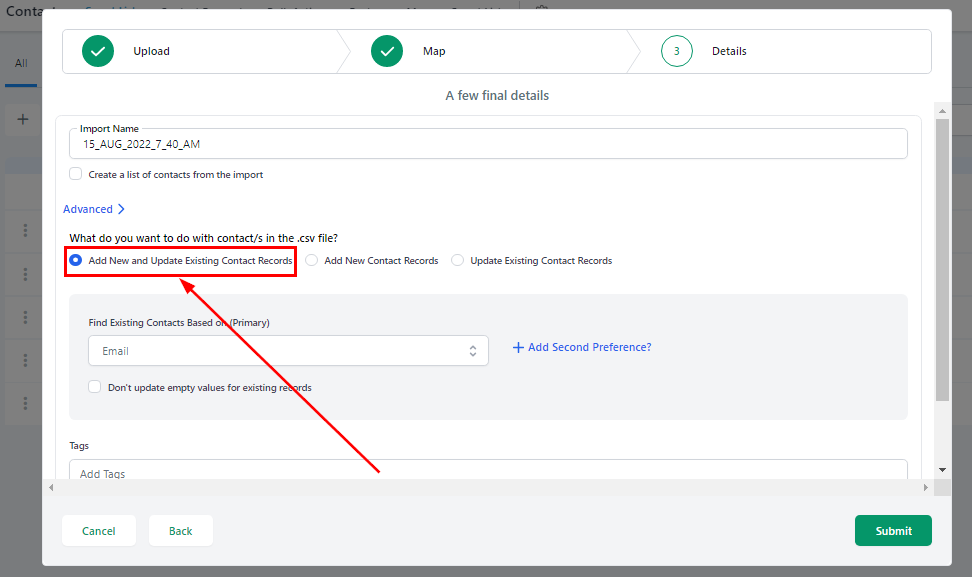
- Add New Contact Records
You can add the contacts to a new list only.

- Update Existing Contact Records You can only merge the new contacts with the existing contacts.
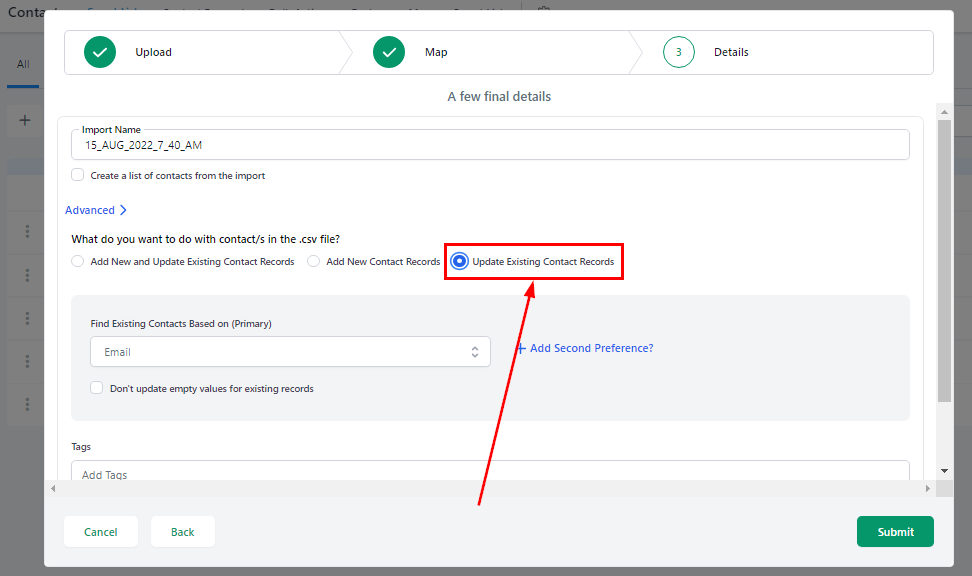
Find Existing Contacts Based on (Primary)
If you are looking to merge or update your contact list, you can choose to bypass any existing contacts that are based off of a primary phone number. Furthermore, if you want to keep your contact list current and up-to-date, you have the option of not updating any empty values for the records that already exist.
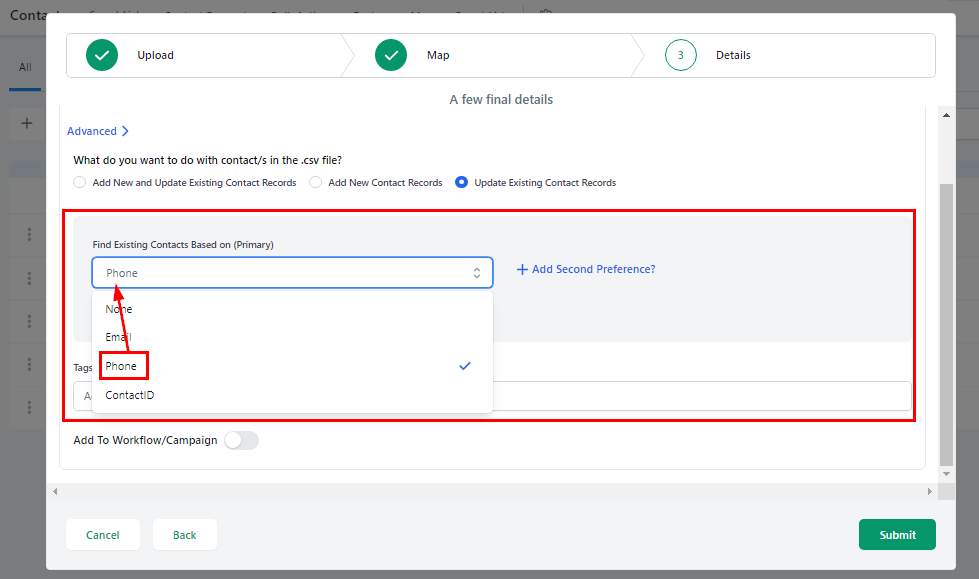
Simply tick the box next to this option and continue with your synchronization efforts.

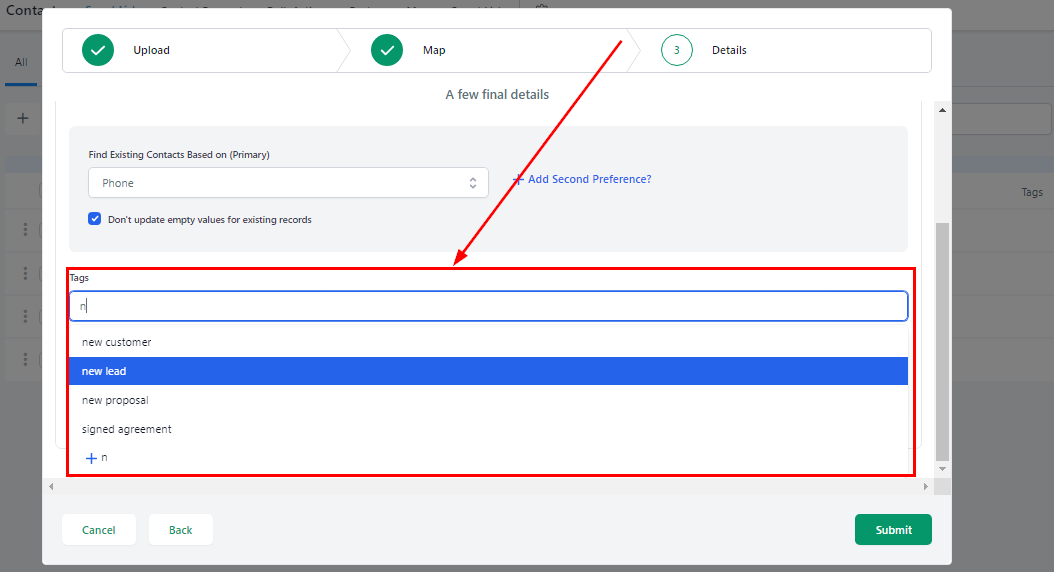
Tags
The tagging feature of your contacts can help you to organize and sort seamlessly. To add tags to your contacts, look in the tags box. You'll find an array of existing tags that you can select from. Alternatively, create a new tag altogether and assign it as you wish. You may also categorize your custom tags and see which ones are the most frequently used. Either way, you'll have an easy and efficient way to manage your contact list with whatever works best for you.
Add to workflow
With a few simple steps, you can add your contacts to an existing workflow or campaign. Start by toggling on the option and select the preferred workflow or campaign. You'll then see these contacts on the platform, so you can communicate with them whenever necessary. This outlines how simple it is to take advantage of workflow and campaign features.
