Automation- Title- video
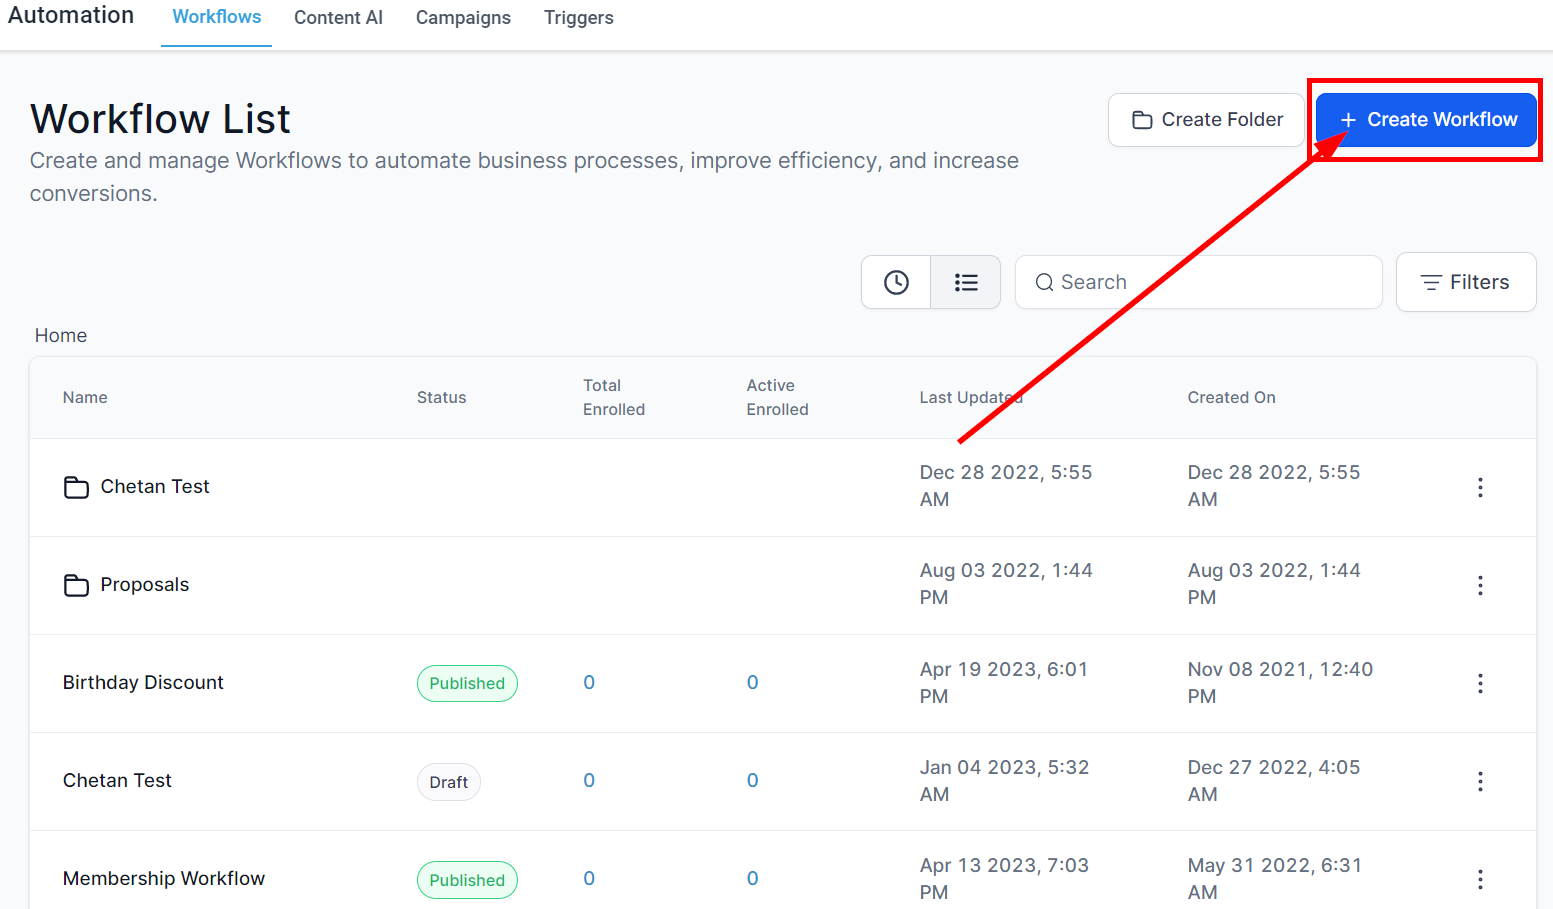
Create New Workflow
To learn more about workflows and how to build them, check out the "Workflow Training" section under the "Advanced Training" help center menu! Click here to check out the Workflow Training!
Create Workflow
Workflows are a key factor when it comes to managing important processes. A workflow is simply a set of actions meant to be performed, typically dependent on the stage of the lead in the process. To ensure several objectives are achieved, you may want to create multiple connected workflows.
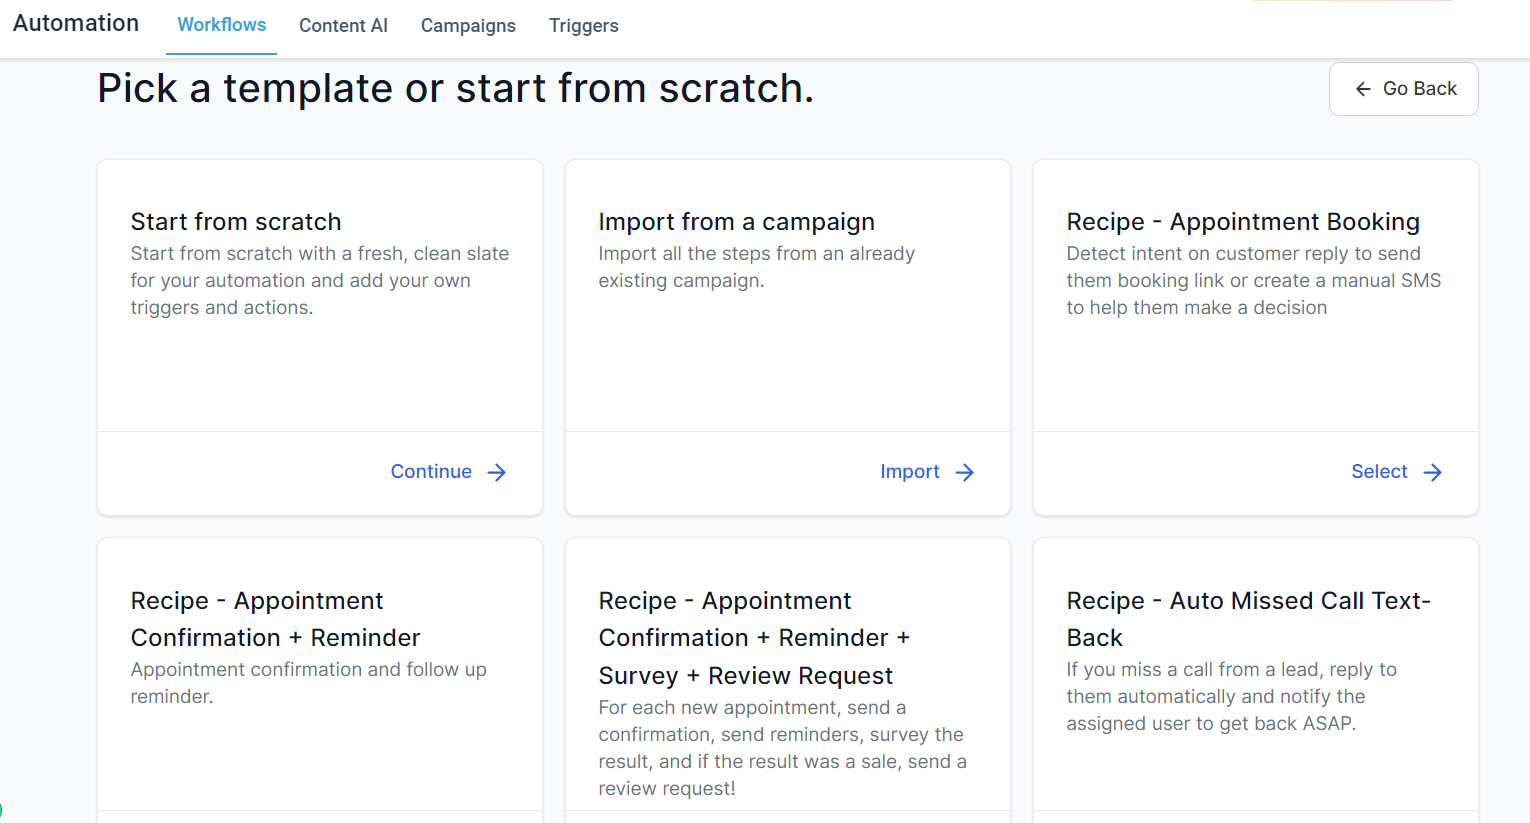
Select a Template
Once you select any of these templates below, click on the "create new workflow" icon to start building your workflow.
- Import from Campaign: By clicking on this template, you can choose from an already existing campaign and Import all the steps into a workflow.
- Start from Scratch: By clicking on this template, you will create your workflow from scratch with a fresh, clean slate for your automation with the ability to add your own triggers and actions.
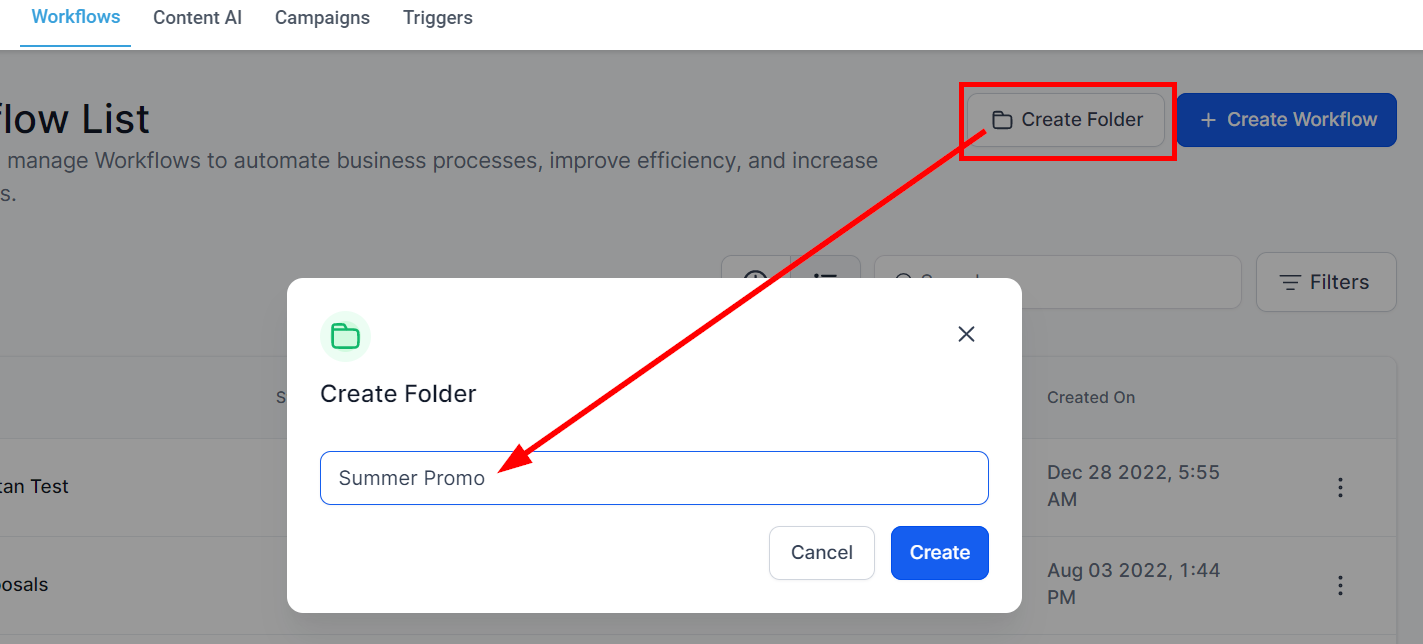
Create Folder
In order to have a clear view of all your data, creating folders can help tremendously with organizing each workflow for the leads that need propelling from one stage to another. After all these are said and done, setting up a folder becomes easier with just the click of the New Folder button located on the top right corner from your screen.
By creating a folder, you can create multiple workflows for objectives. But, In order for you to achieve that objective, you would have to create a series of workflows that will pass every lead from one stage to another. In simple terms, having a folder will help you stay organized when you need your lead to go through different stages.
Naming a Folder
Once you click the button, a popup will appear for you to name your new folder. Once you have your new folder name typed in, click the green save button to create your new folder.
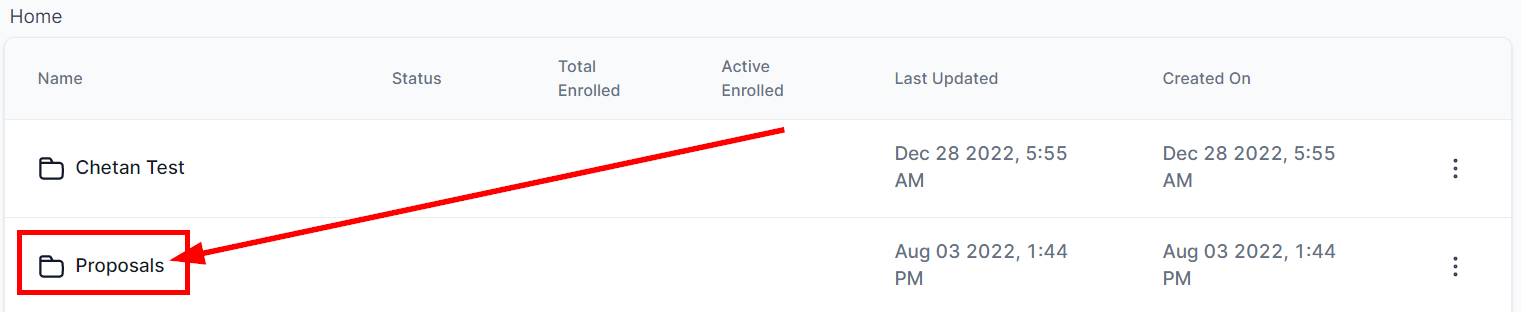
Folder Details
Click on the created folder to direct you to the Folder details. You will see the;
- Folder's name
- Status
- Total number of enrolled
- The active enrolled
- The date and time it was last updated
- The date and time the workflow was created.
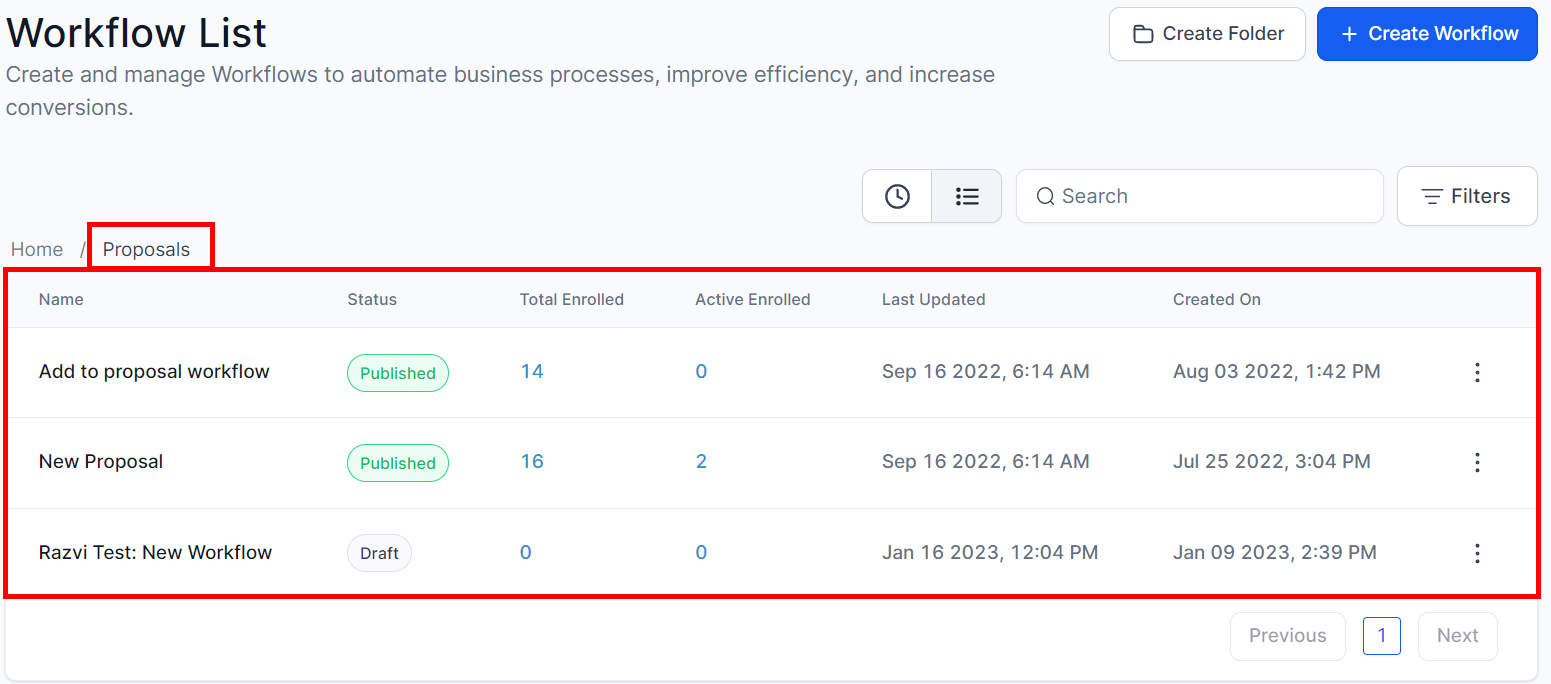
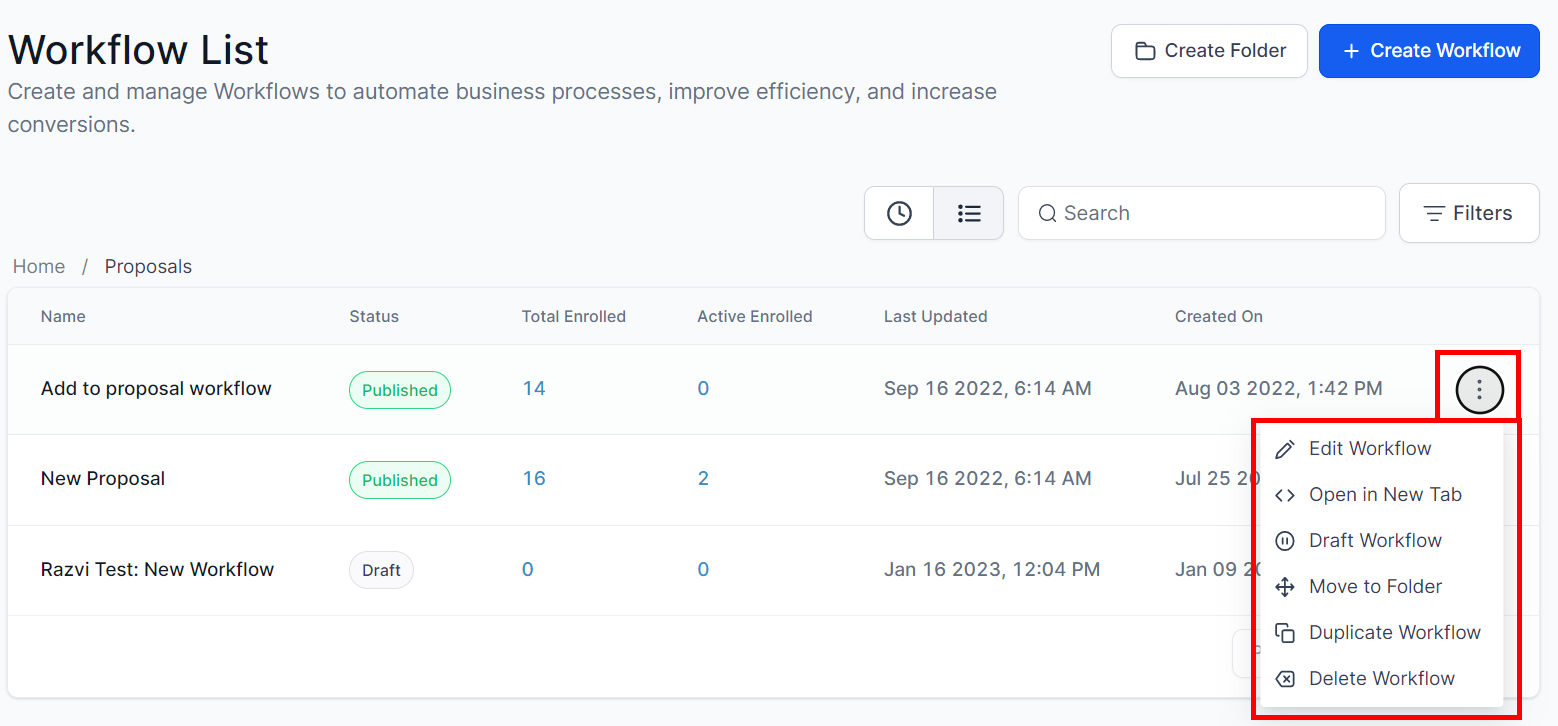
Action
1. Edit Workflow
This is where you can edit your workflows. More details on editing workflows can be found here.
2. Open in New Tab
Click here to open the workflow in a new window tab.
3. Draft Workflow
Click here to switch a Published workflow back to Draft mode.
4. Move to Folder
Click to move the workflow to a folder
5. Duplicate Workflow
This button allows you to clone the workflow.
6. Delete Workflow
This button allows you to delete the workflow.