Social Planner allows you to add all your fan pages from different Facebook profiles simultaneously. To connect your Facebook pages with the platform, follow the steps below. It's important to note that you can only add pages that you have Admin rights to, and you must log in with the same profile that has all the pages you manage.
- If you have already connected your Facebook pages from any profile previously and want to add some new pages, you will have to 'Remove' application from your Facebook Settings > Business Integration section on your Facebook account and follow the steps below all over again. as demonstrated in the image below.
- You can only add all such pages for which you have Admin rights. It is mandatory for you to log yourself in with the same profile that has all the pages you administrate.
Please Note: Due to Facebook's recent API changes, you can no longer connect Facebook profiles, however, you can add pages/groups from different profiles.
Steps to Connecting Facebook Pages
Step 1: Go to Social Planner > Setting
To connect your Facebook pages with Social Planner, follow the steps below. Firstly, navigate to Social Planner by clicking on the setting (gear icon) at the top right corner.

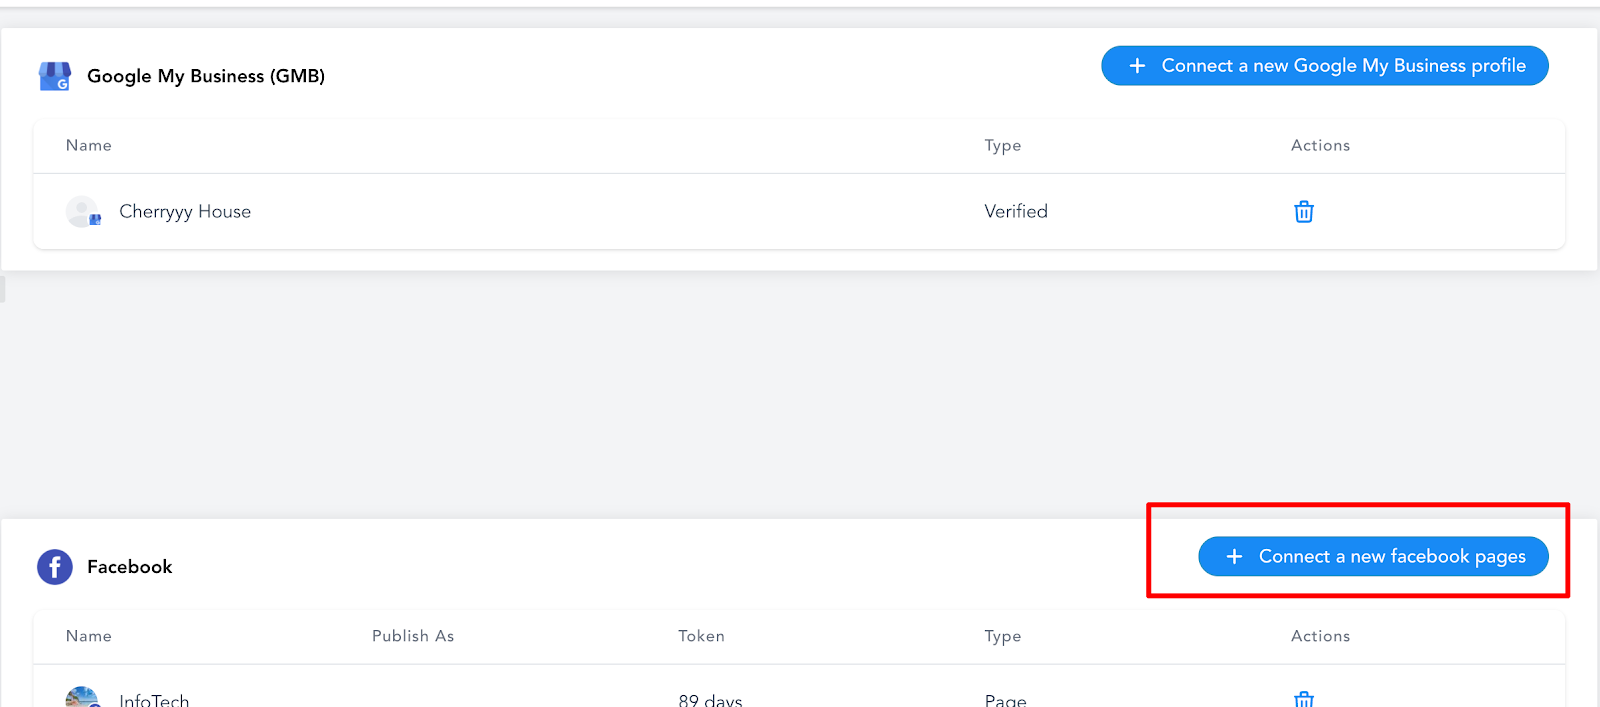
Step 2: Connect new pages
Proceed by selecting the Connect a new Facebook page option on the social accounts page. This action allows you to integrate additional Facebook pages, further expanding your social media management capabilities and enhancing your online presence across multiple platforms.
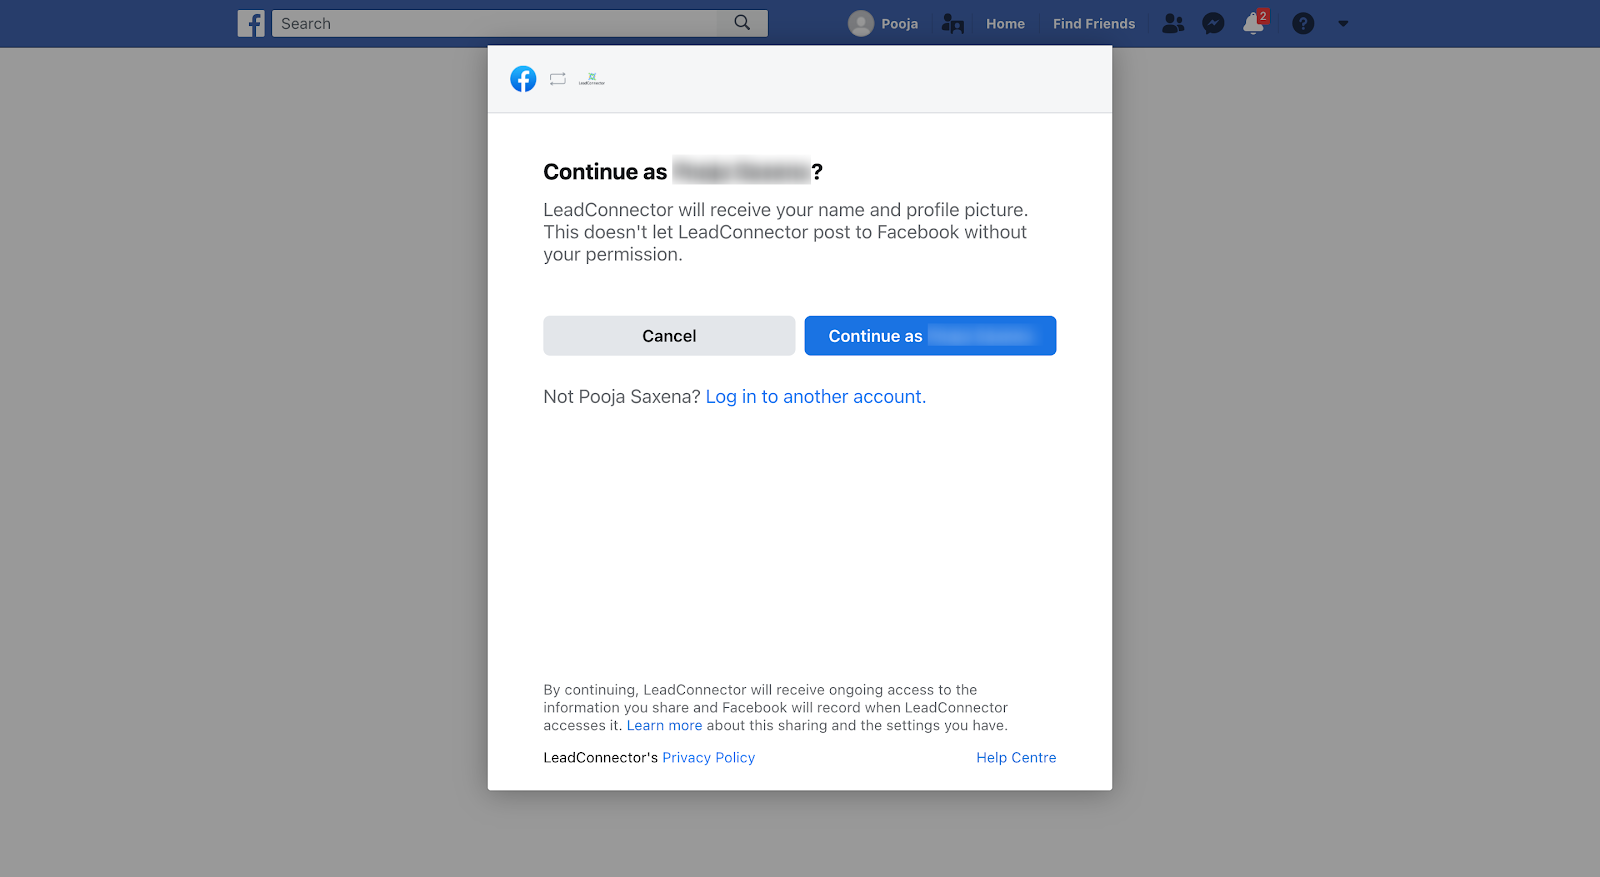
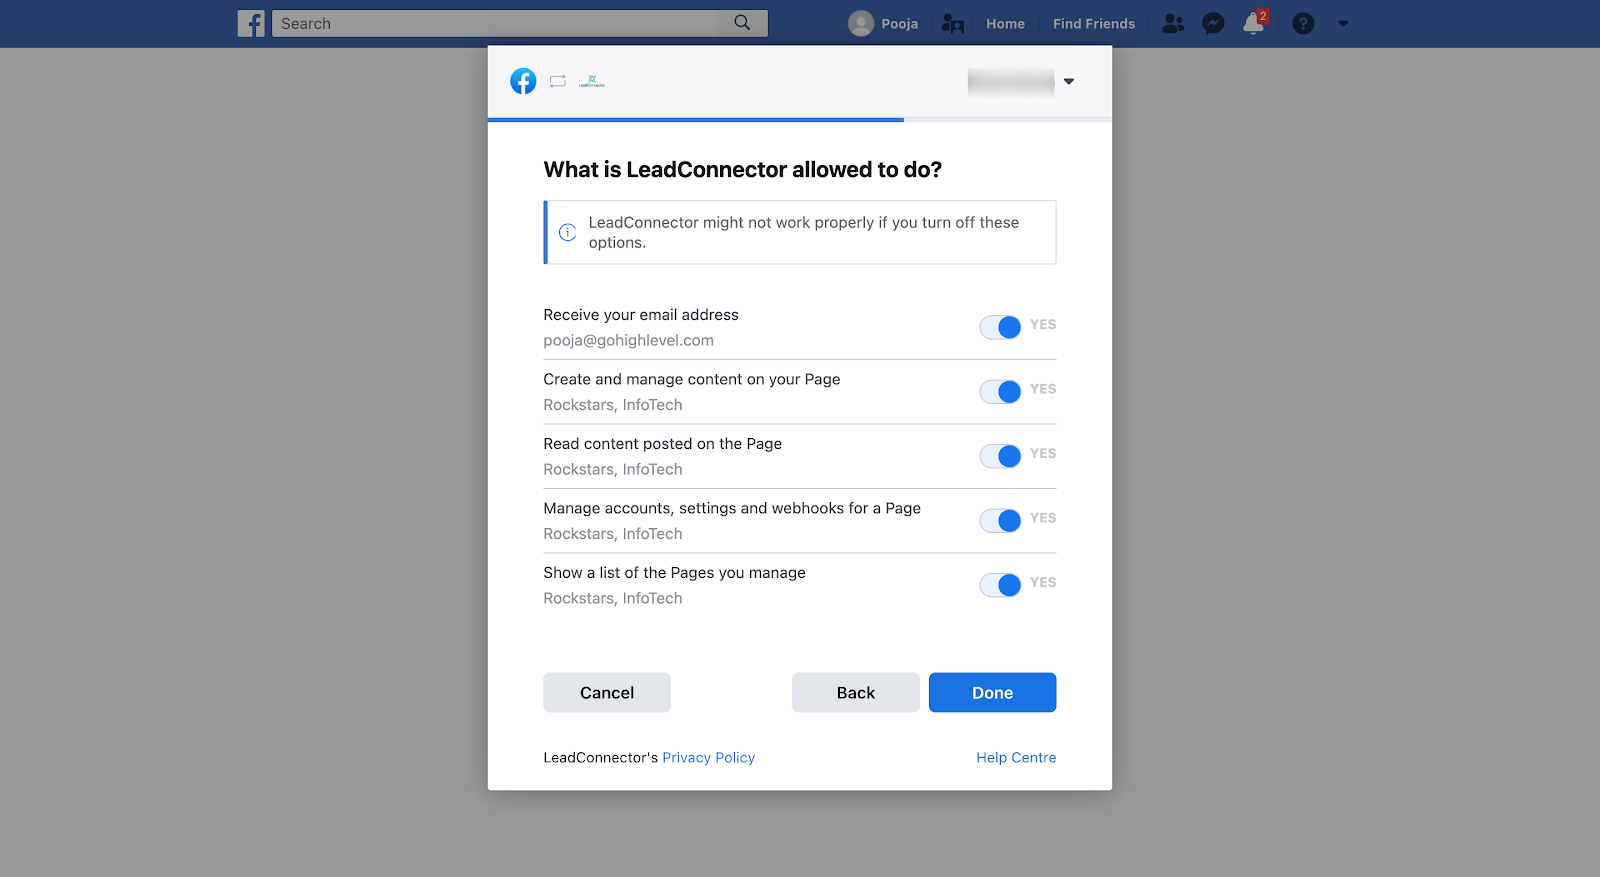
Step 3: Give permissions
If you're connecting a profile for the first time, it's important to ensure that you grant LeadConnector all necessary permissions.
Click Continue to complete the authorization process and avoid any connection issues.
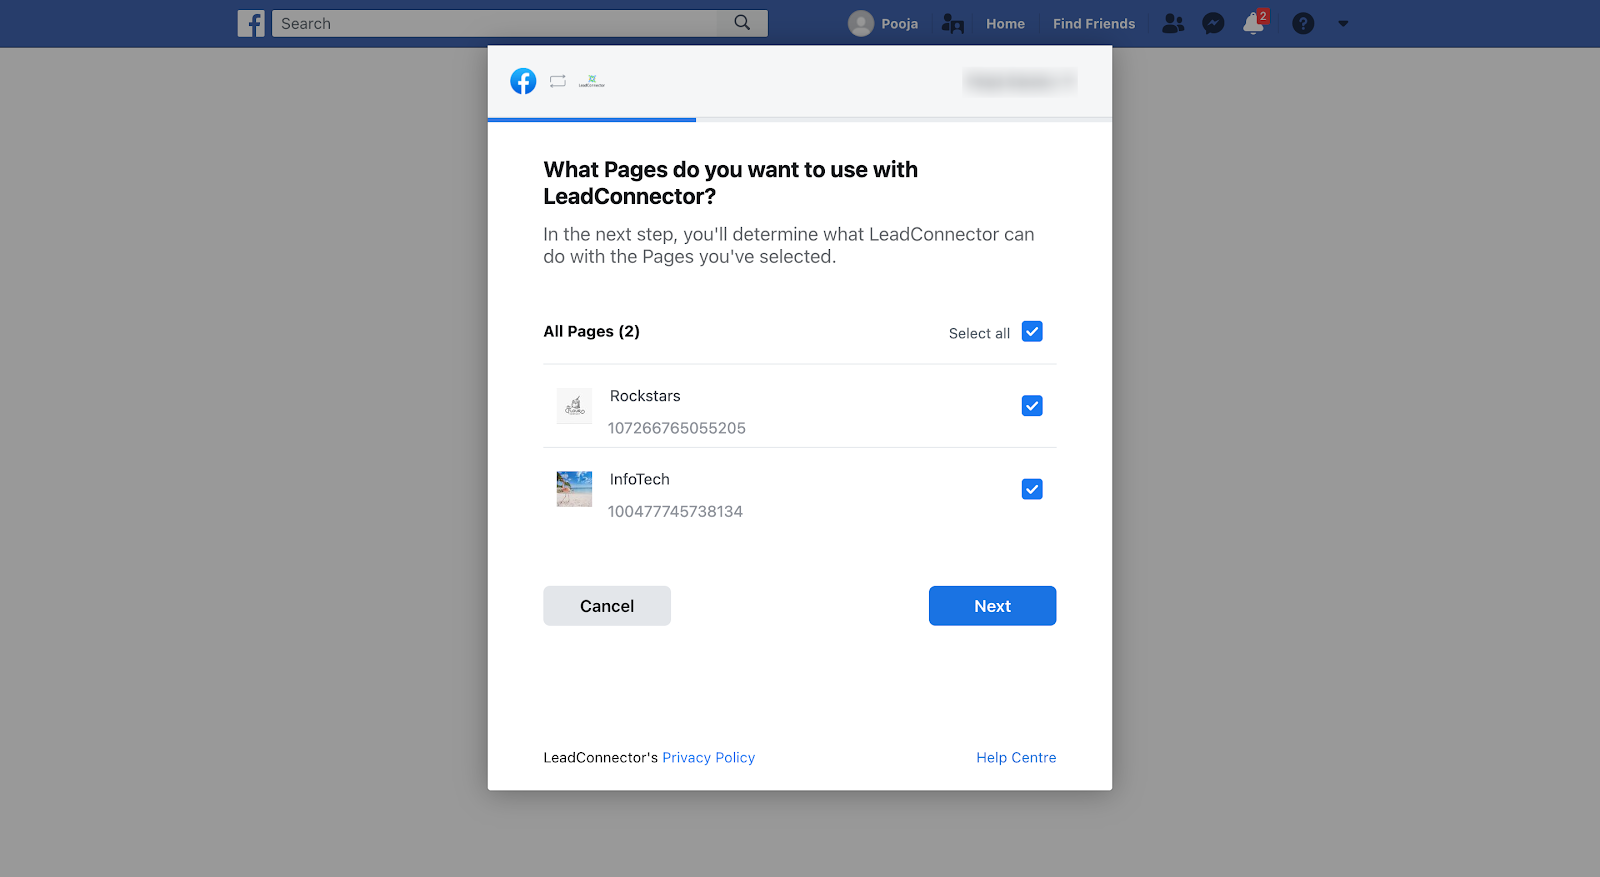
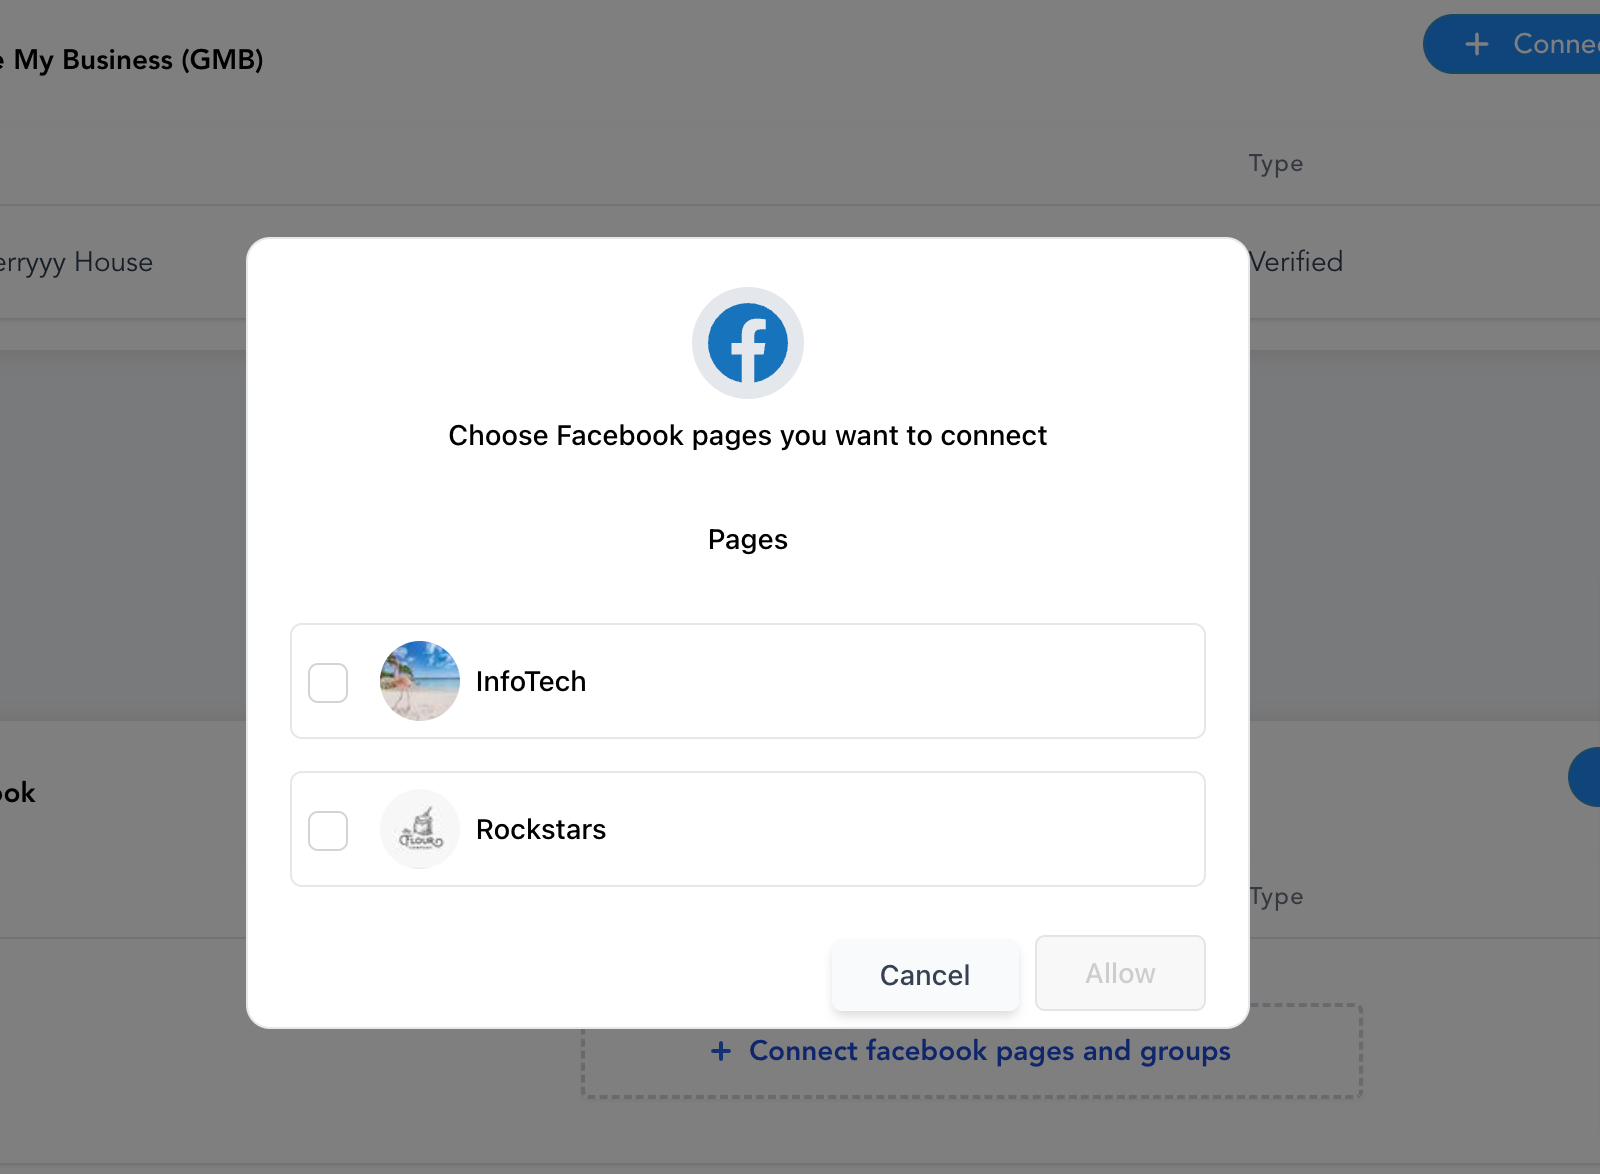
Step 4: Select pages to connect
Upon accessing the profile, you will be presented with a comprehensive list of all the pages you manage under this account. From this list, choose the pages you desire to connect for social posting via the platform. This enables you to efficiently manage and share content across your selected pages, streamlining your social media presence and engagement.
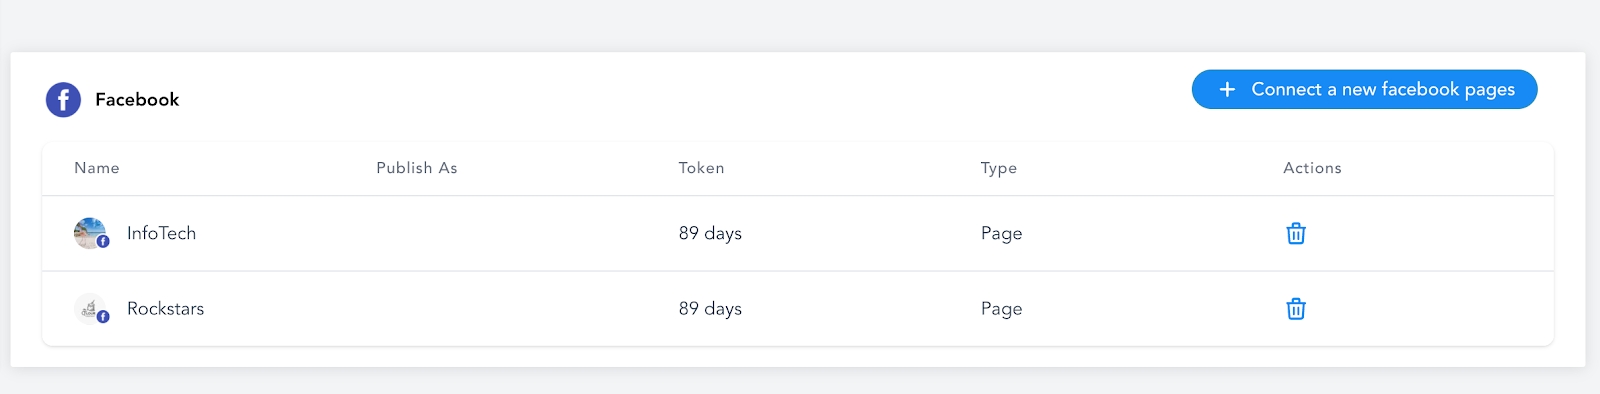
Step 5: Verify your connection
Finally, after completing the previous step, all of the chosen pages will be displayed in a list, indicating a successful connection, as depicted in the accompanying image.
By adhering to these guidelines, you have the flexibility to add numerous pages from either the same Facebook profile or various profiles, tailoring your social media management to your specific needs and preferences.
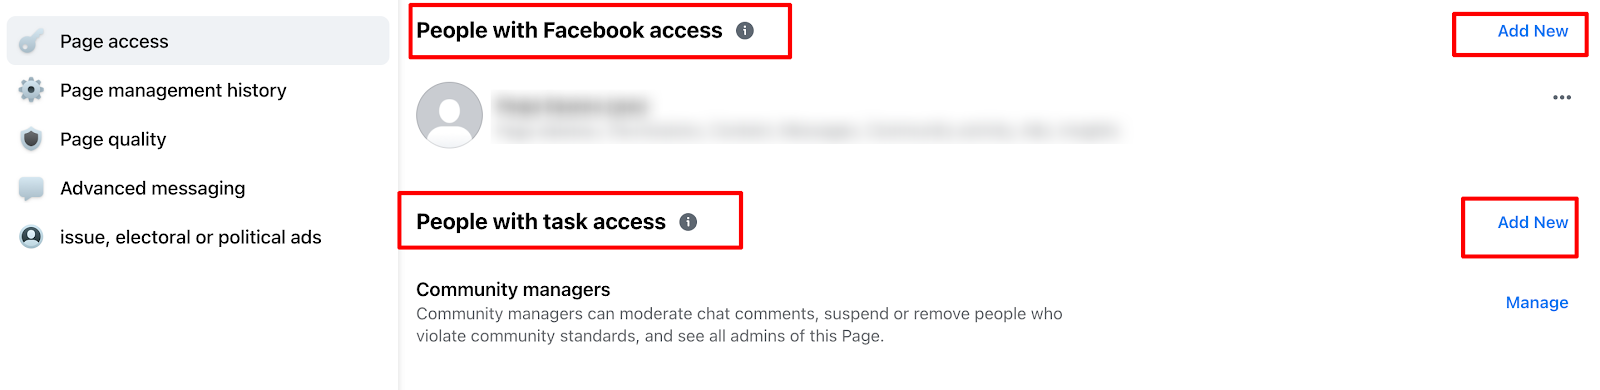
Types of Facebook Pages
Facebook has two types of Pages - Classic and New Page experience. If you are using the Classic page, please follow the above flow.
If you are using New Page Experience, they will be required to add access to the following role.