This section is designed to foster engagement, interaction, and collaboration, Communities bring you the future of online group interactions. Dive into an ecosystem where you can set up public groups for more comprehensive discussions or private ones for more focused conversations.
What are Communities?
Communities is a tool in your CRM platform that lets you create and manage online groups. These groups are like little hubs where people can talk, share, and learn about specific topics.
The person who creates a group becomes the owner and assumes administrative responsibilities and privileges. This feature offers different roles for group management, including admins, moderators, and members, each with its permissions and responsibilities. Enhanced filtering options enable users to sort by user status and roles, and security measures are in place to protect email visibility.
Here are the benefits of groups;
Group Management Flexibility: Introduce the ability to soft delete (make inactive) and restore groups, meaning better control over the community's groups without permanent deletion.
Enhanced Member Search: Search for members effortlessly on the View Members page. Plus, can directly access a member's profile from this page.
Privacy Settings: Choose whether to display phone numbers and email addresses under the Social Media section. A great way to maintain user privacy!
Advanced User Filters: Now filter users based on their status and roles for more streamlined management.
Security Update: For better user privacy, email addresses are now hidden on the view members page.
Private Groups: An Exclusive Space
Private groups serve as specialized hubs where only authorized members can engage in discussions and view shared content, ensuring confidentiality and exclusivity.
Admins and owners can easily transition regular groups into private ones through group settings—a perfect avenue for focused collaboration or confidential discussions.
In this group, the;
Owner: The supreme authority. The creator of a group can assign users as admin or contributor. This role remains exclusive.
Admin: Assigned by the owner, admins can also onboard users as either admins or contributors.
Contributor: A valuable participant without administrative rights.
Public Groups
You can create multiple groups based on specific interests, topics, or industries, including the option to soft delete and restore groups for better control. These groups serve as sub-communities where members can engage in focused discussions, share insights, and collaborate on projects.
Difference Between Public and Private Group
Public to Private:
Convert your public groups to private ones anytime, making content exclusive to its current members.
Private to Public:
Transitioning the other way, all pending members are instantly accepted. However, an informational alert will be dispatched for transparency.
Toggling Between Group Types:
Only accessible to admins and owners via the 'Settings' button.
- Navigate to: Specific Group> Settings > Group Settings > Group Type.
- Choose the desired group type - public or private.
- Decide on the group's visibility to non-members.
Setting Up Your Online Community
Communities is a cool feature that helps you build an interactive space for discussions and learning. Whether you're into e-learning, corporate communication, product development, customer support, or just want to connect with like-minded people, Communities has got you covered.
How to Set Up Communities:
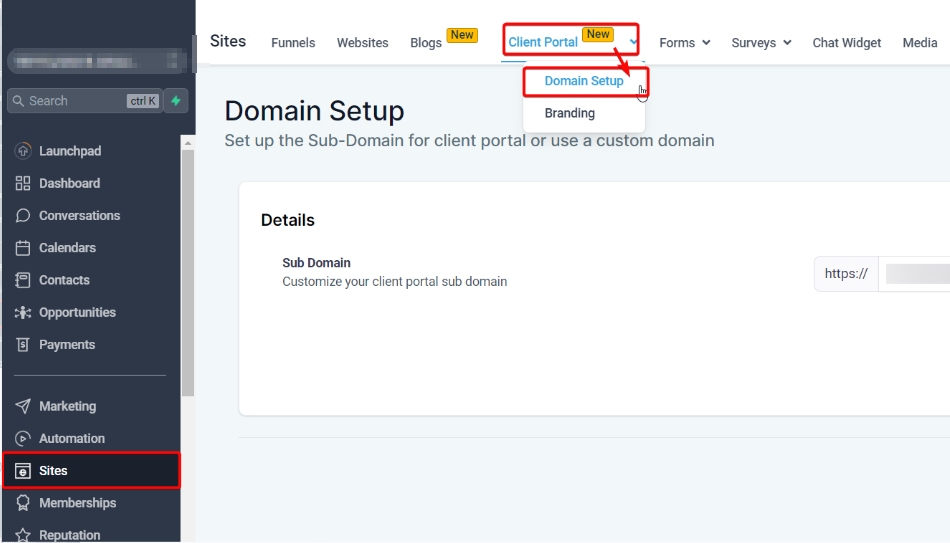
Step 1: Setting up Your Community Domain
Option 1: Utilize a pre-configured subdomain under "clientclub.net". This subdomain is already set up and ready to be used immediately. Simply select this option if it suits your needs. You will still need to scroll down and hit Update Domain to get this to work.
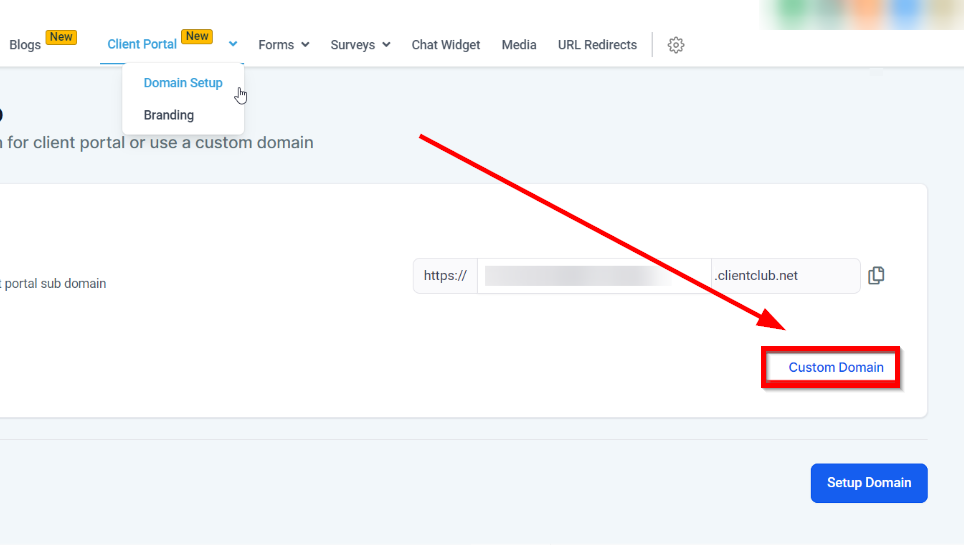
Option 2: Set up your own custom domain. If you prefer to use a domain that you own, follow the next steps.
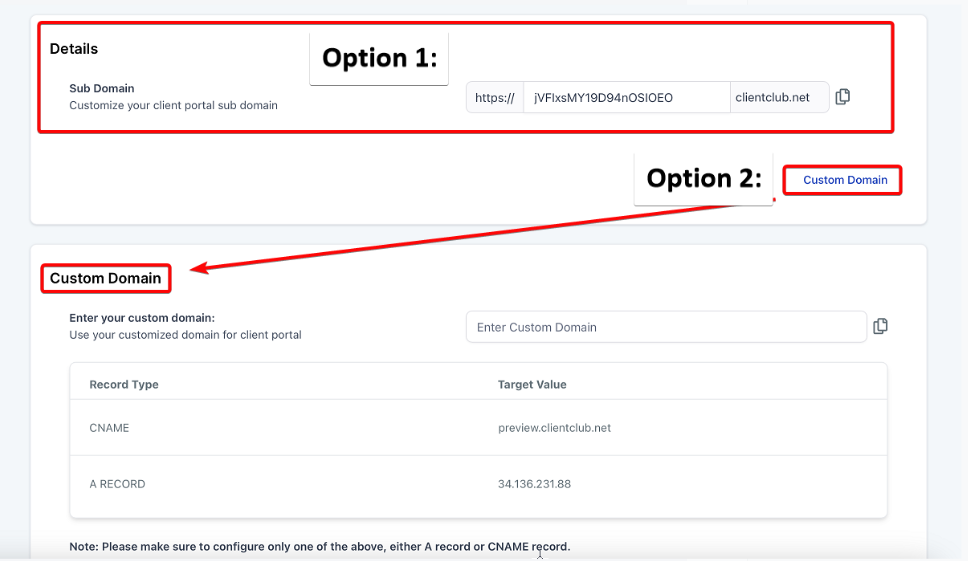
Using the left sidebar, navigate to the Sites tab then the Client Portal section. Proceed to the "Domain Setup." area.
Click on the option for a Custom domain and input your desired domain name.
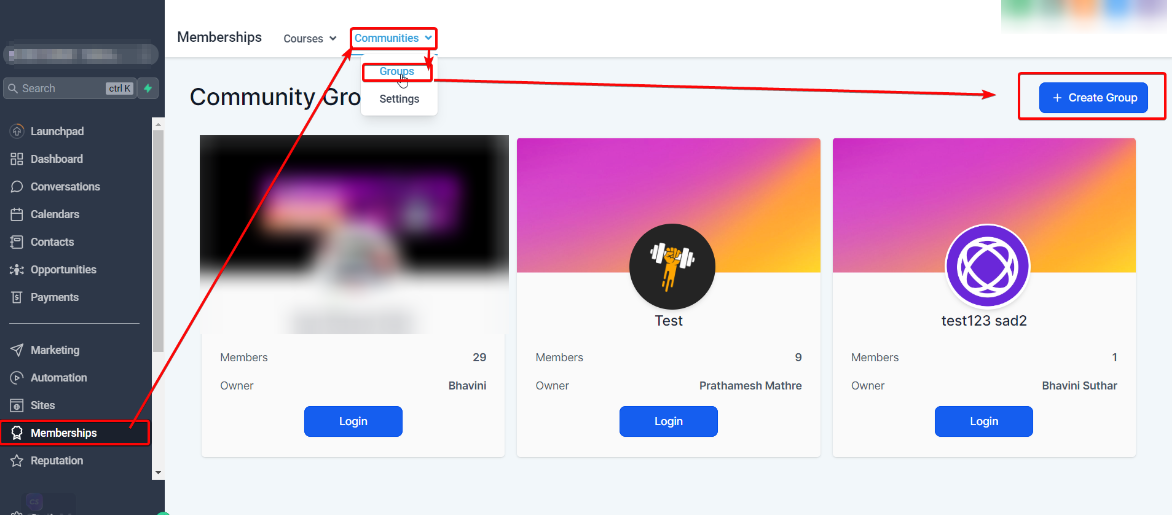
Step 2: Setting up Groups
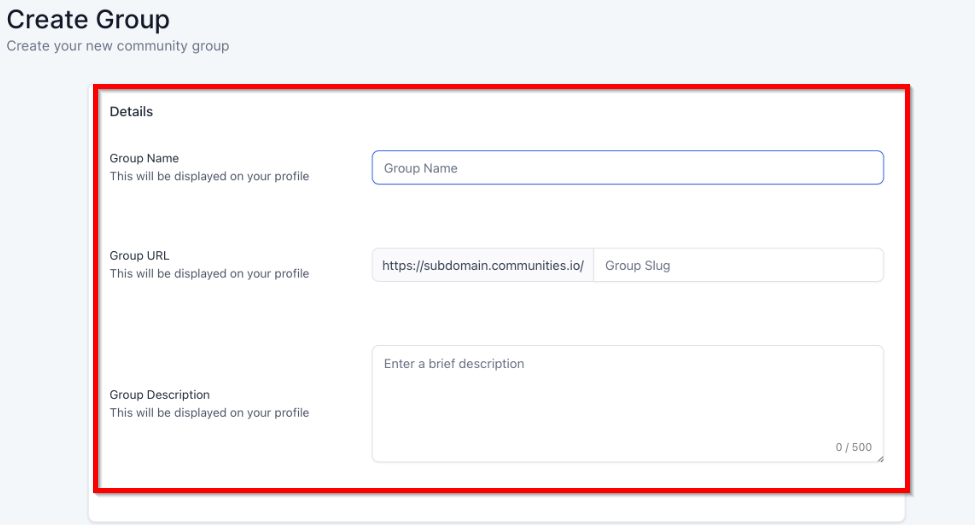
Then navigate to the Group section in the Membership Category and click on the “Create Group” to get started.
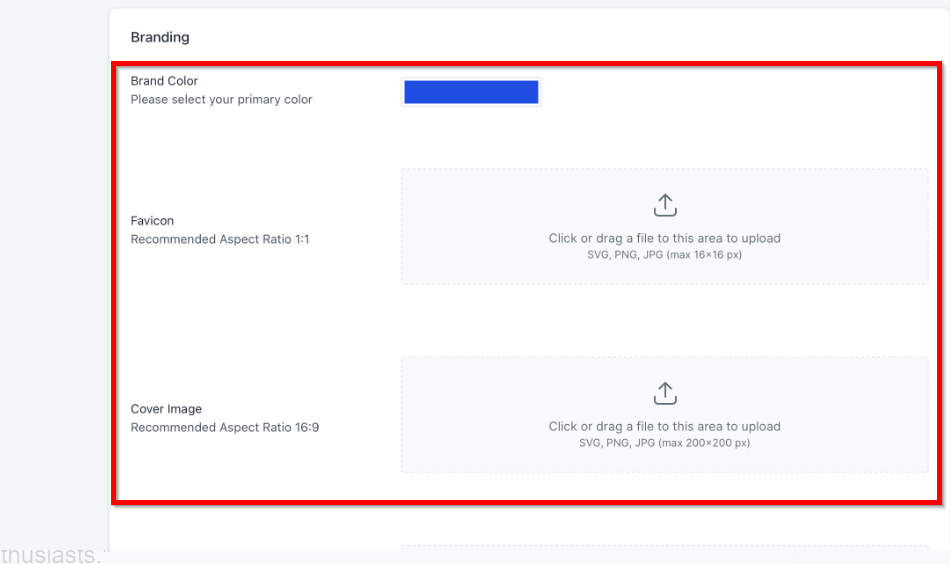
You can customize the communities by including the;
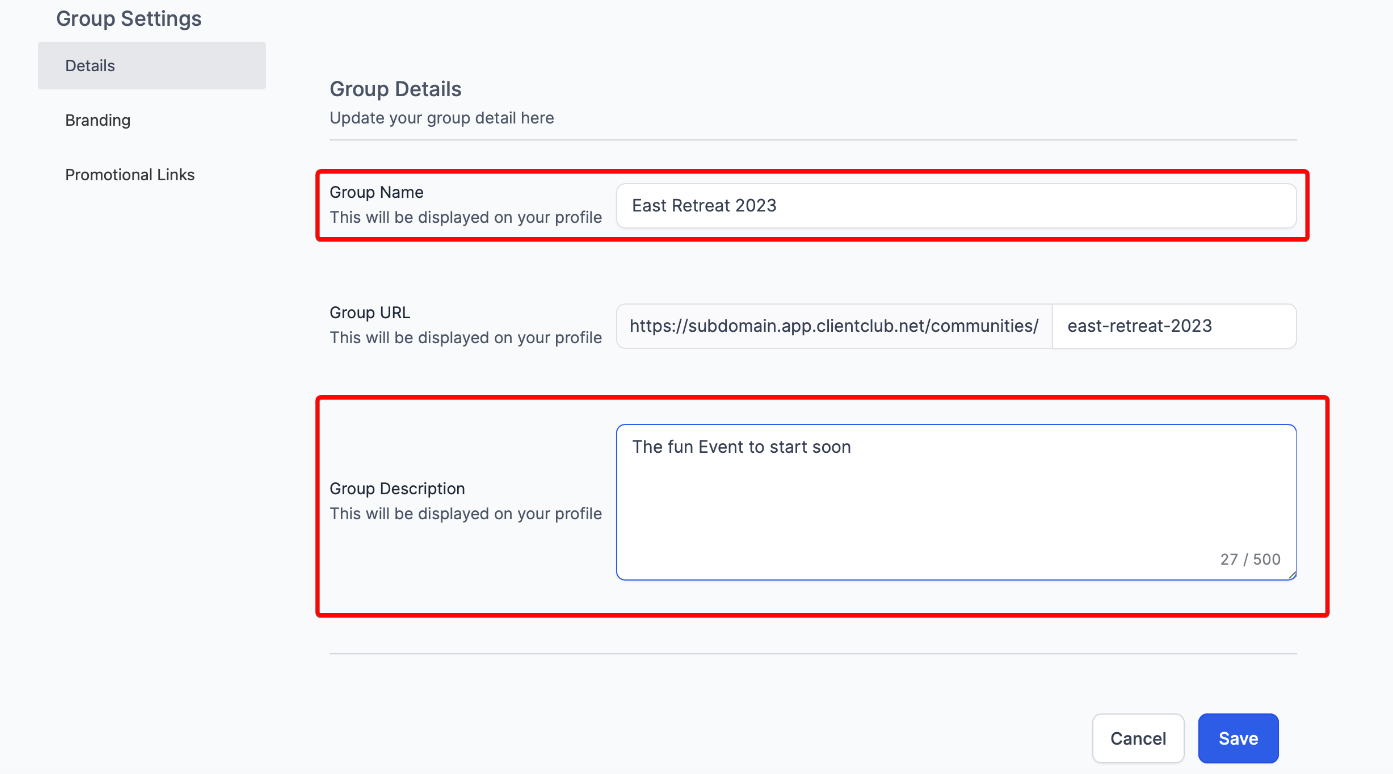
- Group Name: Give your group a unique name that reflects its purpose. For example, "Digital Marketing Enthusiasts."
- Group URL: Choose a simple web address for your group, like "digital marketing." Make it easy to remember.
- Group Description: Briefly explain what your group is about. For example, "A community for digital marketing pros and enthusiasts to share strategies, tools, and industry trends.
- Brand Color: Choose a color that represents your group or your brand. This color will be used in your group's design to provide a consistent look and feel.
- Favicon: This small icon will appear in the browser tab when someone is viewing your group. Ideally, It should be a small version of your logo or a symbol representing your group.
- Cover Image: The main image will appear at the top of your group's page. It should be visually appealing and relevant to your group's topic. The recommended aspect ratio is 16:9, and the image should be clear at a resolution of 200x200 pixels.
- Promotional links.
- The ability to toggle the visibility of phone numbers and email addresses under the Social Media section.
- This allows users to create a unique and branded experience for their community members.
- Then click the Save button.
Step 3: Adding Members to Your Group
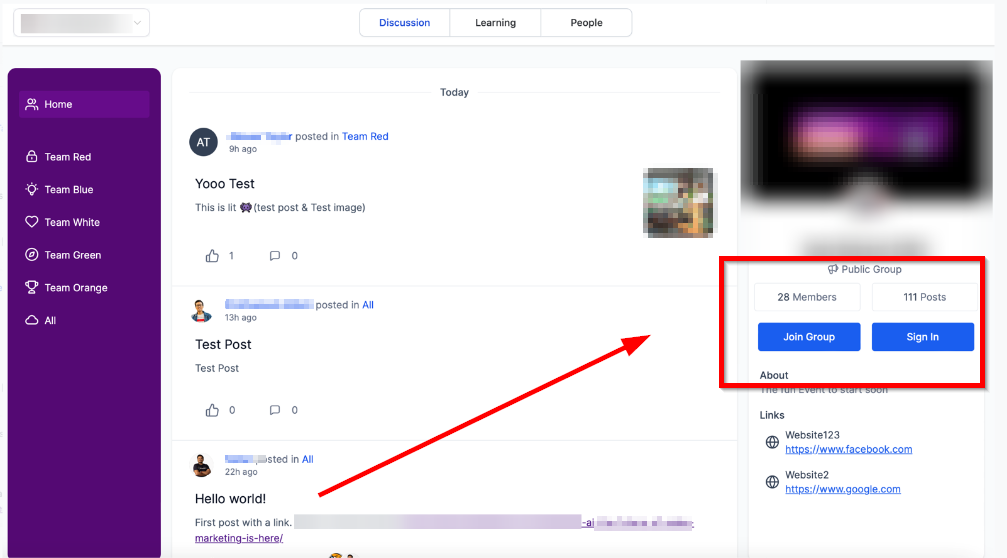
To enable members to join your group, you must provide them with a unique URL specific to the group within your community. This URL will direct them to a customized page where they can sign up and create a profile shared across all the groups within the community. Here's a detailed version of the process:
Joining a group
Members can click on the provided URL, leading them to a page where they can join the group.
Step 4: Customizing Your Group
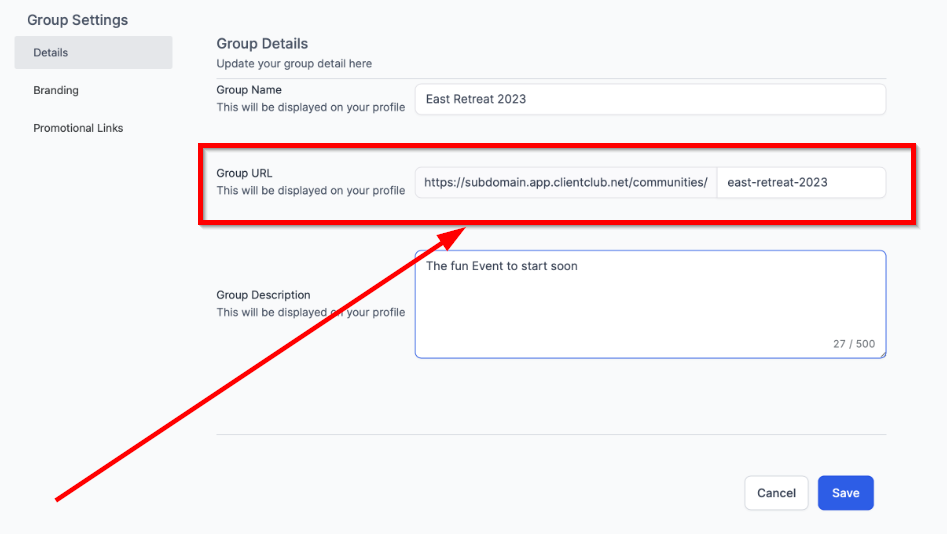
Access the group settings by clicking on the settings icon at the top of the page. In the left menu, locate and click on the "Details" section. You will find the option to change the group URL within the Details section. Once you have made the necessary adjustments, save the changes. Congratulations! Your group now has a customized URL. To confirm the update, you can revisit the settings modal and ensure that your current URL reflects the newly set one.
Step 5: Managing Your Groups
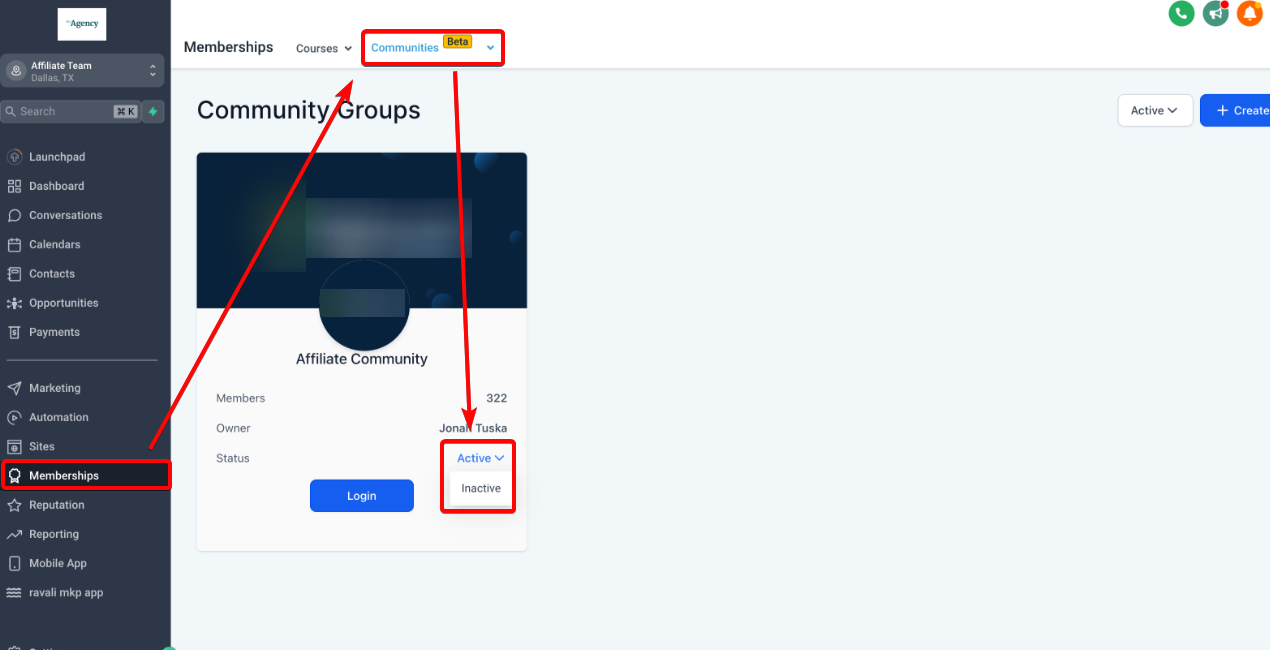
You can delete and restore groups easily, giving you better control over group management. You can switch it to Active to activate your group or Inactive to Deactivate your group.
Sub Account Users Inside Community Groups:
- Anyone can create a group.
- The creator becomes the owner and manages the group.
- Admins have more control, while moderators handle day-to-day stuff.
- Everyone can join and participate in the group based on their role.