Check your Calendar
The first step to creating a calendar workflow is to make sure you have a calendar set up to tie your workflow to.
So, from the dashboard, simply click on "Calendars", then "Calendar Settings" and either create the calendar you need or double check what you named the calendar you wish to use.
Once that is done, click "Go Back" in the left menu to go back to the main menu and choose "Automation".
Setting up the Workflow
When you get to the Automations page, click on "Create Workflow" in the upper right corner. Then you can choose from an existing campaign or "Start from Scratch". I always start from scratch so I know exactly how the workflow is being built. Once you select what you want, then click the "Create New Workflow" button to get started.
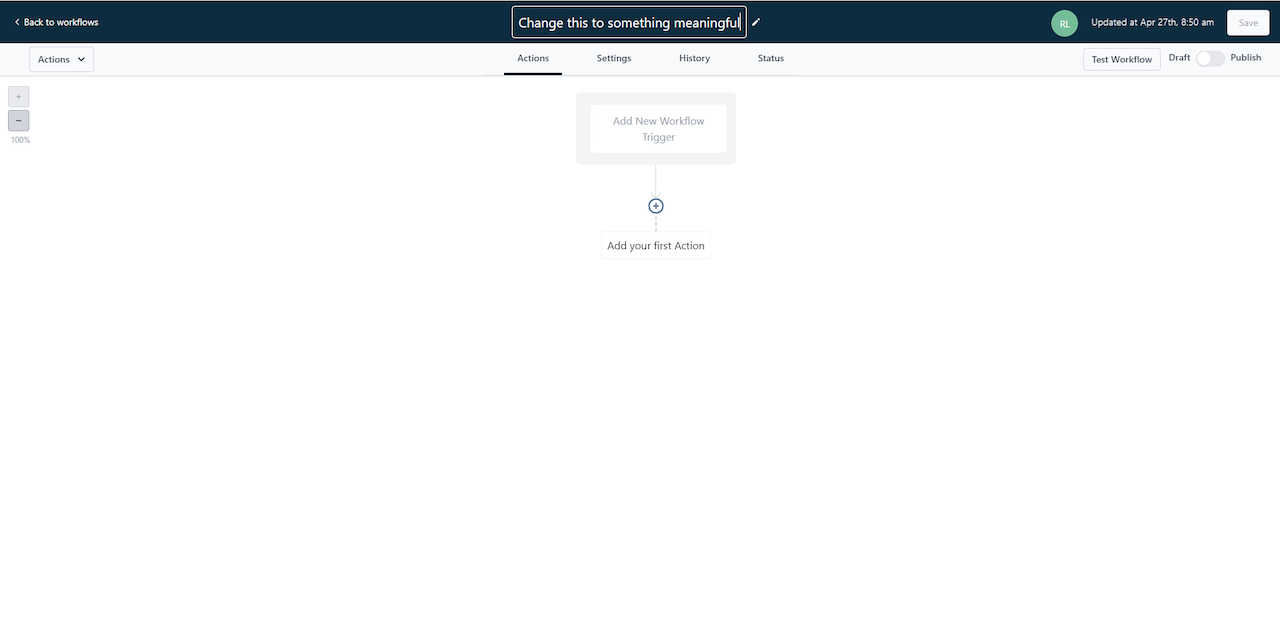
The first step when you are creating any workflow is to rename it and save it.
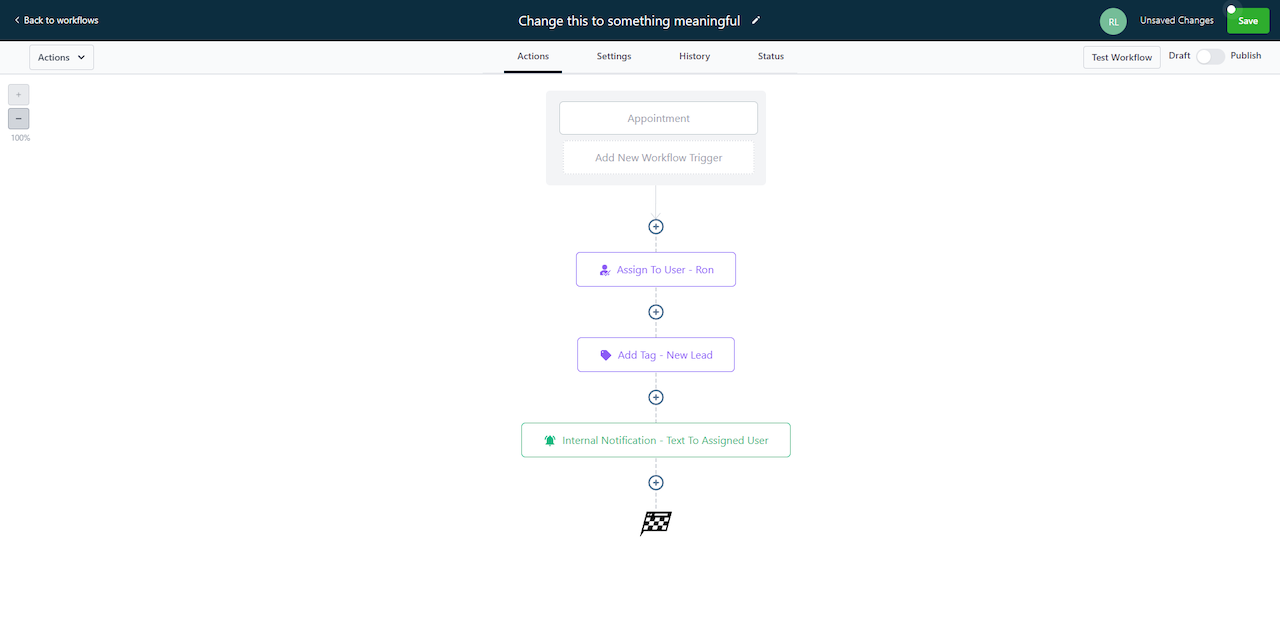
Then, choose the trigger. In this case, I am going to choose "Appointment" with the filters of "In Calendar" and "Appointment Status is" to only trigger off of New appointments on my appt. calendar.

Adding the Functionality
Once you have the workflow created, named, and the Trigger set, it is time to add some functionality to it. There are a few things which I consider to be best practices.
First thing: Assign the workflow to a user. This will make life much easier in the future. By doing this, you don't have to fill out the "from" sections of the email forms. It also affects how other pieces of the workflow will work. When you do this, change the name of the step to reflect who it is being assigned to.
Next, Add a system tag if needed. This can be anything appropriate. When you do this, add the system tag to the name of the step so you can know at a glance what the step is doing without opening it up.
Third - Send an "Internal Notification" to the Assigned User(this is mainly why we did that step first) letting them know they have a new appt on their calendar.
Finishing it up
Congrats! You made it this far. Only three more steps to do and you will be done.
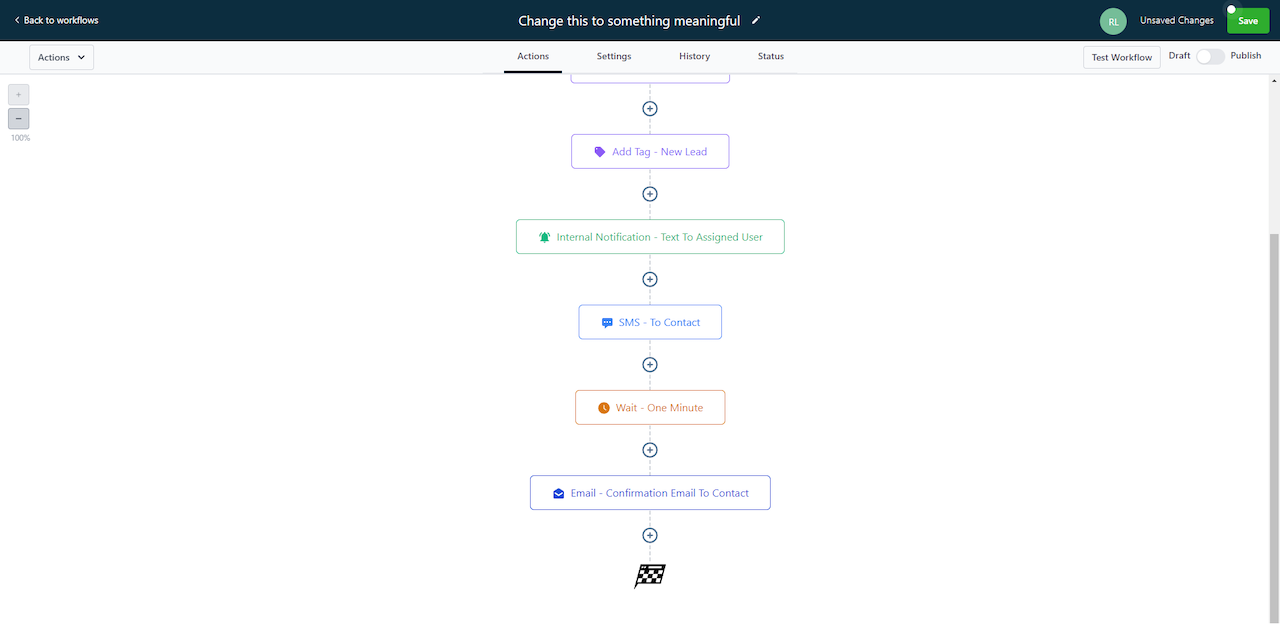
1) We are going to send a text message to the contact letting them know the appt is confirmed. To do this, simply choose "Send SMS" type out your message and save it. Be sure to add something like, "To Contact" or similar to the name of the step.
2) Add a one minute wait step immediately after the SMS step. This causes the system to pause and prevents issues with sending the SMS and Email. Be sure to add " - One Minute" to the name of the step.
3) Choose "Send Email". Add " - Confirmation email to contact" to the name of the step. Fill out the subject and the body of the email as appropriate and save it.
Et Voila' you are done. You now have a simple appointment workflow from which you can build any level of complexity you need.
Closing notes:
- Be sure to name your steps with something meaningful. On these simple workflows, it is pretty easy to see what is going on. However, as the workflows become more complicated, having meaningful names will save you a lot of time and headache.
- By assigning the workflow to a specific user or users, you greatly simplify things like sending emails to your contact, sending info to the specific user and so on. It is just good practice most of the time.
- Be sure to give the workflow itself a meaningful name. Again, when you only have a couple of workflows, it is easy to tell the difference. But when you get more than 4-5 of them, it will save you time and headaches.