Steps to create an email drip campaign
Load the flow builder
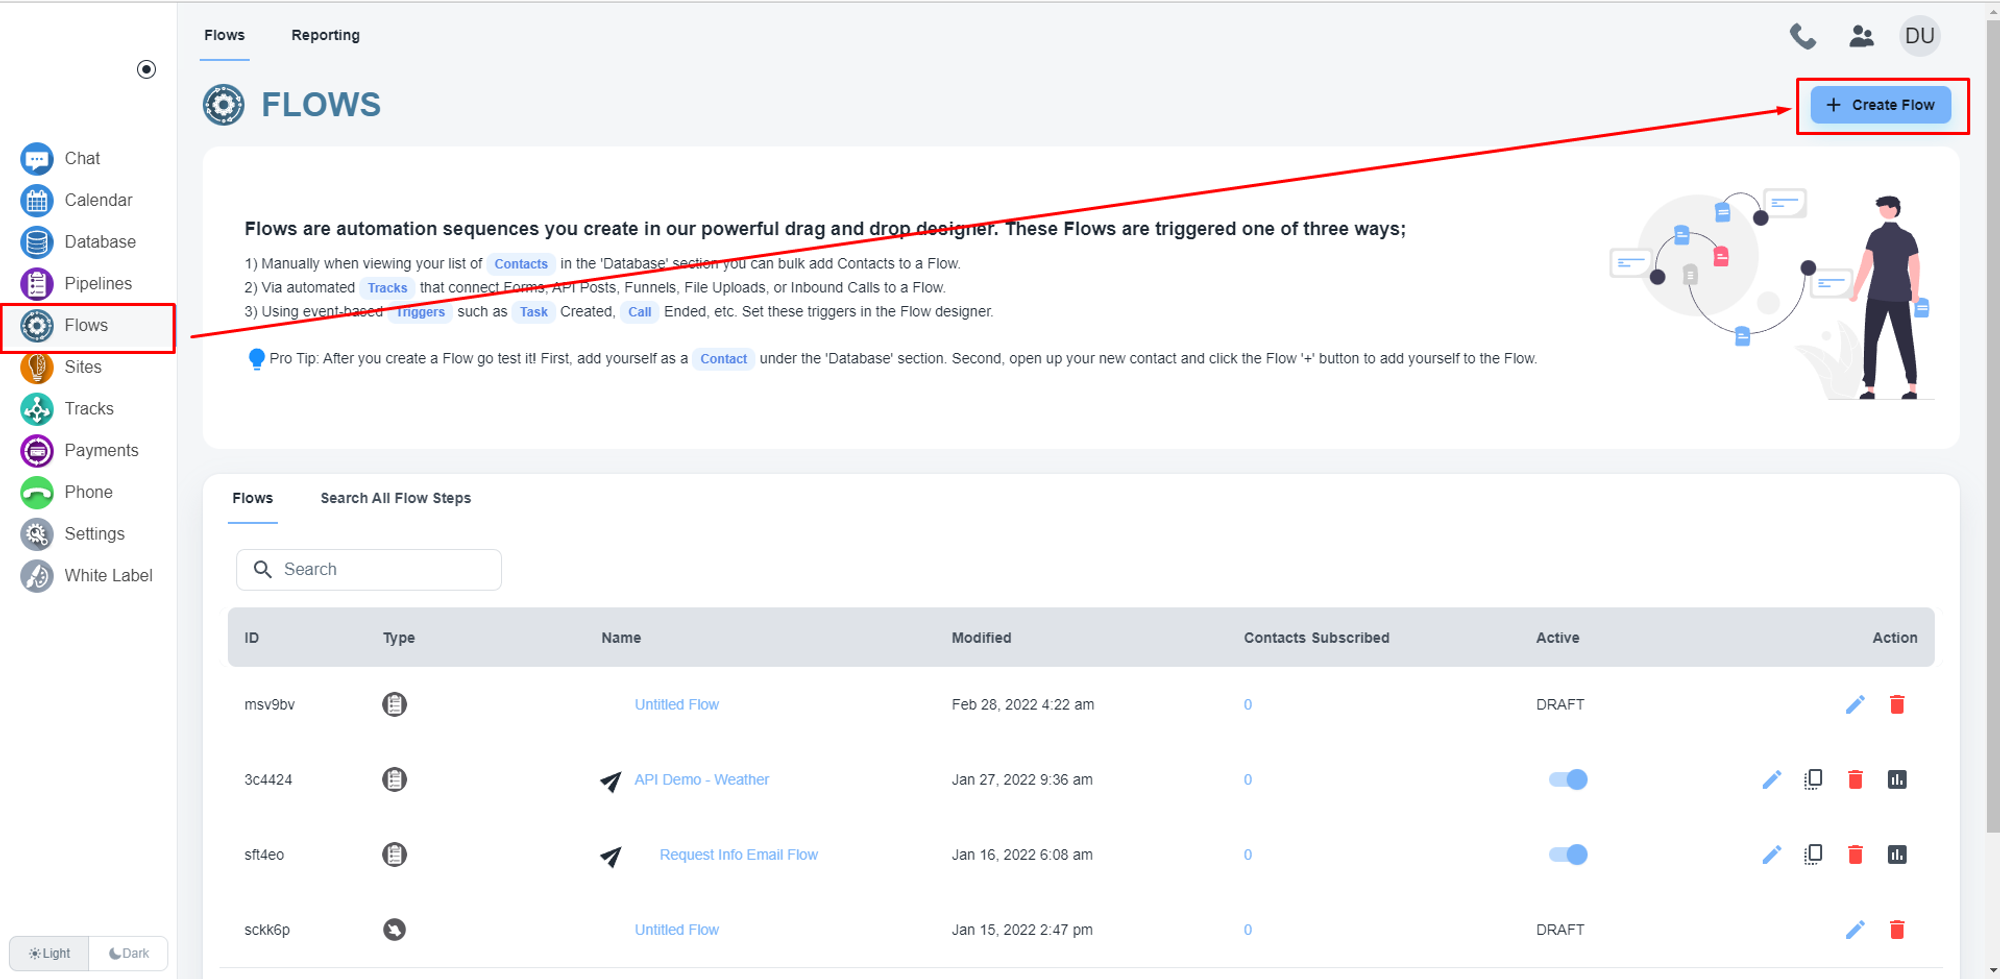
Navigate to the flow builder by clicking the “Flows” on the left side menu. Then when you have the flow page open you will see a link to “Flows” on the top of your page, please click that. Click on the ‘Create Flow’ button.
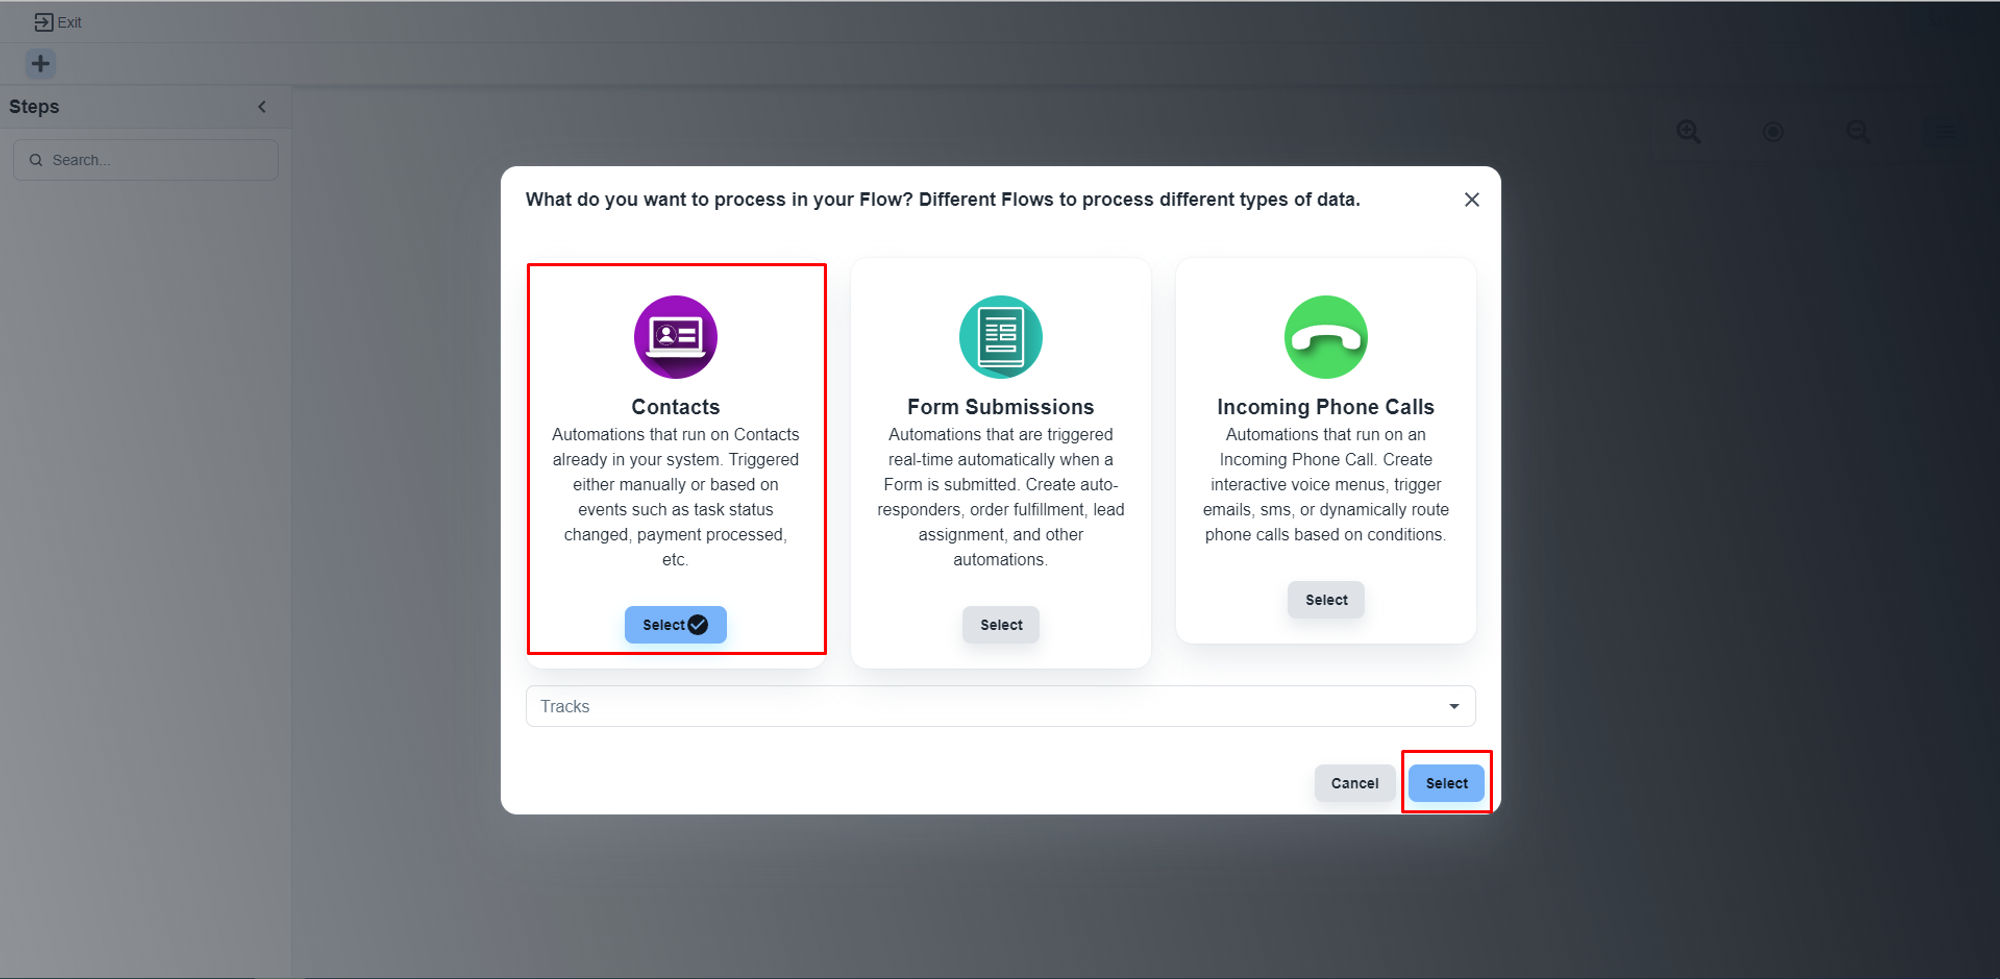
The system will pop up a message box, and you will have to select the first option, 'Contacts'. Now, click on the ‘Select’ button.
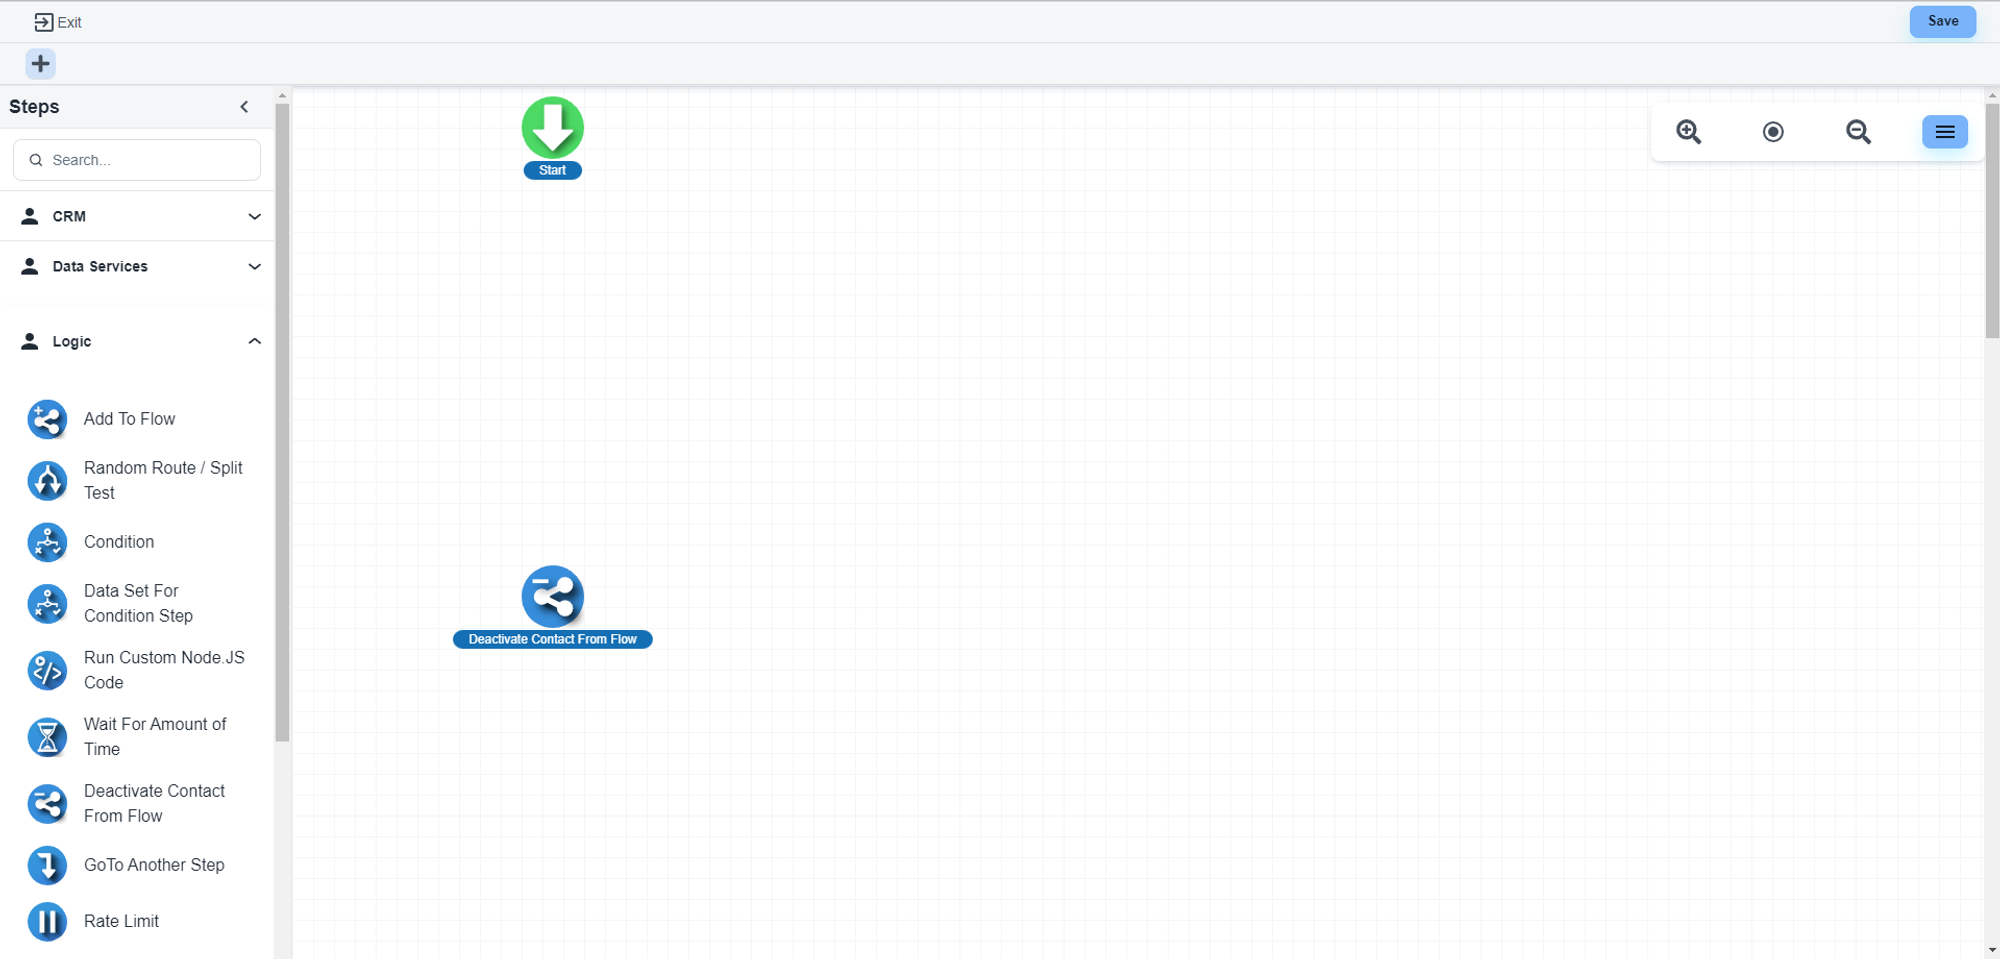
Drag and drop to build flow
Drag and drop elements on the flow builder to add steps
💡 Video guideline on automation flow
Use the ‘Wait For Amount of Time’ step
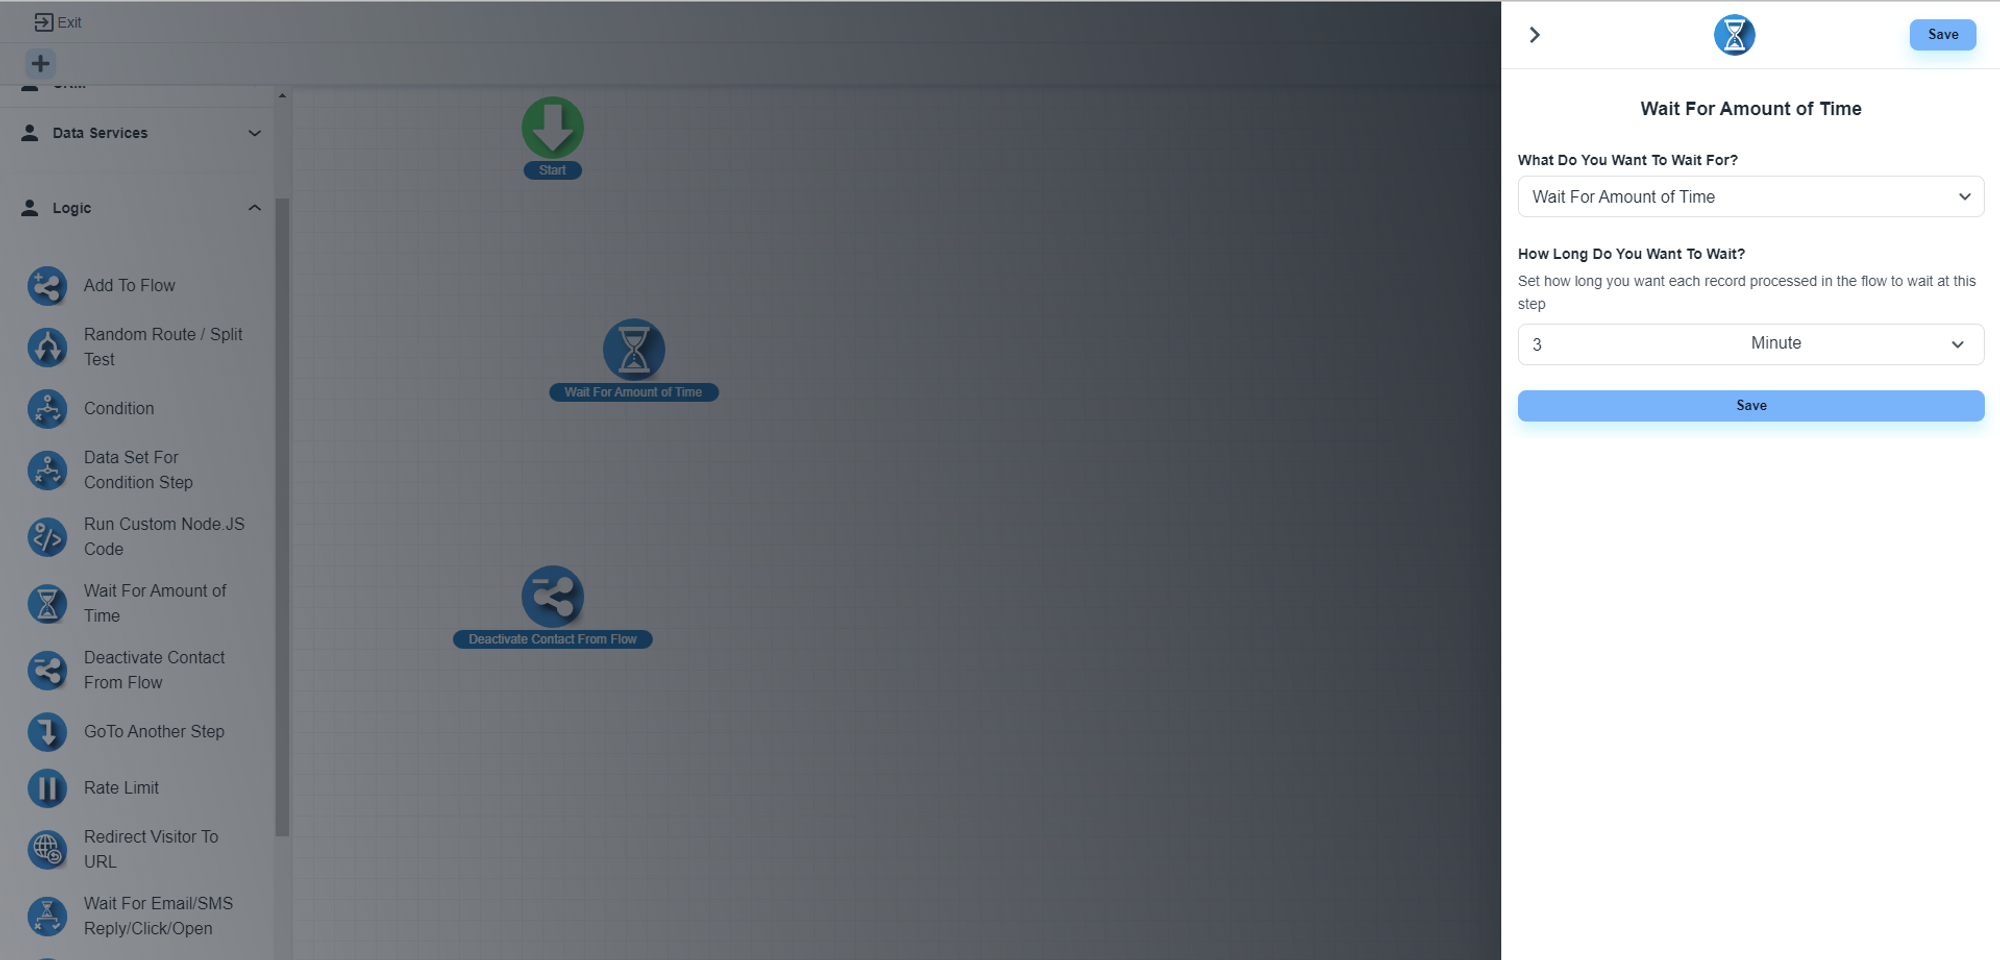
Under the ‘Logic’ section, you will get the ‘Wait For Amount of Time’ step. This step allows you to create a time gap in the drip campaign.
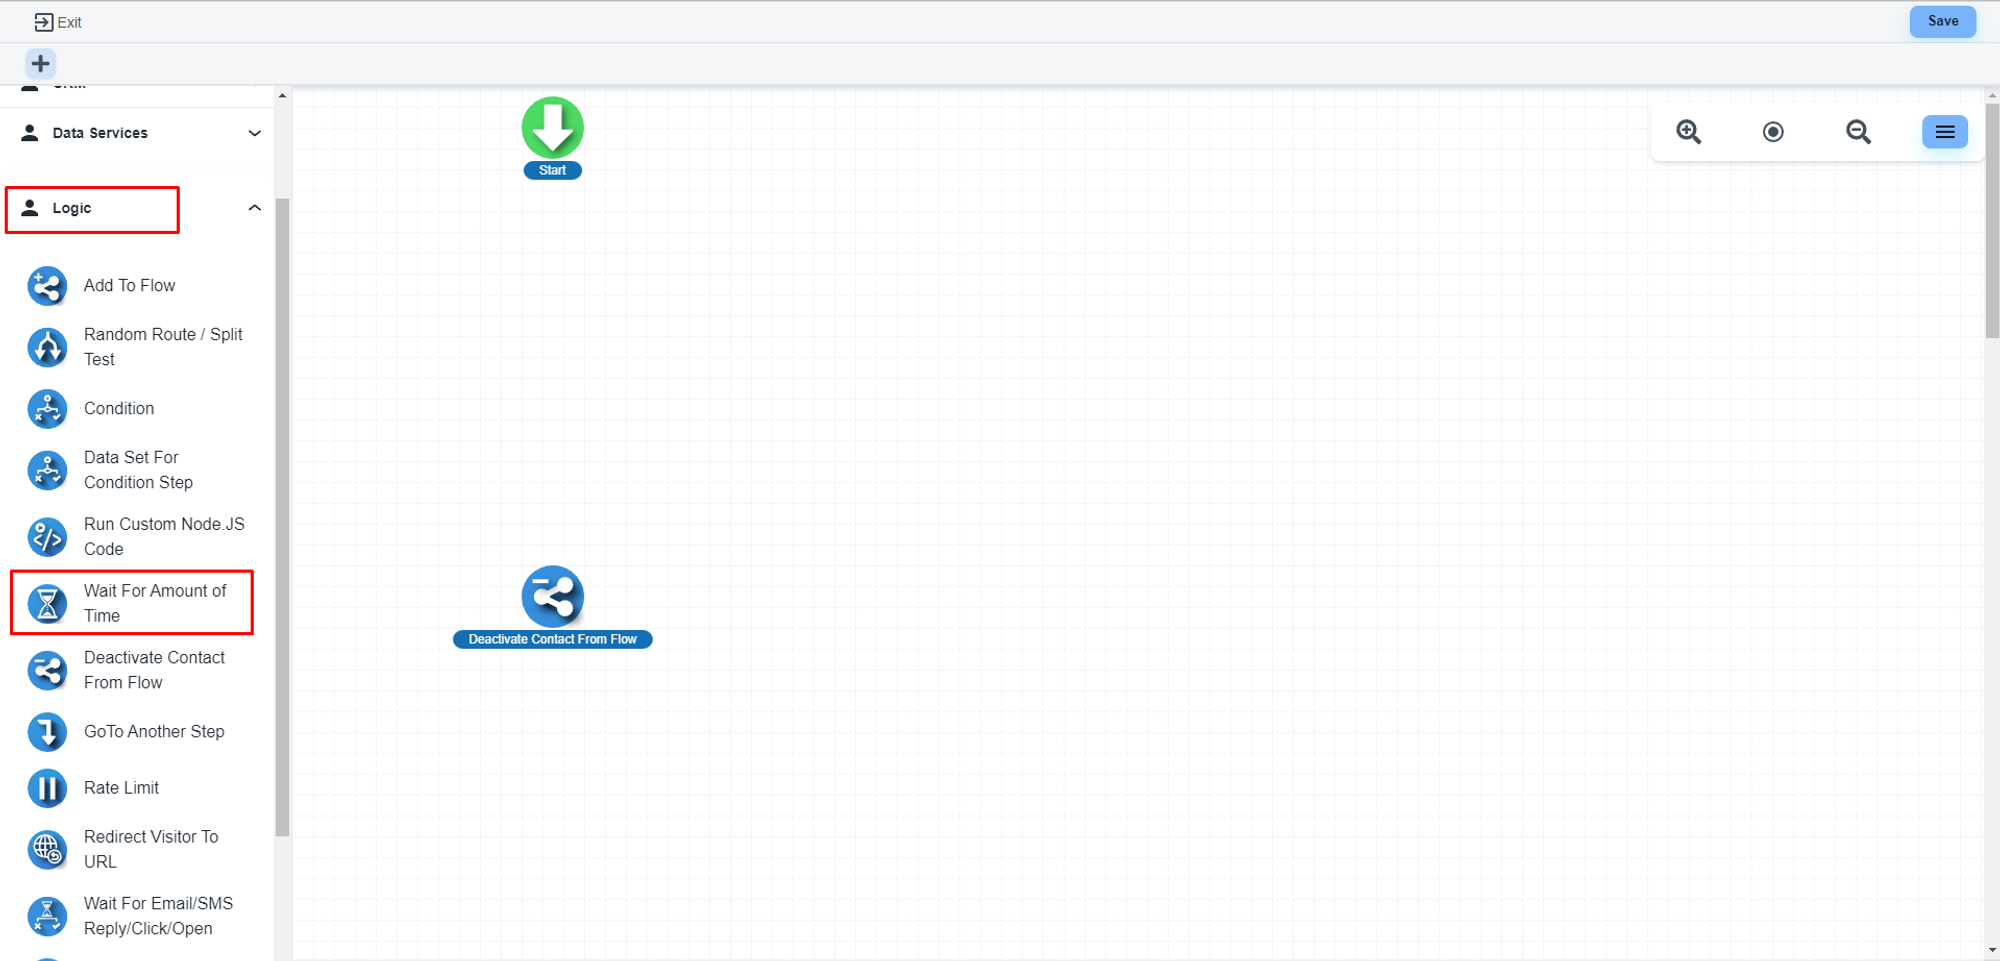
Please, configure the step as per your requirement.
Use the ‘Send Email’ step
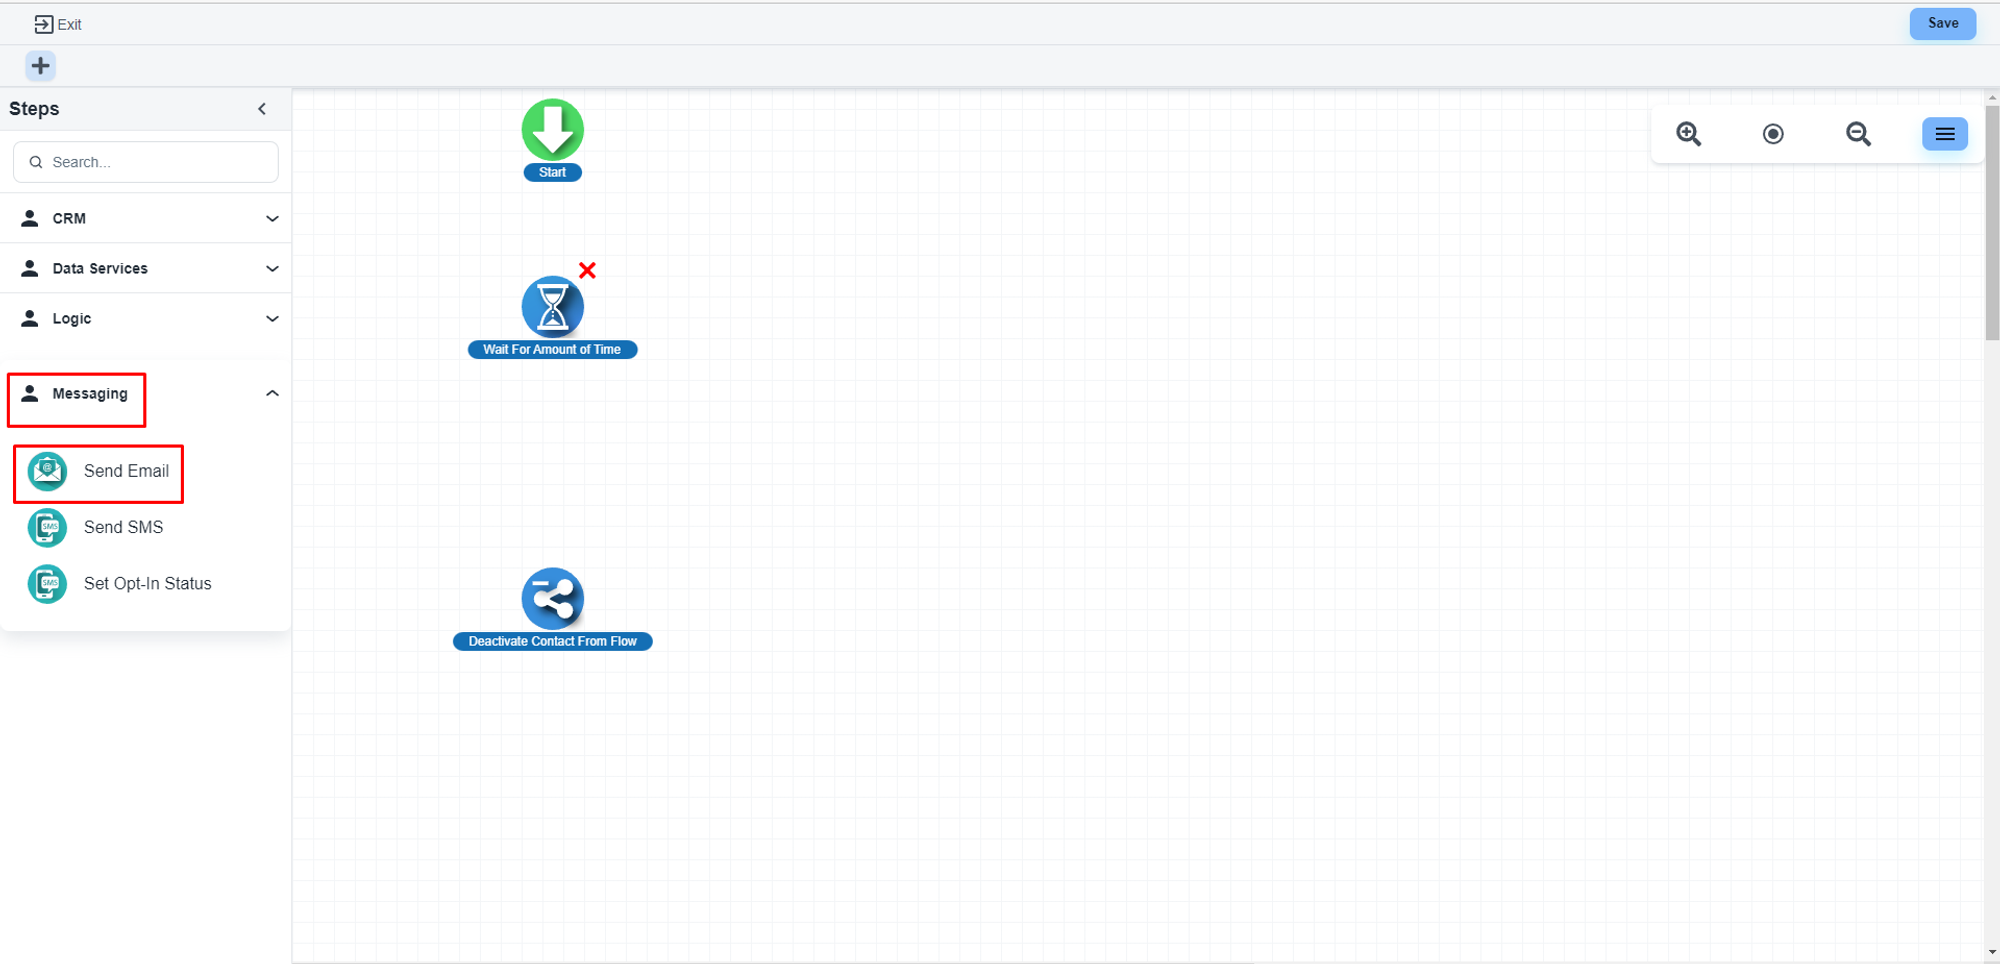
Under the ‘Messaging’ section, you will get the ‘Send Email’ step
Please, configure it as per your requirement.
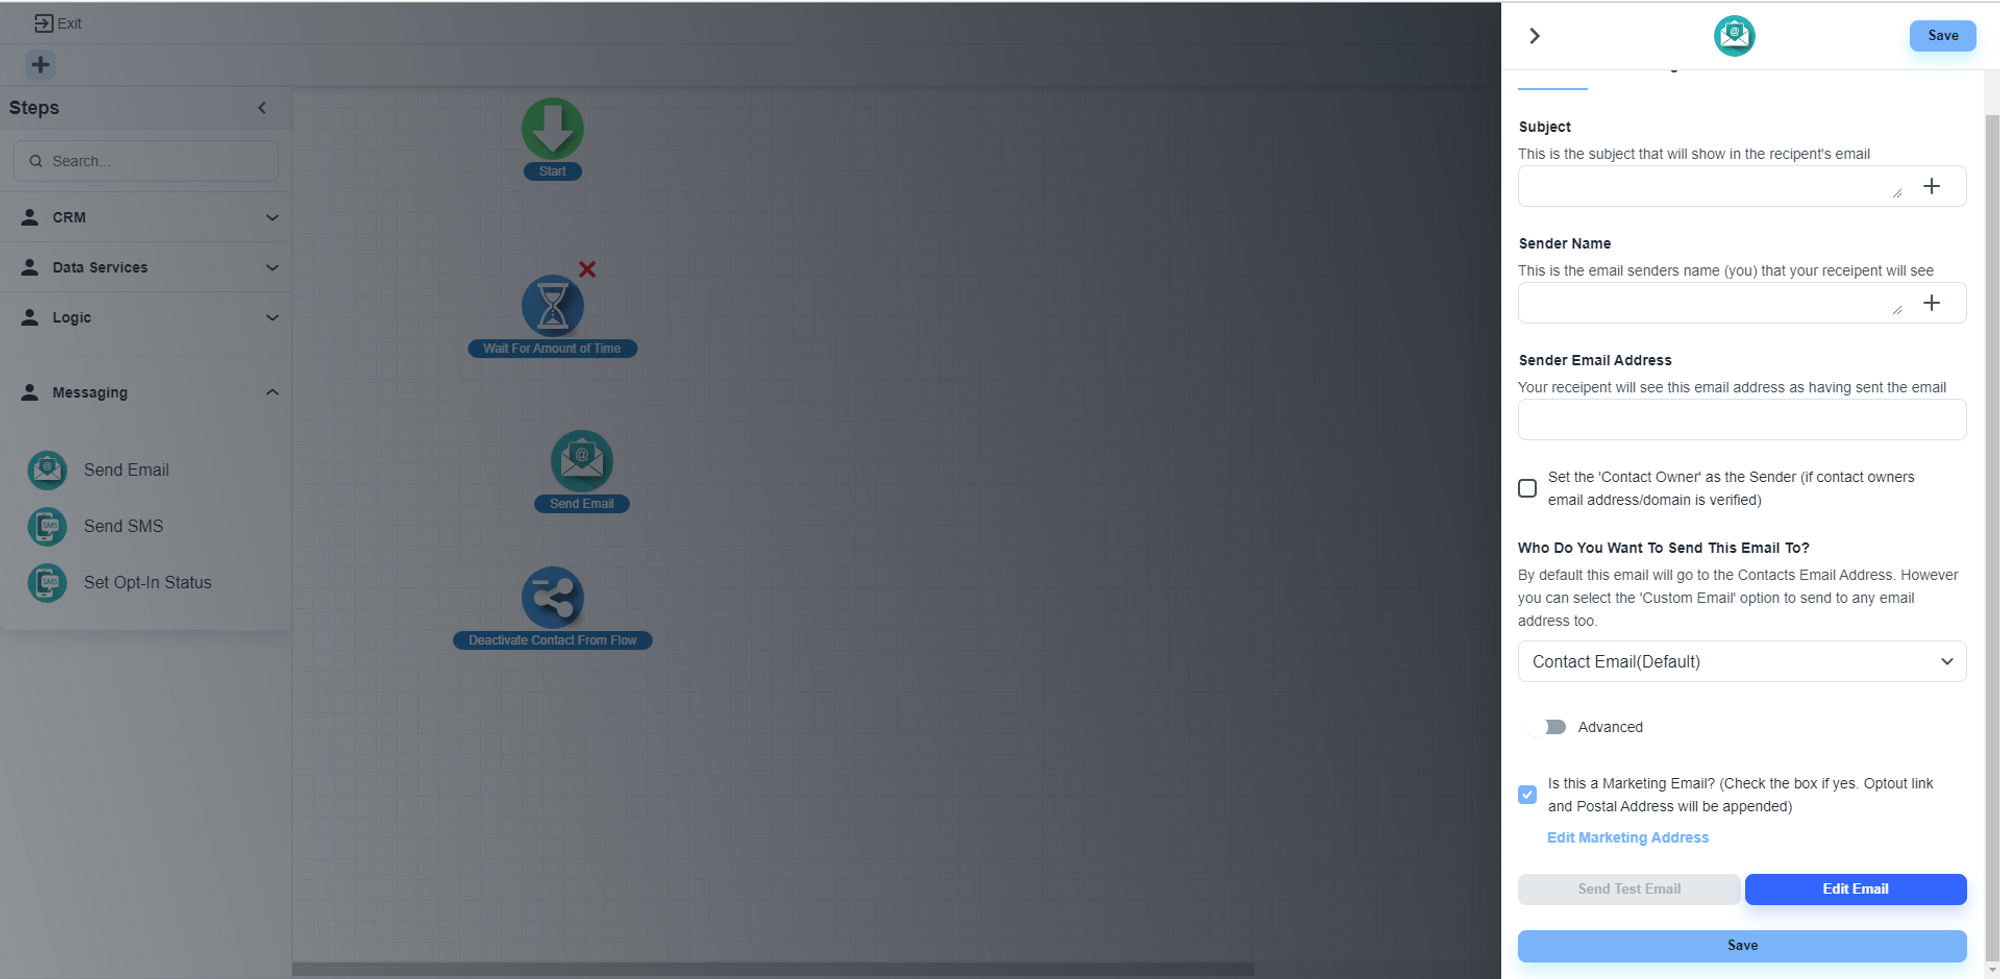
💡 By the combination of these two steps ‘Wait For Amount of Time’ and ‘Send Email’, you can build your email drip campaign.