Create a Google DialogFlow Bot
Your DialogFlow bot is going to process the Chat messages via an “Agent” and then return a response in the Chat. To do this we first need to define an “Agent” with Google.
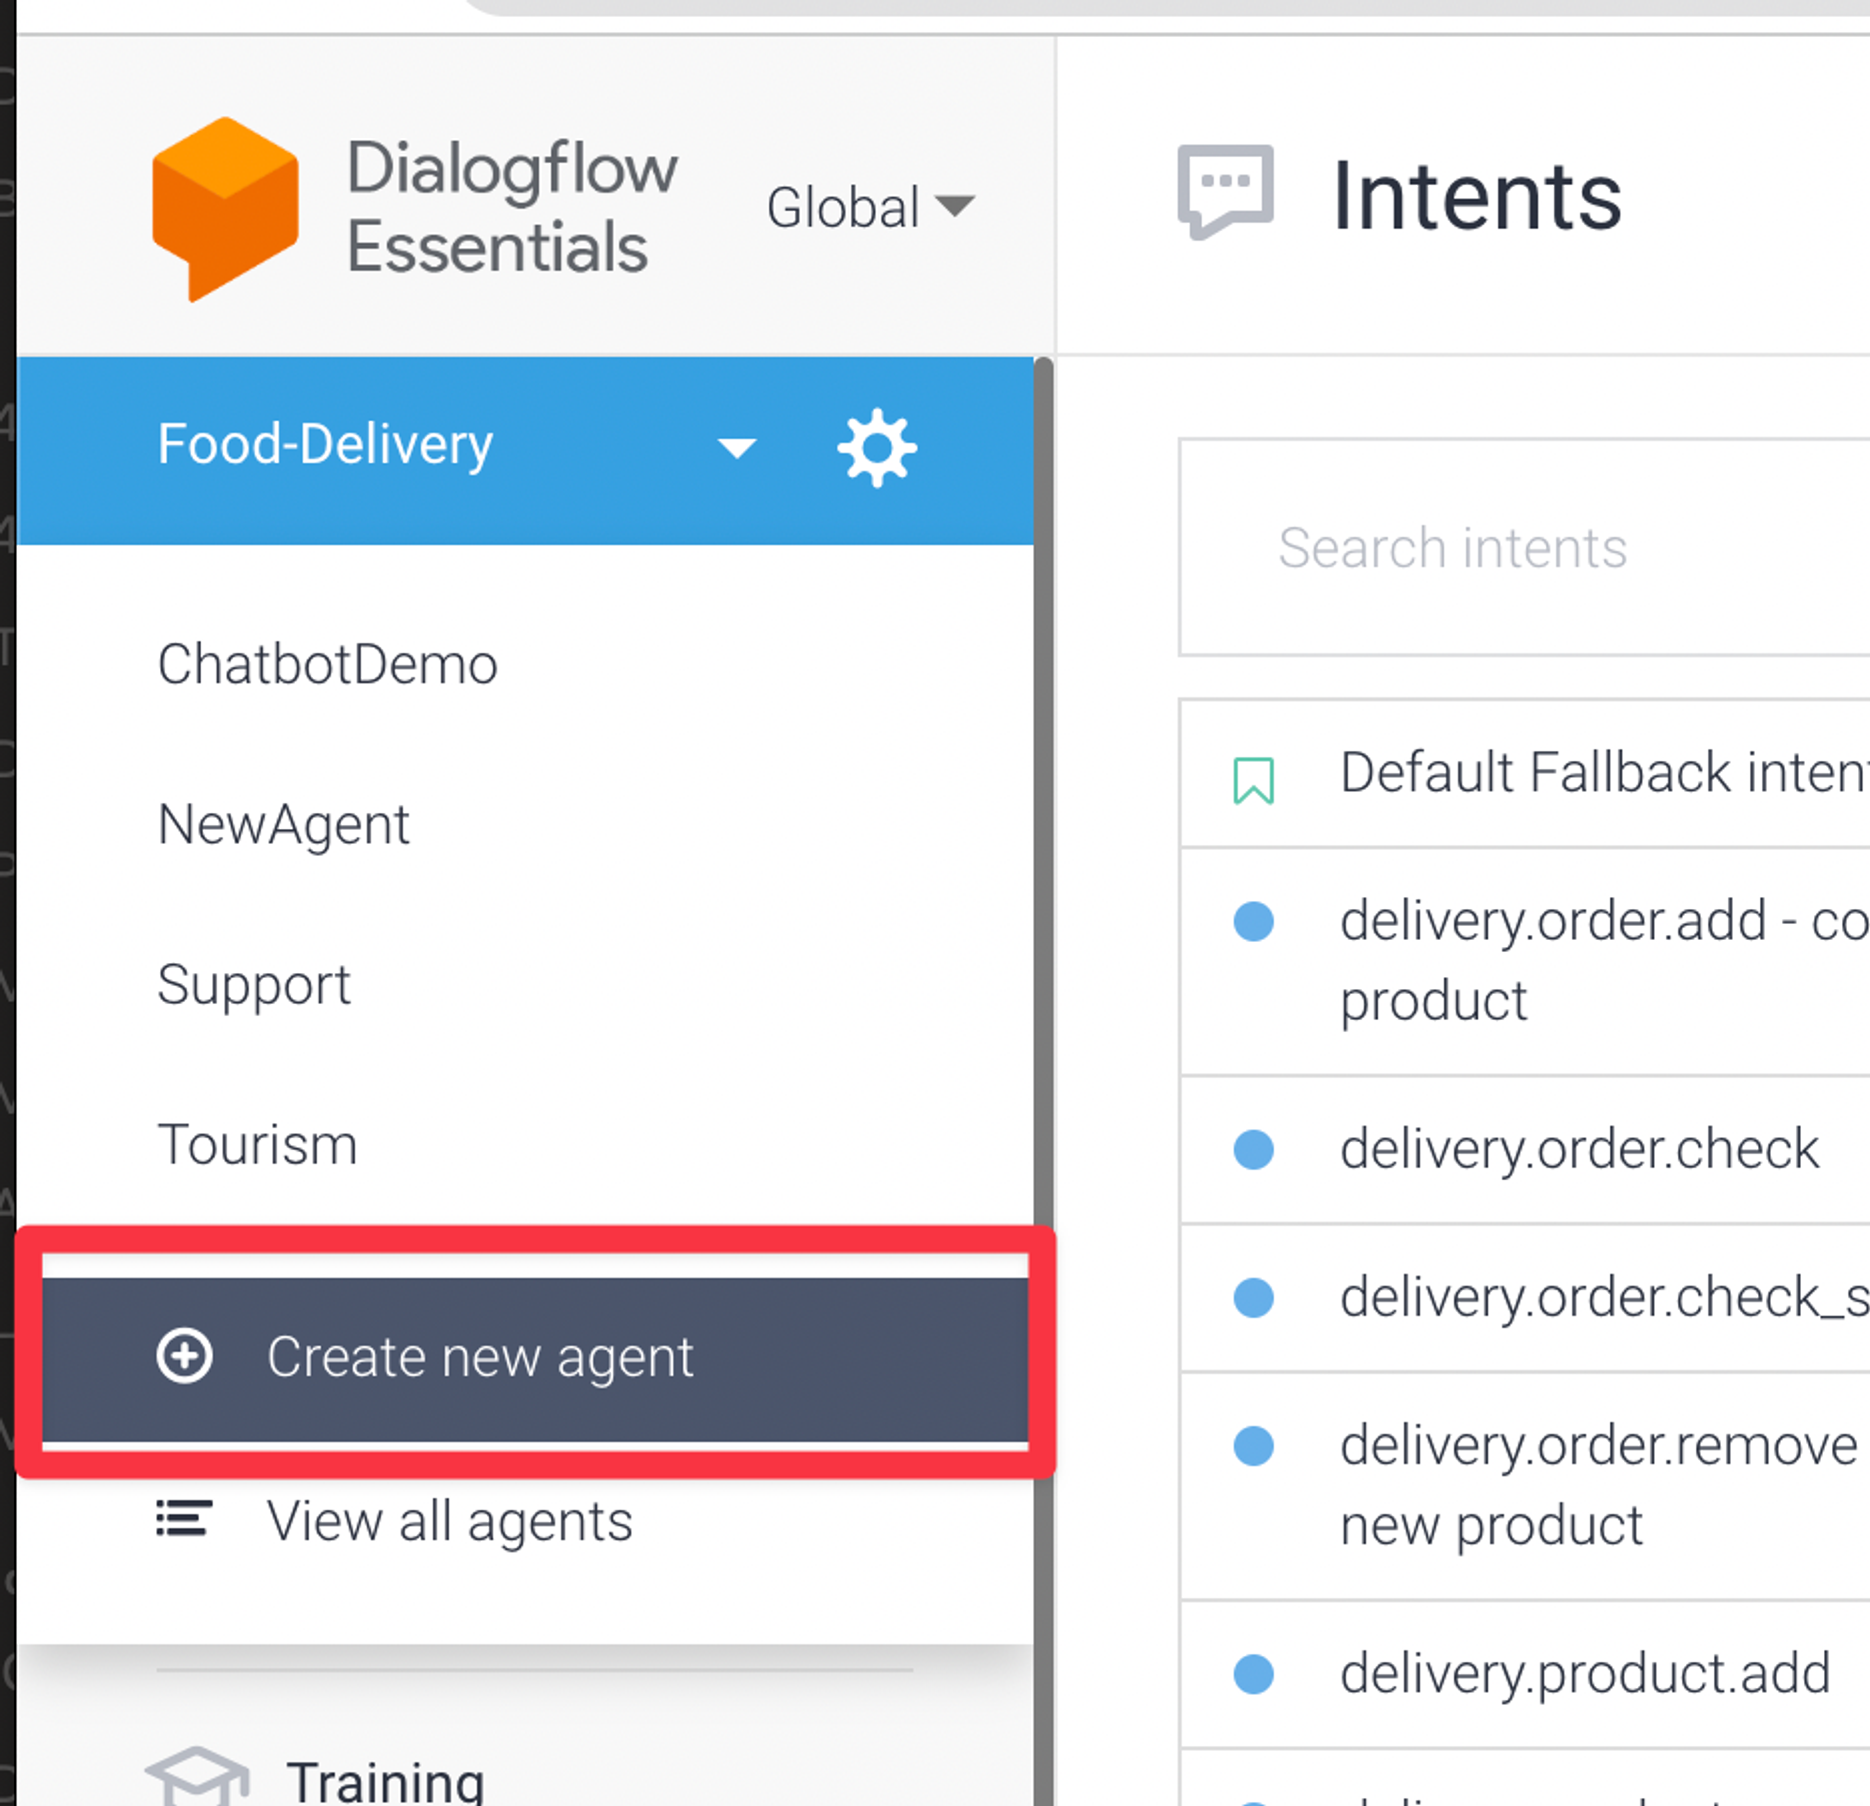
Create a New Agent
Please navigate to https://dialogflow.cloud.google.com/ and click “Create New Agent”.
✅ You can also start from one of Google Pre-built Agents here https://dialogflow.cloud.google.com/#/agent/food-delivery-qewk/prebuiltAgents/
Create New Intent
Create “Intents” with DialogFlow that tells your Bot what to listen for and how to respond.
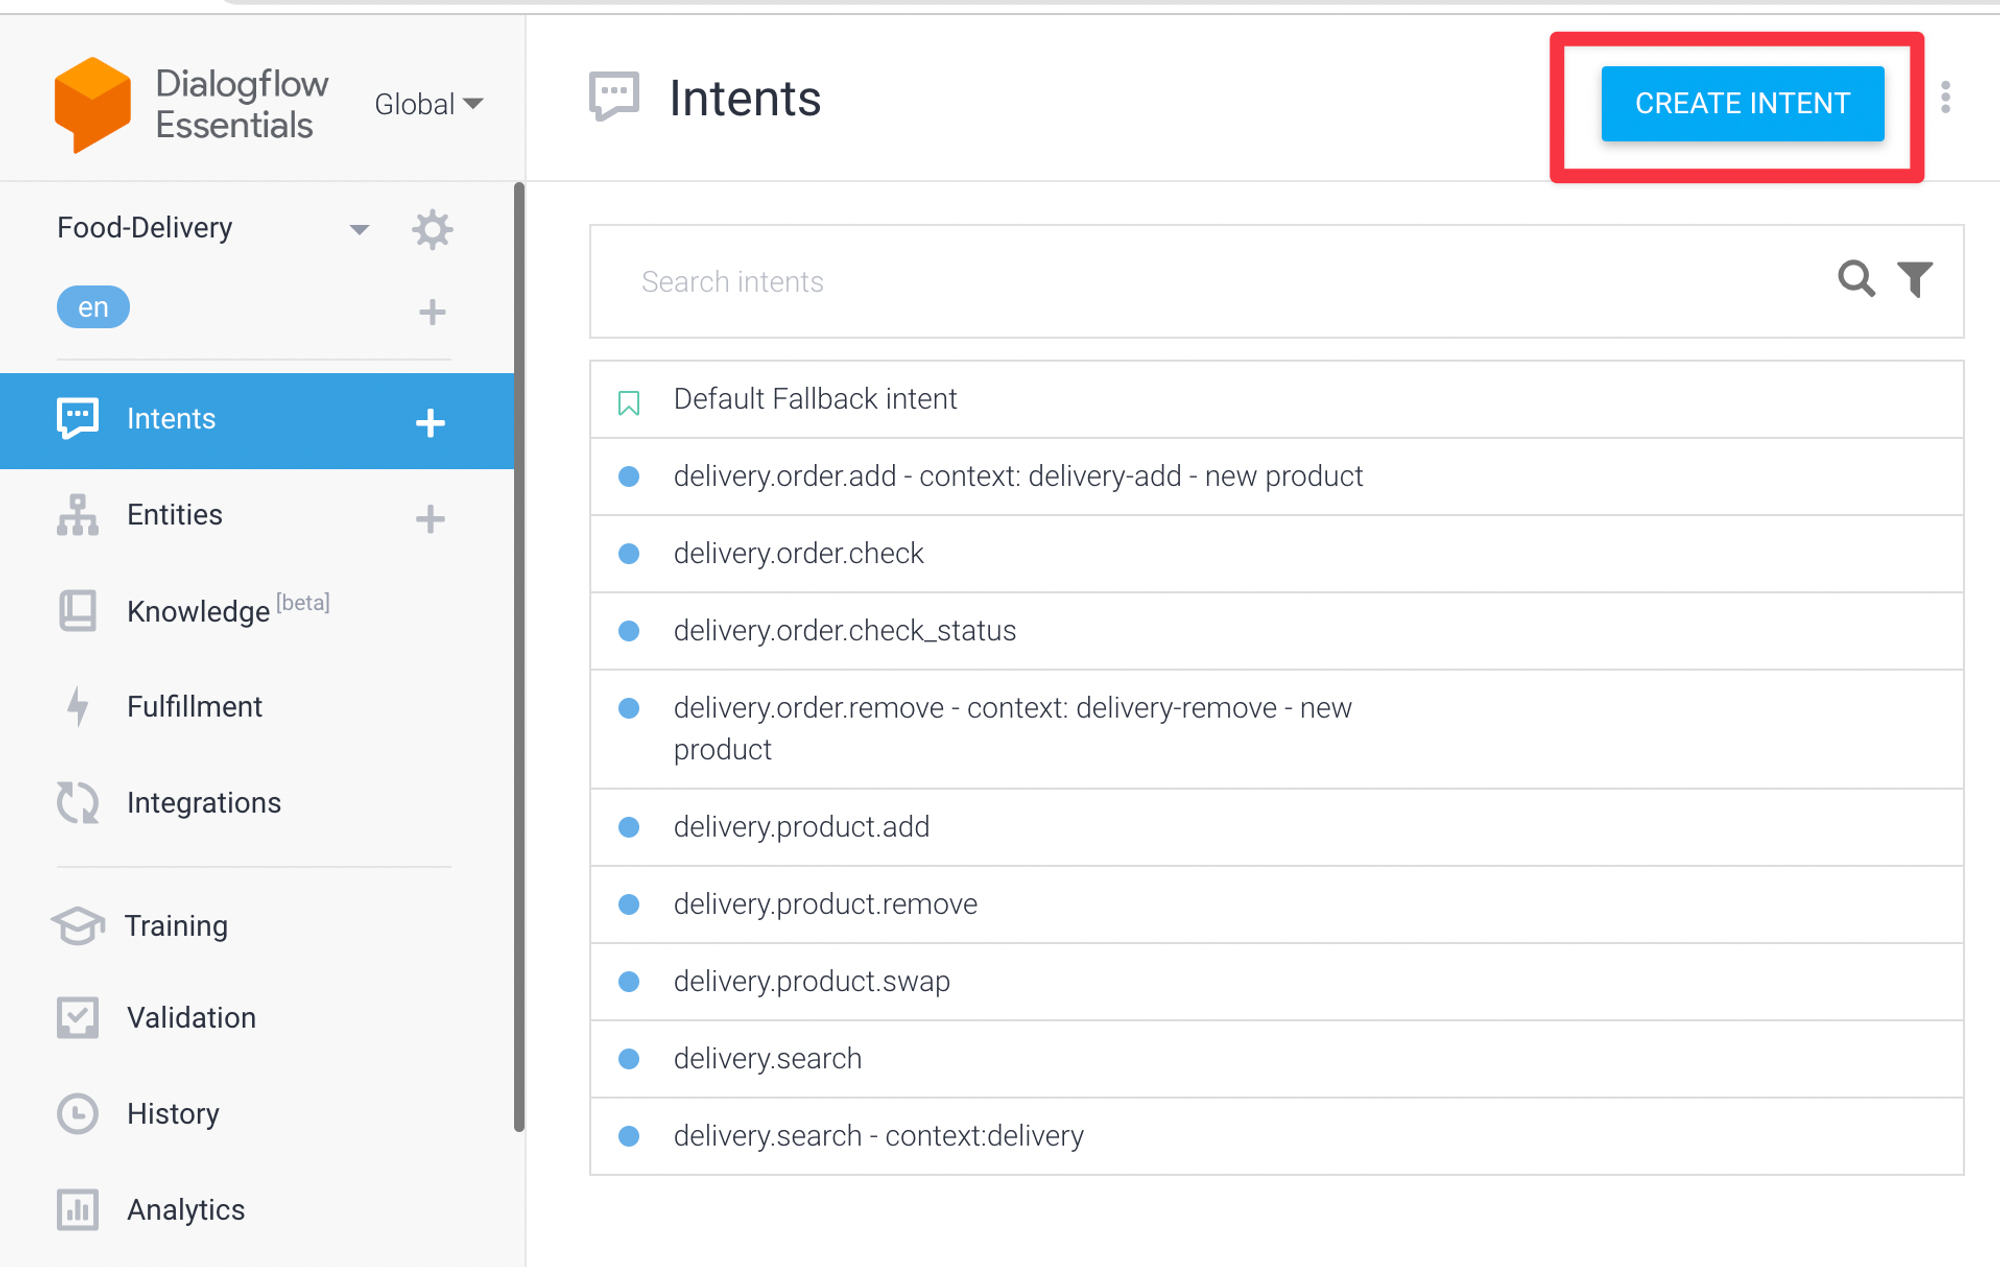
Create a “Handoff” intent that will route route the chat from the bot to an agent
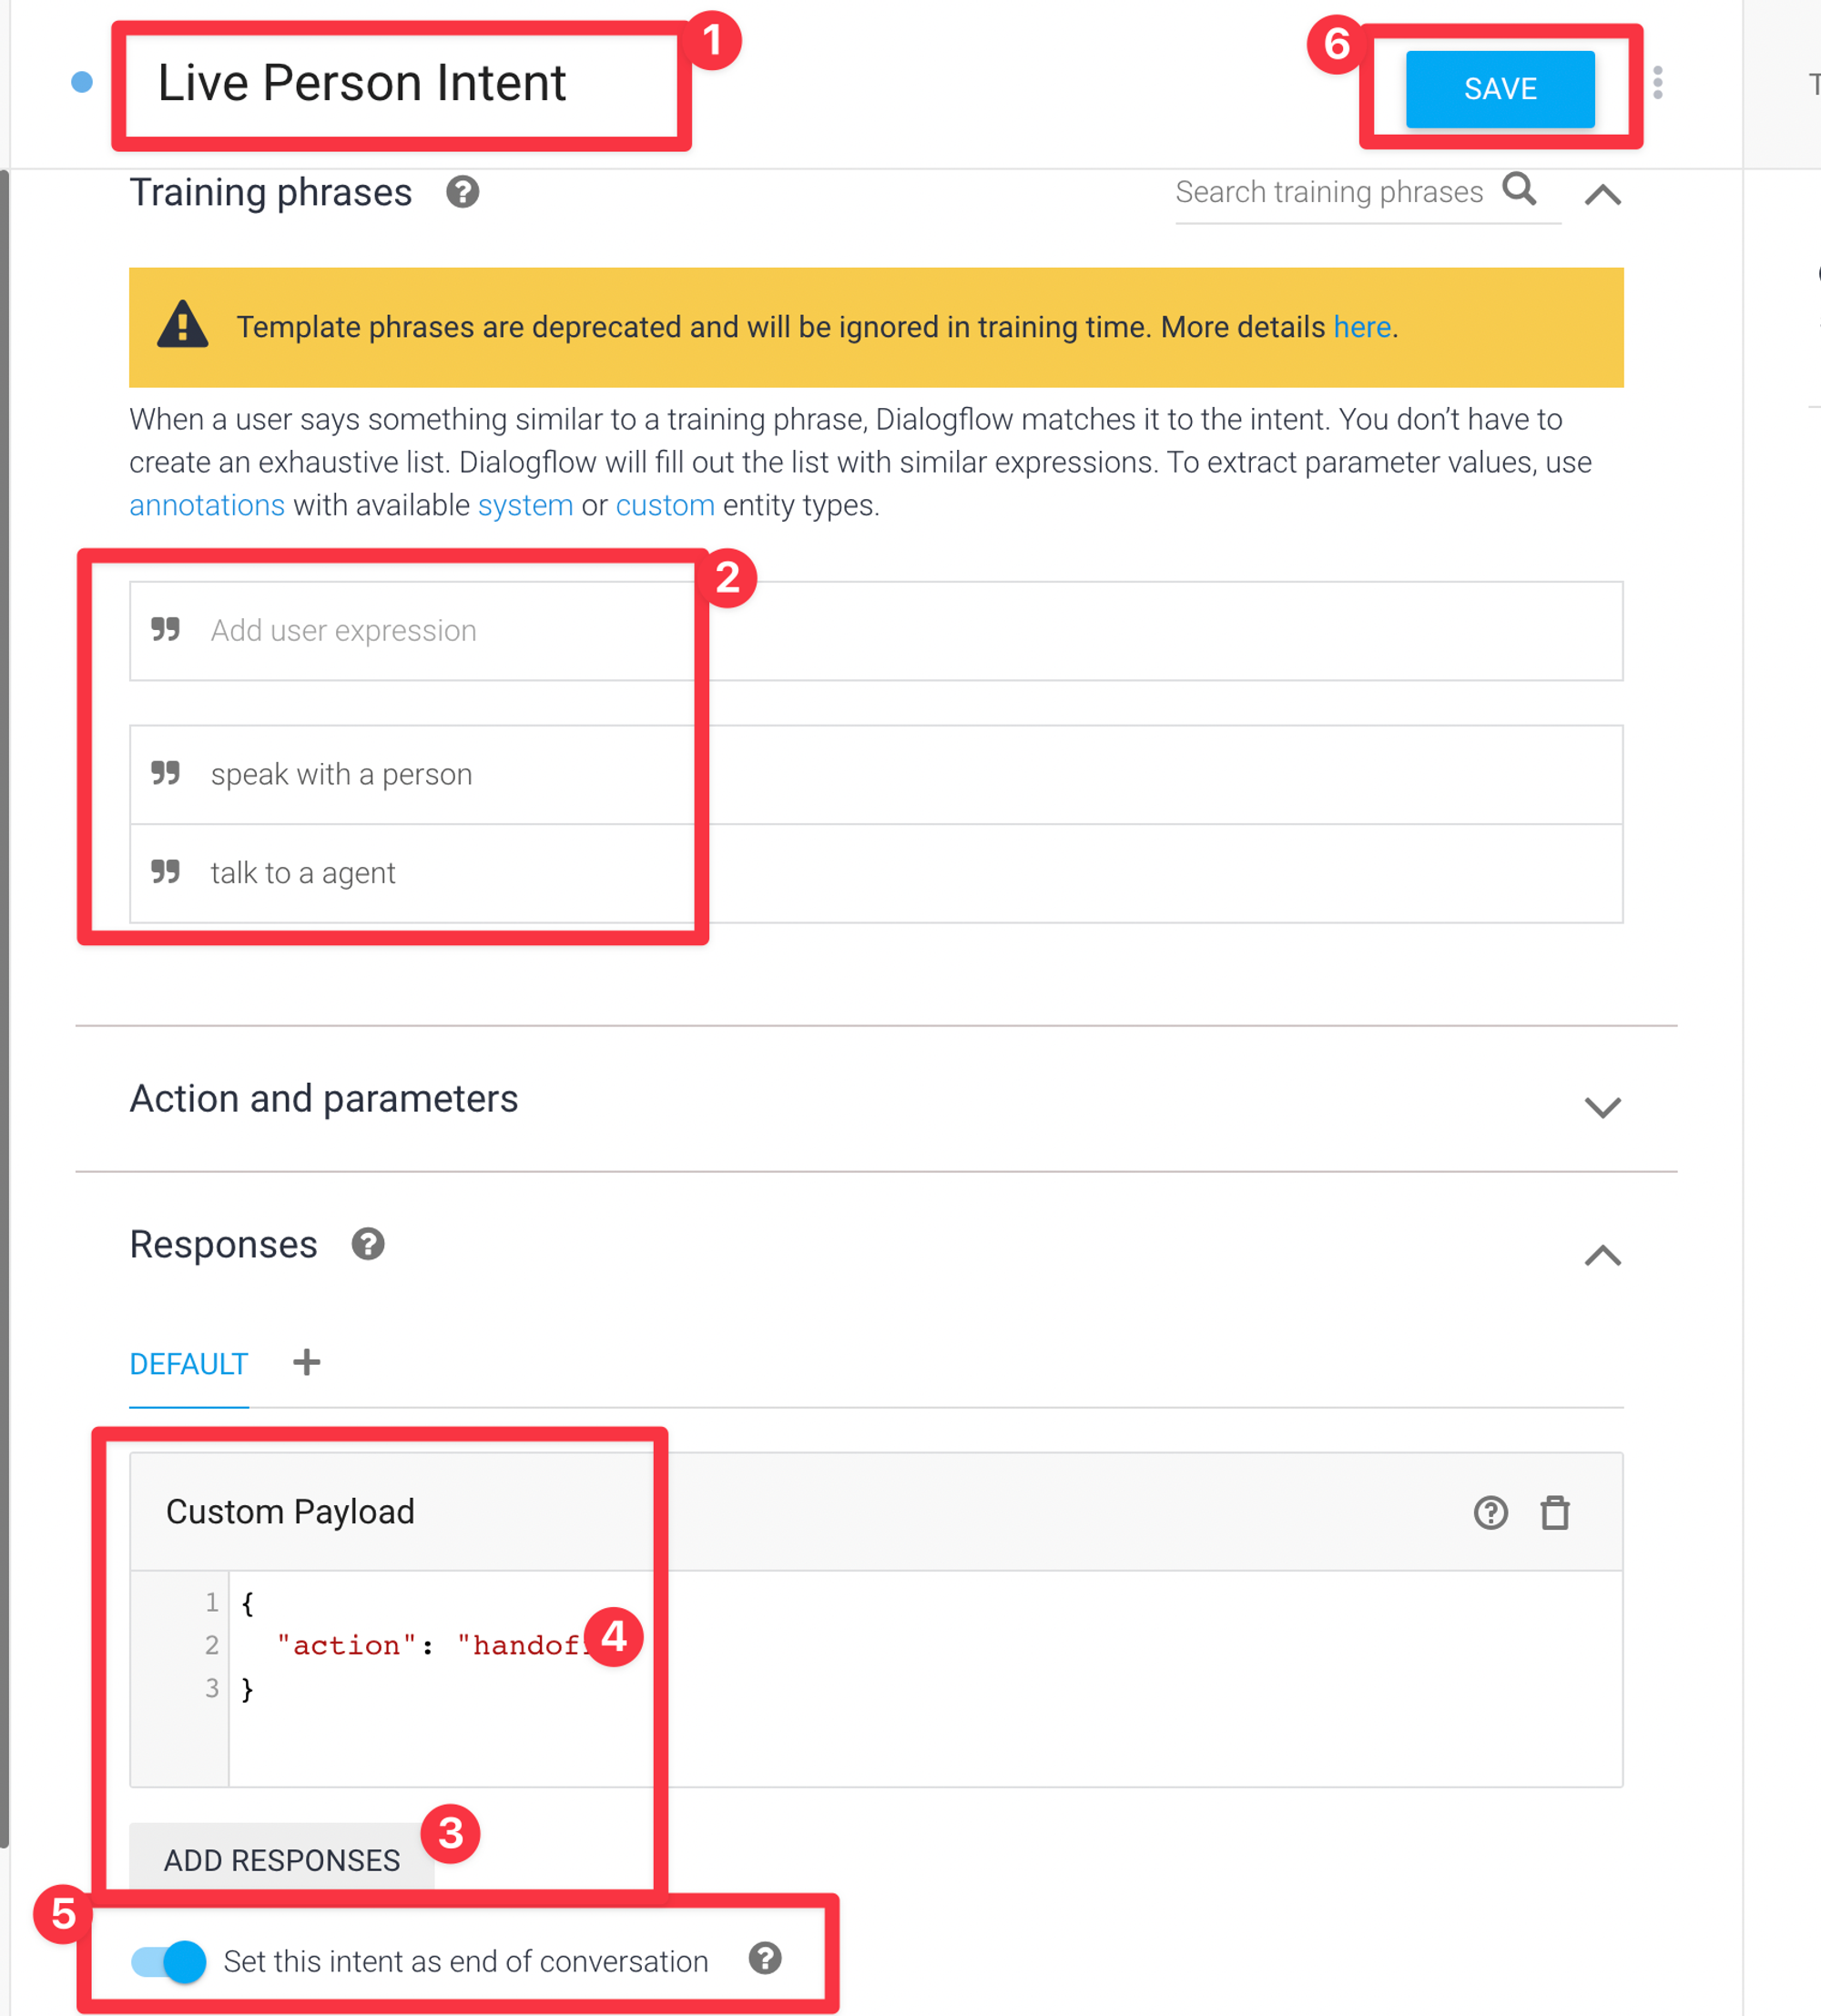
✅ In this example we just created one “Talk to a human” intent that will pass the conversation to a human. Normally you would add more intents here to create many types of Bots from FAQ bots, order taking bots, and more
Create a Google Service Account
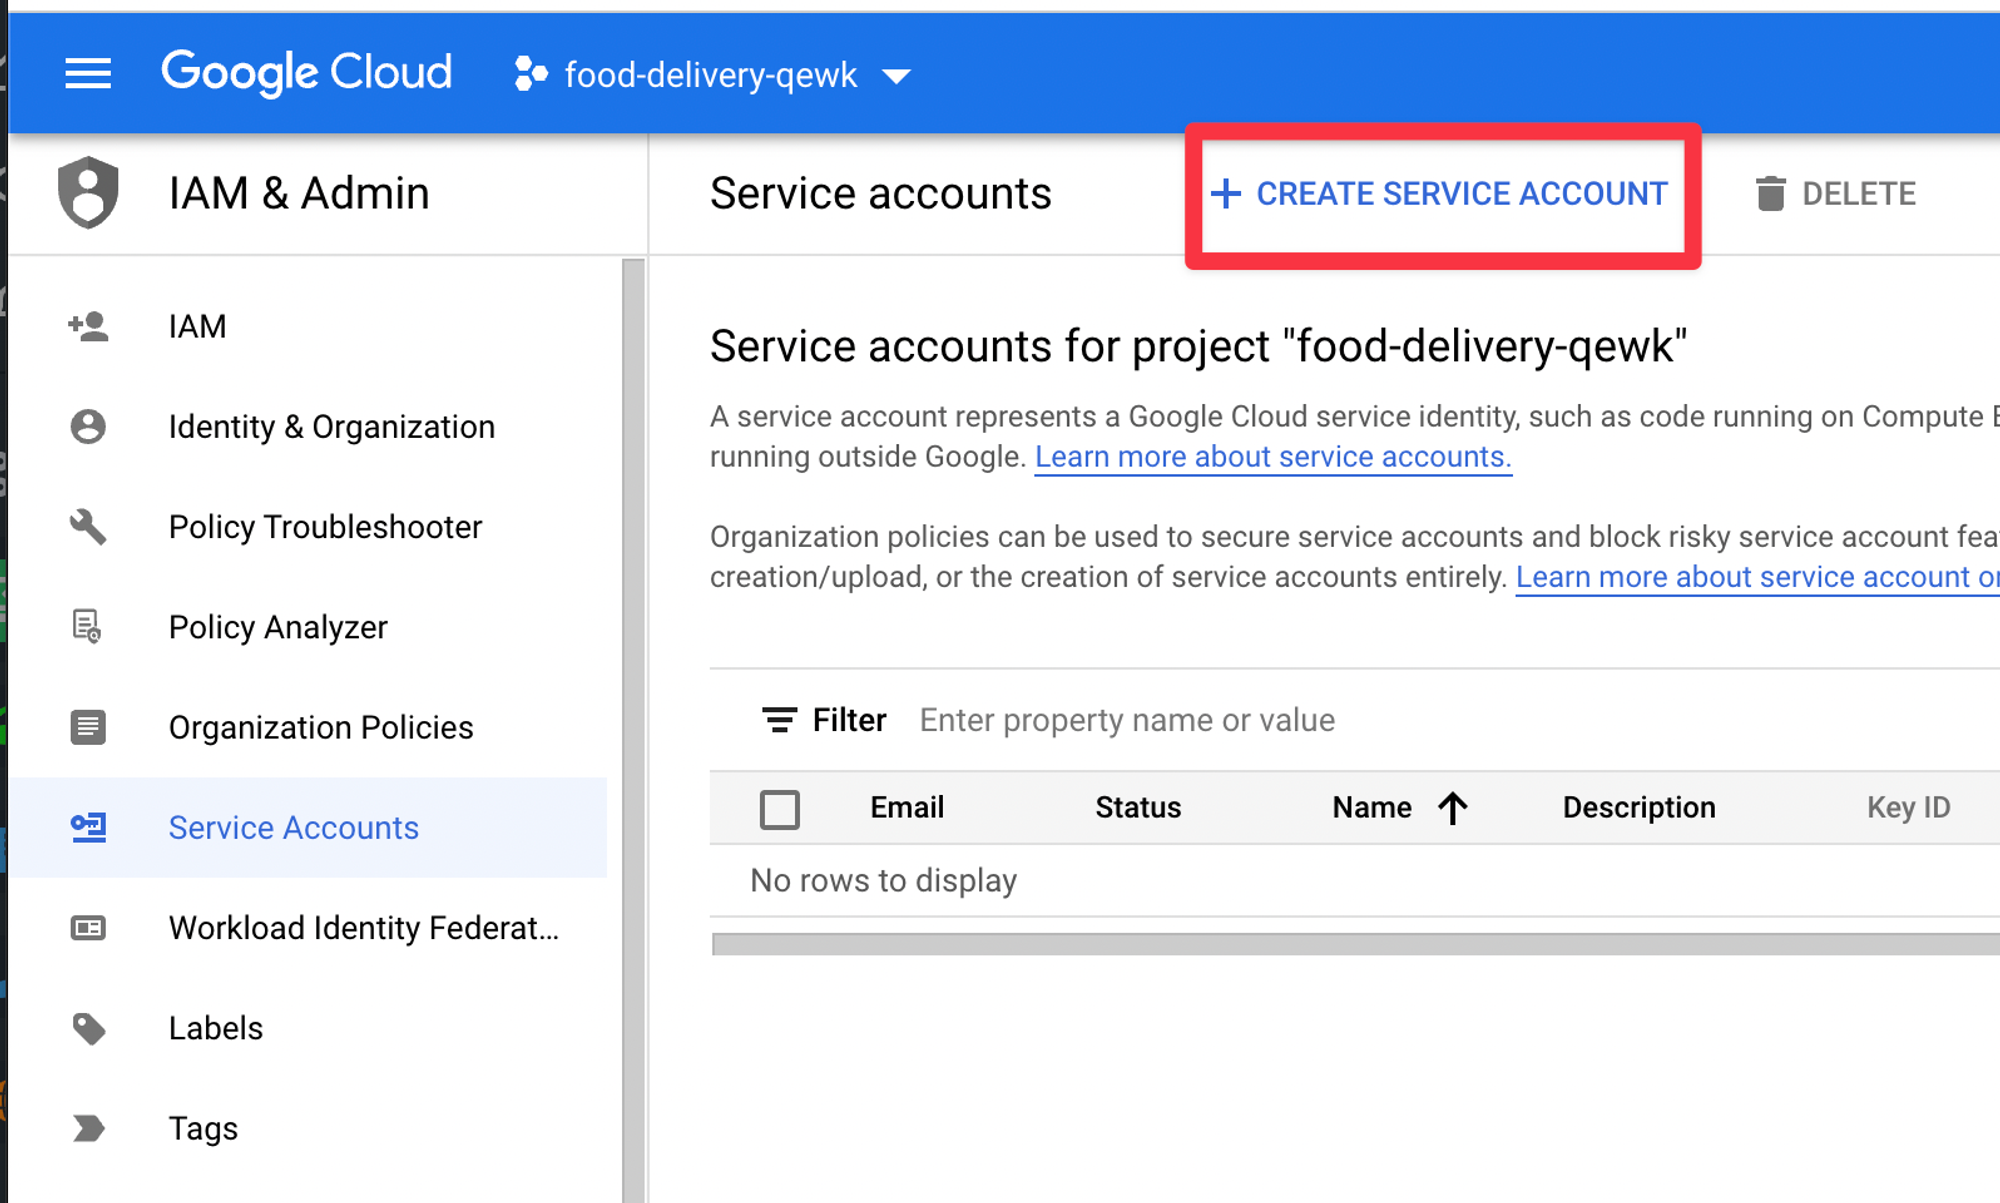
To connect your Chat with DialogFlow you need to create a “Service Account” with Google here
https://console.cloud.google.com/home/dashboard
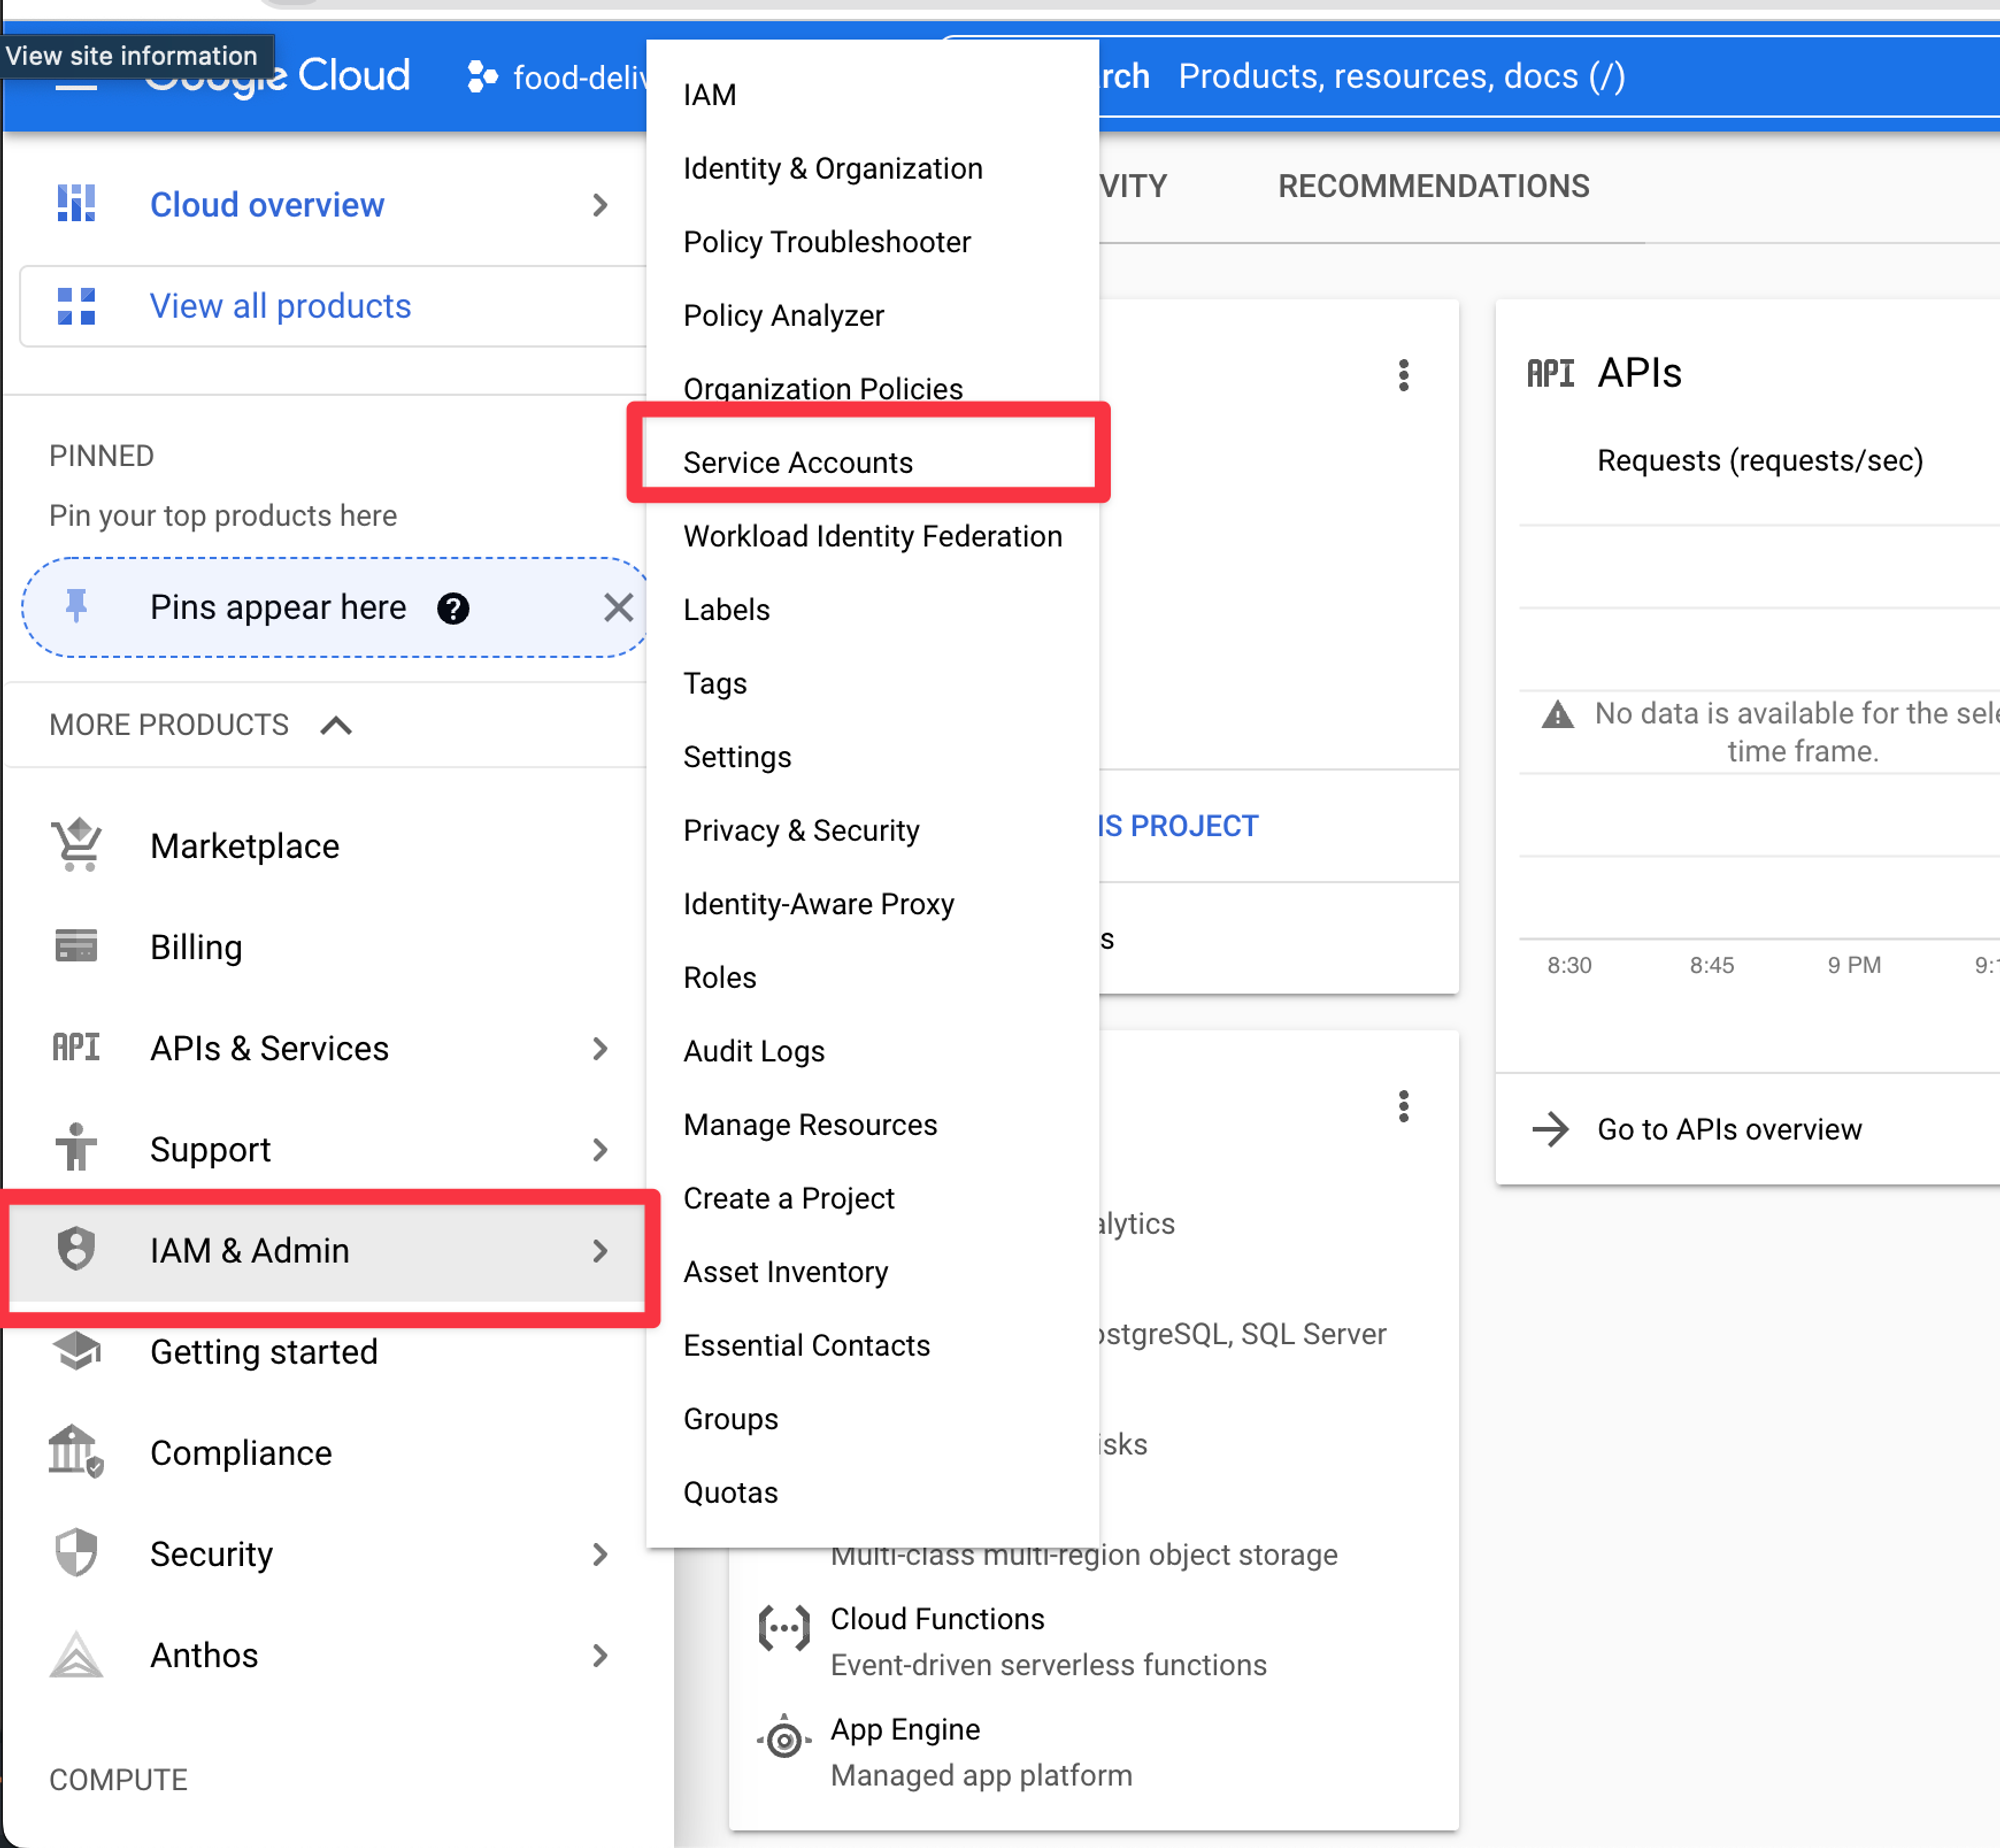
Click the “Create Service Account” Button
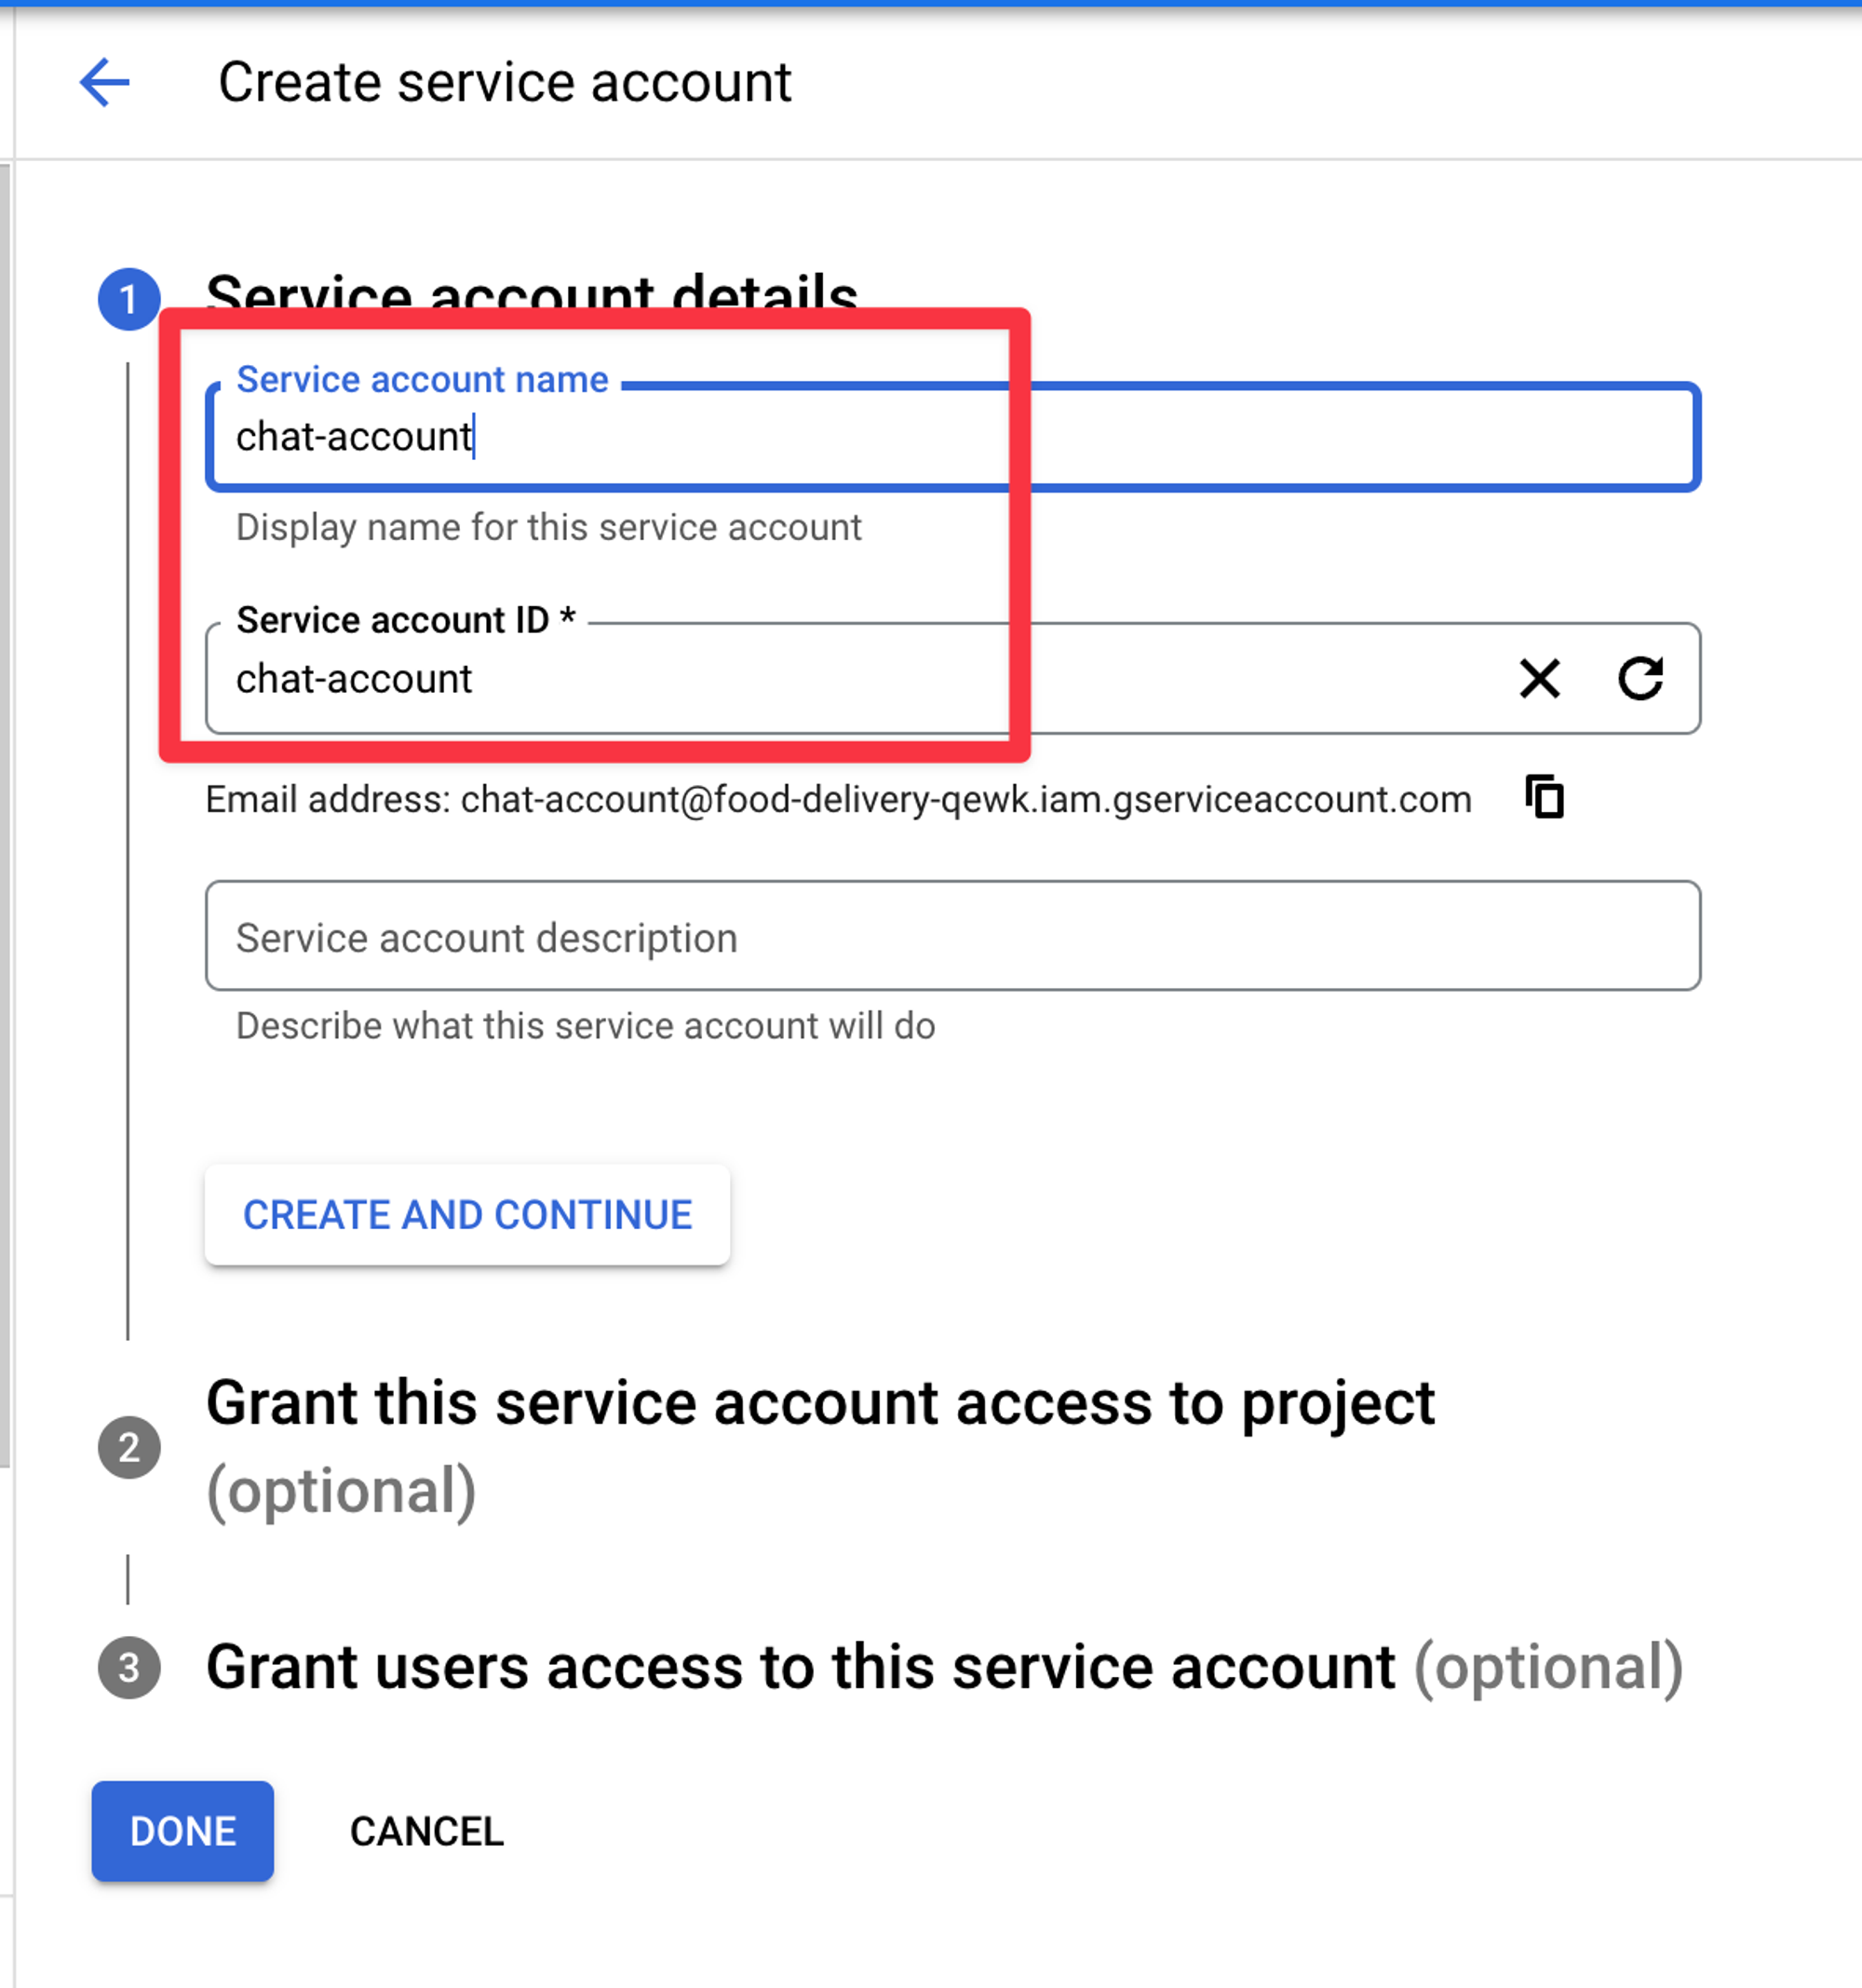
Name your Service Account and give it an ID (you can name it anything)
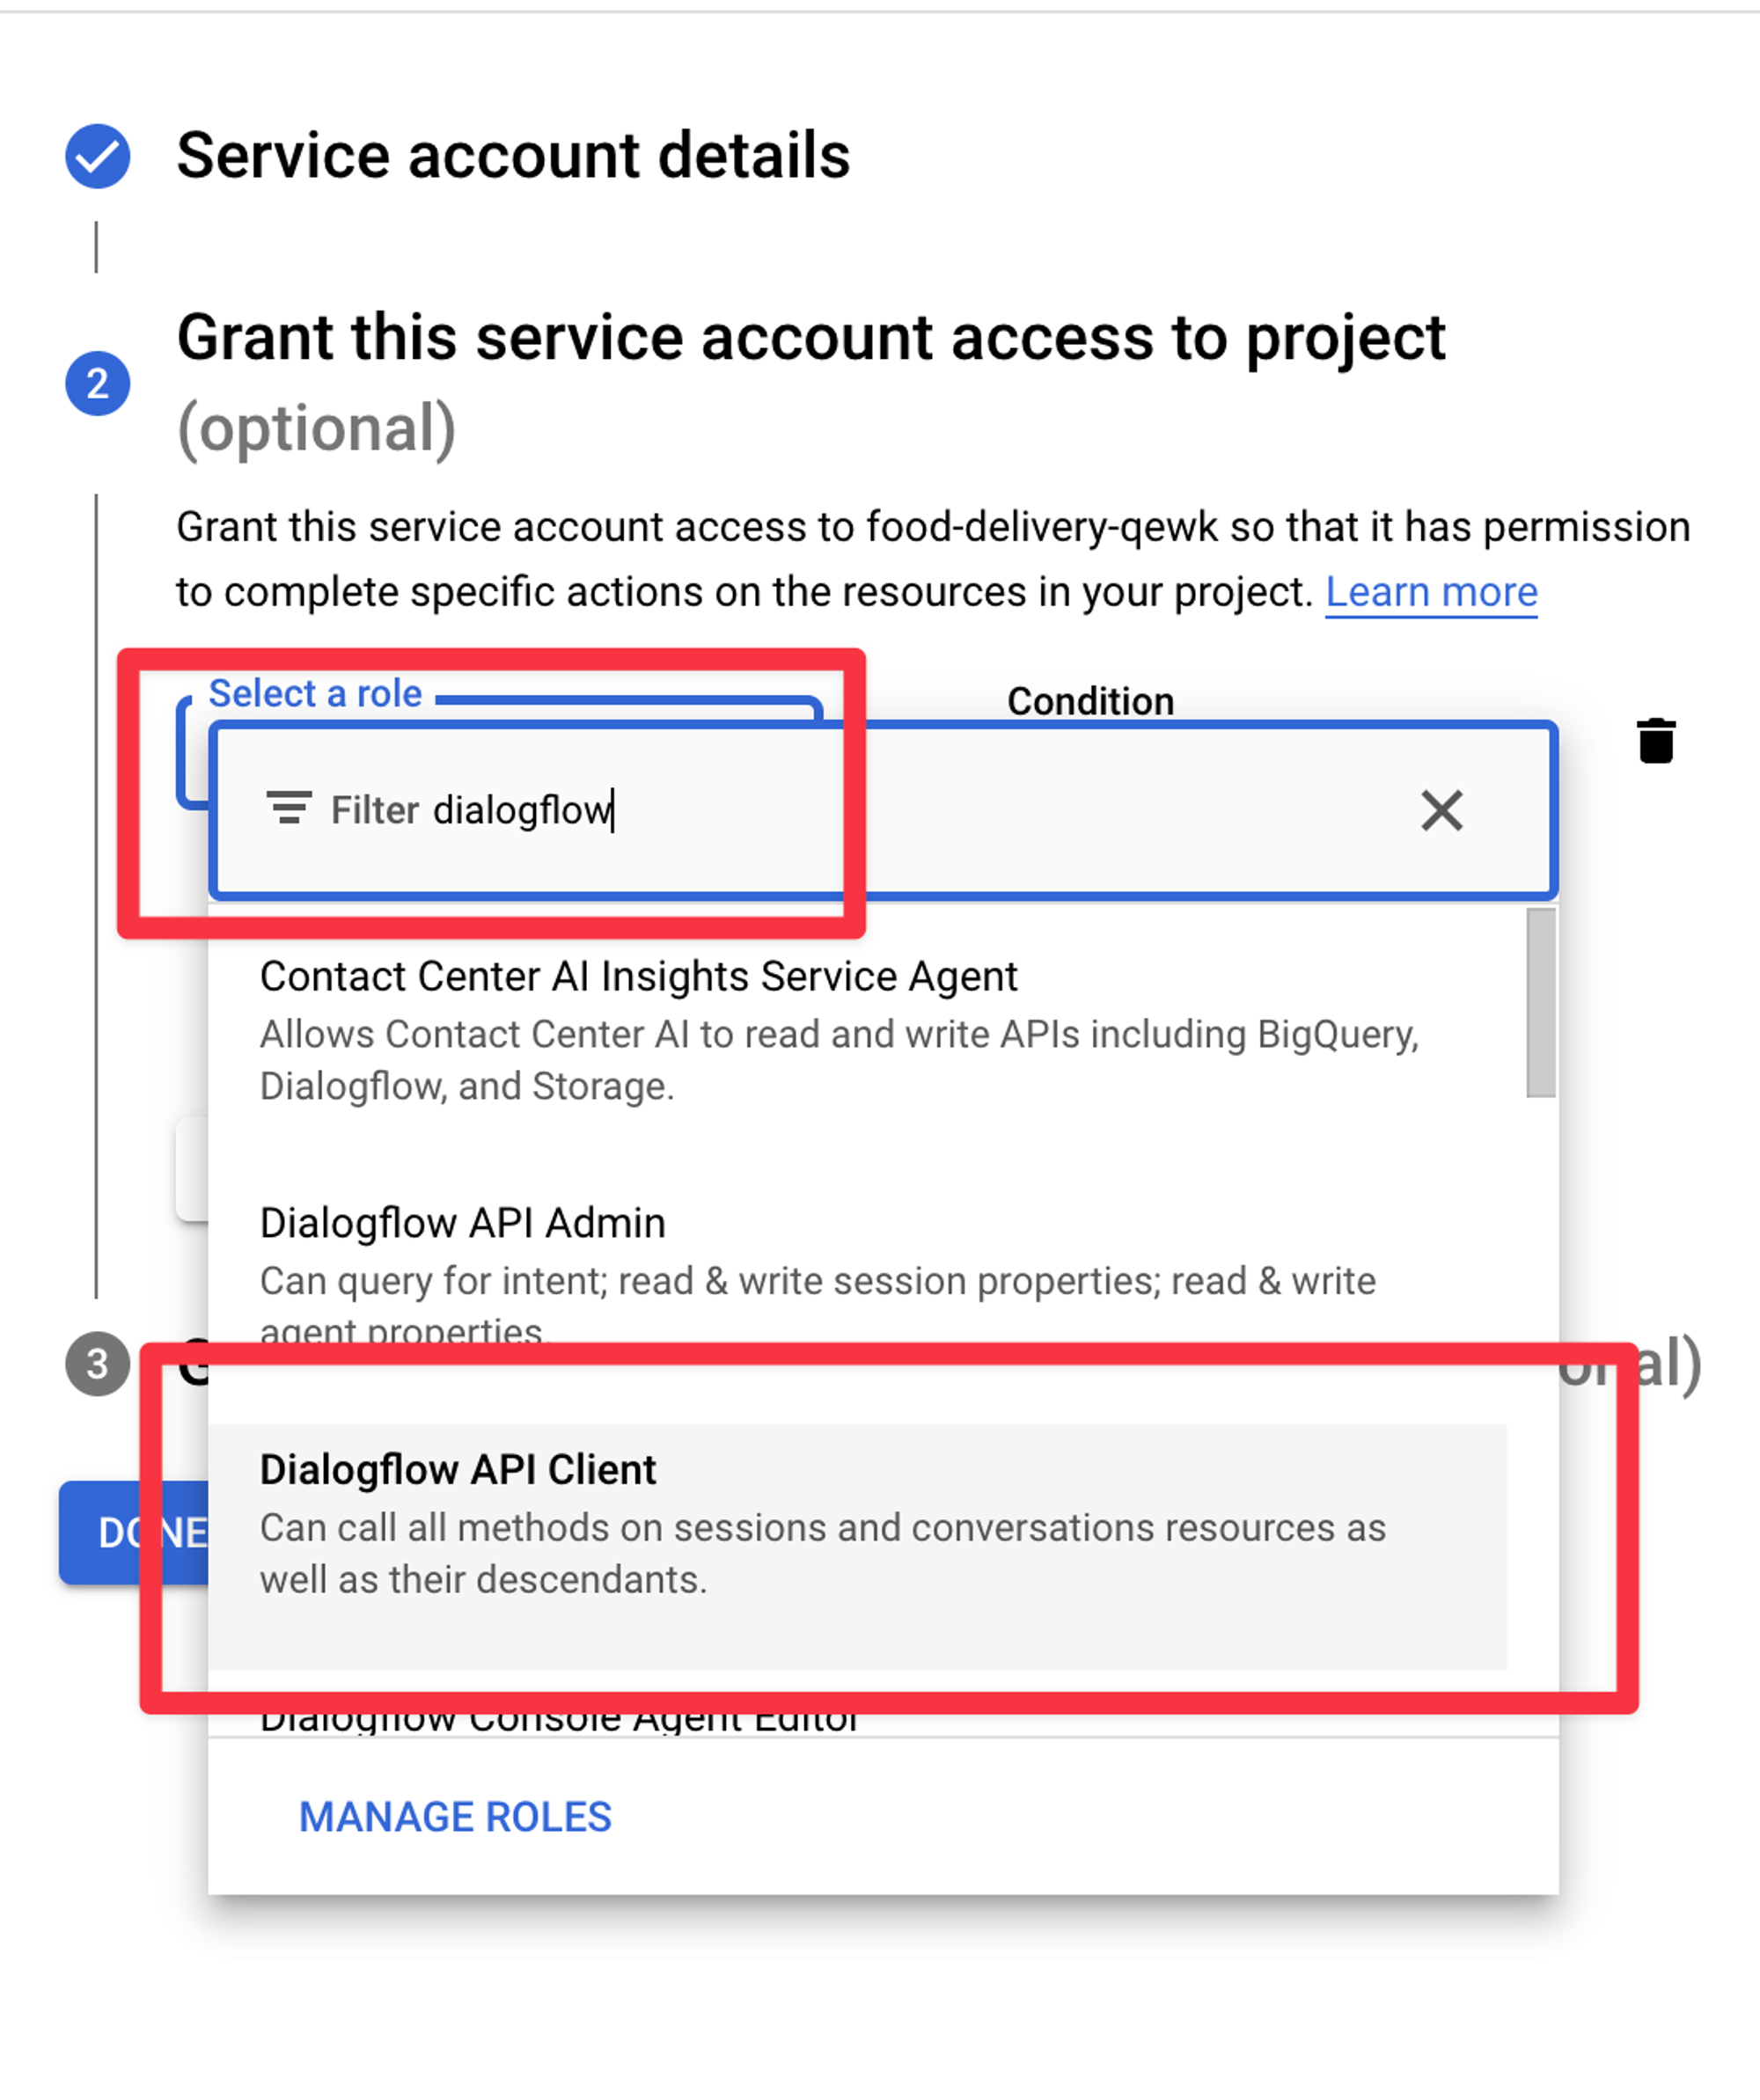
Now select the Role of “DialogFlow API Client” for this Service Account
Create Security Access Keys For your Service Account
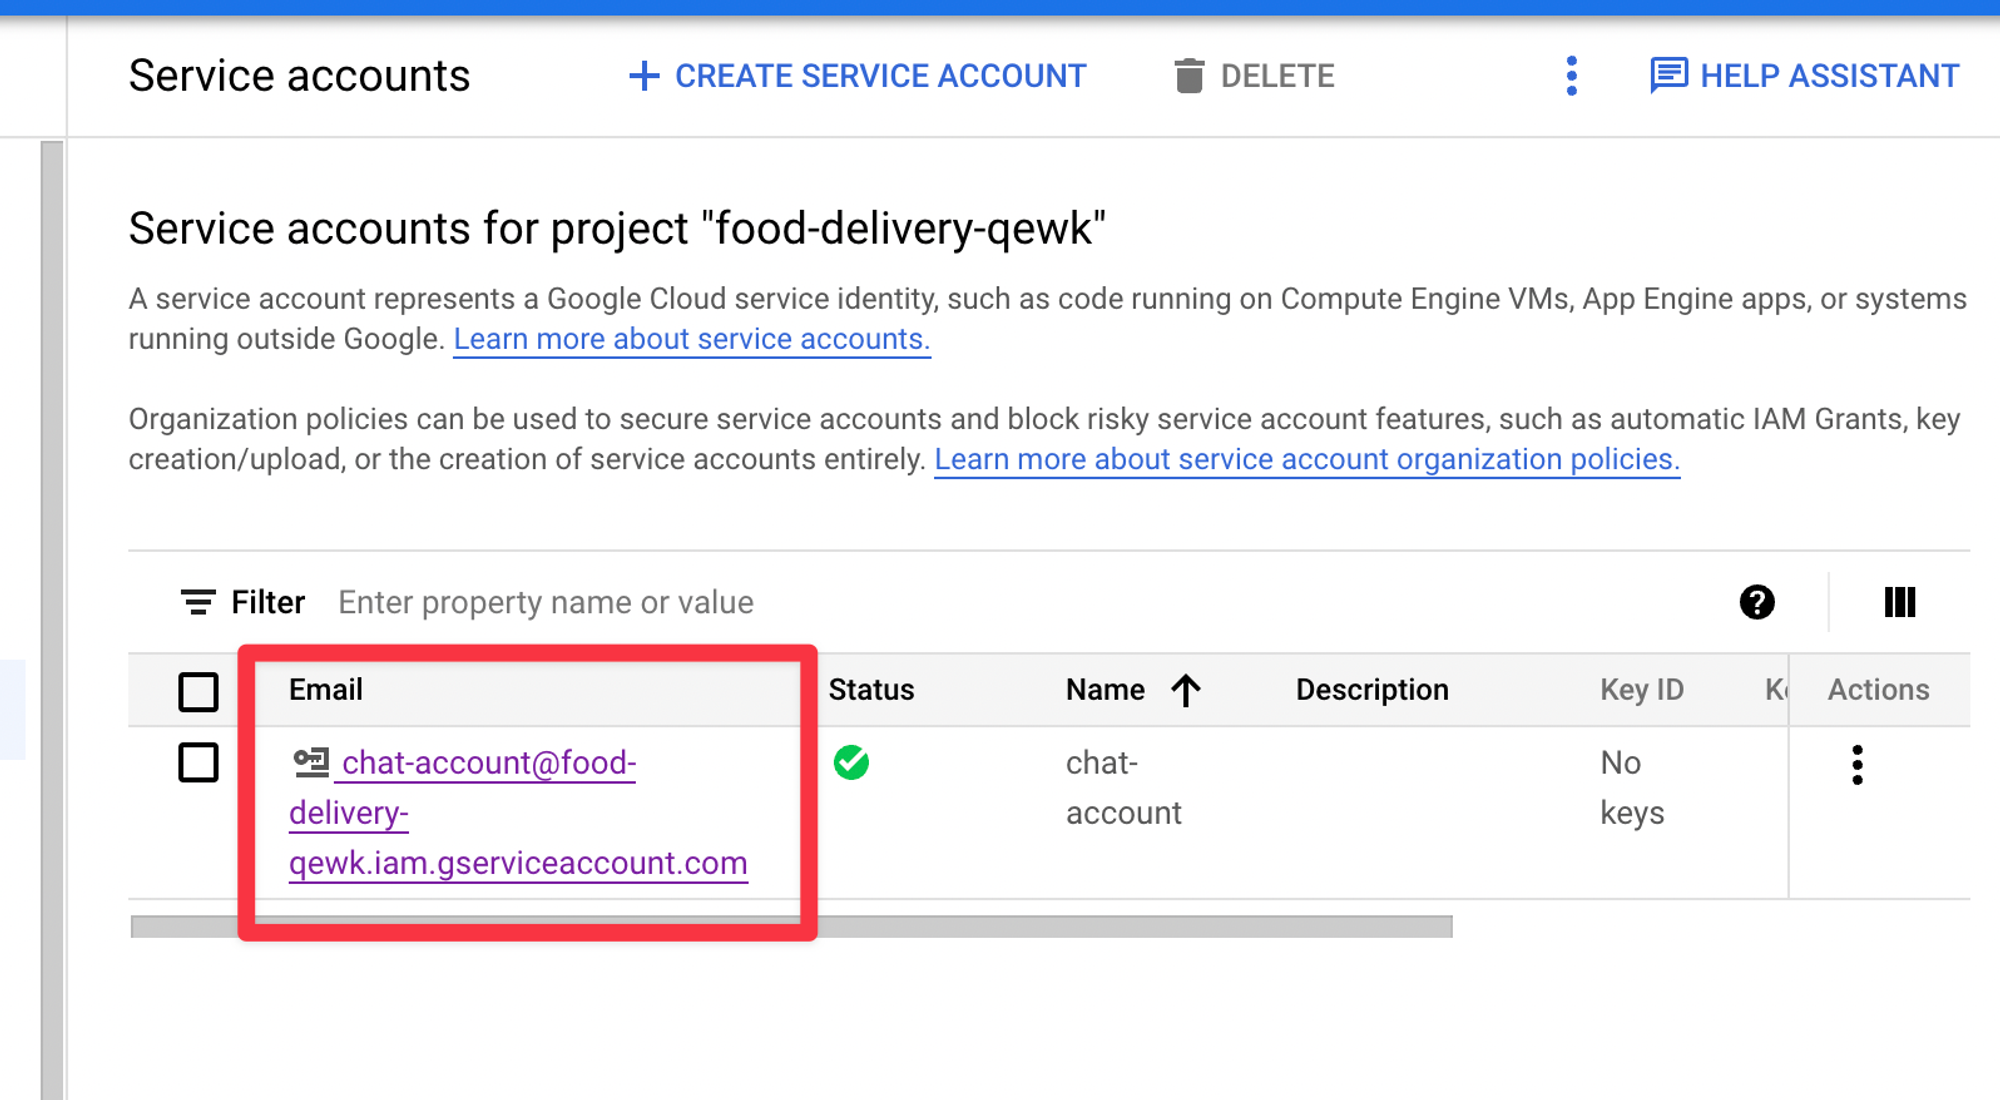
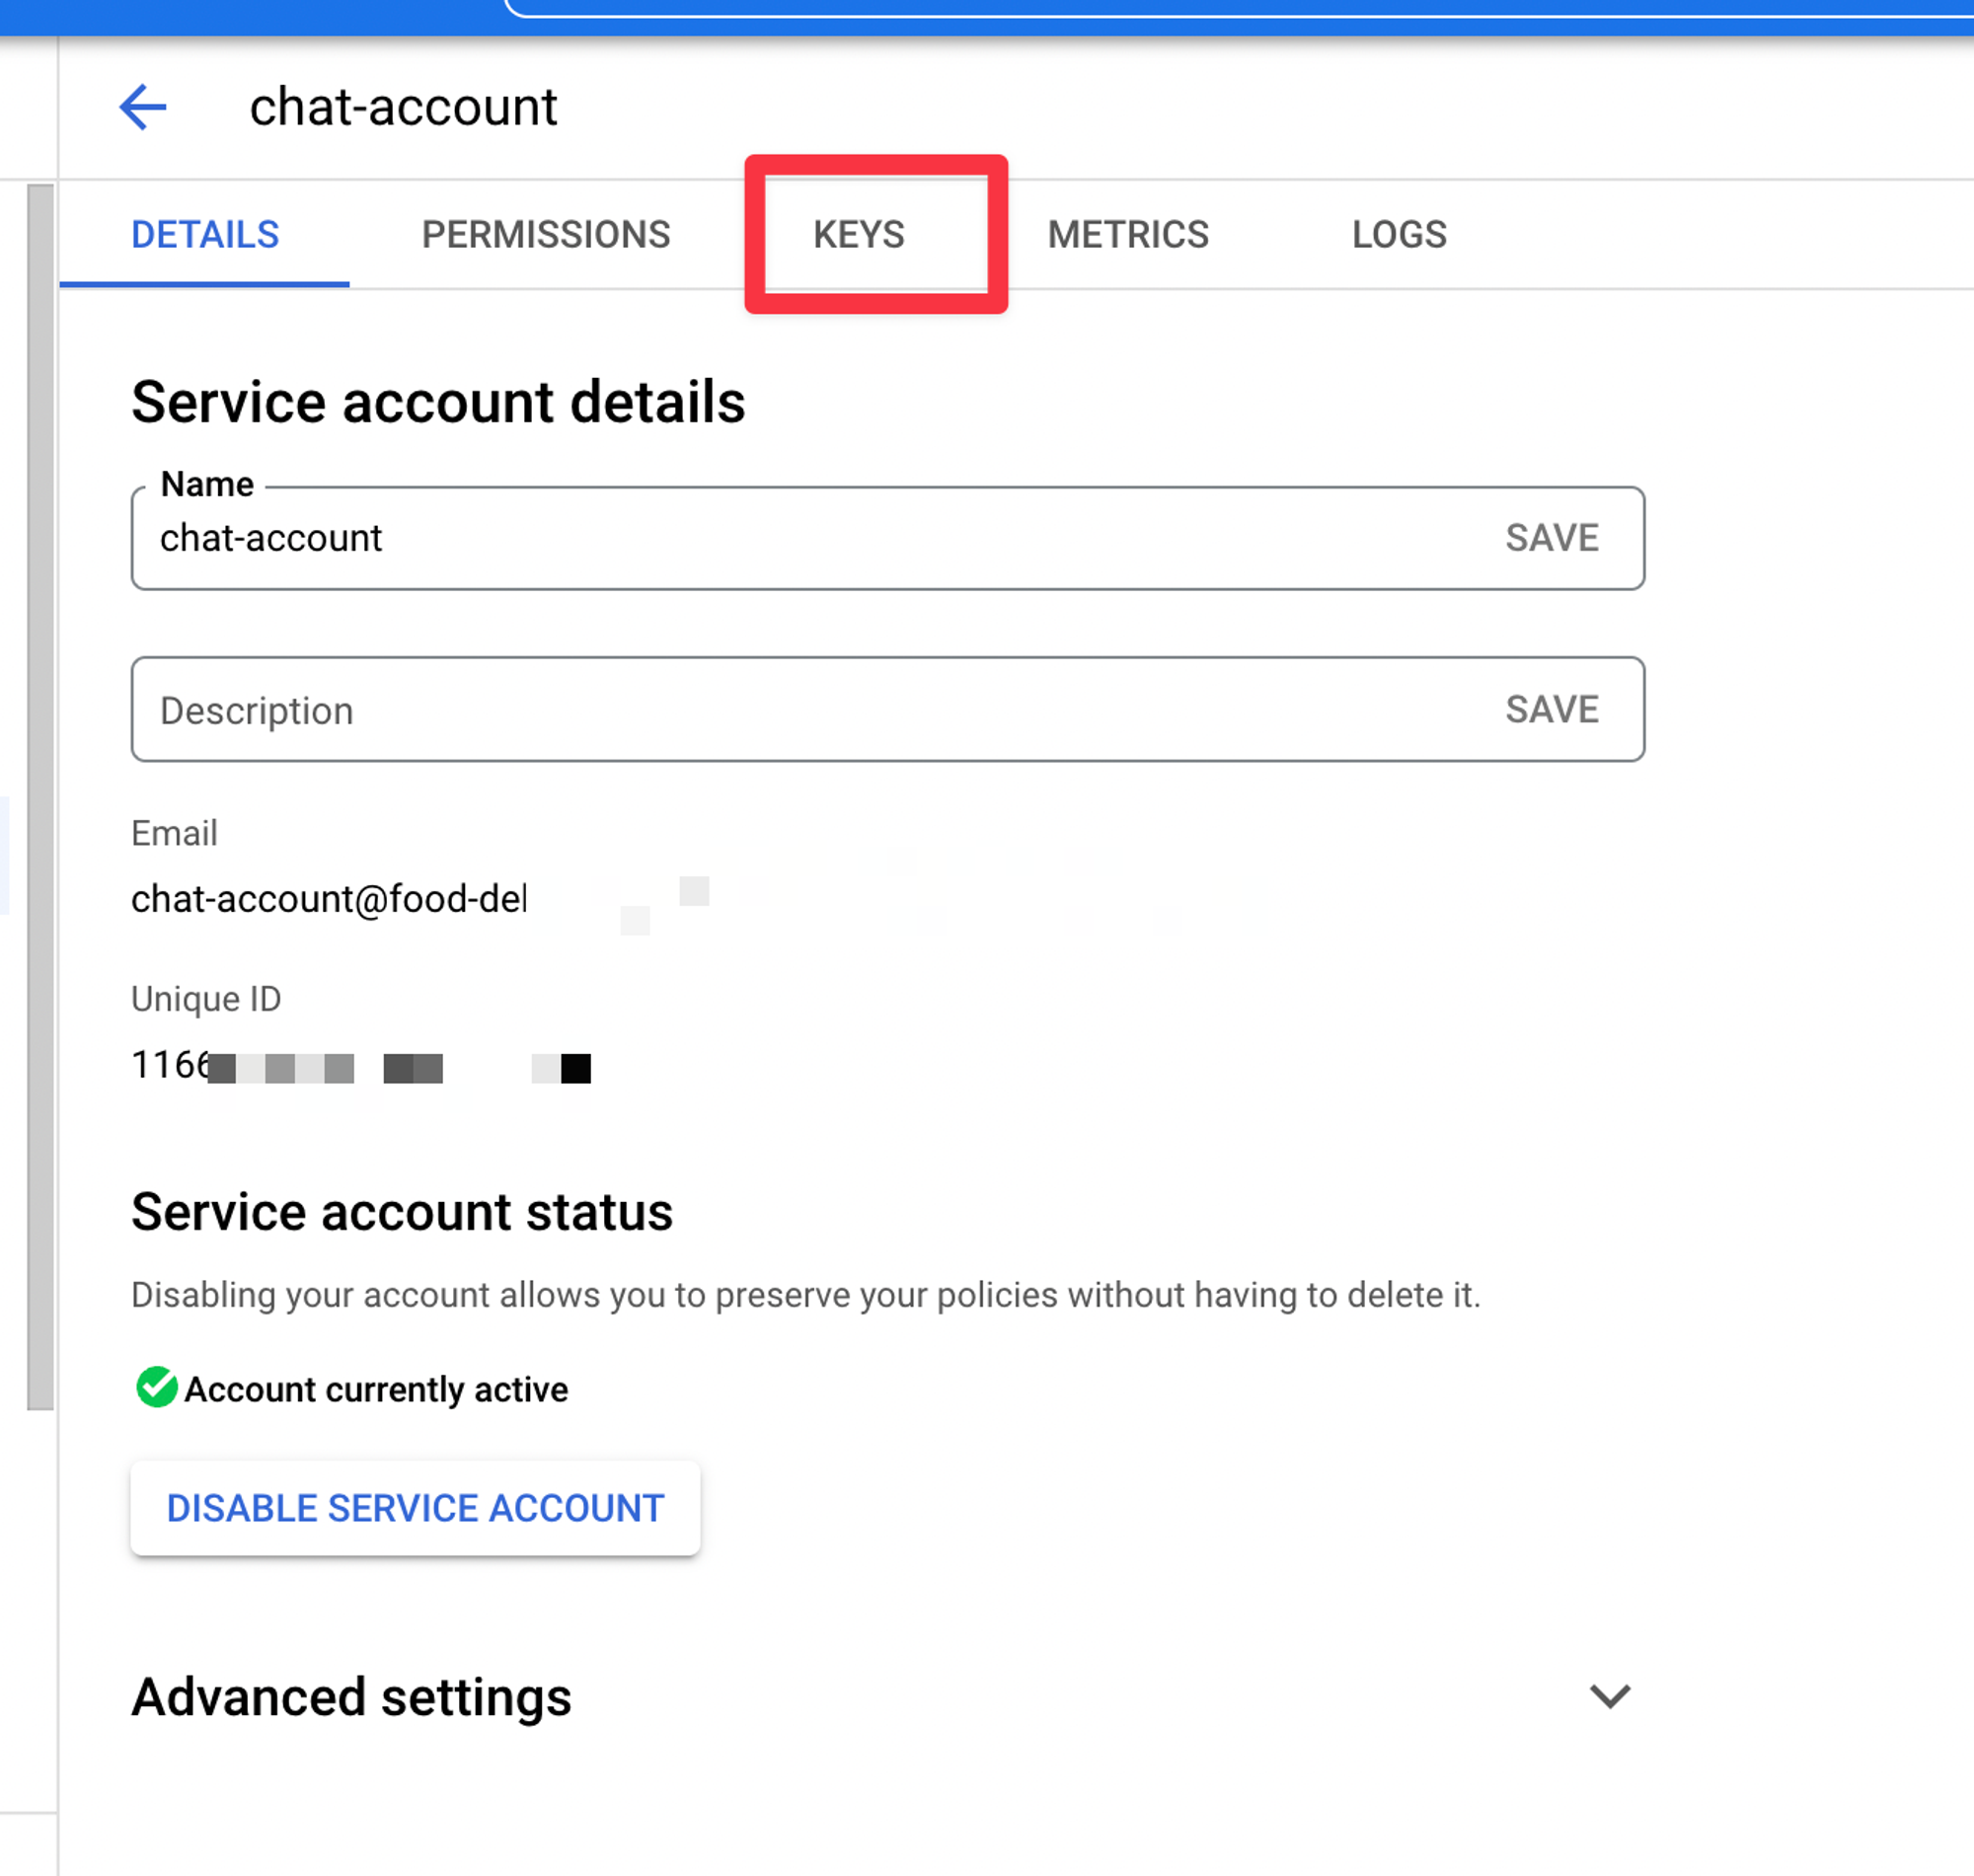
For the Chat system to connect to your new Google Service Account we need to generate an access Key. Inside your new Service Account https://console.cloud.google.com/home/dashboard you will will need to click to open the setting for you new Service Account first
Then click the “Keys” tab
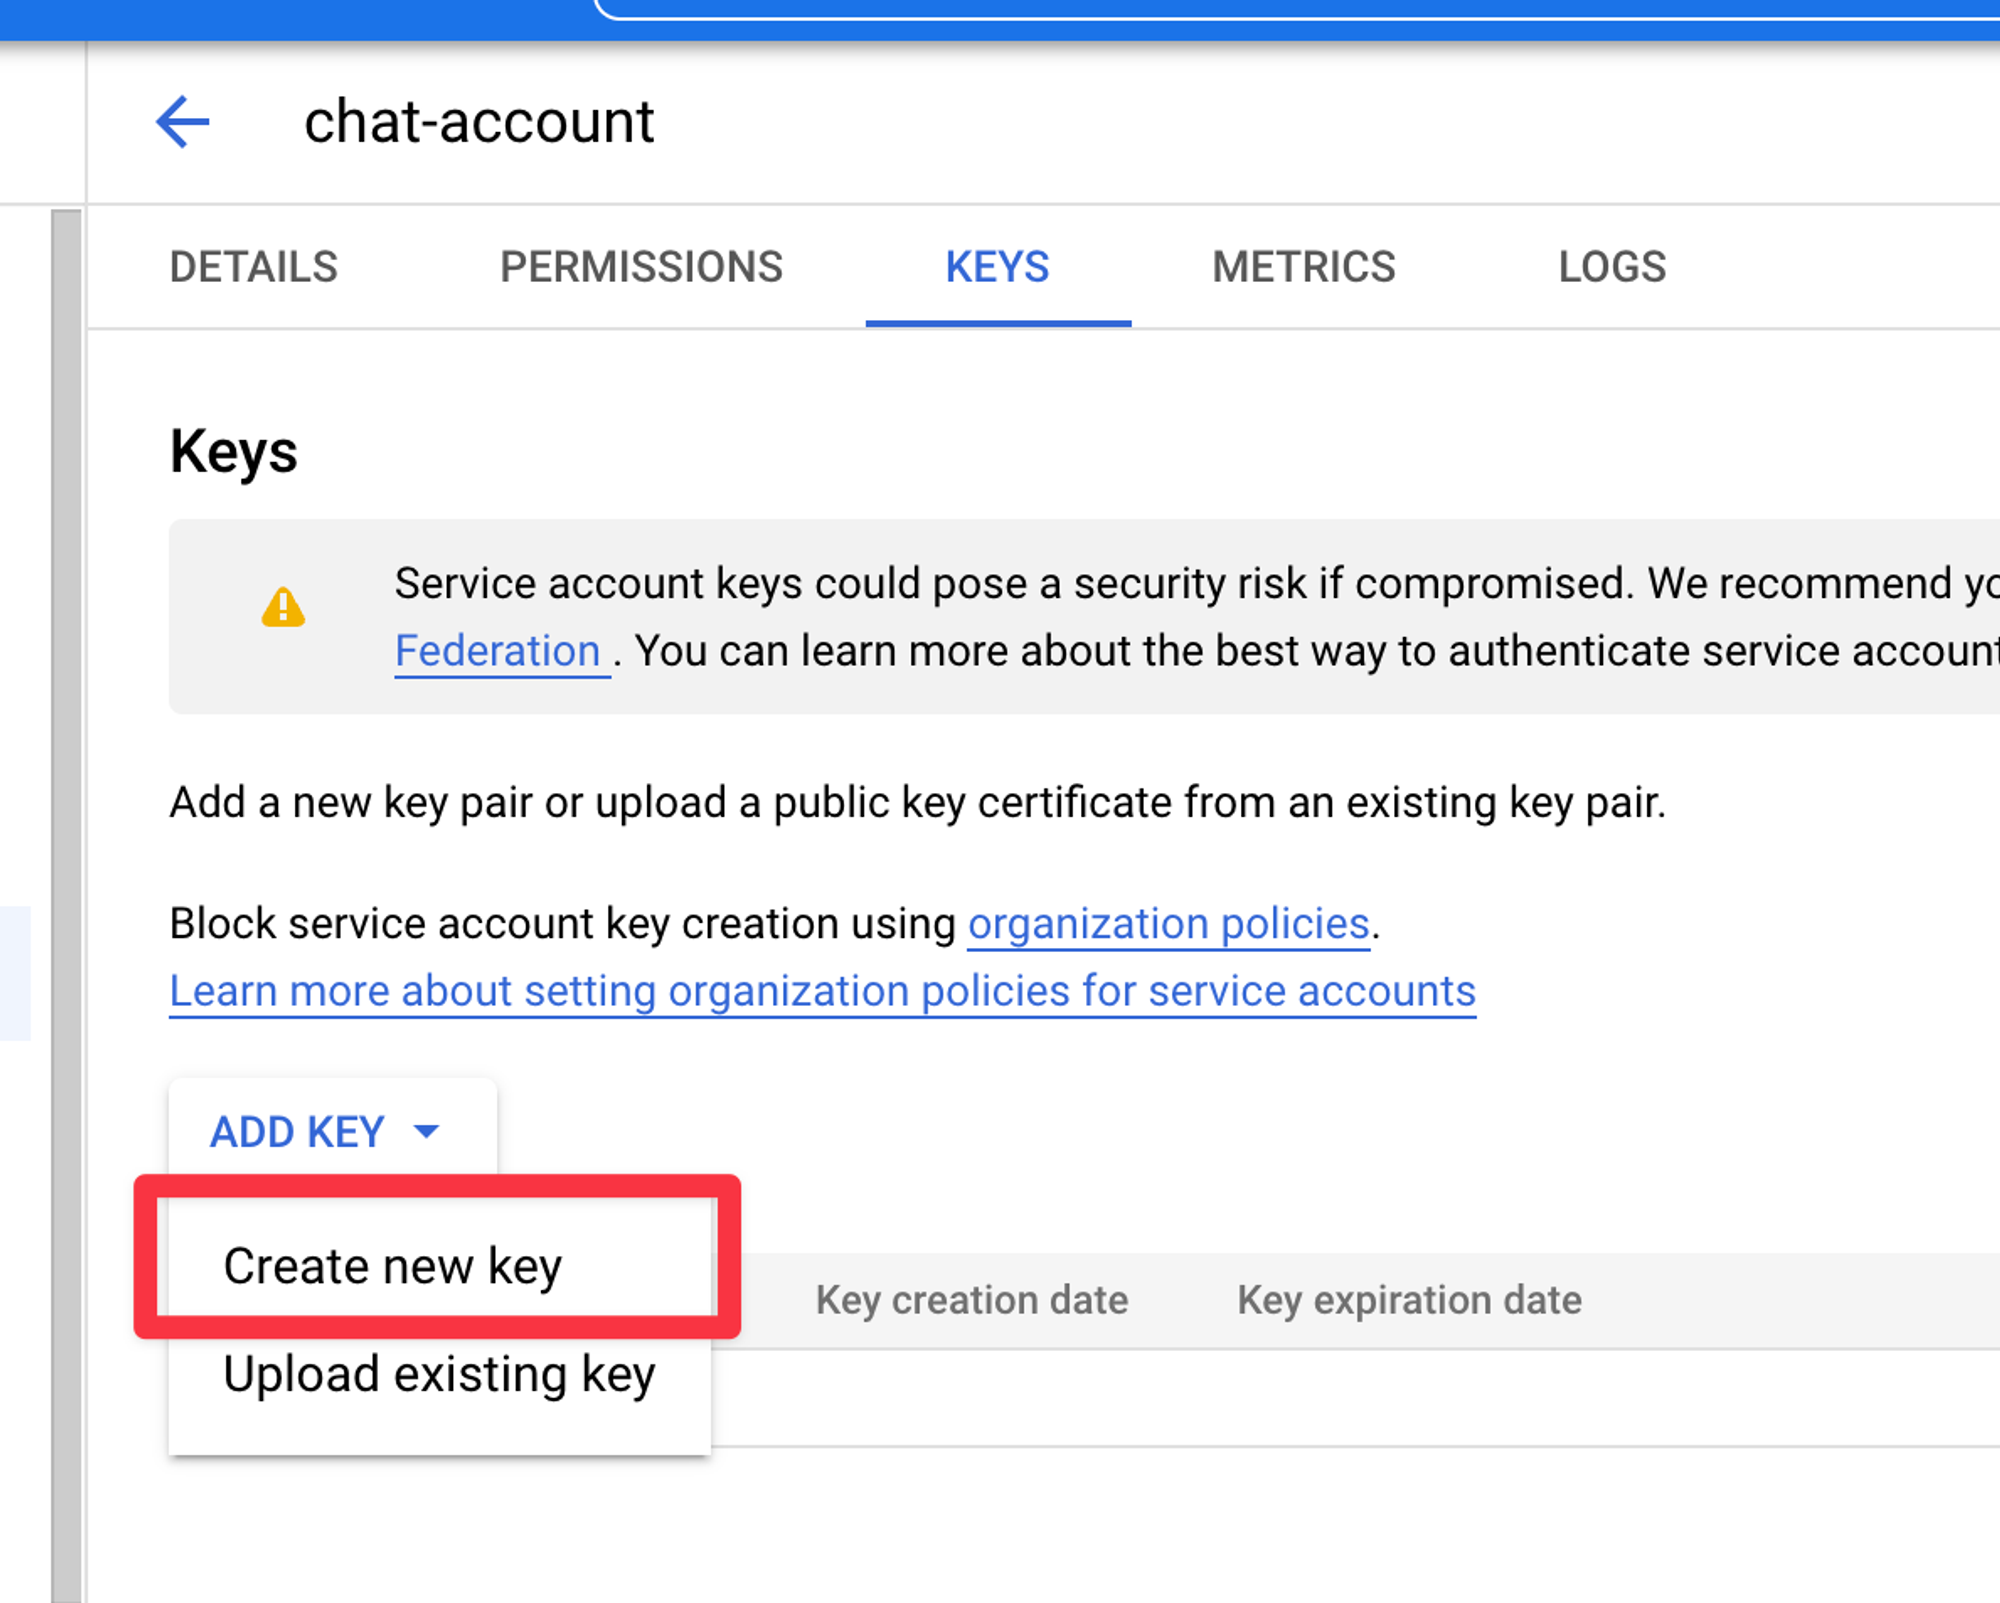
Then click “Create New Key”
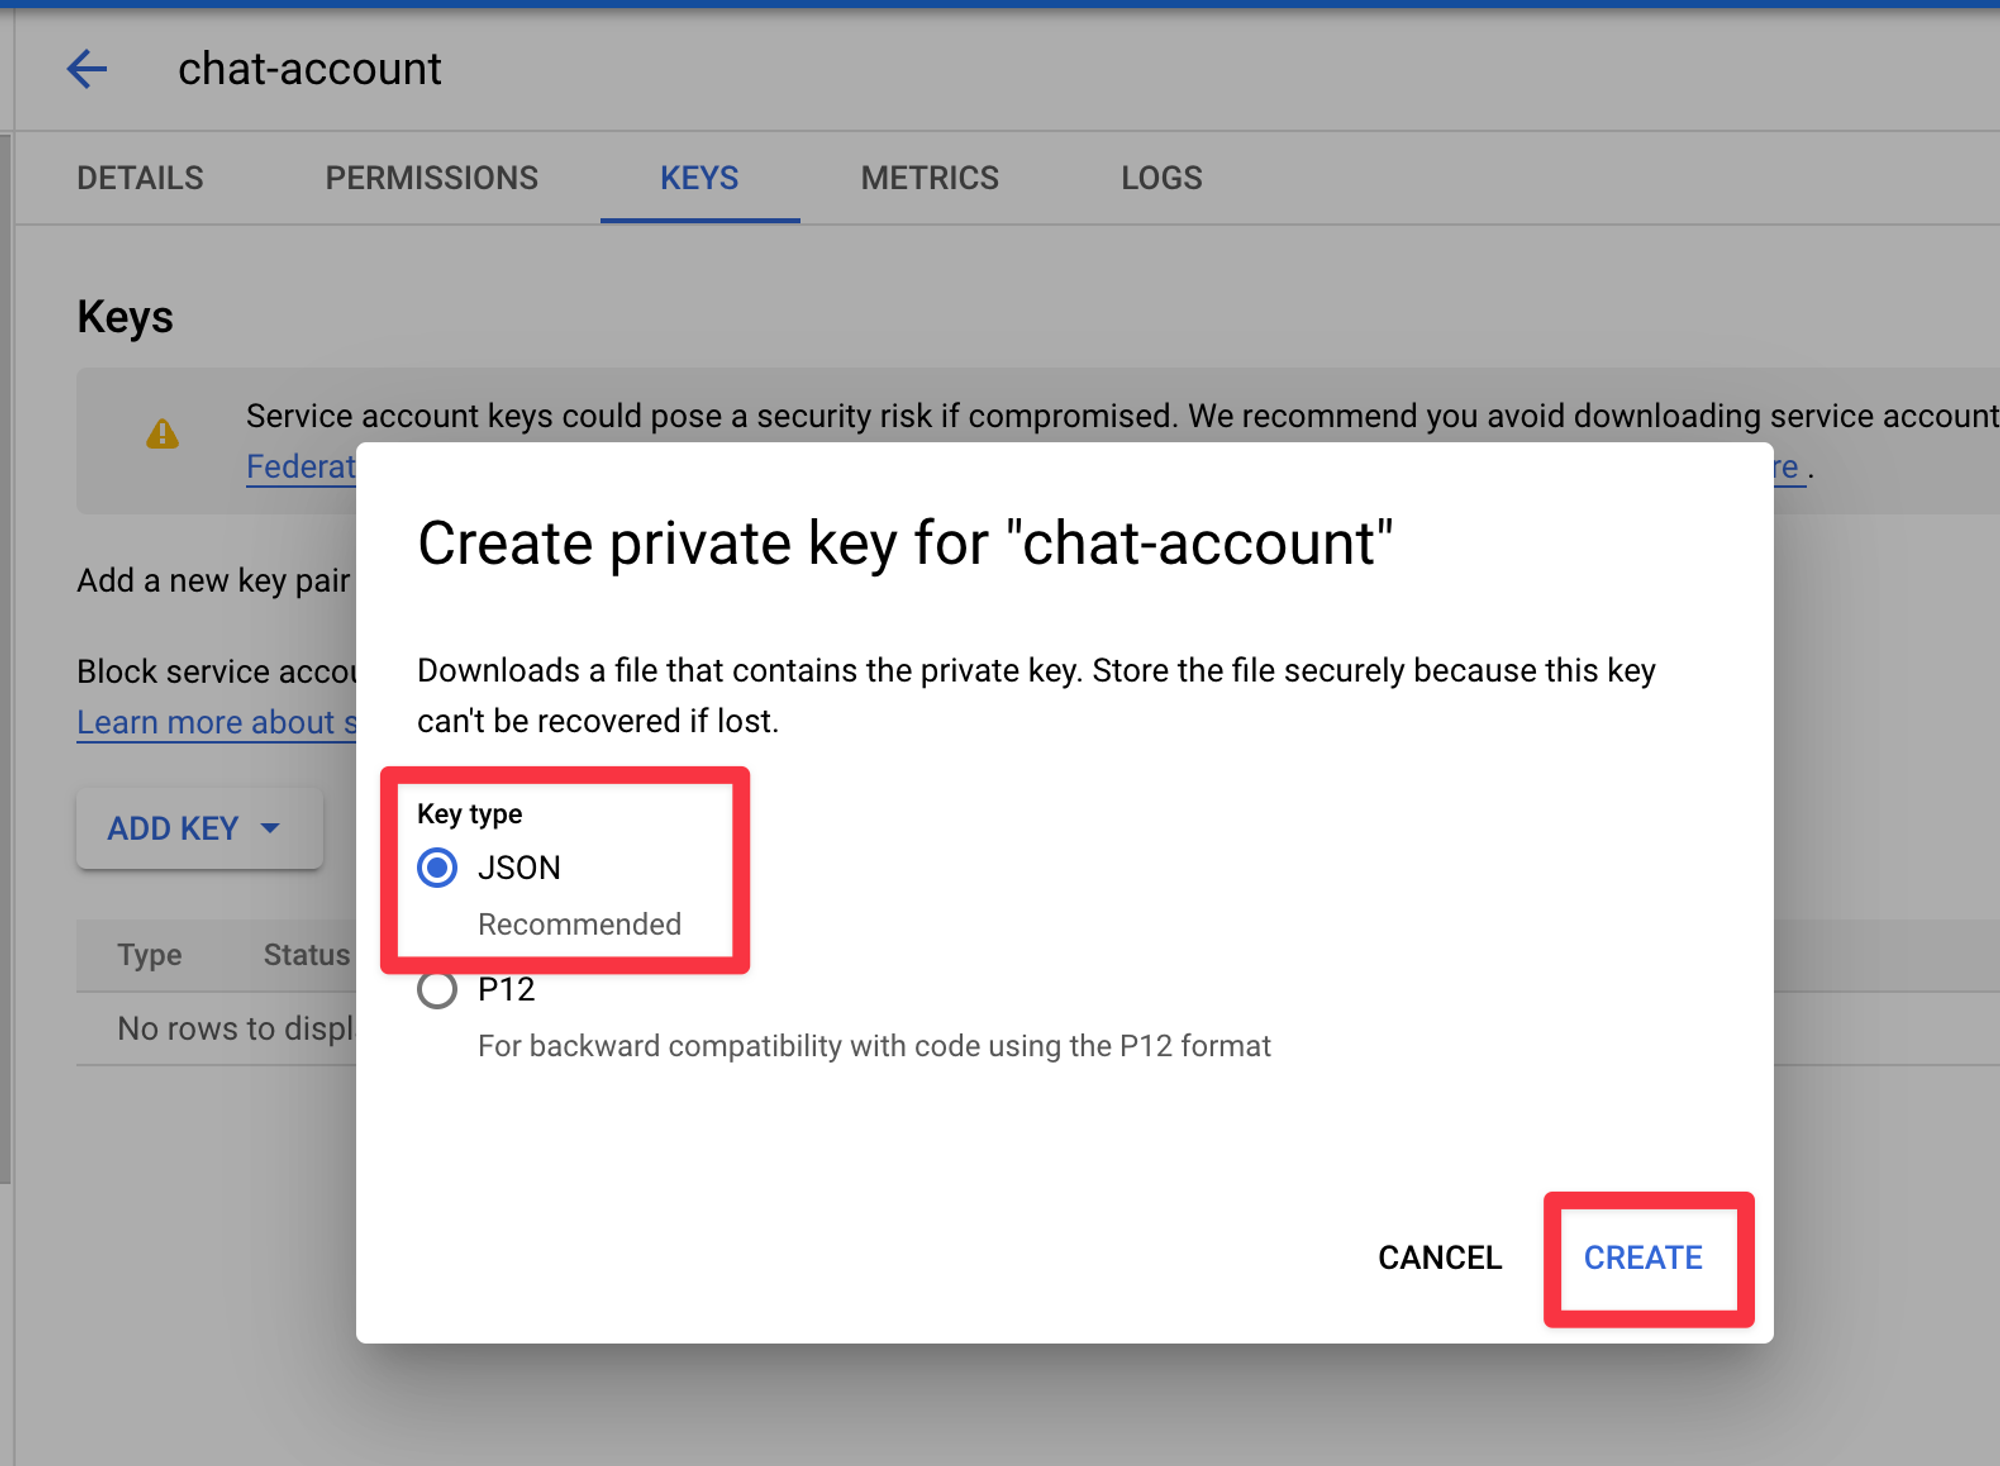
On the next popup you will make sure the “JSON” option is selected and then click “Create”
Enable the DialogFlow Integration
Now that you have a new Chatbot created in DialogFlow and a ServiceUser to connect to that Chatbot you need to enable the DialogFlow Chatbot integration. For this we need to know the Google “Project ID” and the contents of the “JSON” file from the previous step
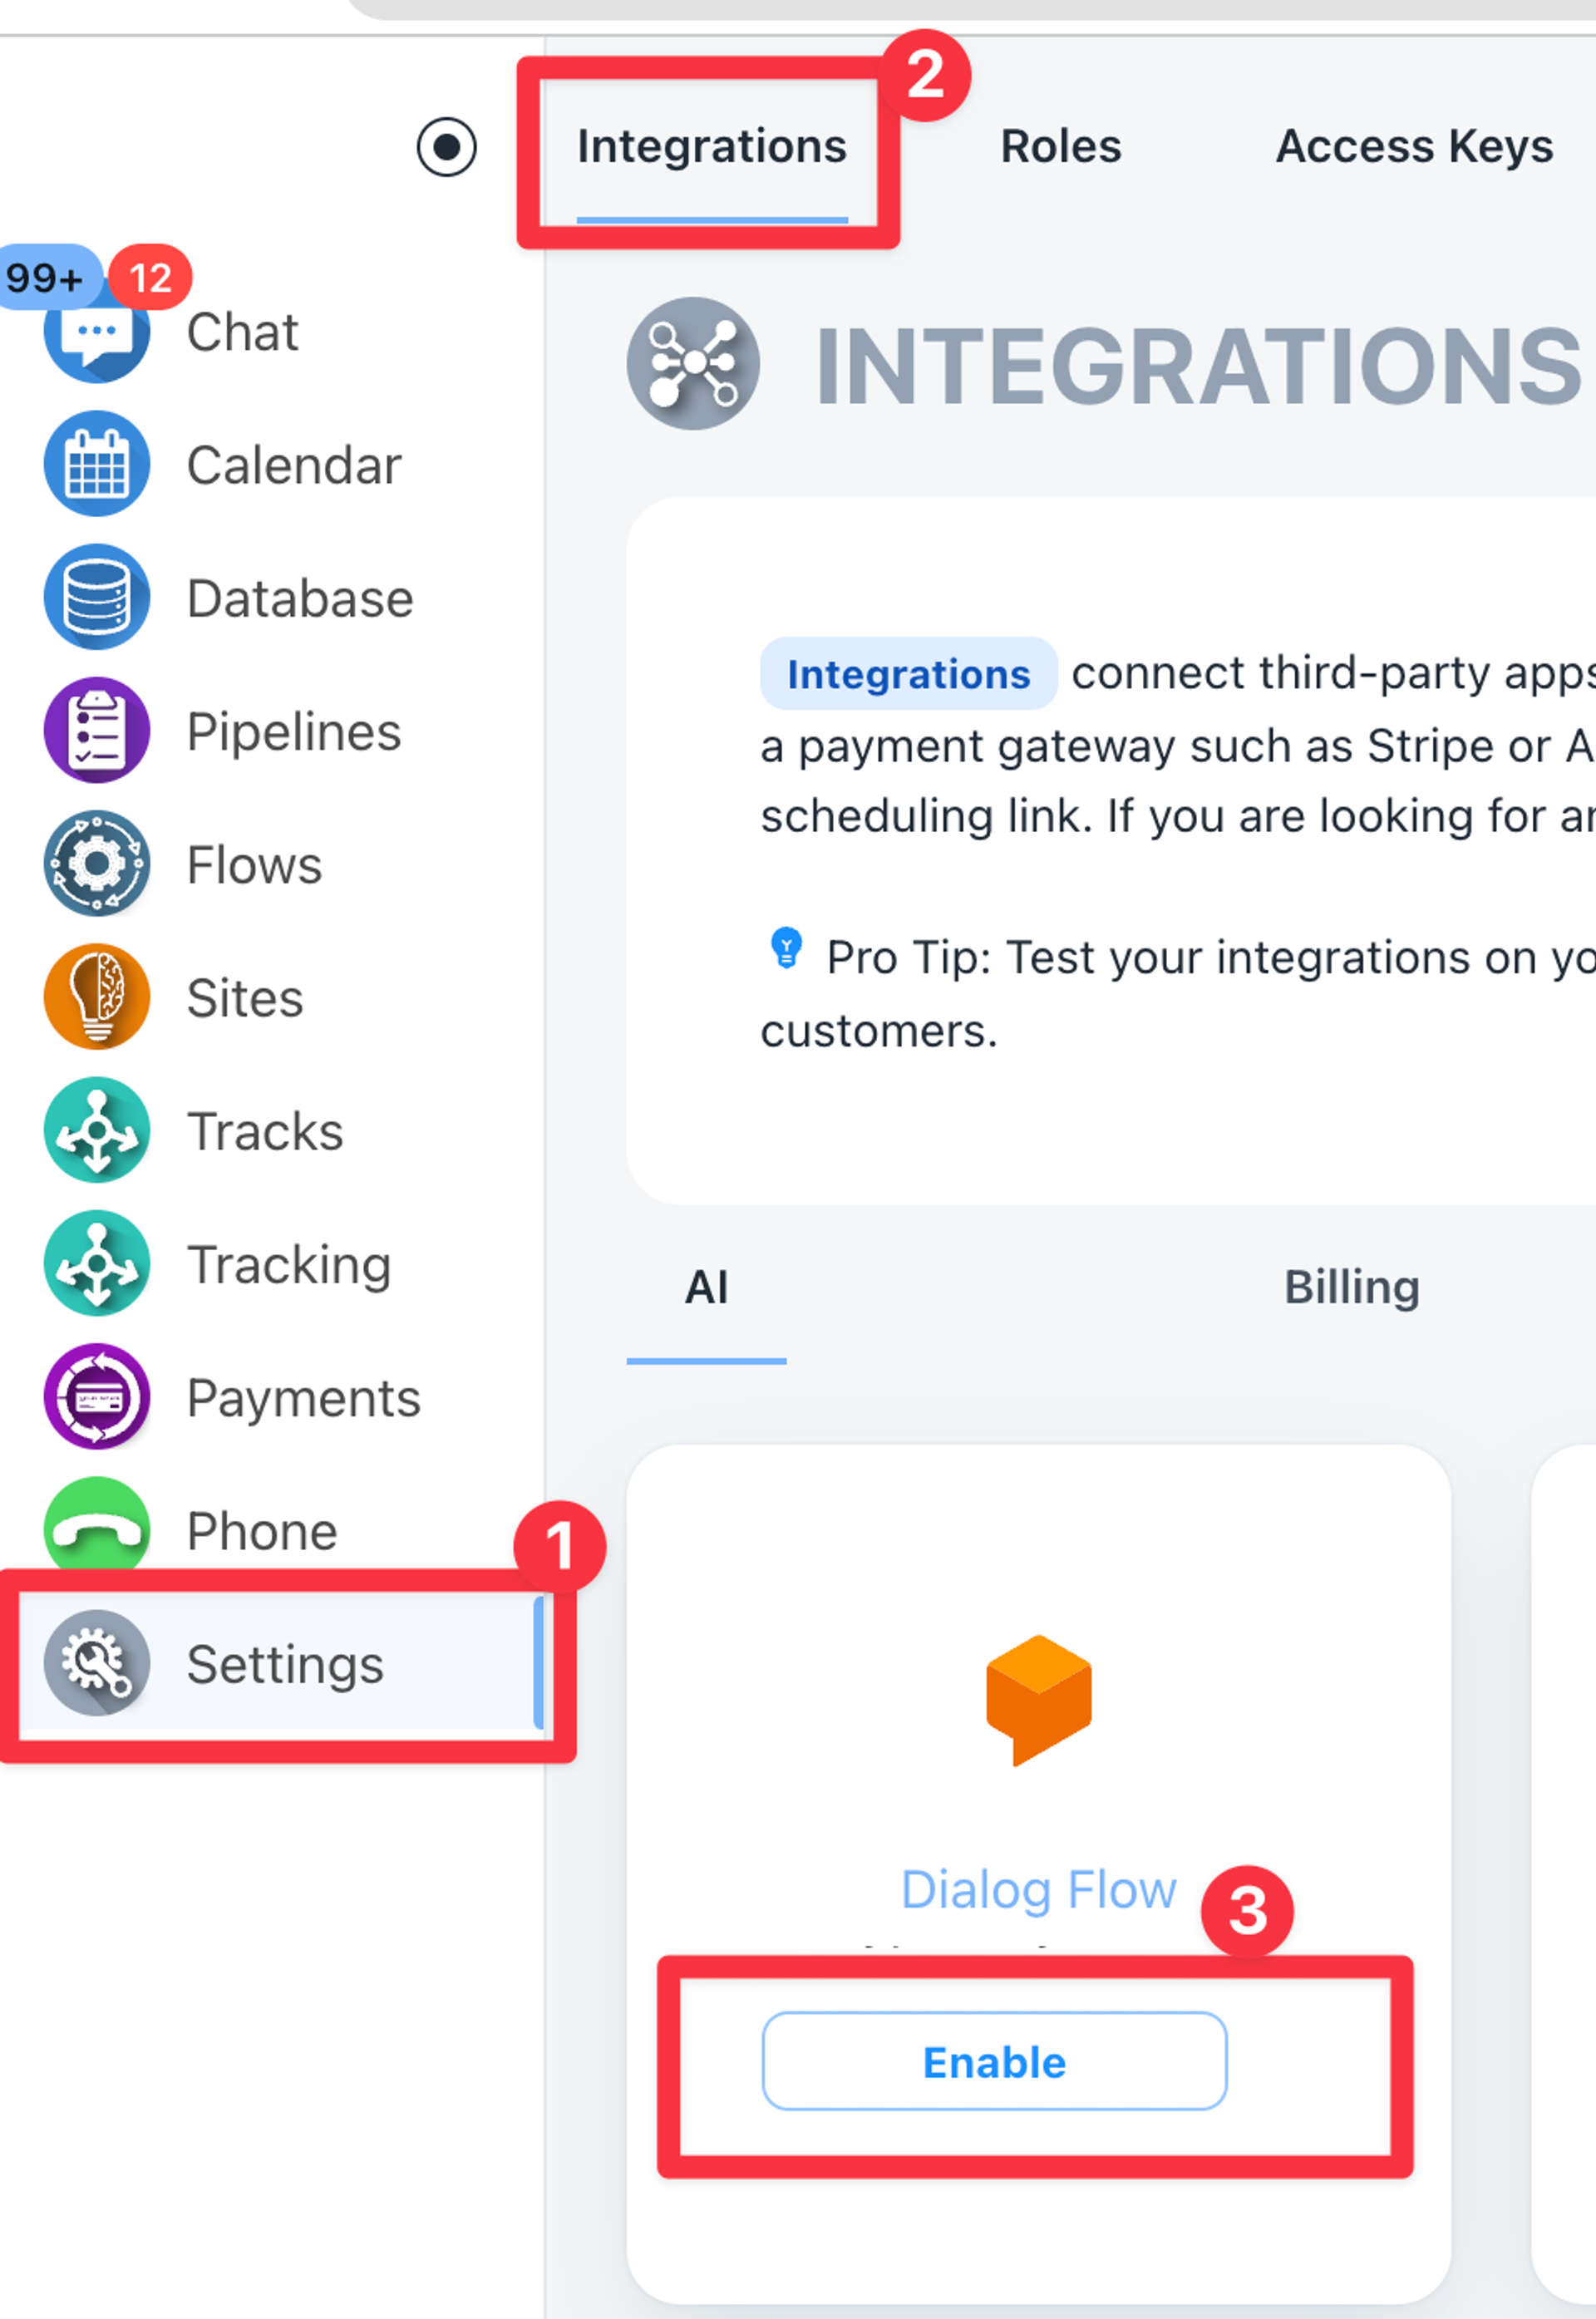
Navigate to “Integrations” > “AI” > “Dialog Flow”
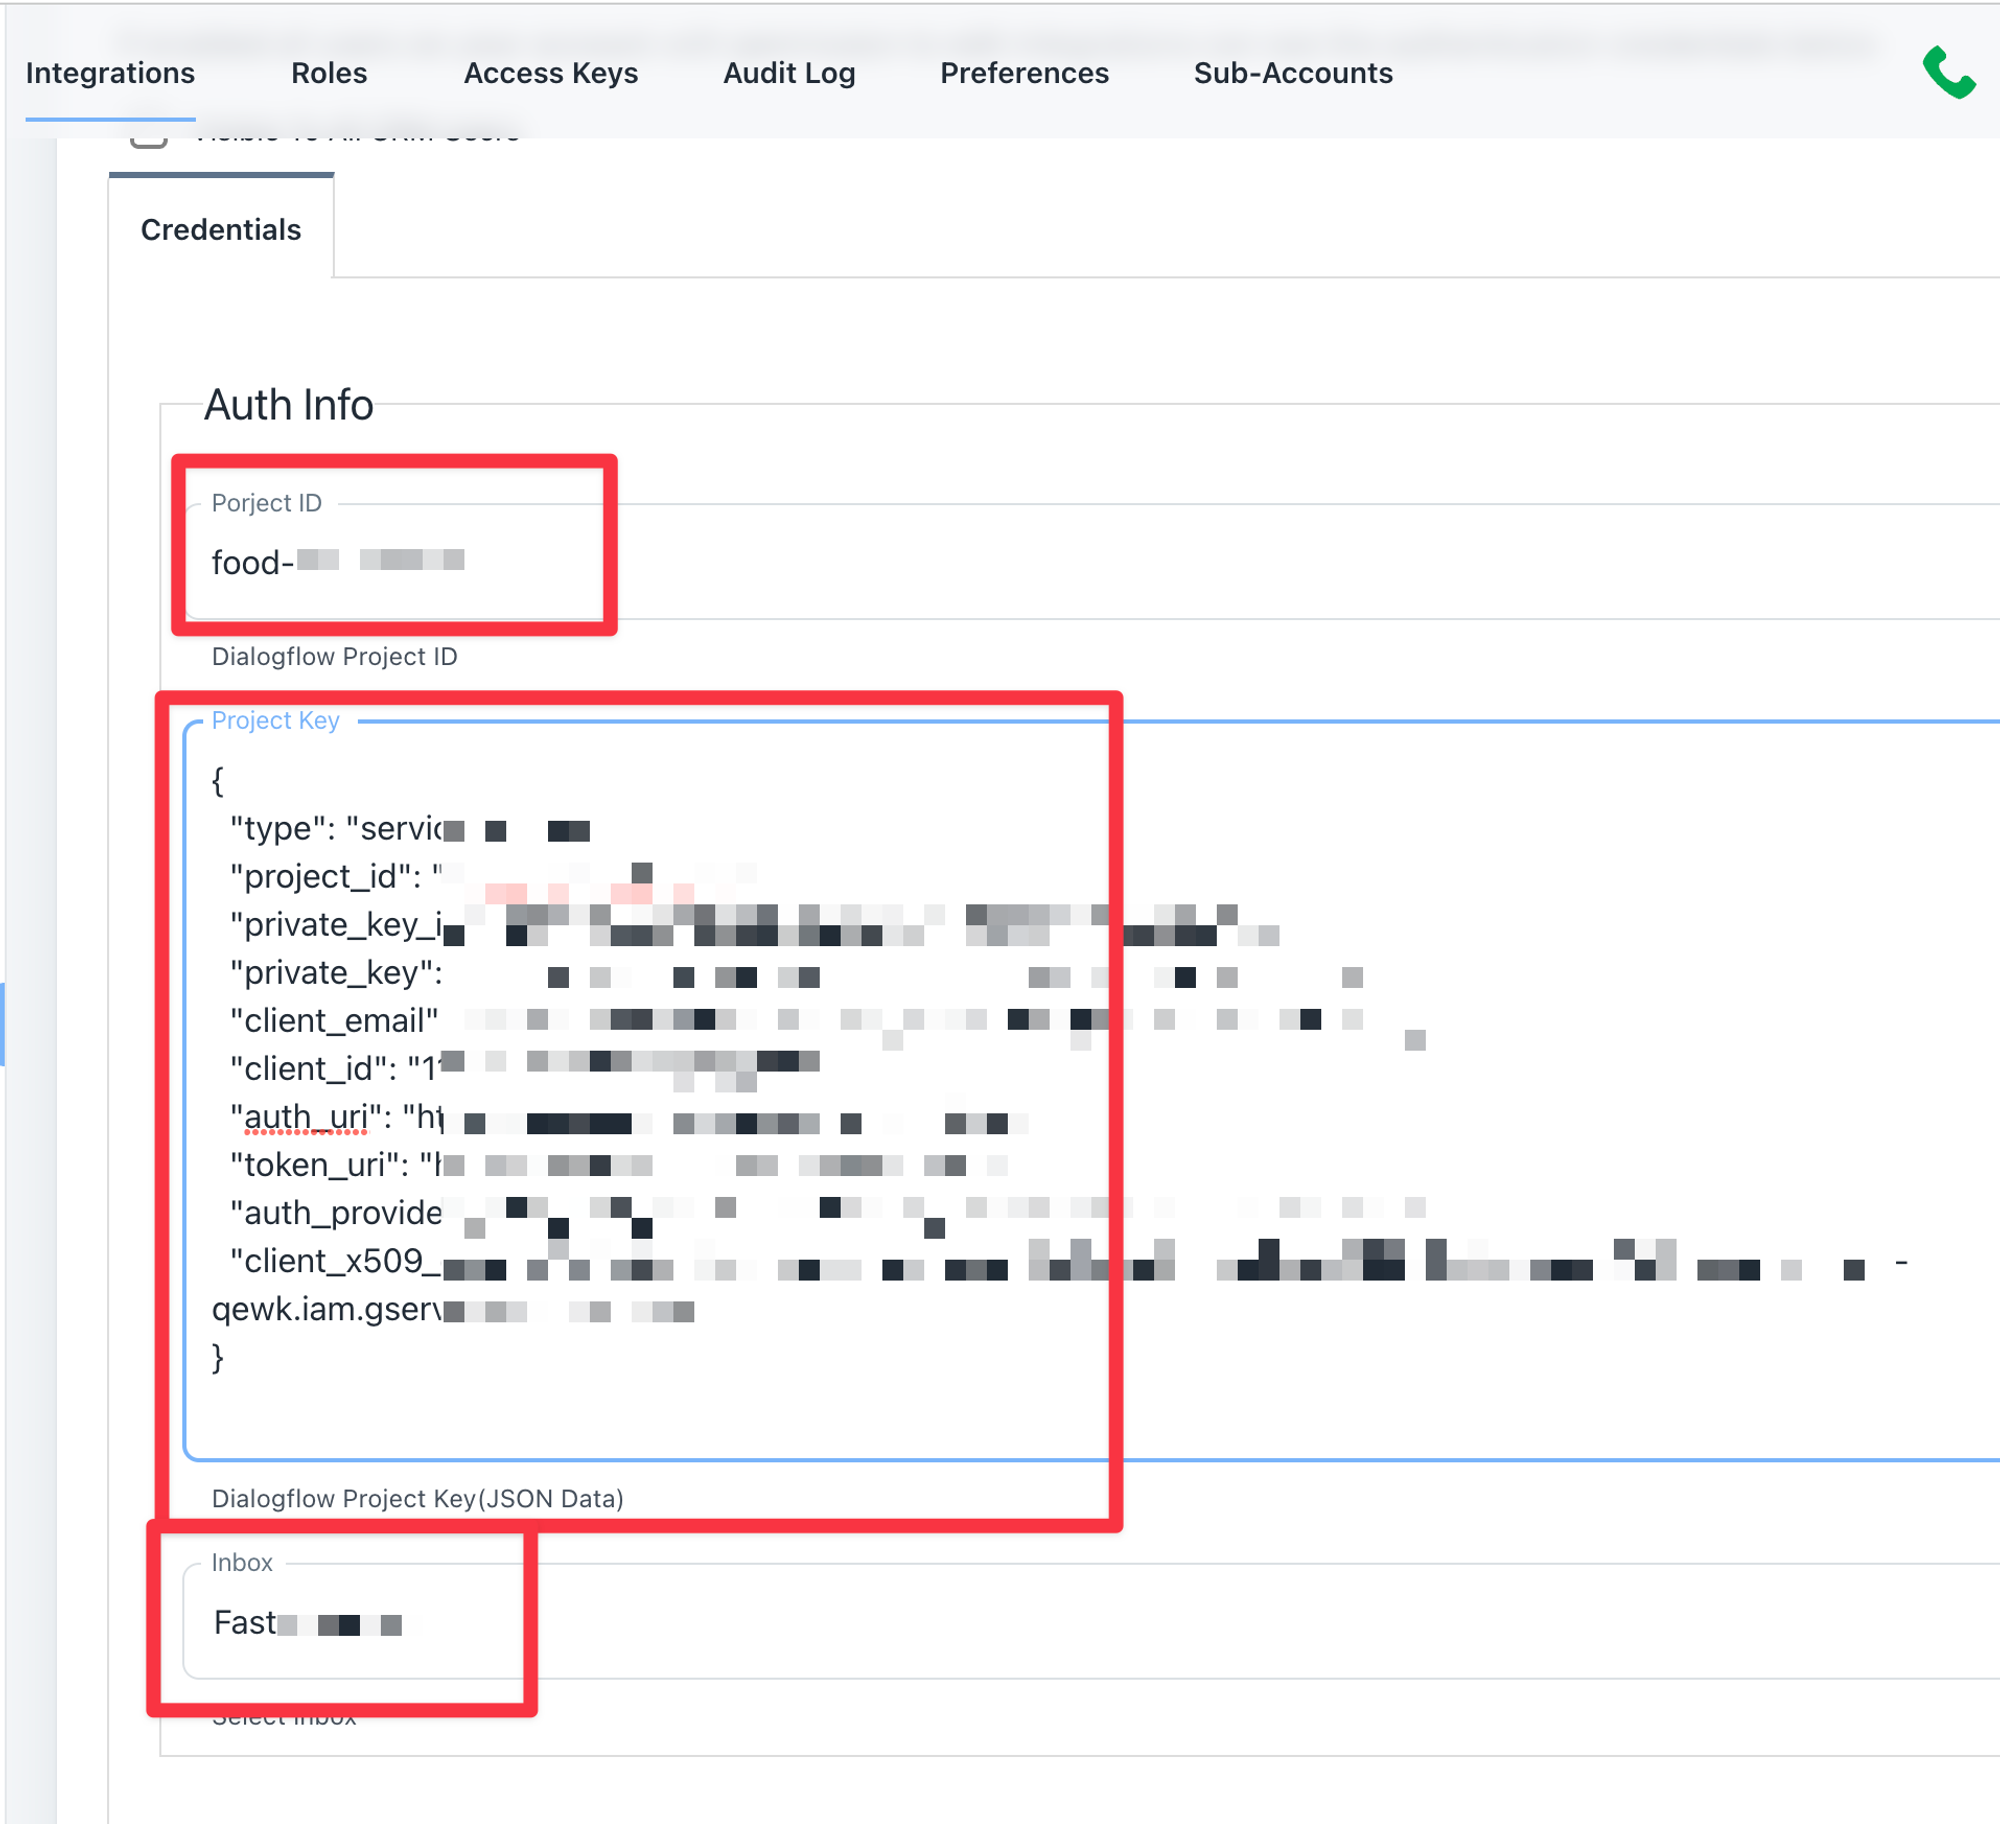
Next enter the;
Project ID
JSON Key File Contents
And Select the Inbox you want to use the Bot with in the Dropdown
Congratulations! You have successfully connected your ChatBot! Make sure the Chat widget is installed on your website and start chatting to test it
✅ Please note when testing your Chatbots that only NEW conversations will trigger the bot. After a “Handoff” occurs to a human the bot will never be triggered again for that contact and conversation