Steps to connect the domain with your system
Open the domain panel
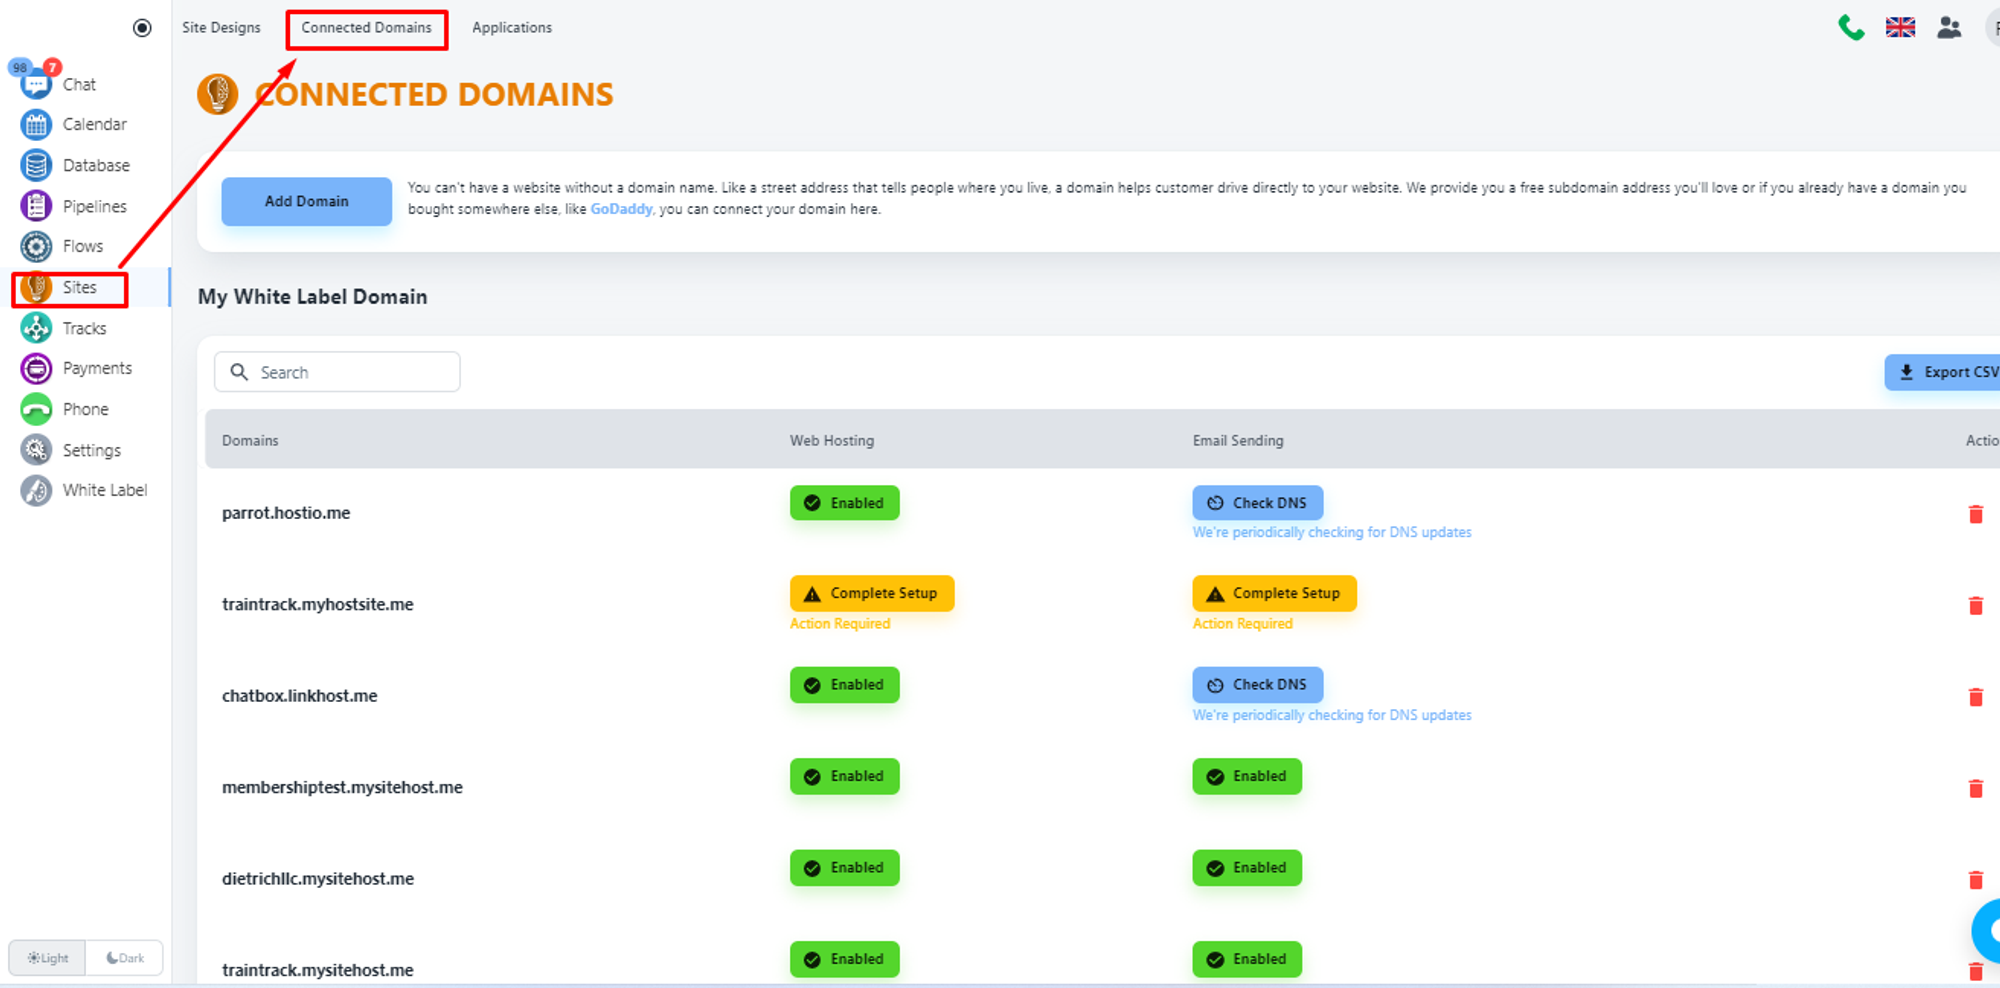
Navigate to the domain panel by clicking the “Sites” on the left side menu. Then when you have that page open you will see a link to “Connected Domains” on the top of your page, please click that.
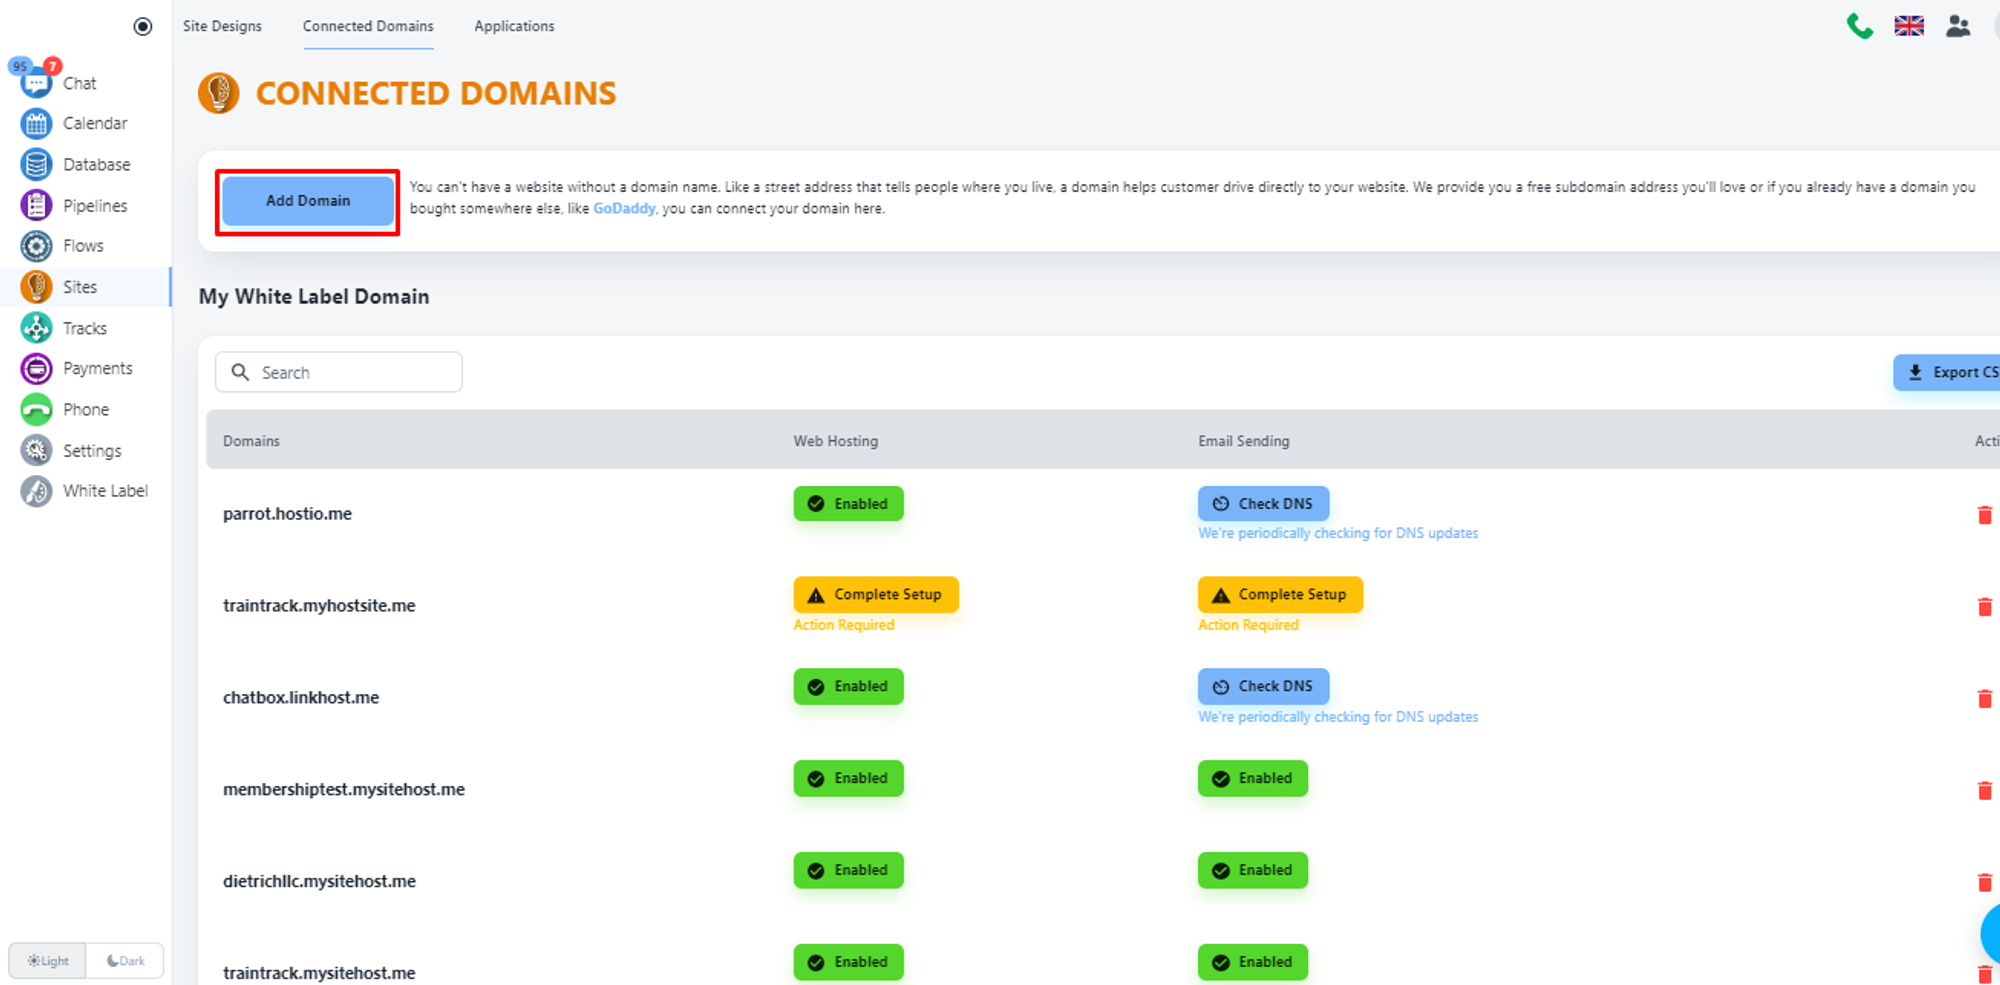
Now, click on the ‘Add Domain’ button to add your domain with System
Select domain type
The system will allow you to add a free domain or custom domain. For our case, we will select the second option, and put your domain name.
What is the difference between a Free Domain and a Custom domain?
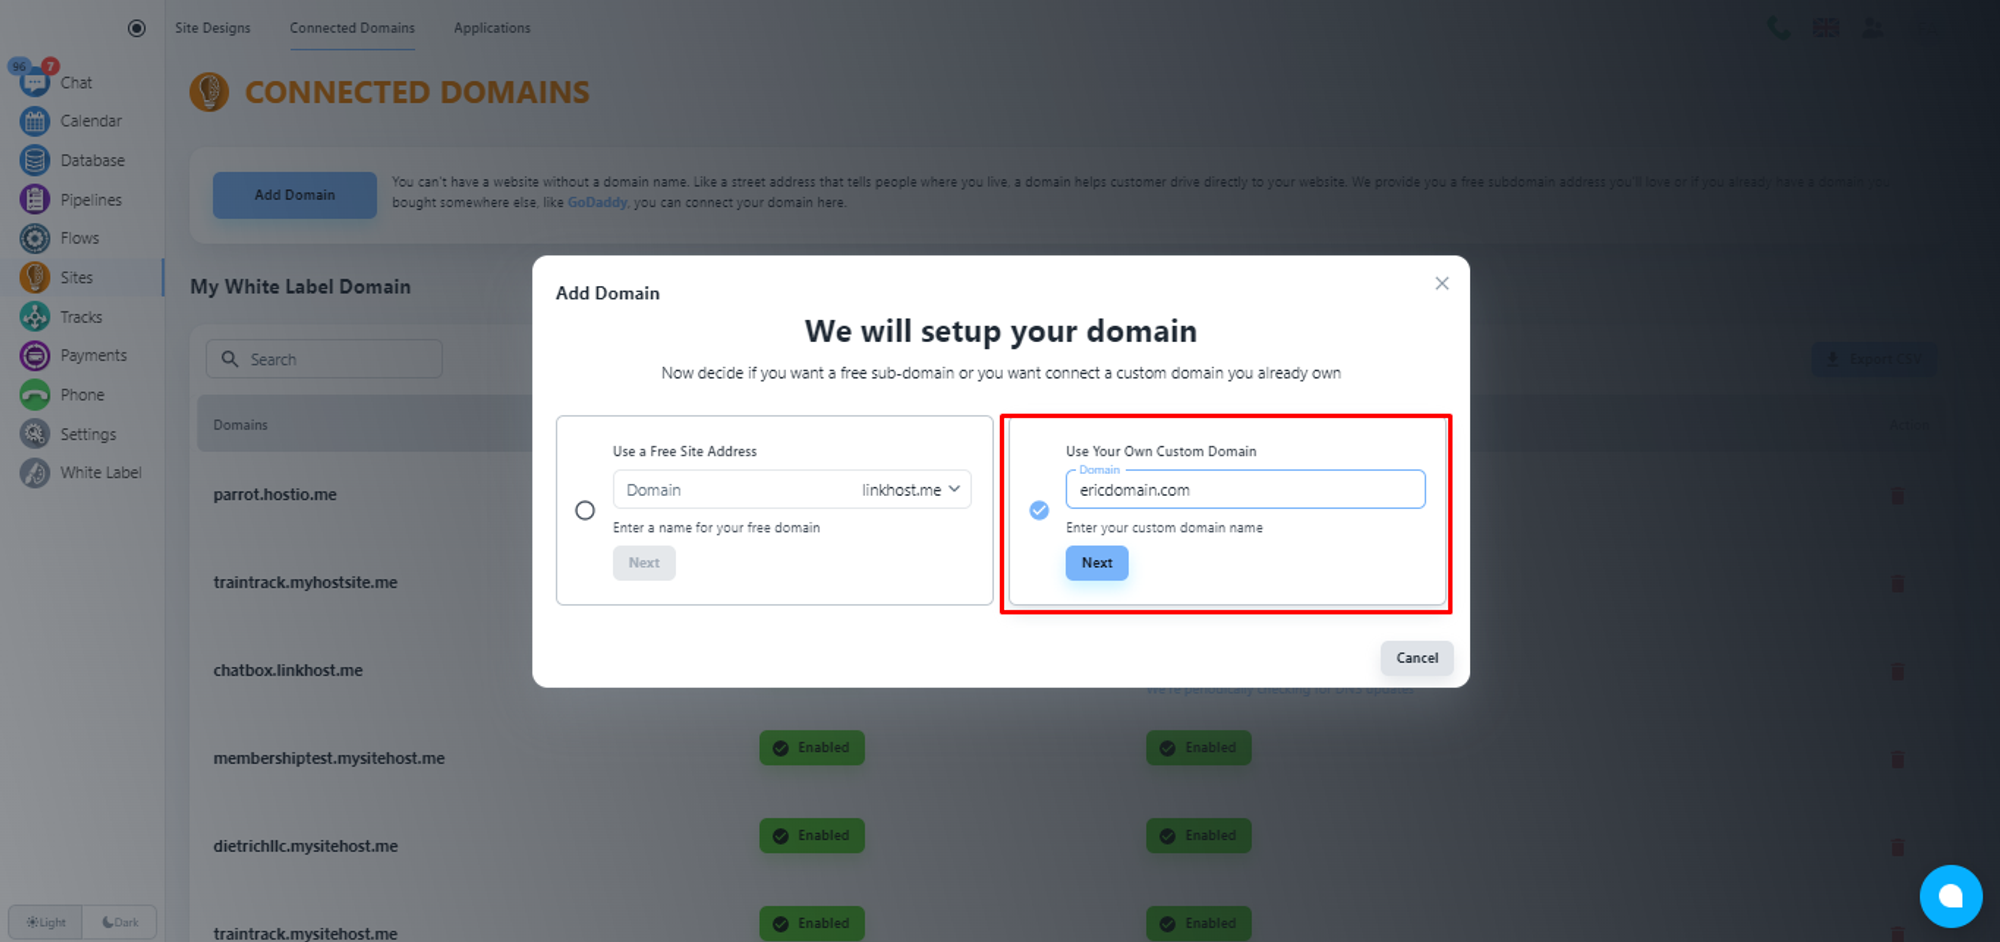
Click on the ‘Next’ button.
Select services
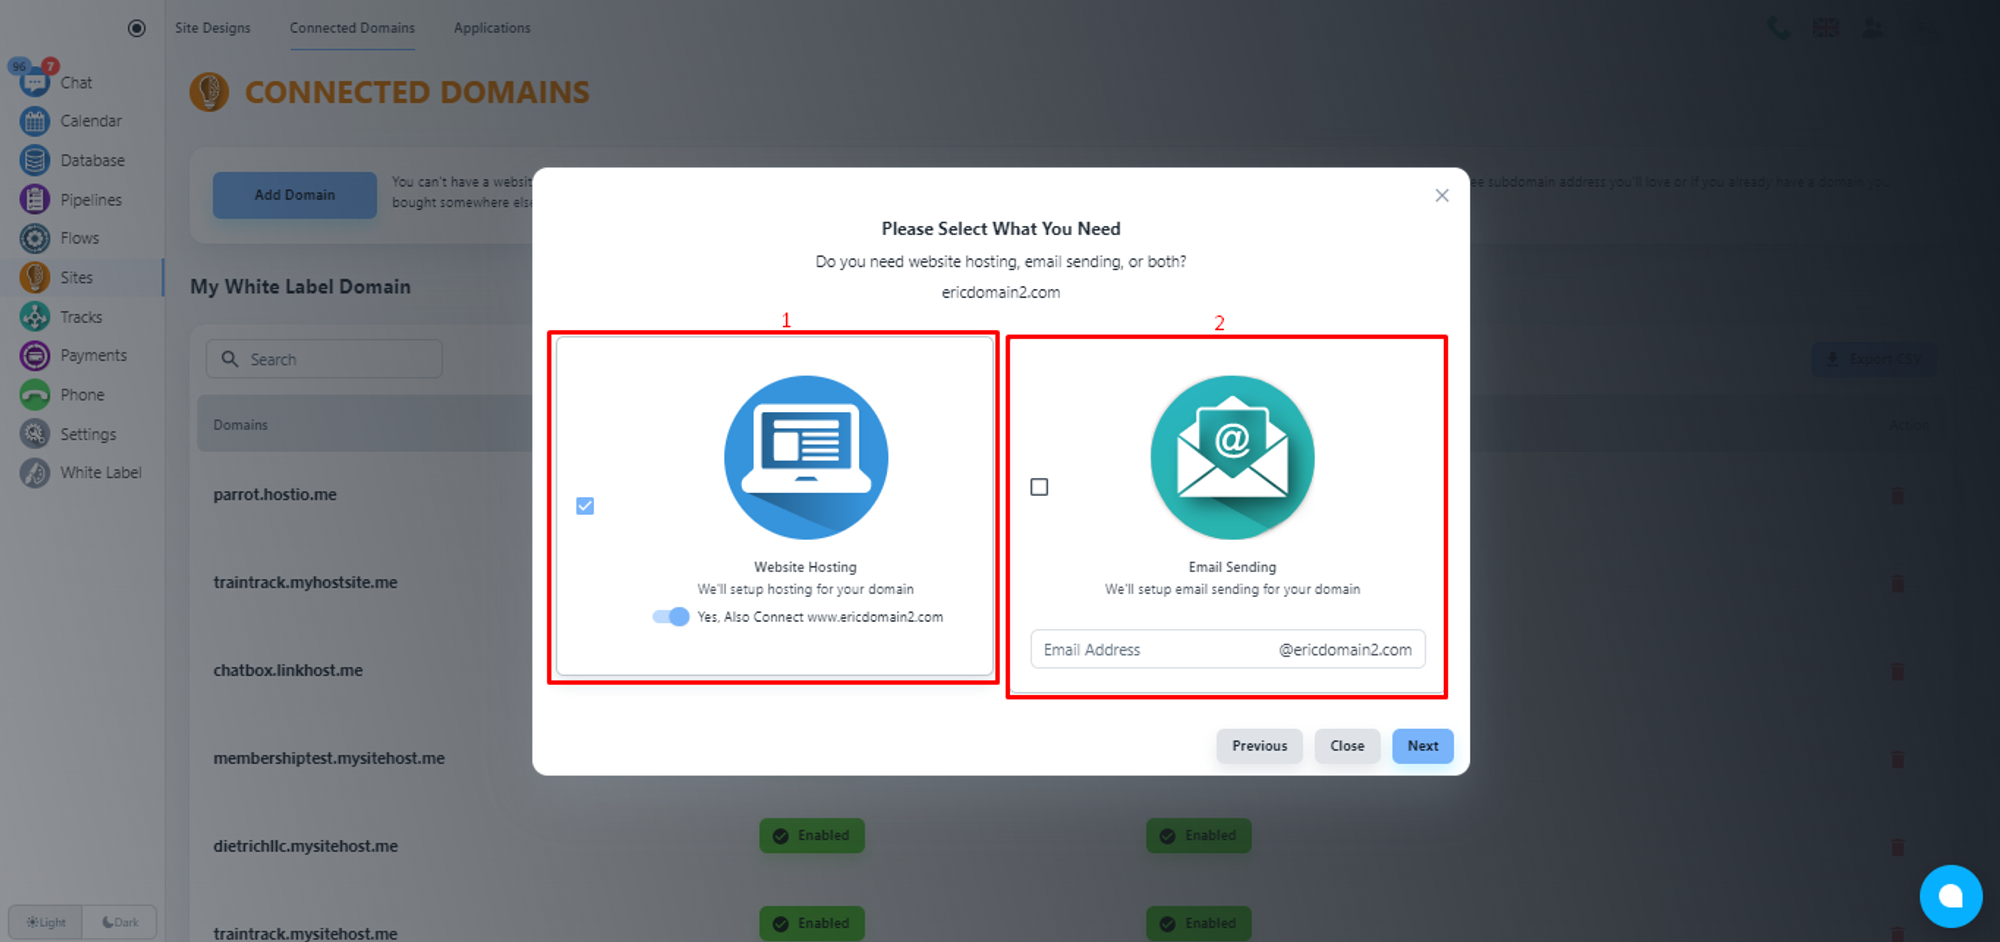
Now, the system will offer you system services. By default, the Website Hosting service will be enabled.
When to use email sending?
If you also need the Email service, please, click on the checkbox of the second tab, and add the email address that you want to add with system for email services.
💡 Enabling email services with this system will not hamper your existing email services.
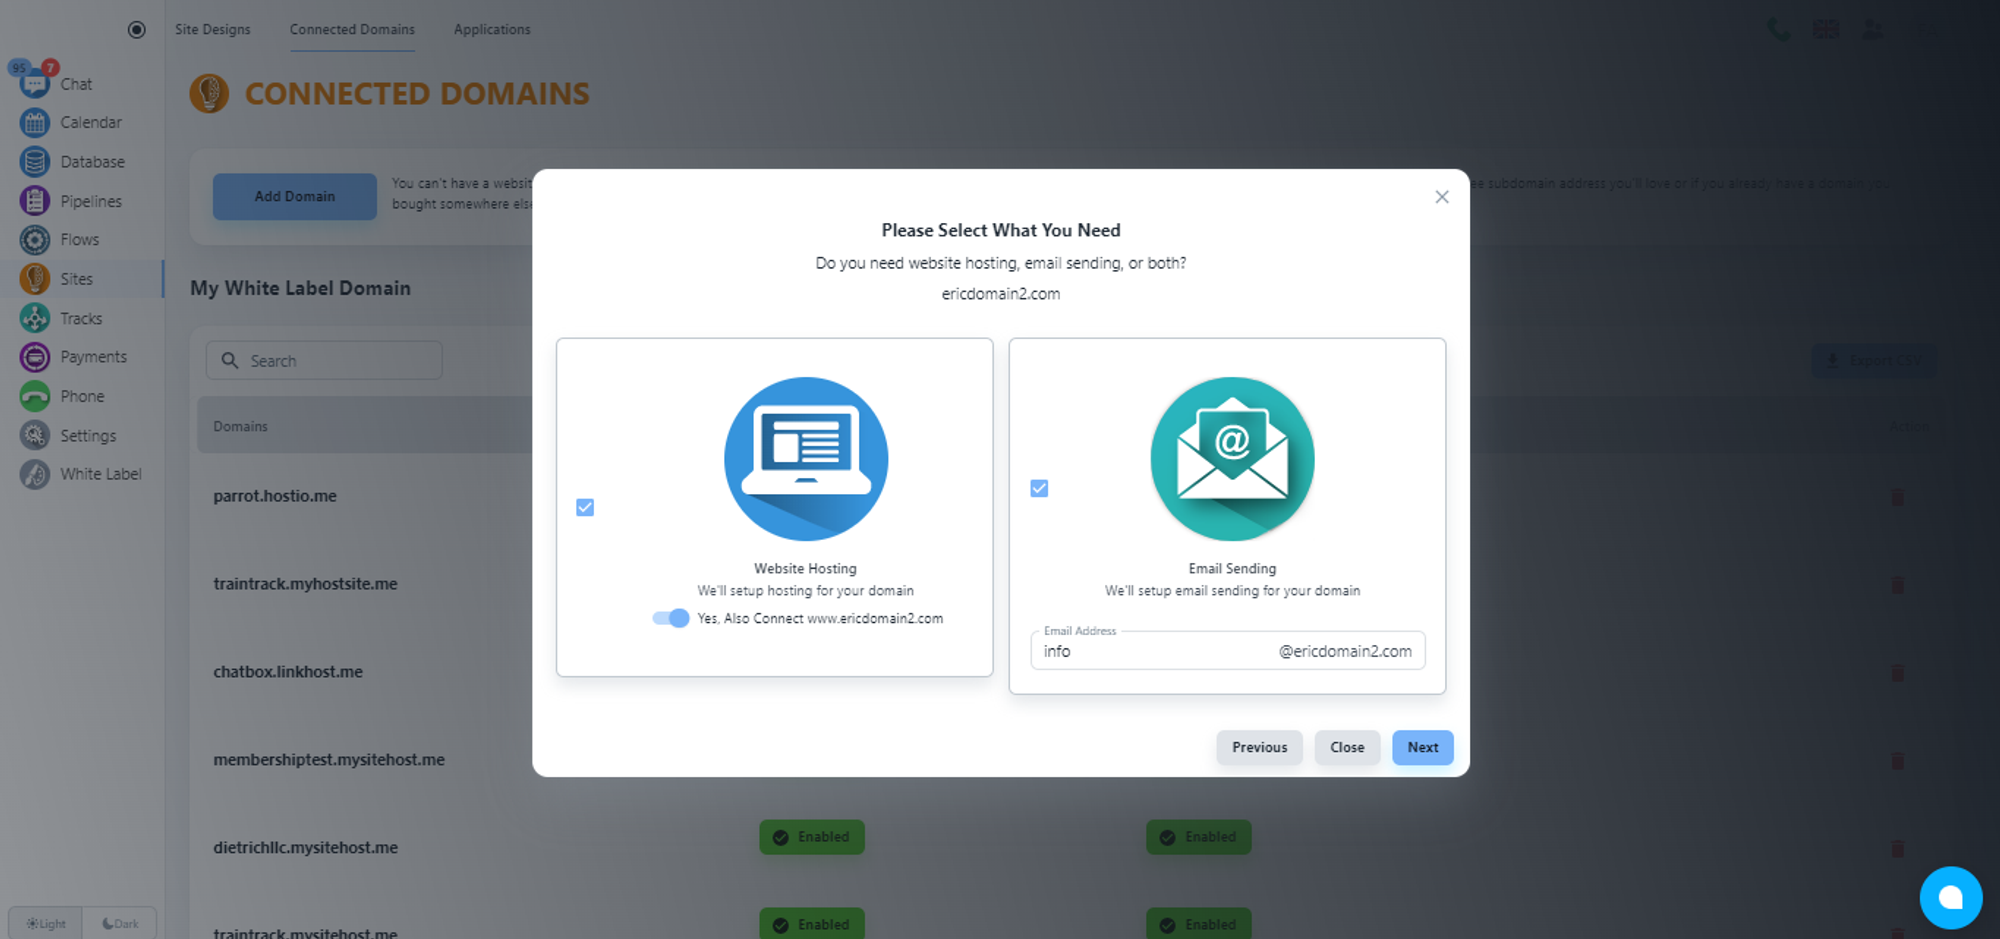
Please, click on the ‘Next’ button.
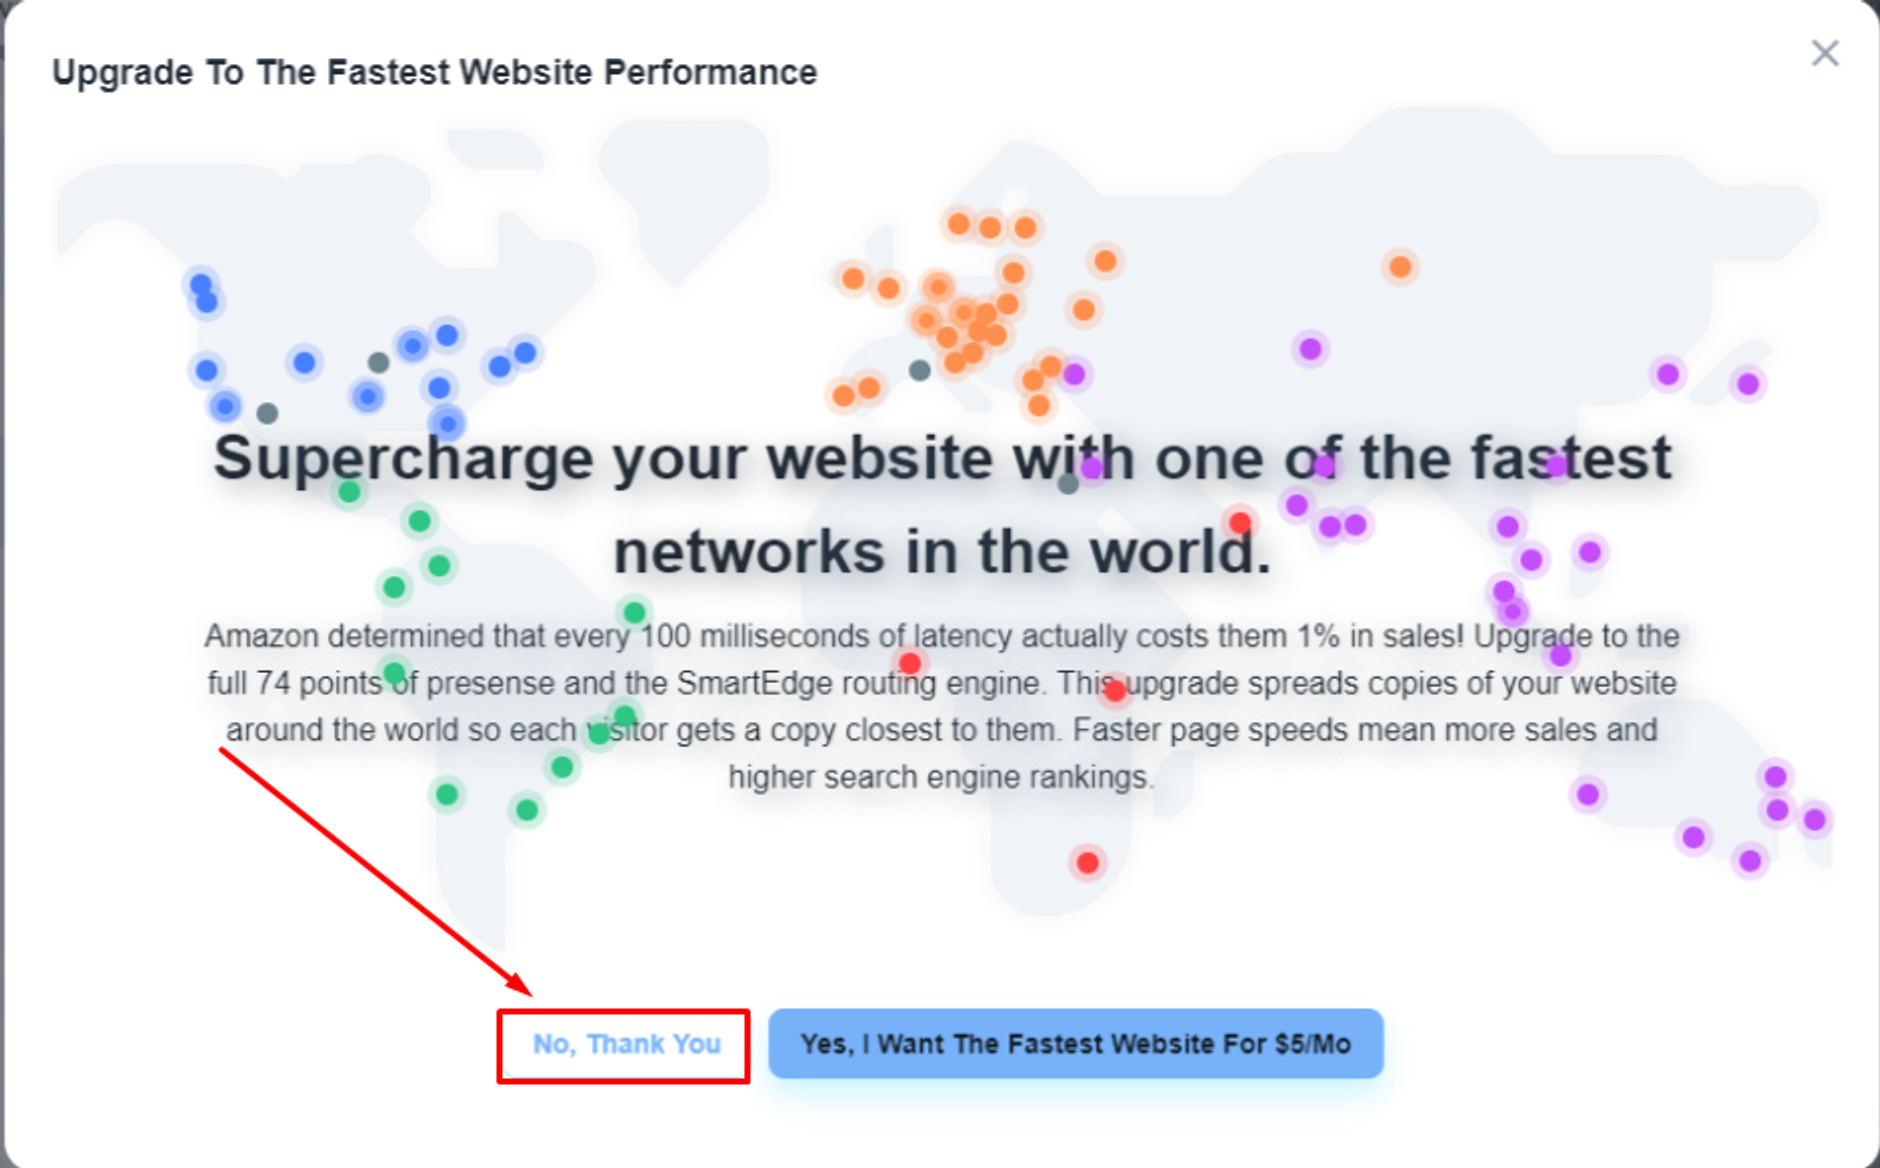
Choose faster CDN (optional)
Now, the system will offer you the option to choose a faster CDN for a better web service experience for your users. Please, click on the ‘No, Thank You’ button unless you want a faster CDN for $5/month.
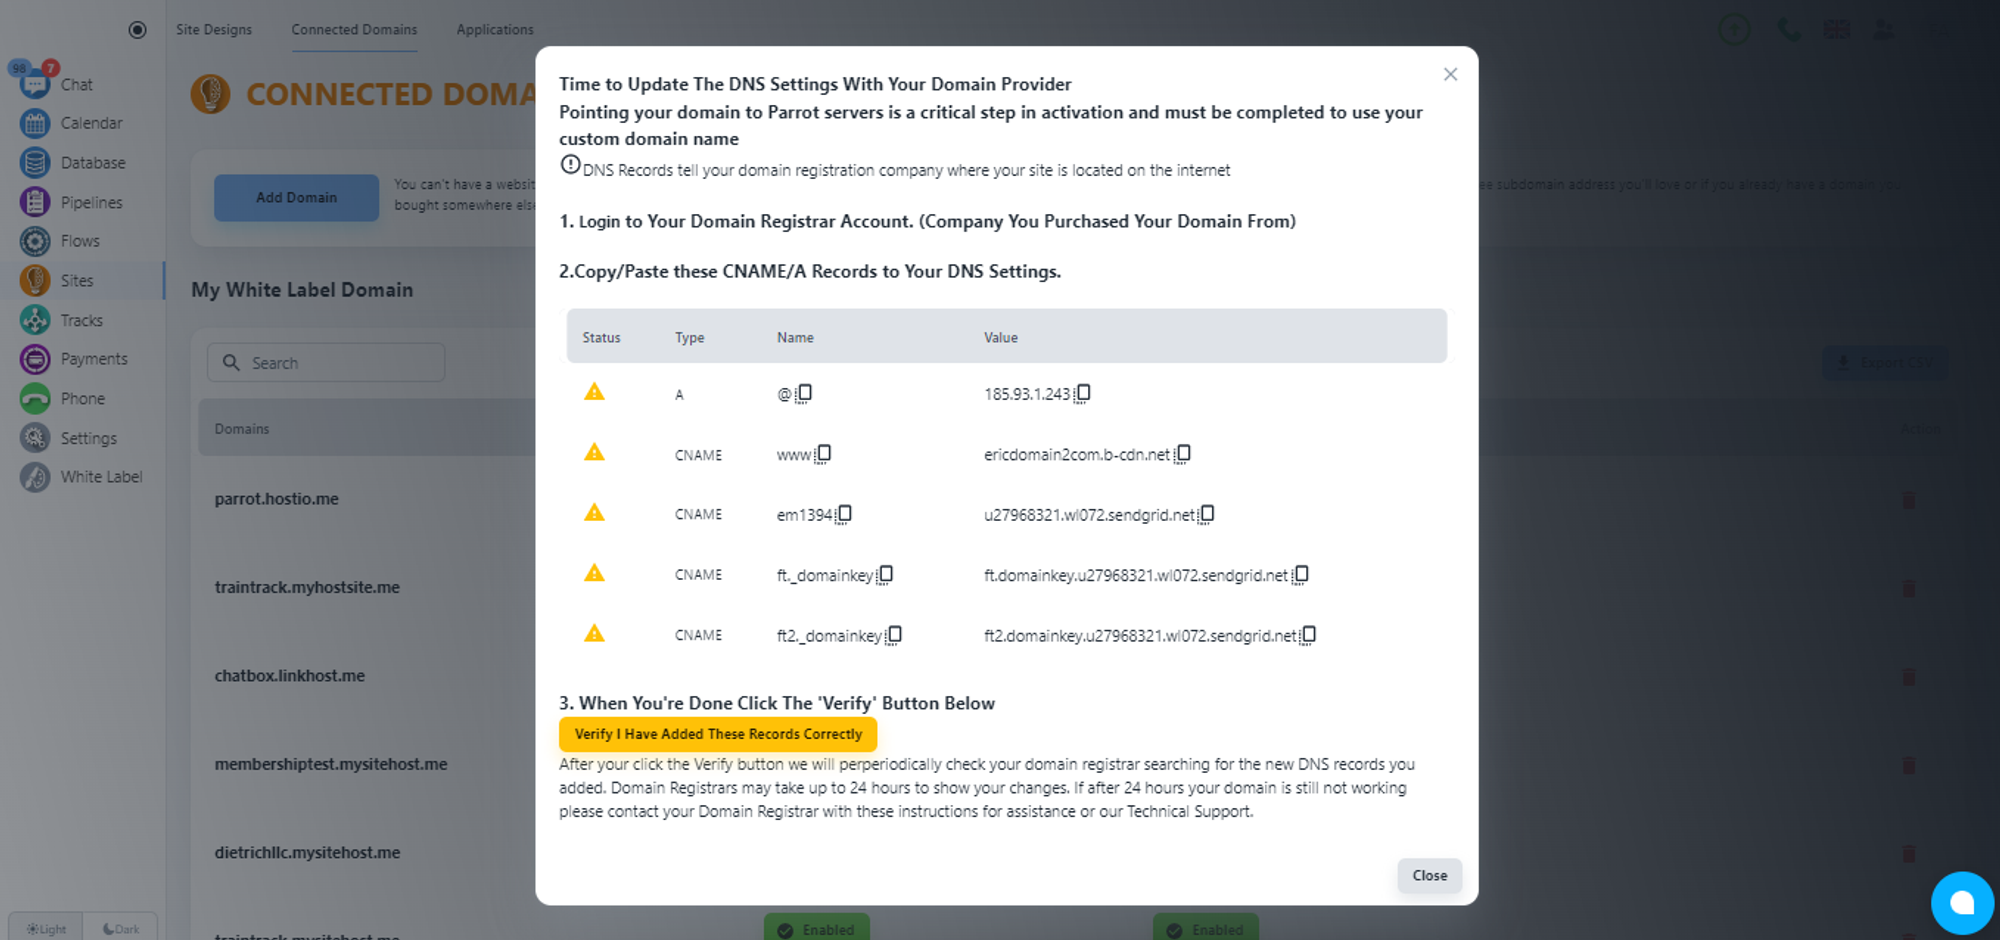
Collect DNS records
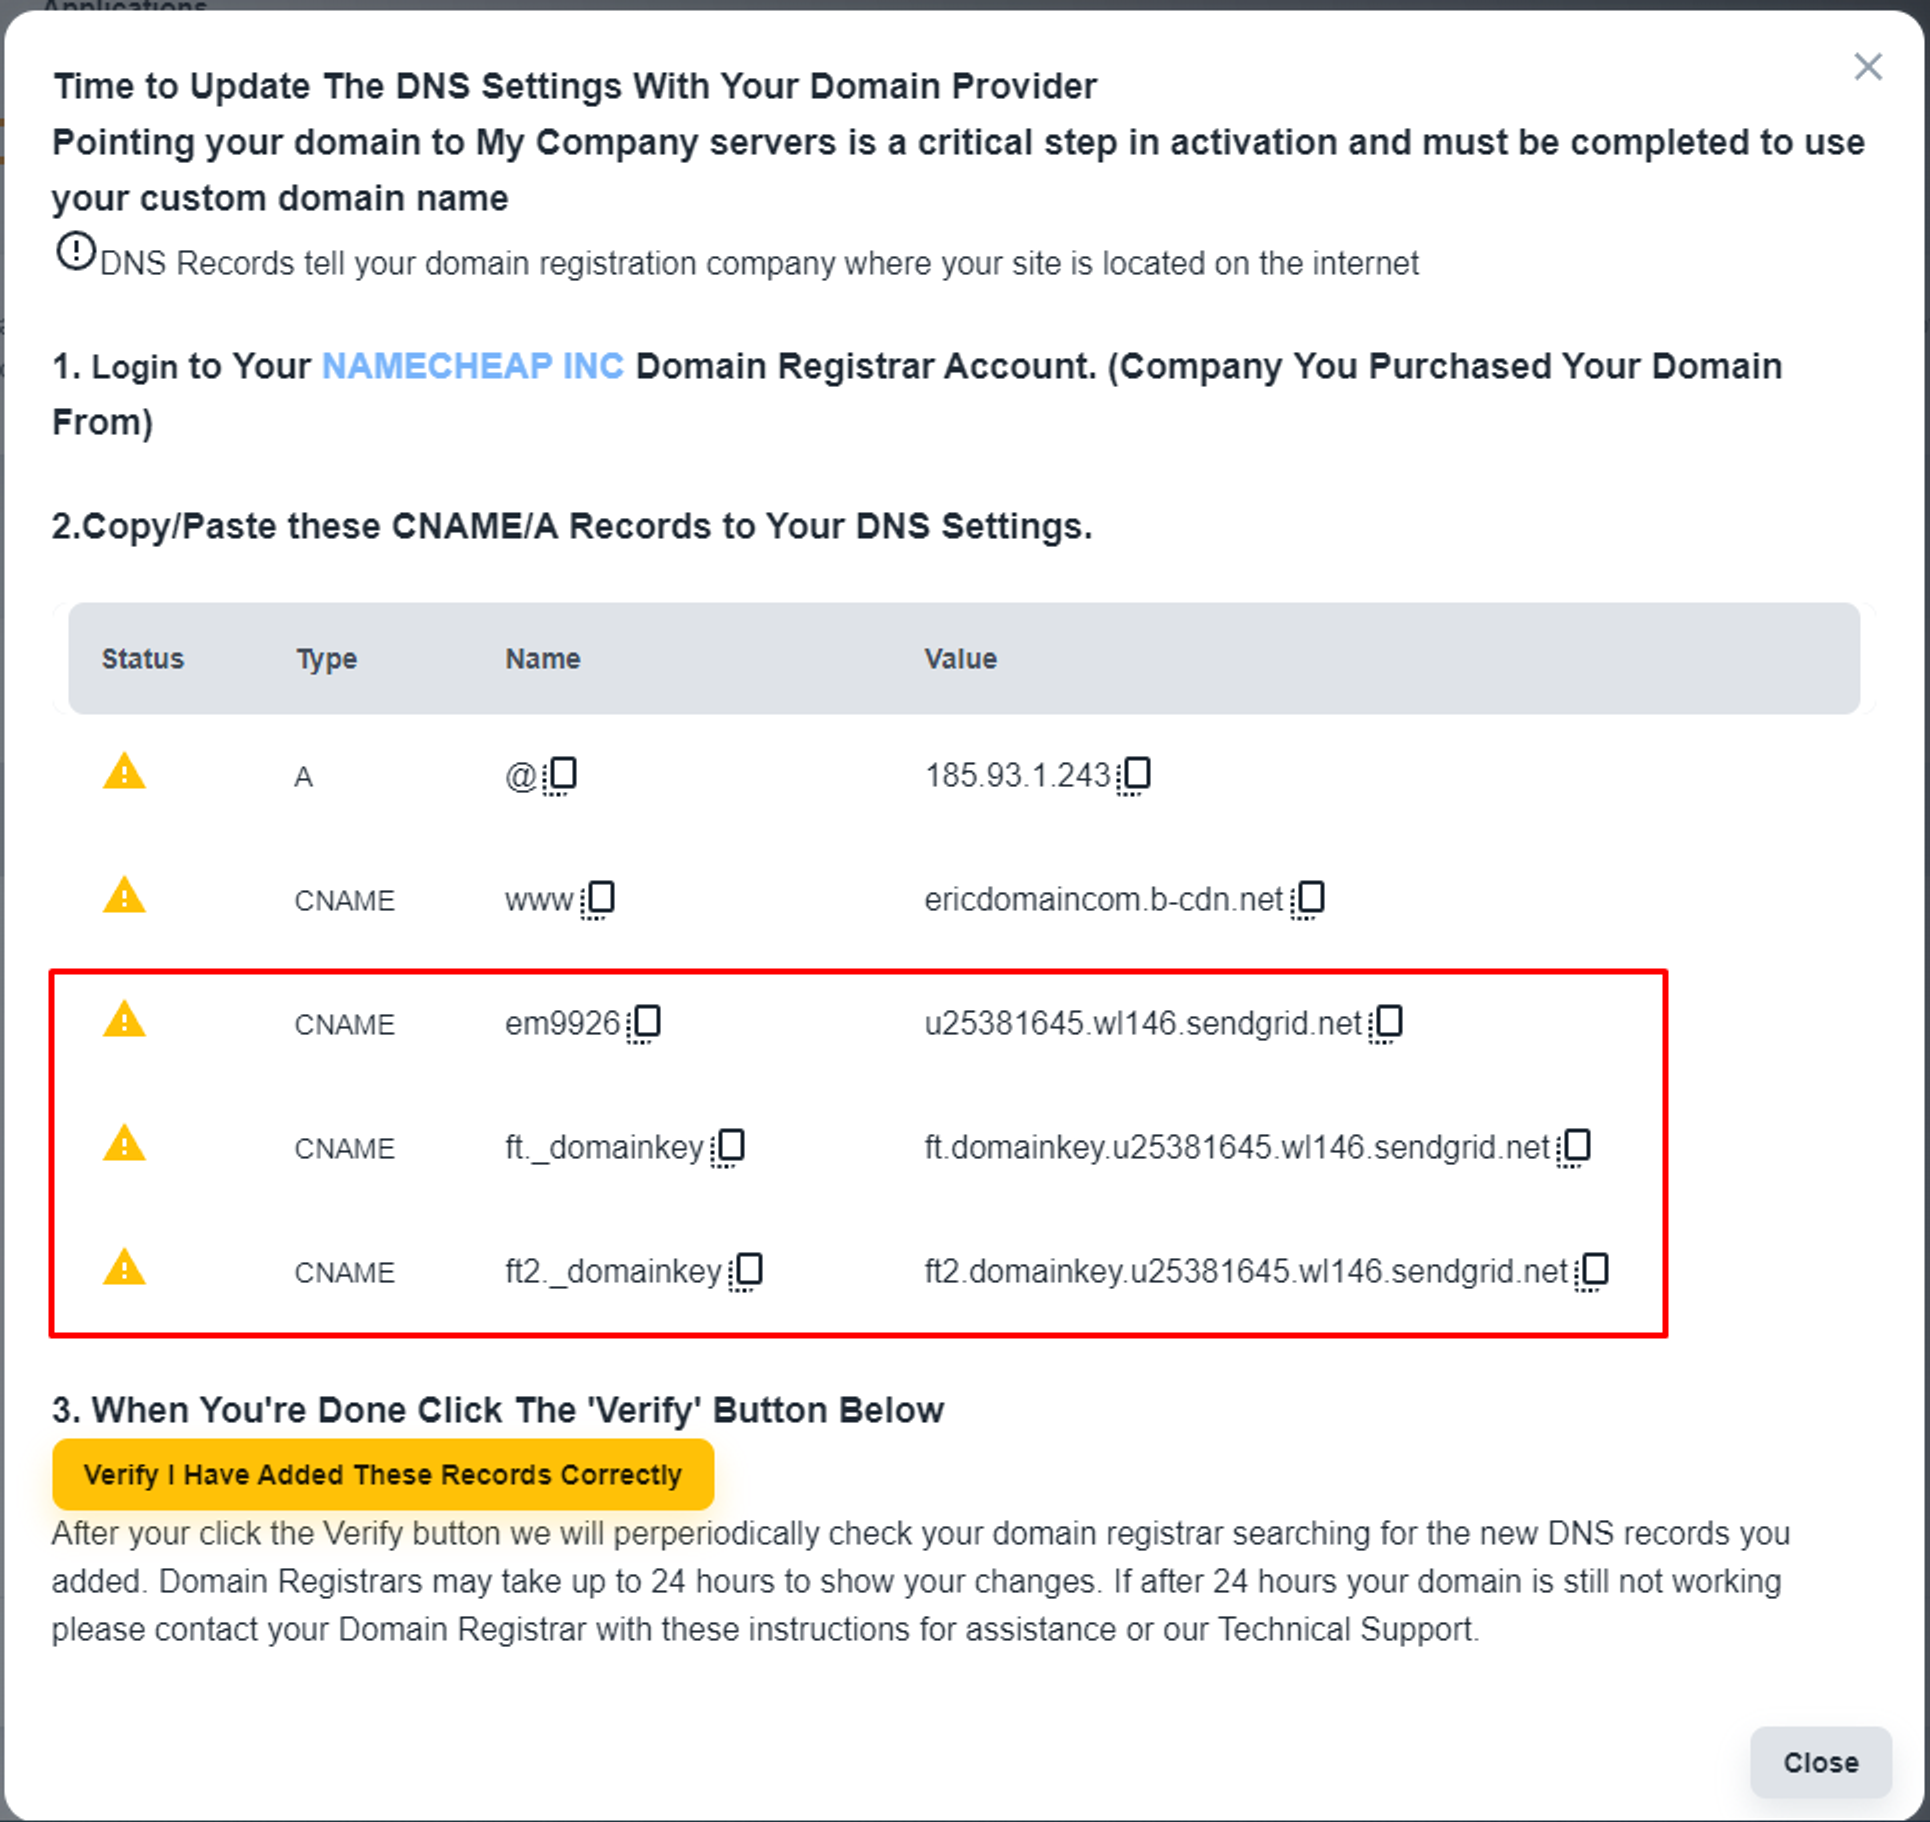
Please, wait for a while, the system will provide you with the required DNS records that you need to add to your ionos account.
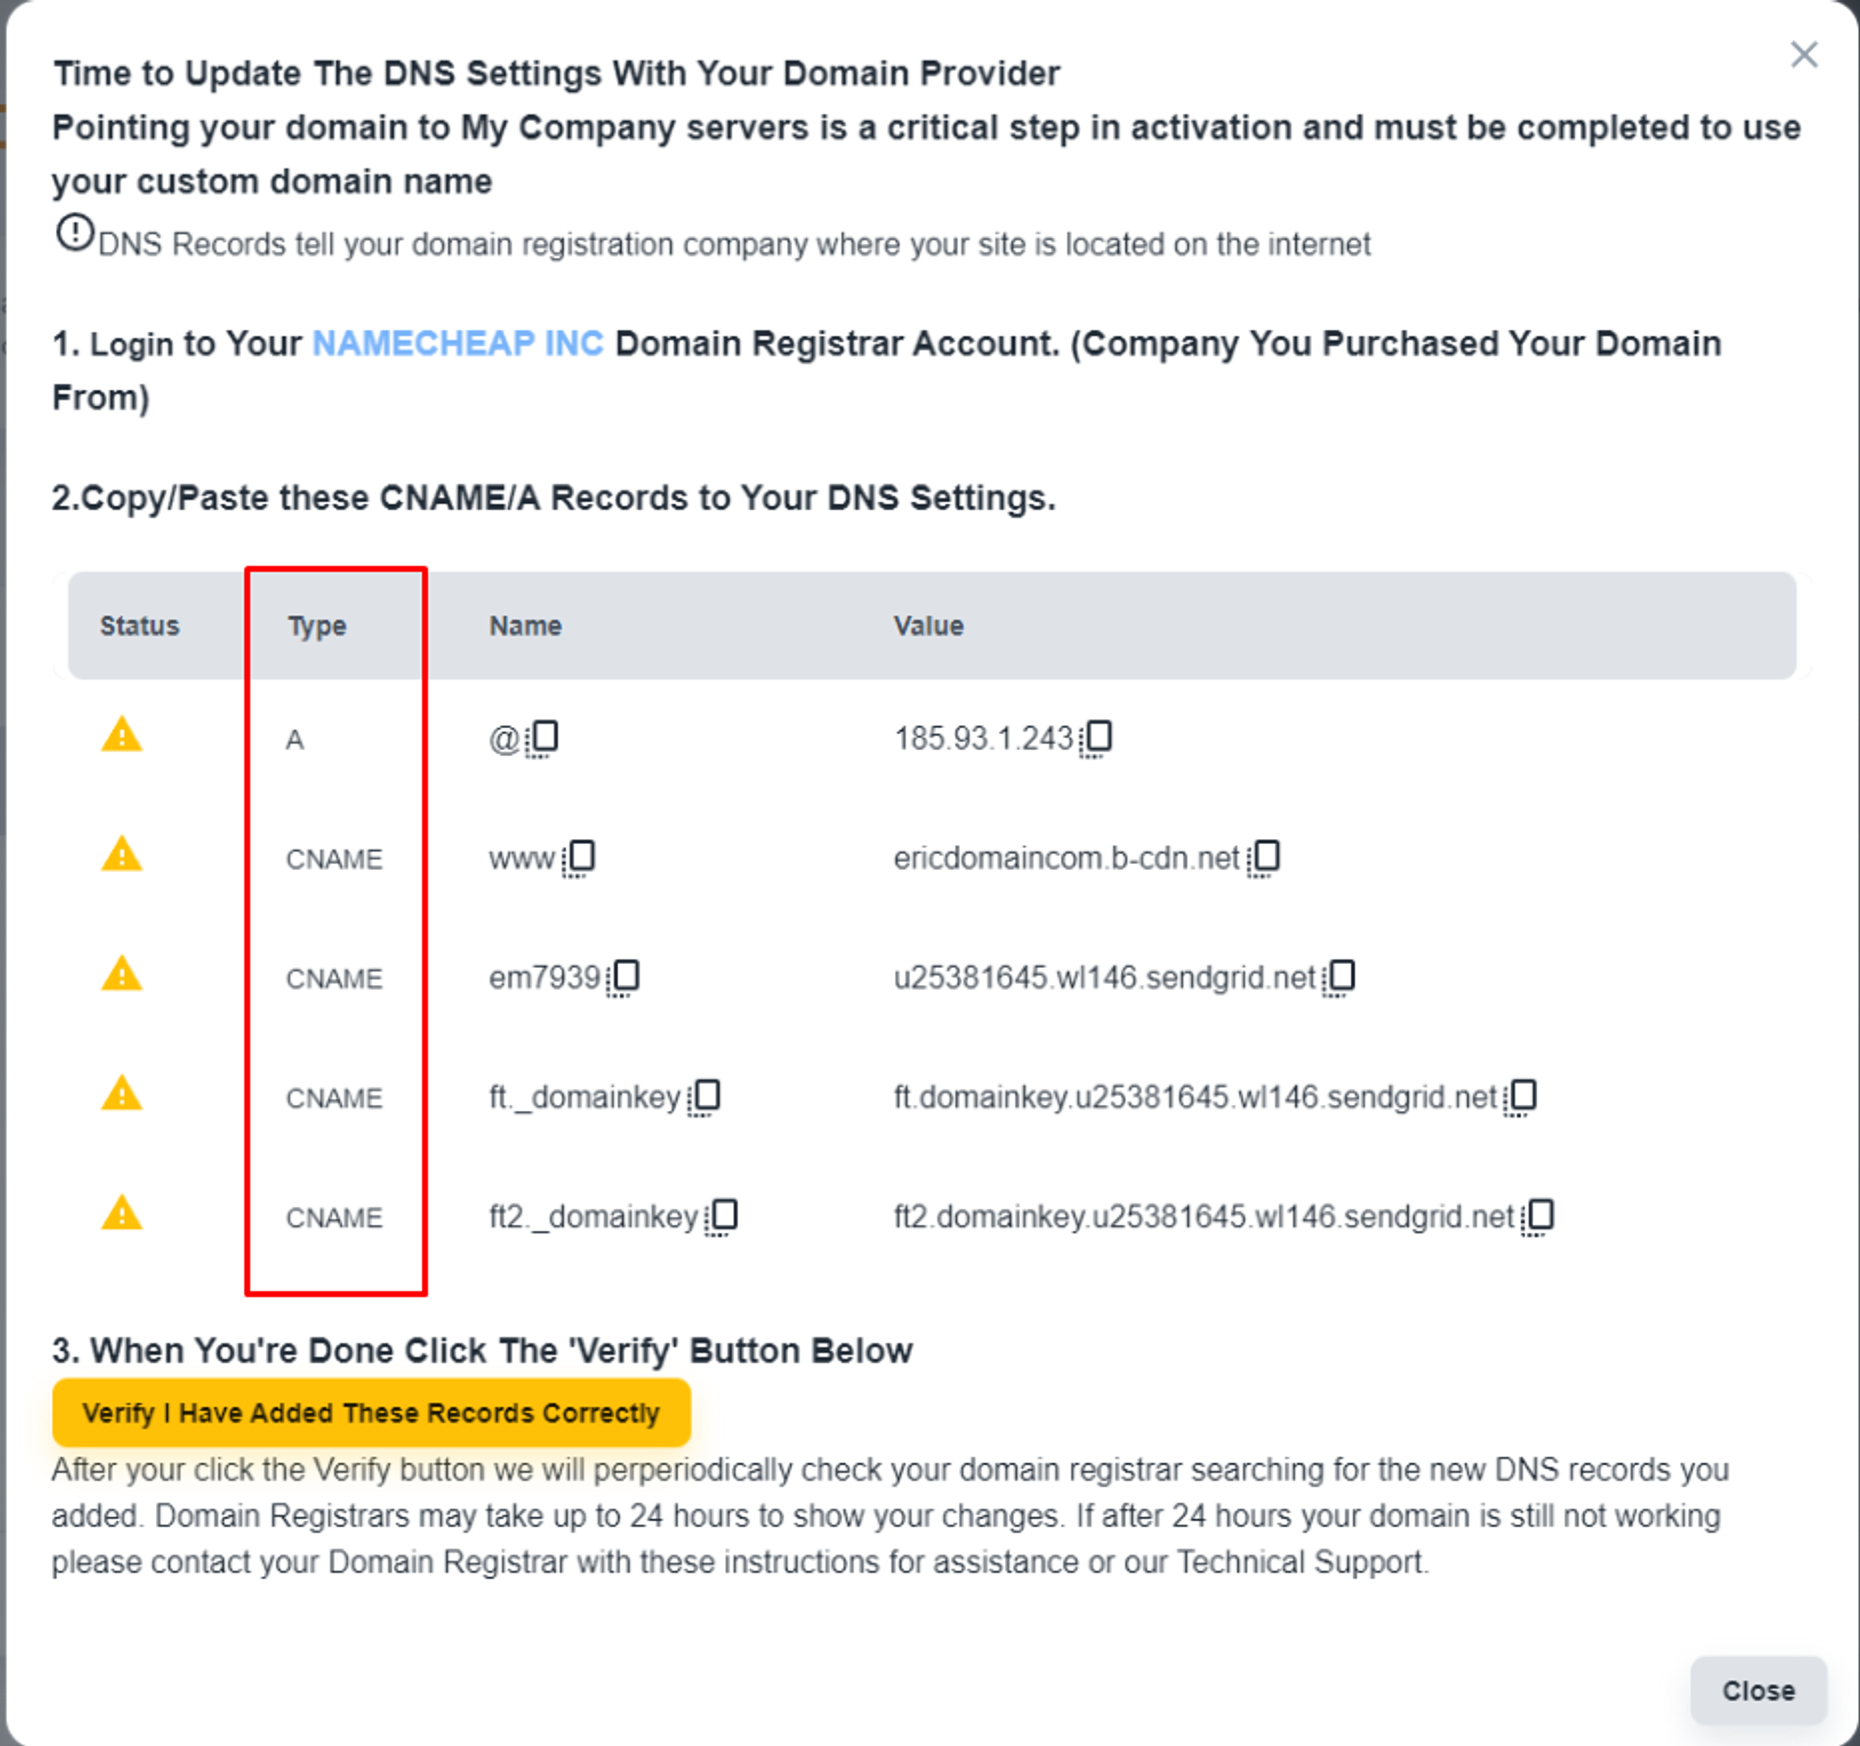
Separating DNS record
DNS record for Web Hosting
As per the screenshot, the first two records are the DNS record for the web hosting service. Among them, the first one is an ‘A’ type DNS record
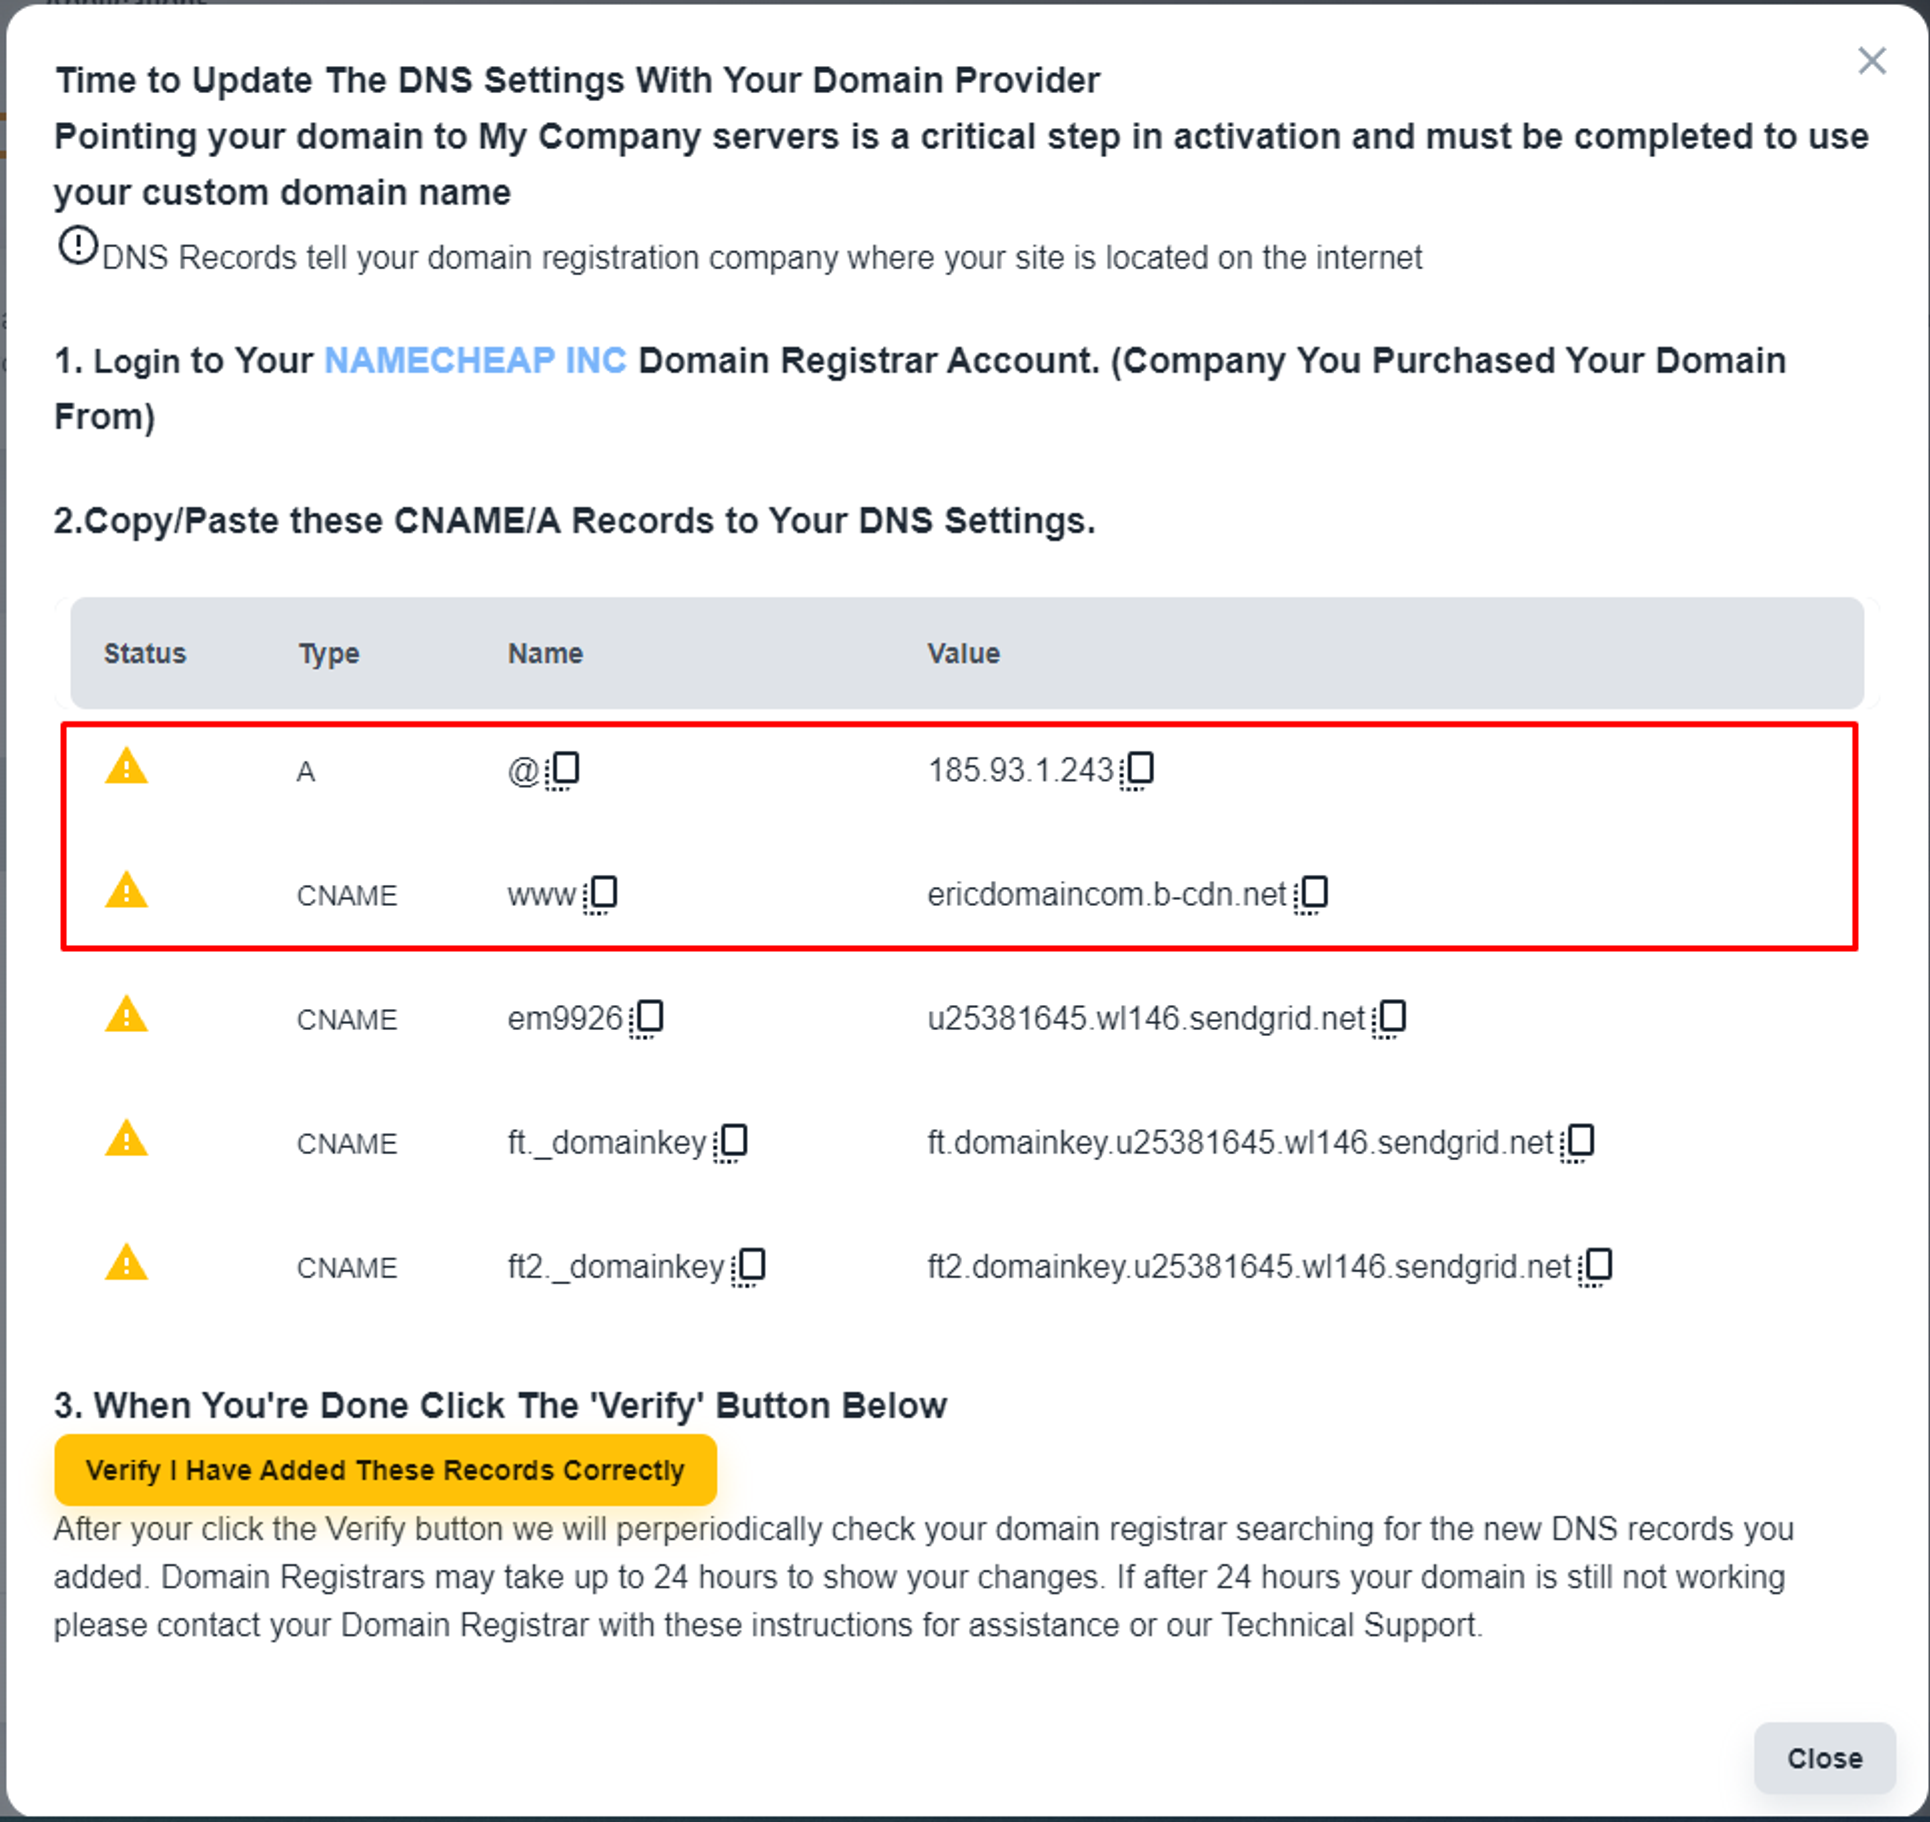
DNS record for Email Service
As per the screenshot, the last three records are related to the email services. All of these records are CNAME records.
💡 If you need only one specific service, then you can ignore DNS records related to other services.
💡 Differences Between A and CNAME Records.
Steps to add DNS record to Ionos Account
Select domain
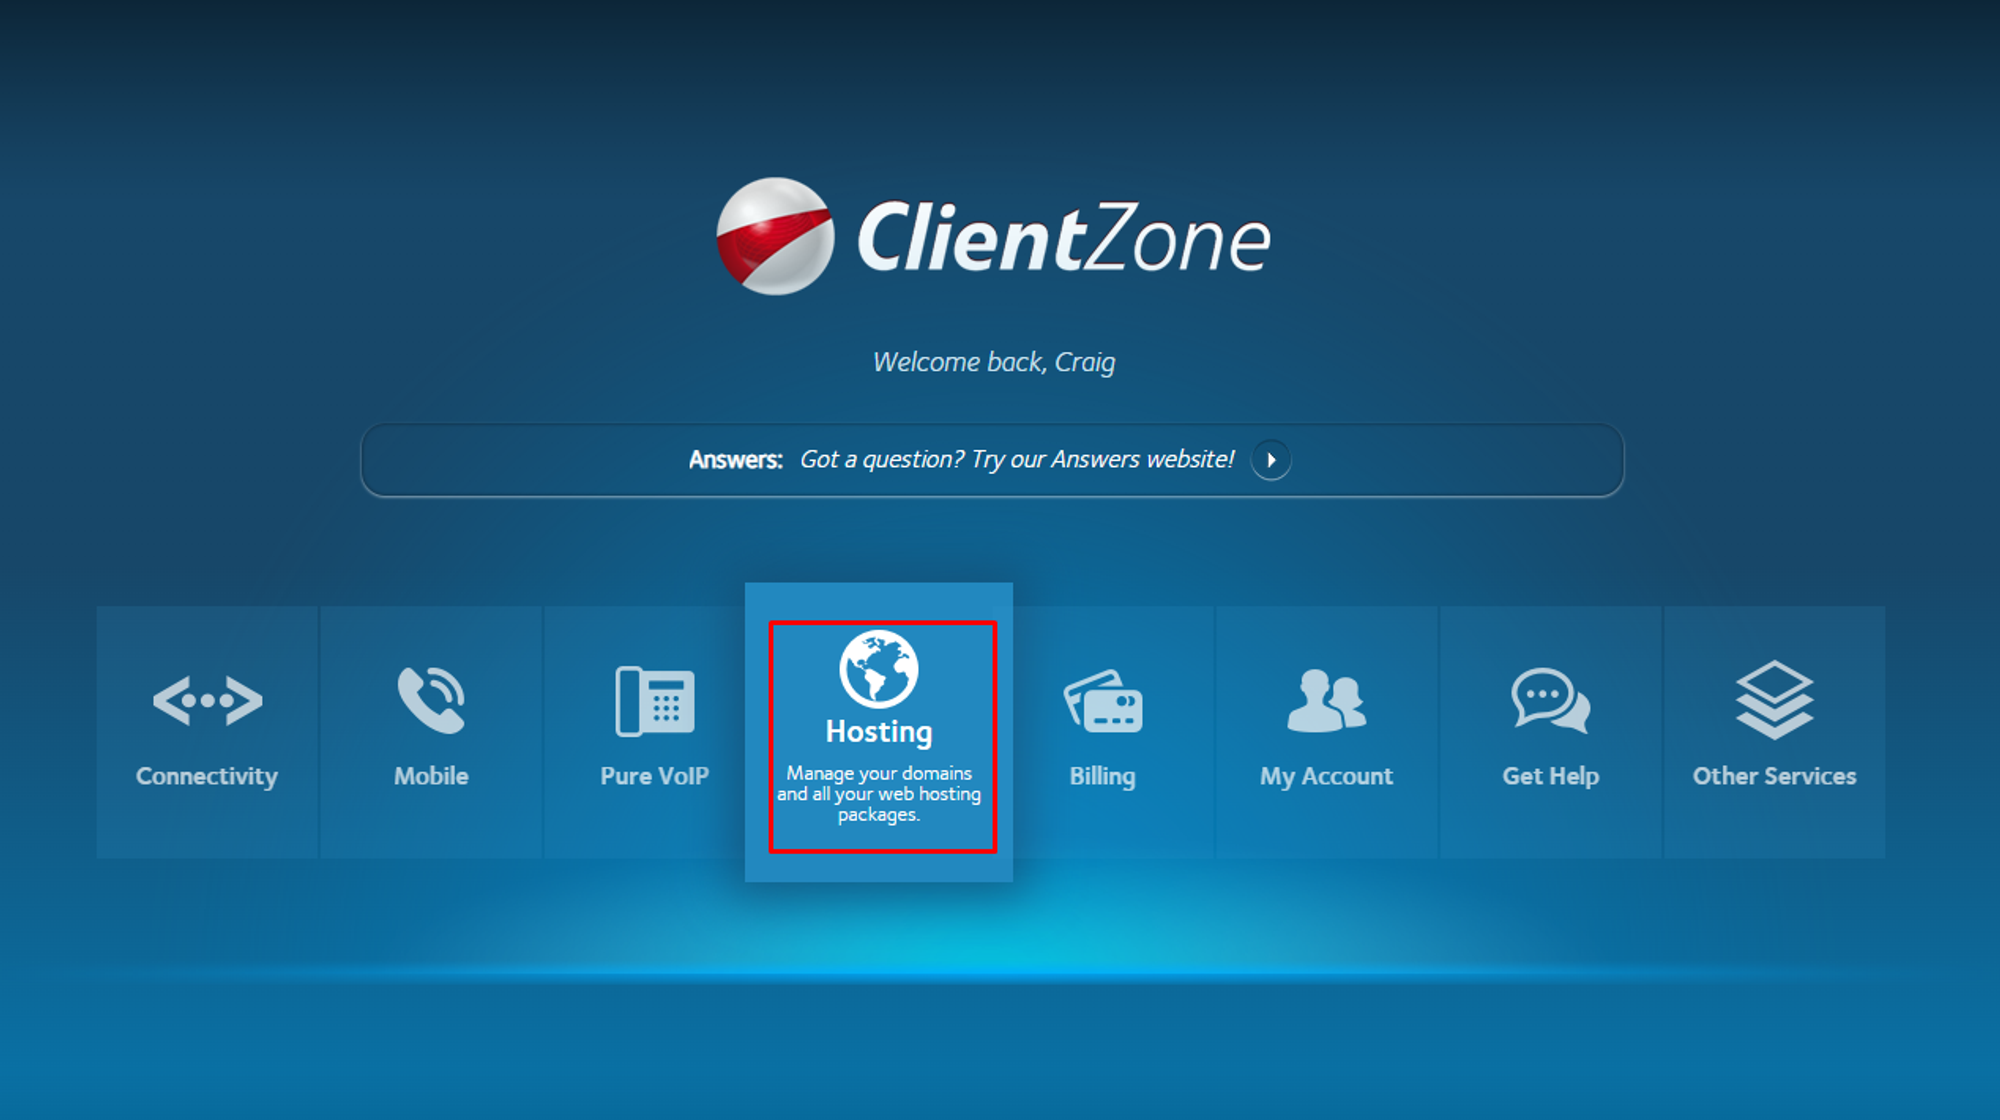
After logging in, please, click on the 'Hosting' button.
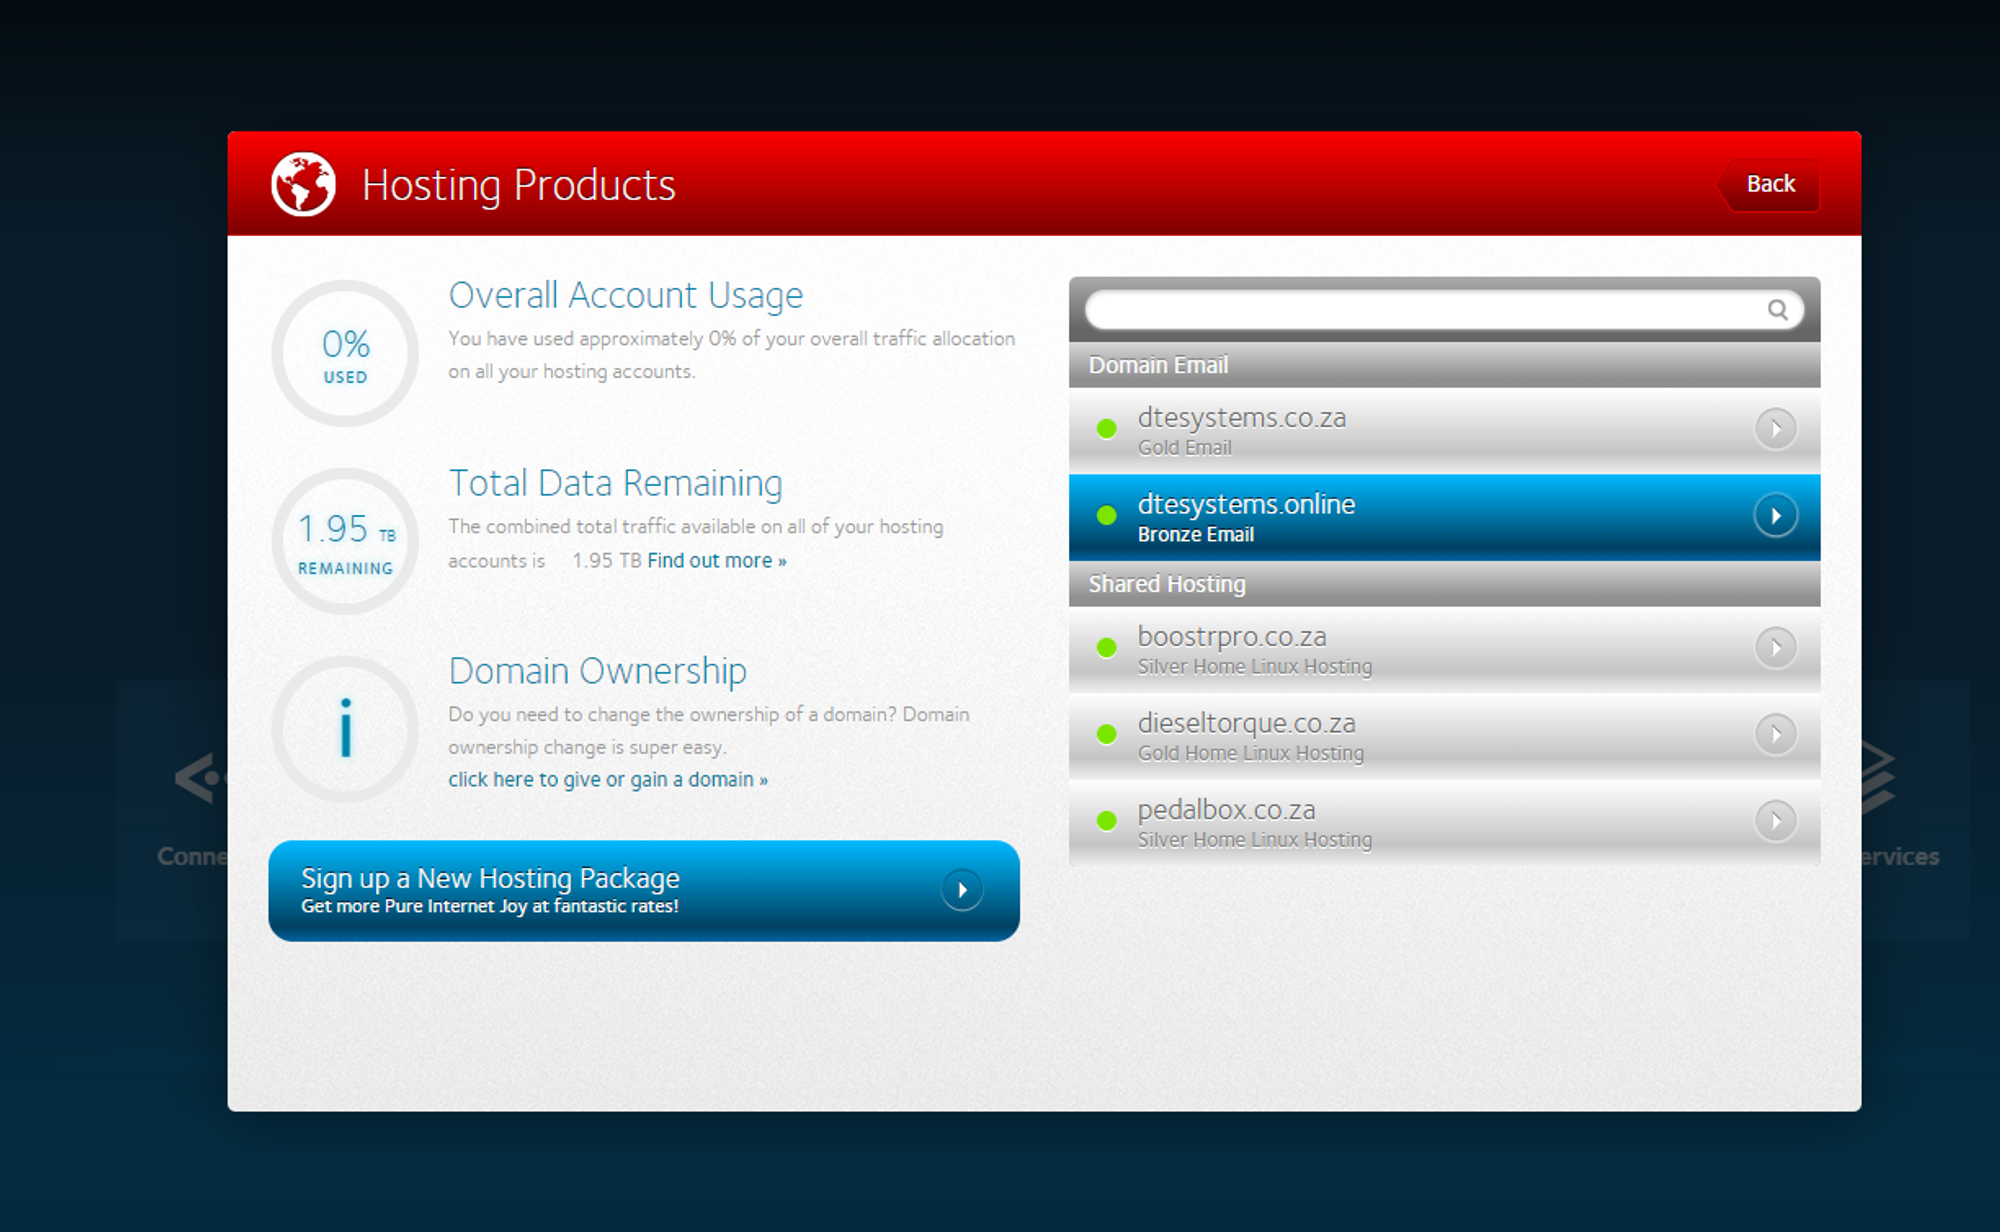
Now, select your concerned domain.
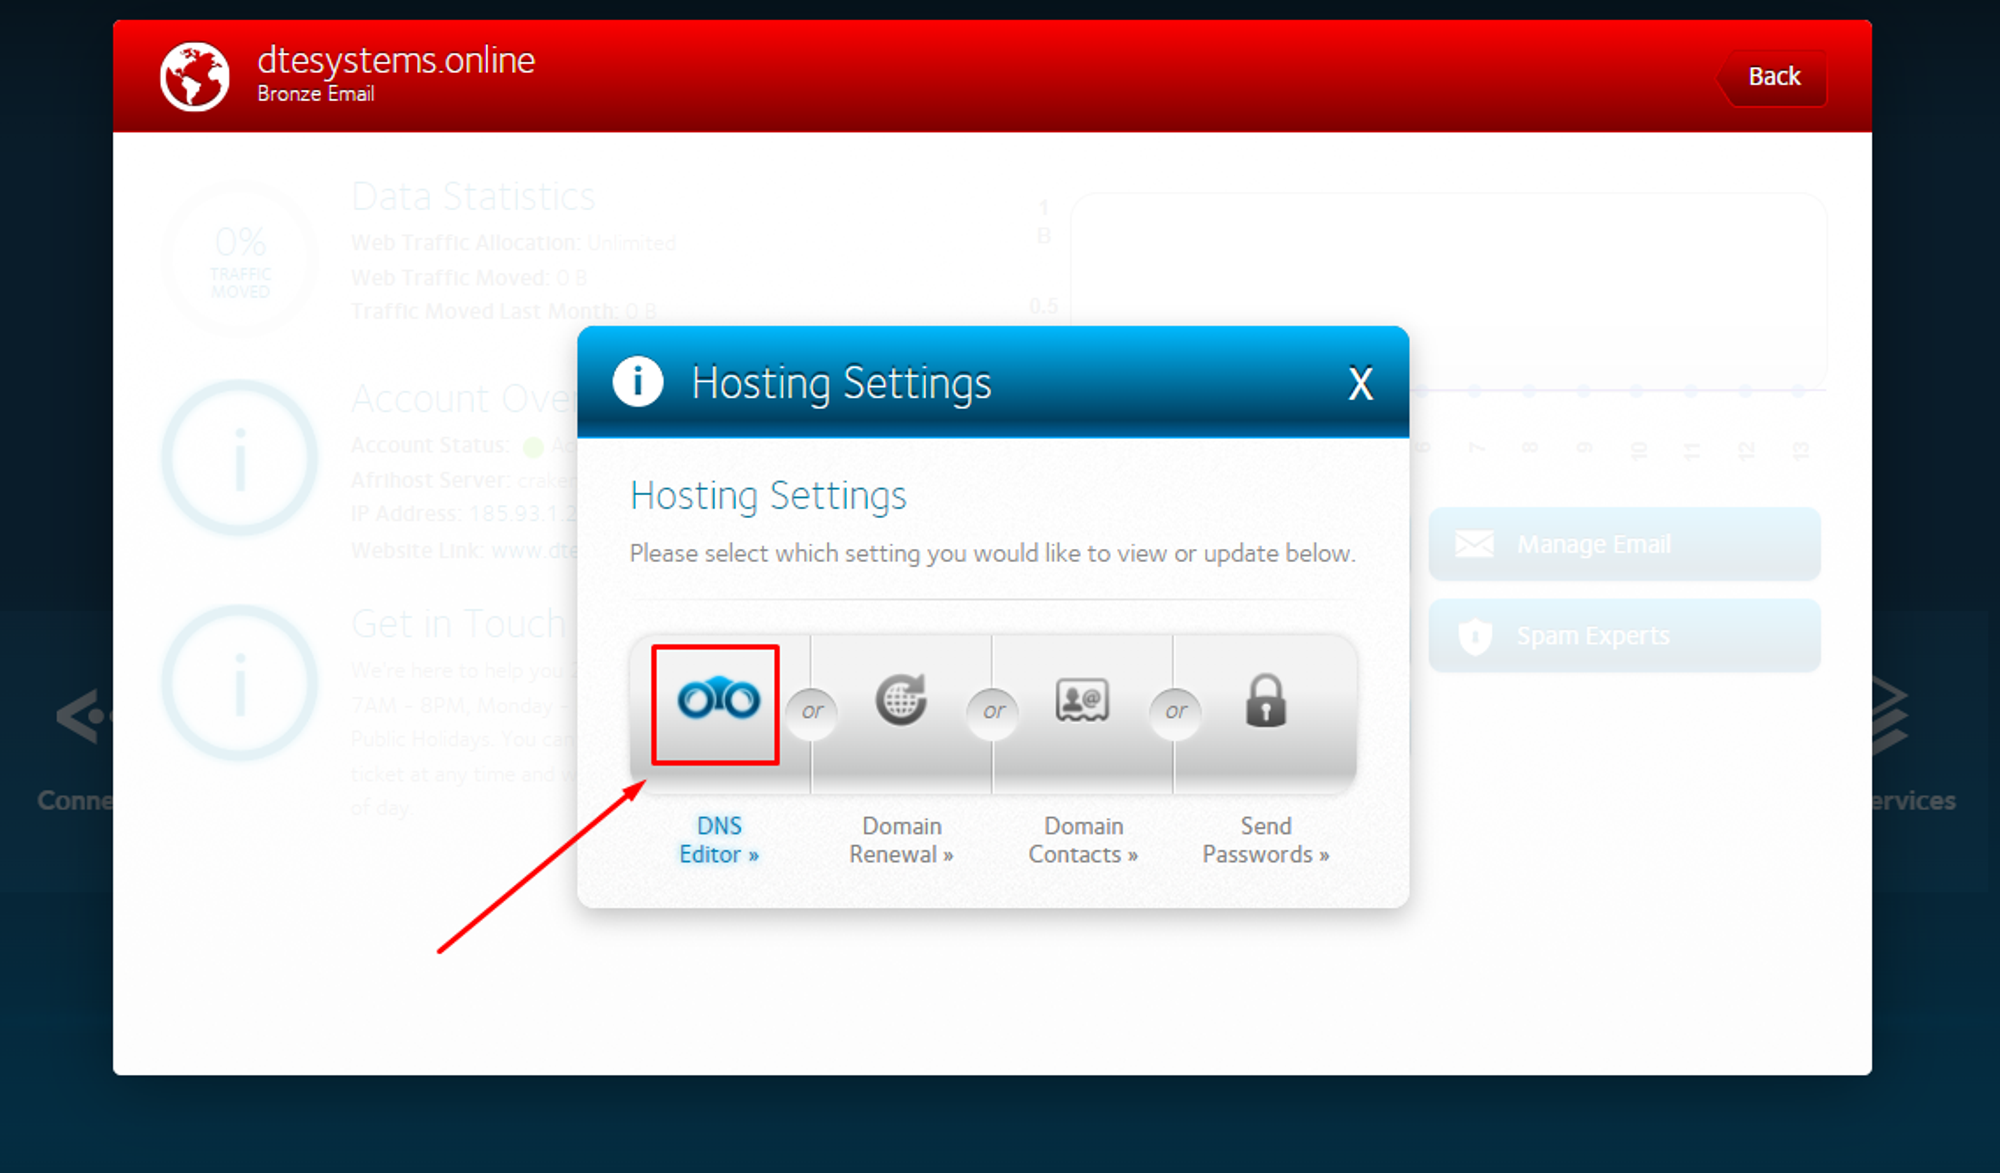
Click on the 'Hosting Settings' button.
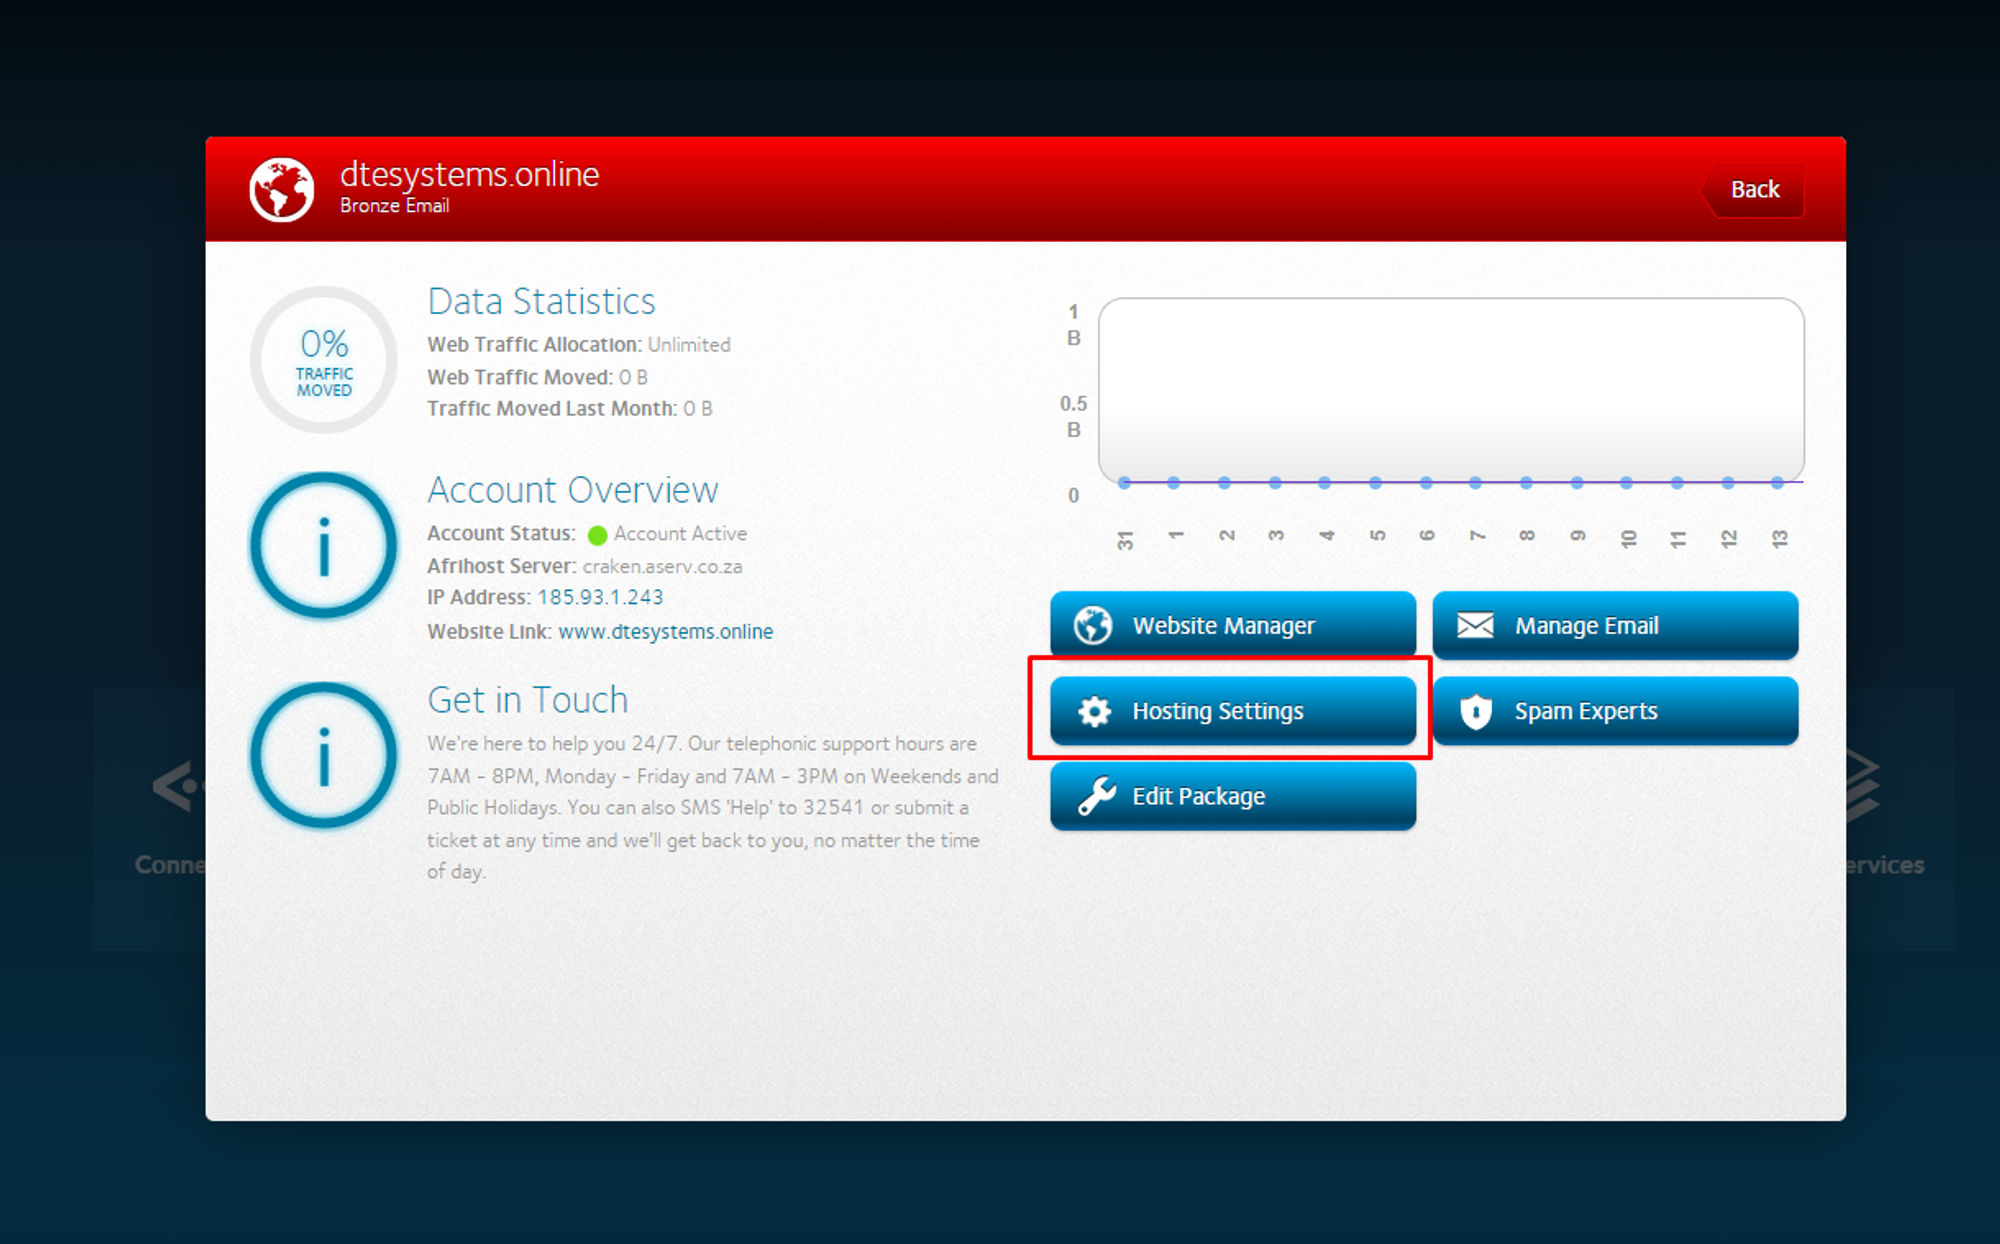
Now, click on the 'DNS Editor’
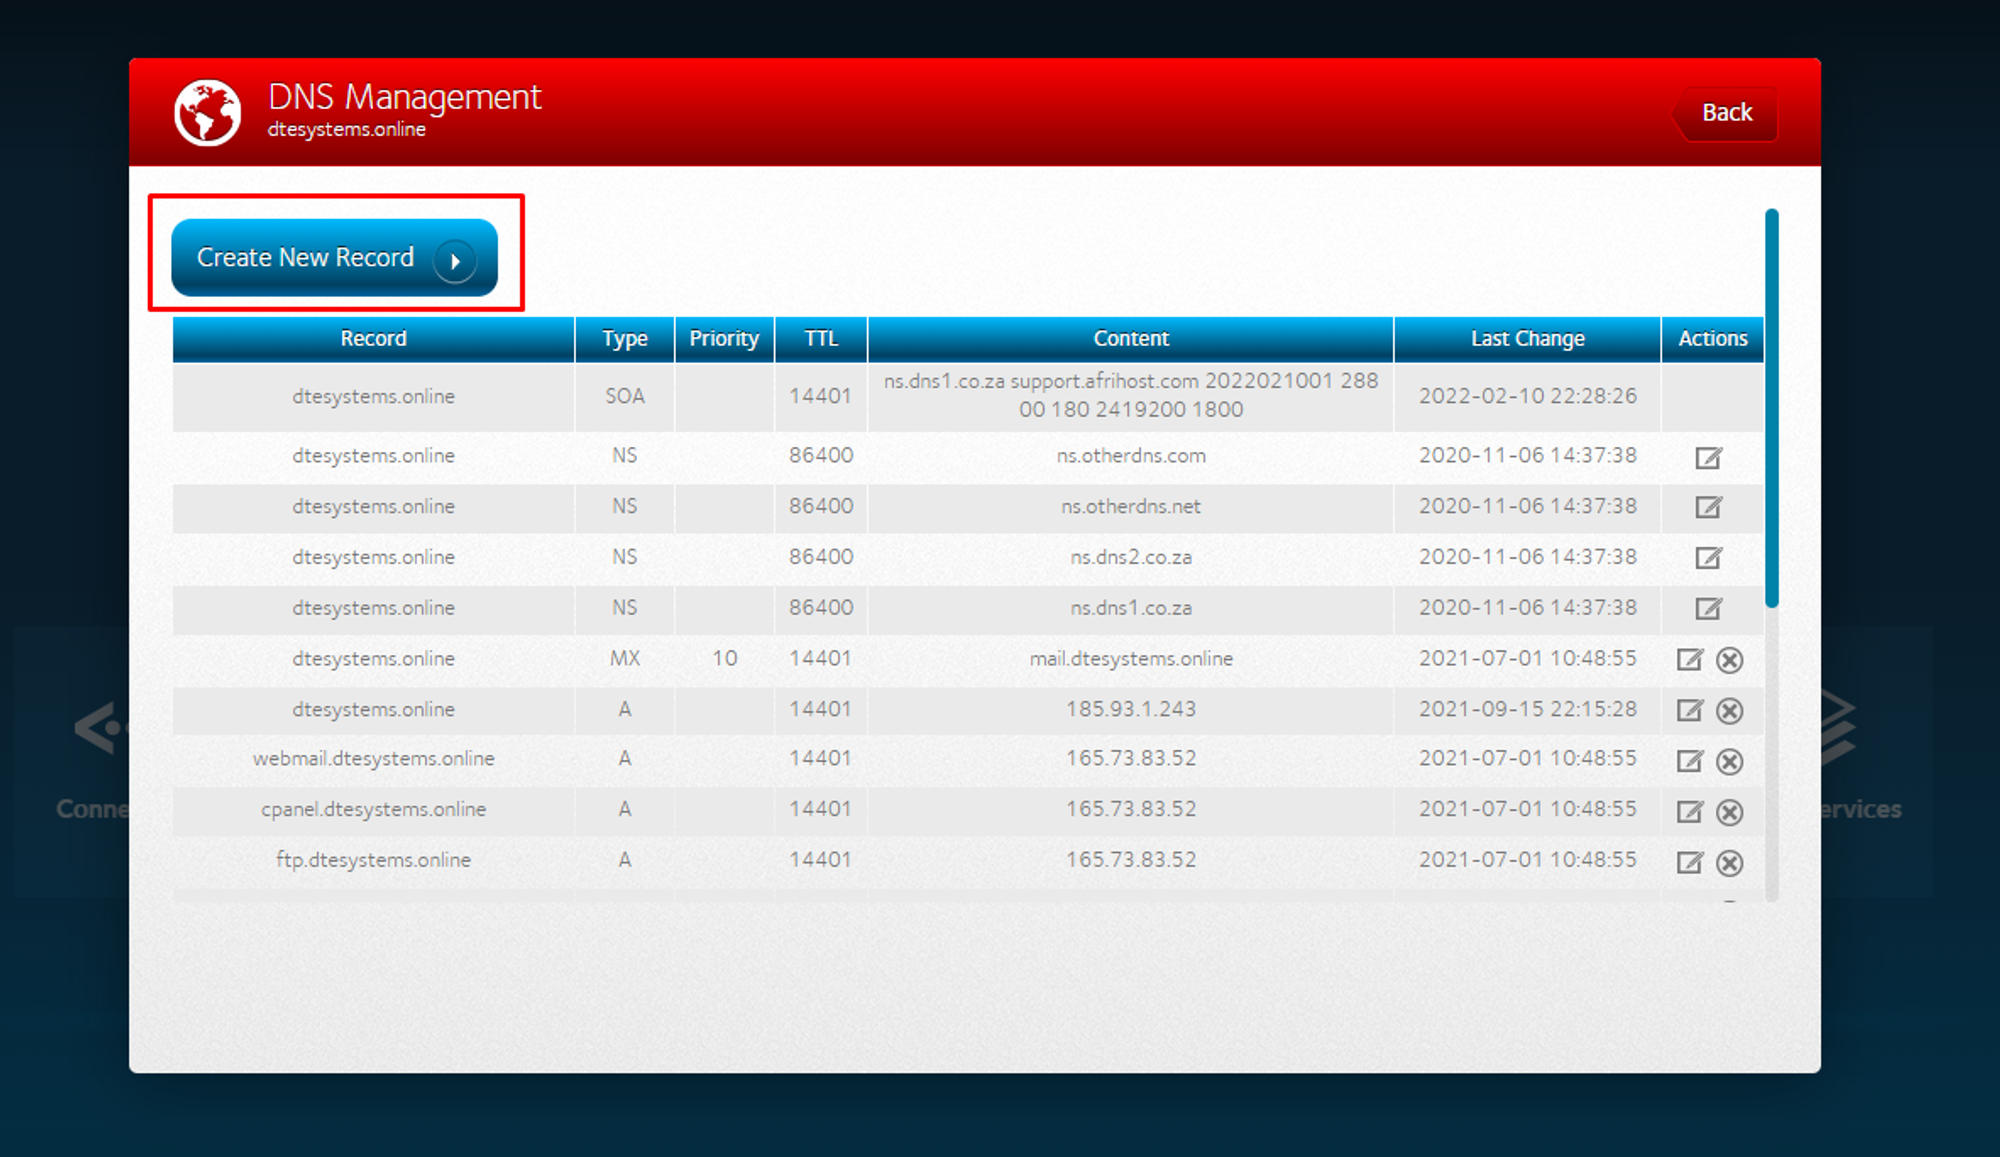
Add a record
Click on the 'Create New Record' button to add DNS records
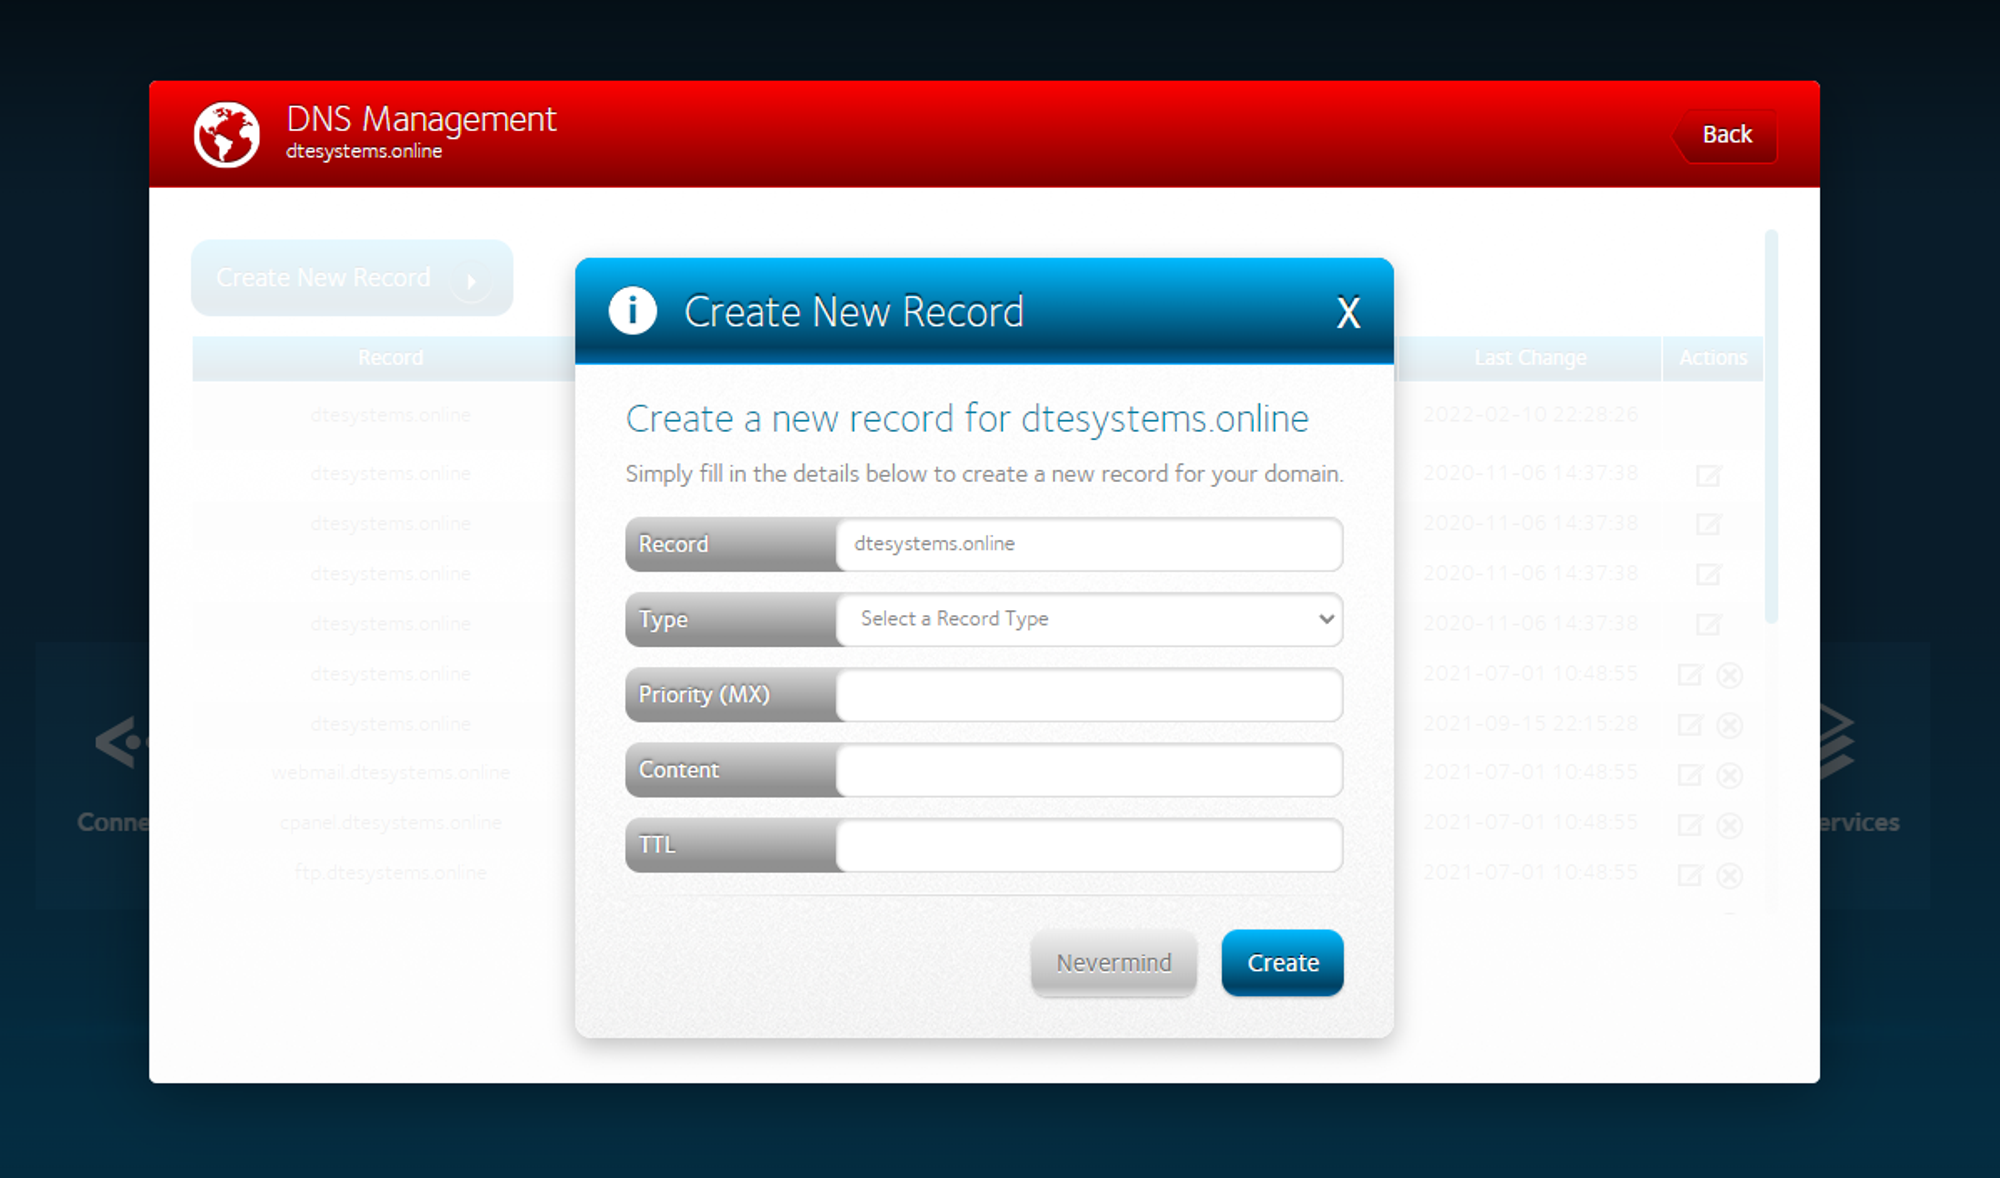
Select record type
To select the proper type of DNS record, you can define that from system-provided DNS records. Please, check the screenshot
Sample format of DNS record
‘A’ type of record
For the type dropdown, select 'A' type to add DNS record for web hosting

You will have to input the following values accordingly.
Host name -> @
Points to -> 185.93.1.243
TTL -> 1 hour
There is no need to change any other default values. Please click on the 'Add record' button to save the record.
‘CNAME’ type of record
Now, follow the same process to add the other DNS records for the email service. But time, you will have to select the 'CNAME' option.
You will have to add the CNAME records in the following way.
Host Record -> em3206
Points To-> u22813504.wl005.sendgrid.net
TTL -> 4 hour